ma
31
jan
2022
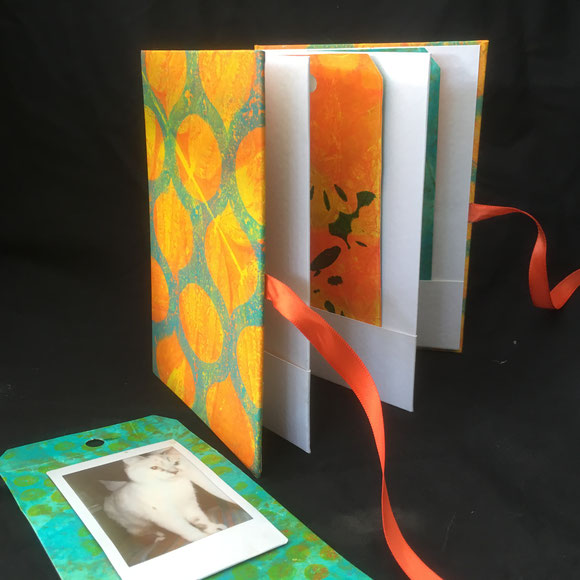
cat lost in a in a psychedelic pop up card !
My husband Wienne loves bold rainbowcolors and psychedelic art: music, art, colors, patterns, shapes,...
So I made him a very personal birthday pop up card.
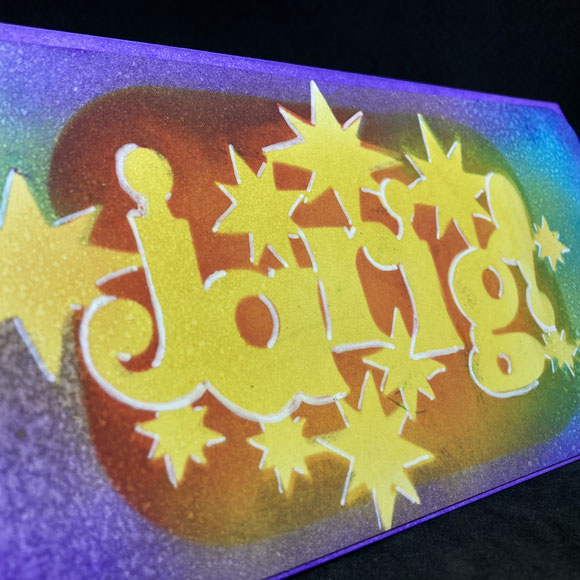
On the front of the card I added the word "jarig". This is the Dutch word to describe someone has a birthday.
The stencil "jarig" was designed by me and cut out with my scan n cut from Brother.
I inked the stencil with distress inks from Tim Holtz and gave the letters a little white shadow with a paintmarker to make the word pop up more.
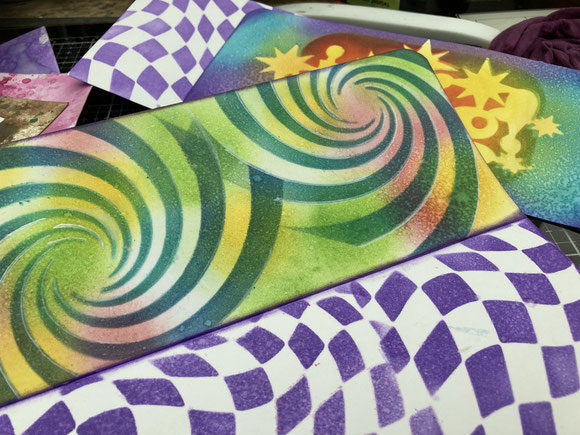
The inside of the card was decorated with distress inks and 2 wonky, psychedelic stencils van Visible Image.
The perfect backdrop this psychedelic pop up card !
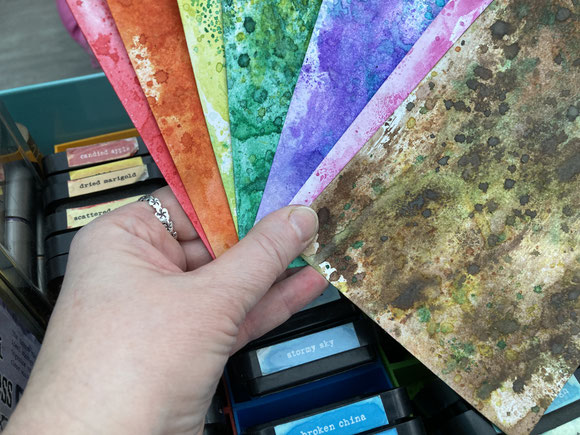
First I made a lot of different backgroundpapers with the distress inks from Tim Holtz and plain white paper.
I put different shades of one color of distress inks on my mixed media mat, spritzed water and then dragged the paper through the inks.
Between every layer the paper is dried with a heatgun, so the inks get layered and don't mix.
You can find a lot of youtube videos of Tim Holtz for this technique or you can have a look at his lives where he shows how you can use distress inks in different techniques.
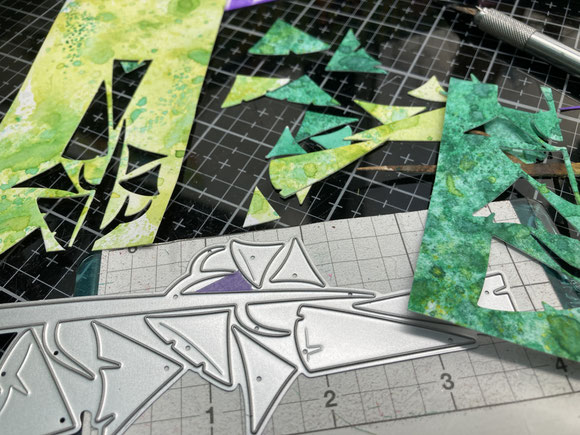
The colored inked backgrounds were used to make the psychedelic trees and toadstools.
I used the funky trees and funky toadstools thinlits.
It takes some time to die cut everything and glue everything together, but I think it makes all the difference !
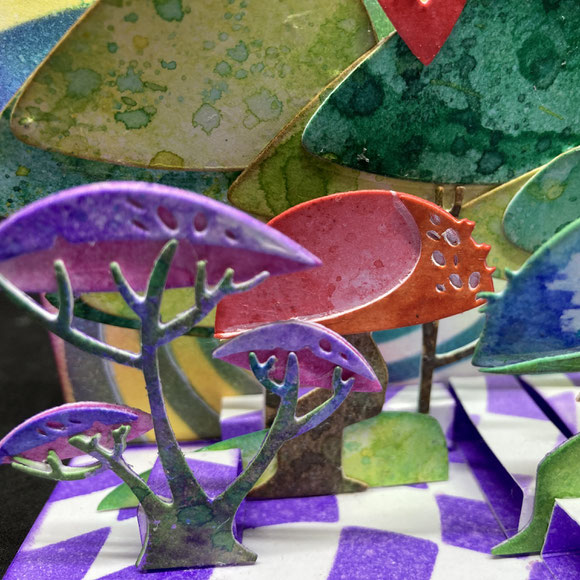
I love the psychedelic forest and would happily live there !
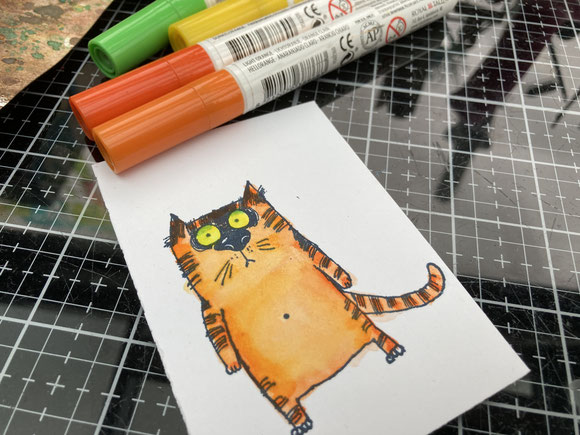
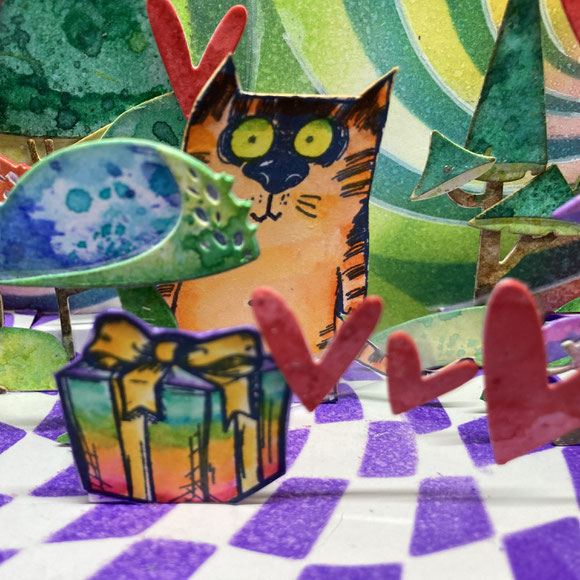
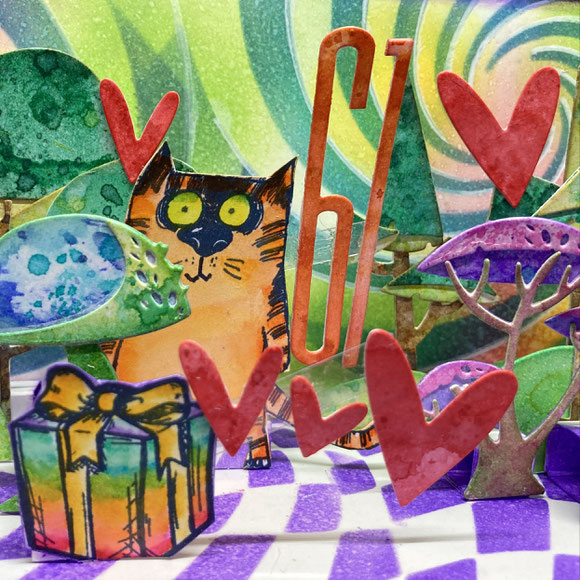
Snarky cat is happy in his psychedelic forest !
The stamp of the snarky cat is from Tim Holtz, but this one looks sad or not happy, not very suitable for a birthdaycard..
With a permanent marker I added two lines to his mouth and now he's smiling !
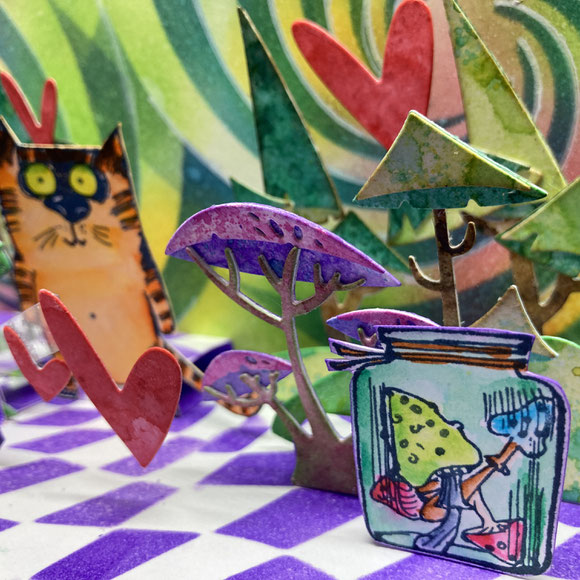
A psychedelic card needs some magic mushrooms.
Never tried them out myself, but read about them and saw documentaries and they can have good use if used wisely!
Birthdaycat feels happy...


A pop up card needs to pop up !
There are several pop up techniques and this one is an easy one, but you can make it as easy or as elaborate as you want by adding more and more elements.
It does take a lot of time and you need to know some principles of this technique so the images don't peep out of your card when closed.
I learn a lot by looking at pop up books, but on youtube my masters in pop up are Matthew Reinhart and Duncan Birmingham (pop up channel).

This is the finished birthdaycard for Wienne !
I'll definitely get this pop up card printed into a postcard by MOO for my Pinkepinke shop on etsy !
No better way to see the fun of a pop up card, by seeing it pop up and move !
On my youtubechannel you can find more of these!
I hope they inspire you to try them out yourself !
Start with easy techniques and only by making them again and again, you will learn and improve. When I look back at my first ones of 2007, I evolved a lot, but that's because I made mistakes, I explored and played and above all... enjoy myself in making these !
greetings from Belgium
Inge
ma
17
jan
2022
dreams in glass.. love is

Give me white paper, inks and paints, stamps, scissors and a cutting knife,... and I will turn it into a colorful creation !
That's what I love the most: starting from white paper and building all the layers.
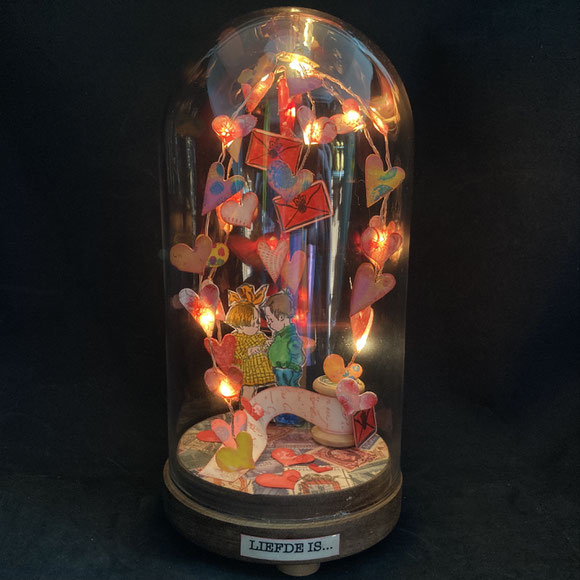
This glass dome "LOVE IS.." is an attribute I made for the multi-sensory theatre of Mabasenso " Hekse Hikse Huisje" about two witches who live in a little house in the woods that is bigger on the inside then on the outside.
They play this theatre for people with disabilities, toddlers, people with dementia,...
I made a OOAK pop up book, a box for this book and 8 dreams in glass.
These will be used when they play in the bedroom from the witches!
The glass dome is from IKEA and is about 20 cm high and 9 cm wide (7,8 inch hight, 3,5 inch wide).
The wooden base stands on 4 old bingopieces, so there is just enough space to put the batterypack of the tiny lights in between and it is easy reachable to put the lights on and off.
I cut a slit in the side of the wooden base so the string of the lights fit in and the glass can be put on easy.
Base was covered with a stamp scrapbookpaper ( I need to use my scrapbookpaper up that I have...) and this one fitted the theme.
I added some old wooden spoons and a stamped paperscroll ( "love letter").
Love is... sewing a new button on your friends shirt ;)
I love this stamp from The Stamping Ground: stamped with permanent ink and colored in with distress stains from Tim Holtz and a watercolor pen.
I drilled a hole in the base and glued a wooden stick in it.
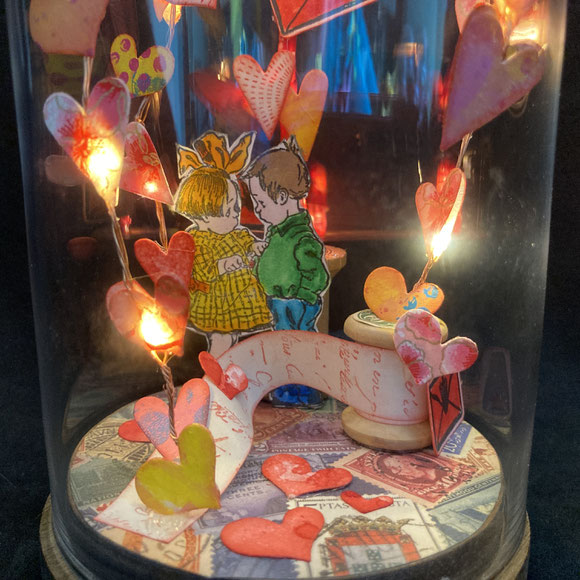
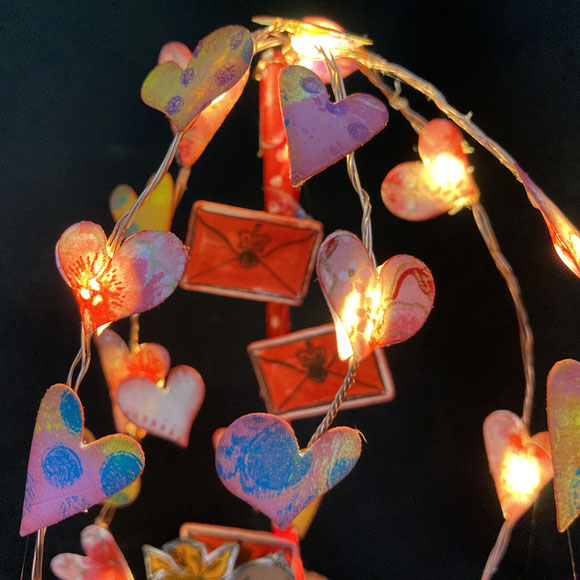
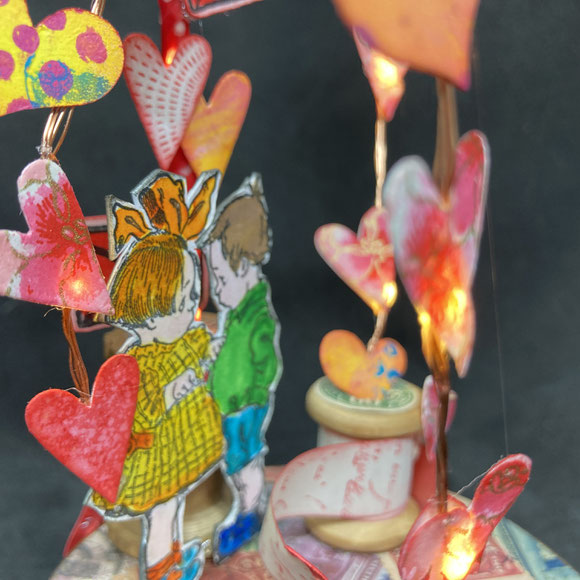
This stick holds up the string of ledlights I twisted and let dangle like the shape of an umbrella.
The hearts were cut with the "heartfelt " die of Tim Holtz out of all kinds of scrappapers : handstamped, gelliprinted, handmade Japanese washi papers,..
I pressed the ledlights between two hearts. Some papers are translucent, other let the light shine from the sides,..
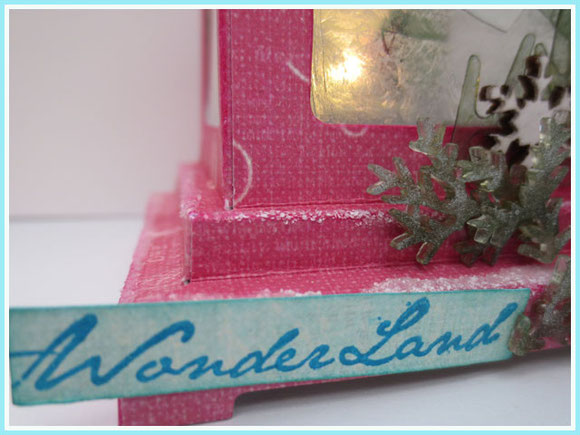
The paperletters are made with the envelopstamp of my Alice in Wonderland stampset from Oxford impressions.
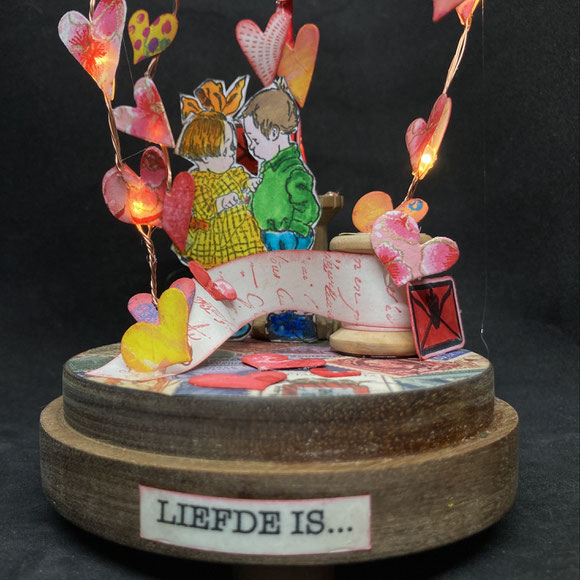
On the front of the glass dome base I added a strip with the title of the "dream in glass" ( "liefde is.." is Dutch for "Love is..")
I love to make ooak projects, but this also means they leave the house and then they are gone for an adventure outside of my house.
Luckily I can take nice photo's with my phone !
I always take a lot of them so I can see and remember all the details I added.
And sometimes when I look at the photos I think...
Well, this one would look good as a postcard !
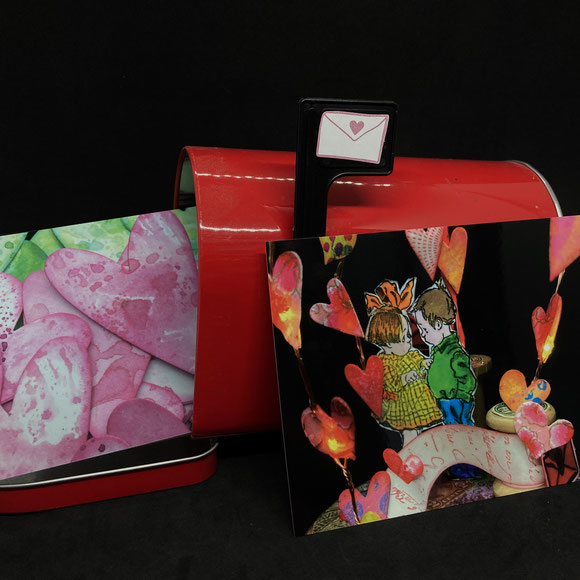
So that's how my postcards are made.
Photos from my own creative projects that I get printed by MOO, a compagny that prints in such an amazing way you can see the depth of the original even in a flat 2dimensional postcard !
This "love is" postcard is now in my Pinkepinke etsyshop together with my handmade pop up cards, my handsewed books and many other postcards !
Perfect for a Valentines card, but why not give it to a friend of someone else you love ?
Spread the love by sending real mail !
greetings from Belgium
Inge
za
01
jan
2022
out with the old, in with the new.. upcycling my loved apron!
I made an apron in 2011 with Oilily fabric I found in an outletstore and a piece of the Tim Holtz apron I recieved after ordering one of his books. These made up the body of the apron.
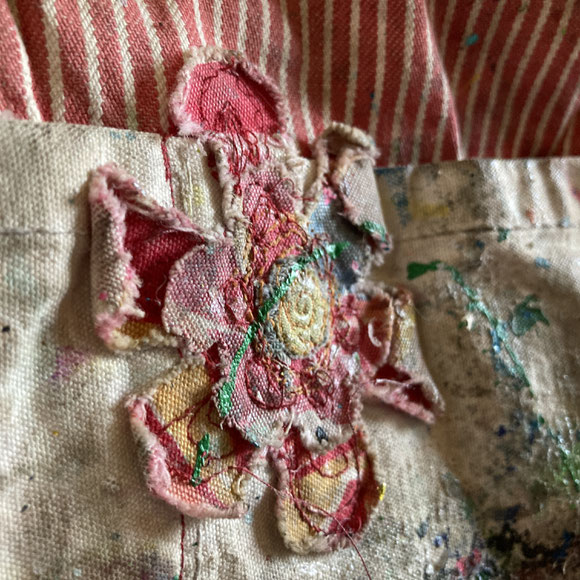
I also added flowers made from the previous apron, a blue one, that my mom gave me 10-20 years before ?
The apron had such beautiful stains in it and holded so many memories of creative moments, I wanted to do something with it.
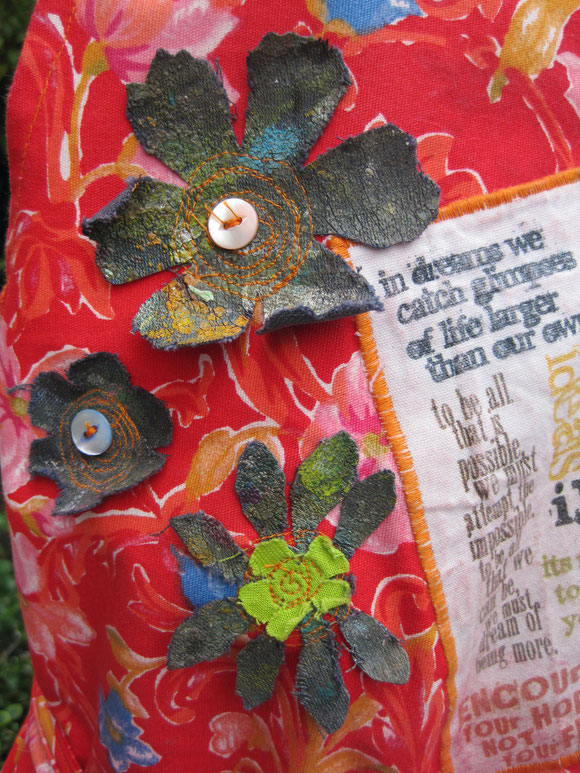
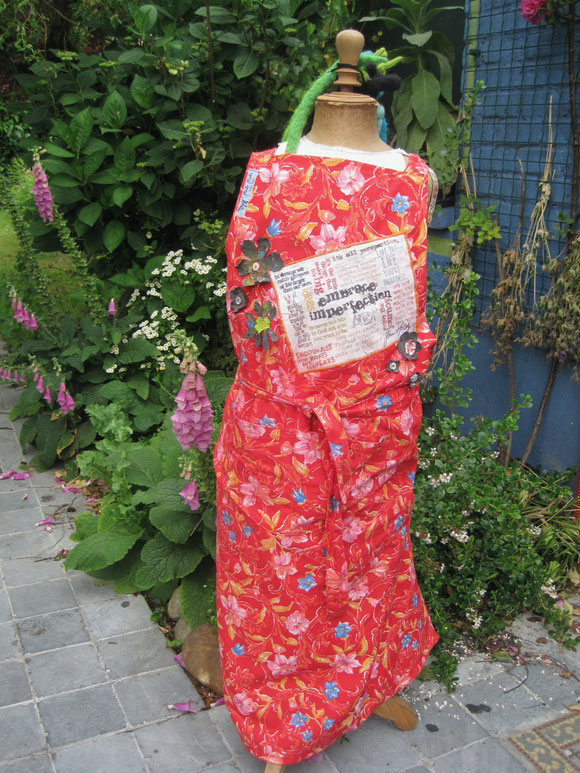
That apron died a few years ago and I made a new one, a red striped one, again with outletfabric from Oilily, reusing the Tim Holtz quotes fabric, fabric flowers made from the two previous aprons,...
I used this apron the past 7 years daily whatever I create with inks, paints, markers, glues,.....
It also traveled with me to Coventry in the UK in 2018 for a week filled with artworkshops with Julie Fei-Fan Balzer and Nathalie Kalbach.
A trip on my own to the UK after being chronically ill for so many years and being at home since 2015 after my physical crash.
The whole creative week filled with inspiration, creative play, the kindness of the teachers, the shopowner who organized it and the other participants,... were a gamechanger for me that moment.
It was definitely a start of putting myself and my creativity more on the foreground in my life. Also one of the moments that started my healing..


It went with me in 2019 to Amsterdam for a handletteringworkshop with the amazing Mike Meyers from Better letters. Again a revelation, creative play, meeting new people.


I think my well-used apron was already at it's end for about 2 years...
The fabric was stiff from glue and paints and there were holes in the pockets, so they could not hold stuff inside anymore, the ribbon to tie it around me was so frayed, I could sometimes hardly unknot it to get it out!
But a combination of balancing energy, prioritizing time to other things and an I-do-not-want-to-quit-this-apron-feeling made me procrastinate...


But new times, new year, new challenges,..
Time had come to finally get behind my sewing machine and make a new apron !
And of course, it's about re-using, recycling and upcycling !
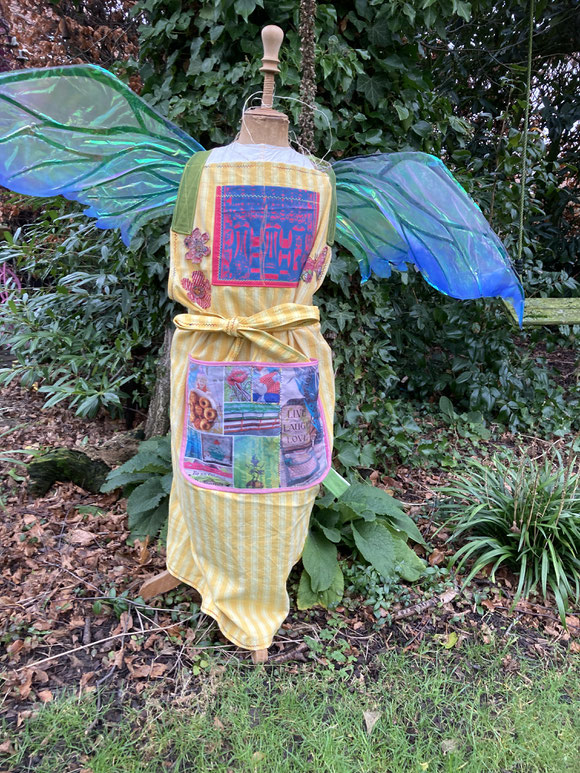
The yellow-white fabric is from an old curtain, bleached on one side by the sun, but the other side was still colorful enough.
Some parts of the fabric were fragile because of the power of the sun, so I took the most sturdy pieces to make the apron out.
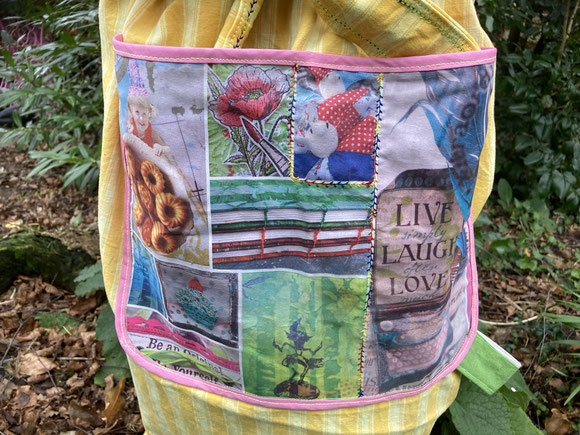
For the breastpocket I used a screenprinted piece of fabric that was not 100% right for the cushioncovers I made from the other prints, but still too good to be thrown away !
The drawing is from a painting my mom made of our house with cats in her own imaginary way.
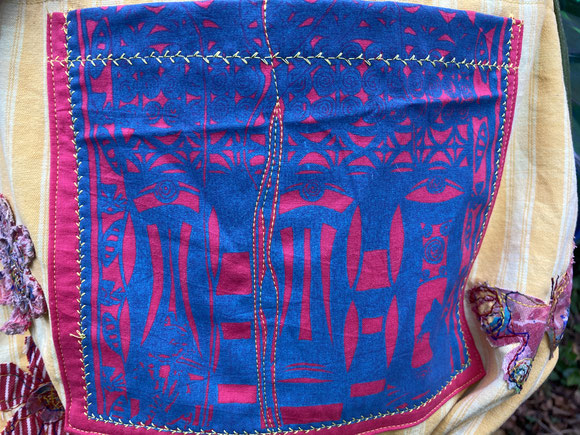
For the other pocket I used a printed fabric that was once a printed bag.
Bag was worn out, but I saved the printed cover for years for the right occasion..( now ! ;) )
The print shows all kinds of things I make: sweets, books, softie harlequins, postcards, pop up cards, 3D projects,...
The bag was perfect to show people if someone asks : "what do you create ? "!
Now my apron will tell this story.
The reused, upcycled apron would not be complete without pieces of my previous aprons. So there are stories of more than 30 years on this apron !


And now I fly into a new year with new adventures of life and hopefully lots of creative projects and connection with other people.
I'm flying into the unknown 2022!
Exciting !! :)
greetings from Belgium
Inge
za
01
jan
2022
2022.. There is always light.. BE the light..
"There is always light
If only you are brave enough
to see it
If only you are brave enough
to BE it"
When Amanda Gorman recited her poem in january 2021 I was moved to tears.
I live in Belgium, but her words, spoken out loud in the USA, with grace and movement and conviction, reached also my heart and soul, just as they did for many people.
Her words have been a guidance through 2021.
Past years have been heavy in our home due to losses of family, illness, the pandemic we are all in worldwide, the polarisation, the climatecrisis.... but although life was challenging, there was always hope, I always saw a light in the opportunities and in the people who came on my path.

After 15 years I finally am able to work in the garden again!
It's an and-and-and story, but I feel I'm healing ( not cured..) after fighting chronic illness ( fibromyalgia, CFS and 2 auto-immunediseases... for 26 years..).
I feel like a kid in my garden, my secret garden !
Lots have happened, lots have changed, lots is shared...
One of my intentions of 2022 is to pick up my blog again and share with you fun and colorful creations, how to live a creative life, how you can transform a lawn into a local share-garden/ edible forest garden and build community, how fear and anxiety and being paralized can be changed into deep concern and hope and activism to make this world a better world for all and for the coming generations.
My New years card for 2022 is a call to action for you all:
"See the light
BE the light!"
greetings from Belgium
Inge
ma
13
jan
2020
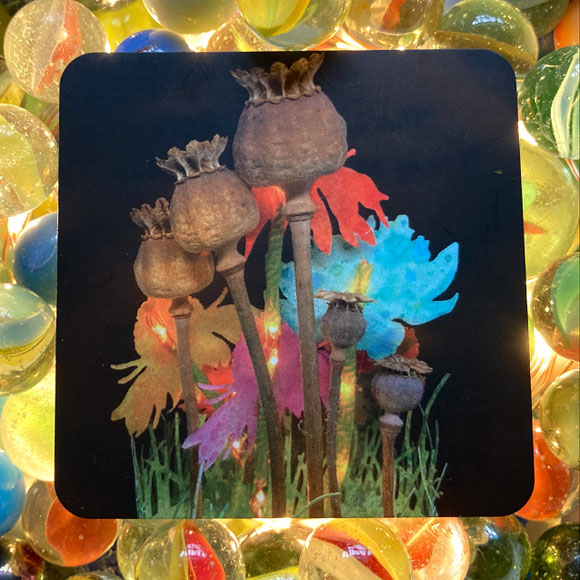
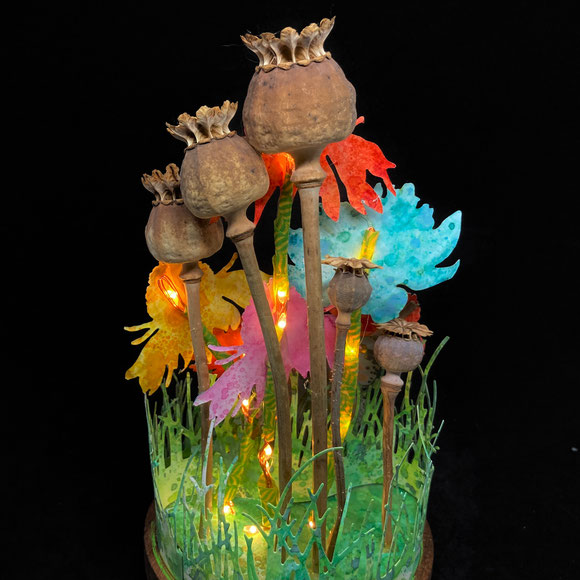
Poppies and hope in dark times..

Poppies inside our home.. even in winter..
I bought these ceramic Poppies on different craftfairs every time from the same artisans, but I always forget to ask their name...
Every time I see them on a craftmarket, I buy a new Poppy.
They are ment to be in the garden, but to prevent them from cracking when it freezes, they better find a space inside the house.

As a maker myself I find it important to surround myself with creative art from other makers.
It inspires, it makes me happy..
When I buy a gift or something for myself I go often for handmade creations of other makers.

Poppies play a big part in my life.
When my sister died 26 years ago, she left me with a metal tin full of poppyseeds..
When I sowed them in my garden, poppies grow in colors and sizes I never ever had seen in my life !
The "sleeping" seeds of the poppies inspired me later to name my class for severly disabled children "the Poppyclass" and I'm for always and ever the Poppyclassteacher... cause you never know what awesomeness will bloom in these children.

I'm also born in West-Flanders where WWO I had a huge impact and even more than 100 years later it's still remembered and I hope the memories stay to learn from history for the now and the future...
Poppies were the first flowers that bloomed on the total devastated land.. They've been honored in poems, in songs,..
The are still a sign of hope in dark times.
I find it important to see them every day, even now in winter.. not in the garden, but inside my house.
Little signs that "there is always hope, just like the sun.. she's always there even when you don't see her"..

zo
29
sep
2019
teacher in heart and soul ...
Time flies... and life changes...
My life has changed a lot the past years. Due to chronic illness I struggle with for 26 years I'm not a teacher anymore at my Poppyclass with children with severe disabilities.
It was hard to accept I could not do my passionjob anymore after 30 years.
The past years I worked a lot on my health which mostly means "listen to my body" immediately and not wait until it crashes..;)
I'm better than I have been in a long time. I live again and don't survive life anymore.
I also discovered I am a teacher in heart and soul ( and a forever student..) and that's what I still want to do but in another setting.
Sometimes when a door closes, more doors open.. I just have to choose which one to go through !
I followed workshops myself, I met people who asked me to give workshops as a volunteer in a local heritage project... and that made me feel a teacher again !
In the meantime Pinkepinke, my expensive hobby since 30 years... is transformed into a real official sidebusiness! Now I have to learn a lot to be a real creative entrepreneur ;)

And now I'm asked by a local librarian to give a workshop at her open-door of Lettergek !
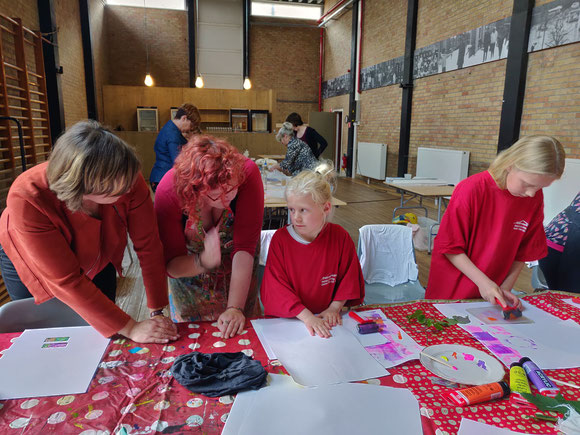
Next sunday I teach 2 workshops monoprinting with the gelliplate.
Of course we will start with experimenting this tool and techniques and having fun in the process.

In this workshop people will not only make monoprints, but make a one-of-a-kind photobook and labels.
They will learn some of the first techniques of bookbinding : making covers and perfect corners ;)


I love to teach people how to let go and go with the flow, but also to teach how to be precise.
Details can make or break a project.. or at least make a difference ! ;)
The students will learn all this in 3,5 hours in a workshop where they go home with a unique photobook, completely in their colors and their patterns.
They can keep it for themself, give it away as a gift.. or why not make more of these at home for holidaypresents ? ( with photos of the children and grandchildren ;).
In the workshop everything is included , also a very detailed worksheet how to make a photobook in accordeonfold.

If you are from the area and want to spent a relaxing workshop coming sunday, feel free to contact me at [email protected]
If you are from elsewhere in the world ? I'll share what the students made !!
greetings from Belgium
Inge
vr
09
feb
2018
2018... going for a positive spiral and...popupcards !
New year, new intentions or renewed intentions...
I really want to give my blog a new chance, cause I always loved writing these stories.
People who followed me in the past, know I struggle with fibromyalgie and CVS since 25 years.
After 5 years of crashing I'm still at home and I probably will never be able to work at my passionjob again: teacher of the Poppyclass with children with severe disabilities...
At first, life seemed to get on hold, but now after 2 years I found a new rhythm in life and all those years, creativity has been my saver.
It kept me sane and helped me to avoid depression and it gives me joy every day !
This is something I shared in the past and still want to share!
One of the ways to do this is sending handmade New Years cards.
It always takes me a lot of time... end of january is always my goal to get them all out of the house... but it's 2018 for 365 days, not ?
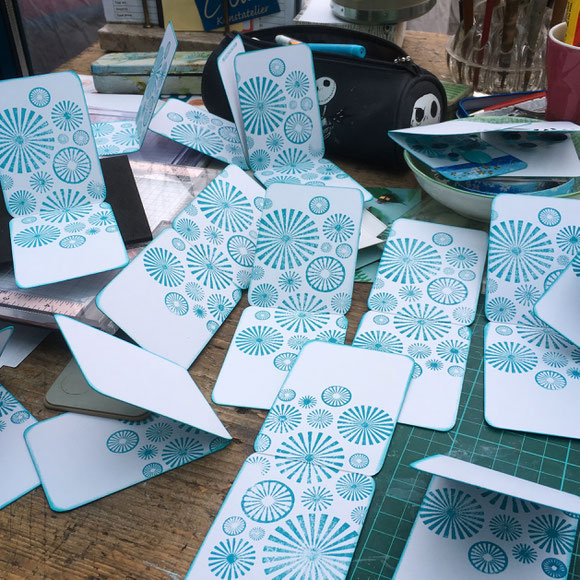
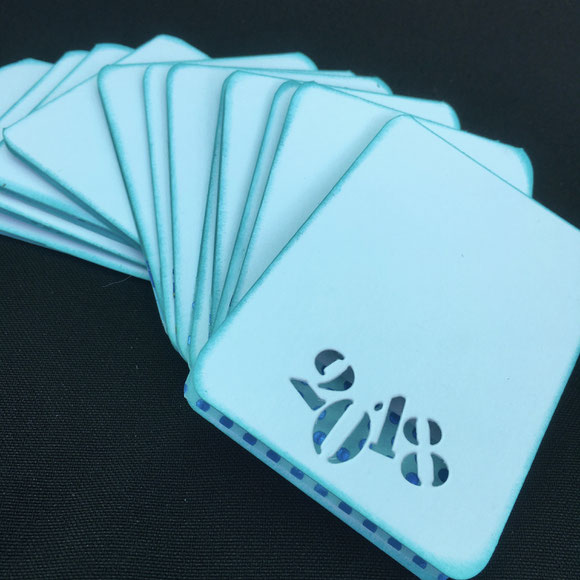
Since 2007 I make my cards in ATC-size ( 6,3 cm/ 8,9 cm) and in white and hues of blues.
Once I started this I couldn't go back, cause this makes a lovely collection and my recievers even expect I add one to their collection !
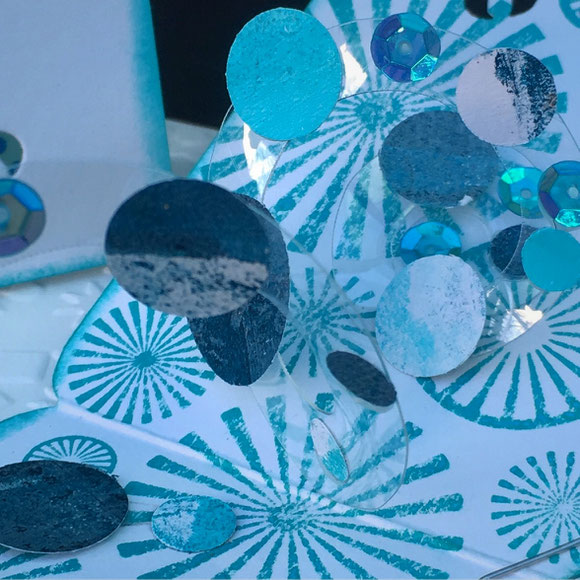
On the inside I stamped with distress oxide inks (Ranger and Tim Holtz) and stamps of one of my long-admired artists Michelle Ward.
On her site you can buy several of her own designs: stamps and stencils.
This stencil looks like fireworks for me, so everyone can use some sparkle and shine in the new year.
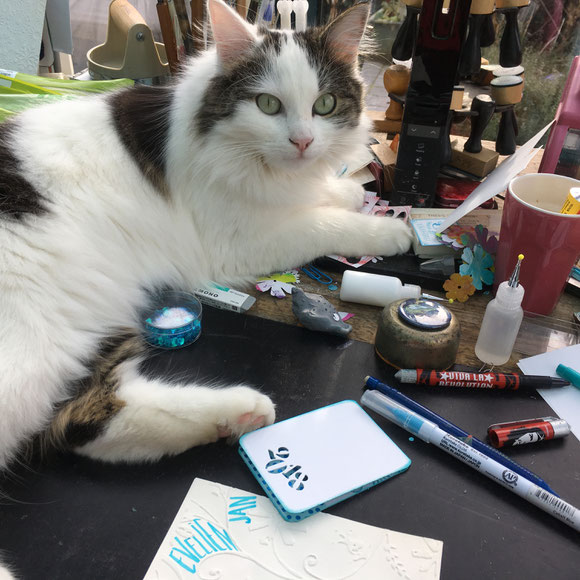
One of the reasons my cards take a lot of time is.... distraction and obstruction by my cats !
The cards are double ATC size so I could make them into a folded ATC-card.
On the front I diecut the year 2018 with metal numberdies from Tim Holtz.
This gives a little peek of what happens inside the card !
Don't forget to add some ink on the edges of the outside and inside of your cards, cause this little touch really helps to draw the attention of the viewer inside.
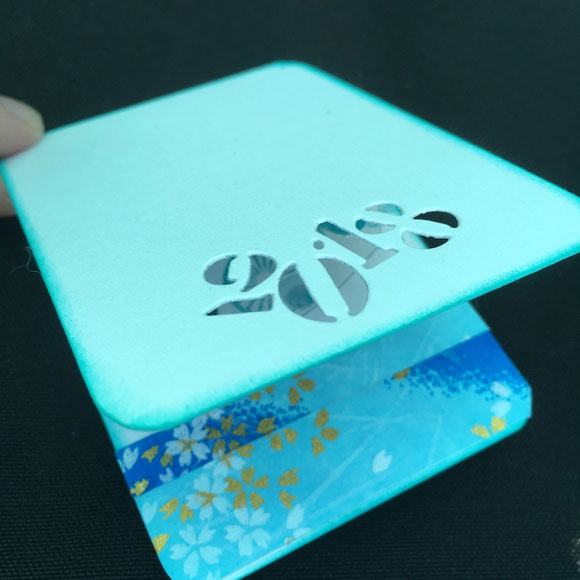
I added washitape from therareorchid on the bottom where you can see through the numbers.
I found the screenprinted washitape and papers of therareorchid through instagram and ordered twice from them. They have awesome prints and the owner is a very sweet person who runs her own small business.
And if you are a maker yourself you definitely have to support other small handmade businesses !
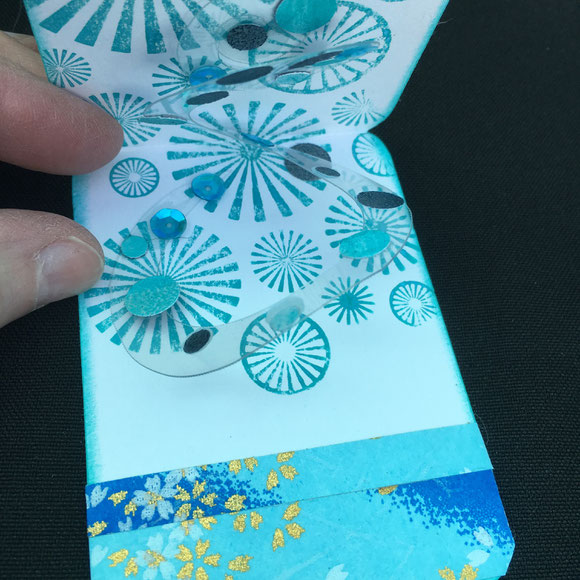
Inside the card I added a spiral popup.
I cut a spiral from leftover packagingpaper for the spiral.
In the future I will show here on my blog how you assemble a spiral popupmechanism !


On the spiral I added little circles.
When you gelliprint with a gelliplate (mine is from gelliarts), you always have leftover papers and especially the paper where you clean your brayer, can have lovely textures and colors.
One of these scrappapers had several hues of blues, so perfect for the circles for my new-years-cards !


I love how my popupcards turned out.
They are little cards but with a surprise inside with a meaning..
I wish sparkle and joy in 2018 with lots of little happy moments that make life worth living.
The spiral is an upgoing spiral...so if you want to climb a mountain... take the winding road. It takes more time, but gives you more chance to reach the top.
An advice I take for myself too !
To keep my popupcard open, just put a little paperclip in the middle fold.
My popupcard will be displayed the whole year. Everytime I pass by, it will remind me to stay positive and live in an upgoing spiral.
Same wishes to you all !
greetings from Belgium
Inge
wo
19
apr
2017
crazy for popupcards, mechanical cards.. and guestdesigner !!
I'm crazy for mechanical cards and popupcards. For a while now...
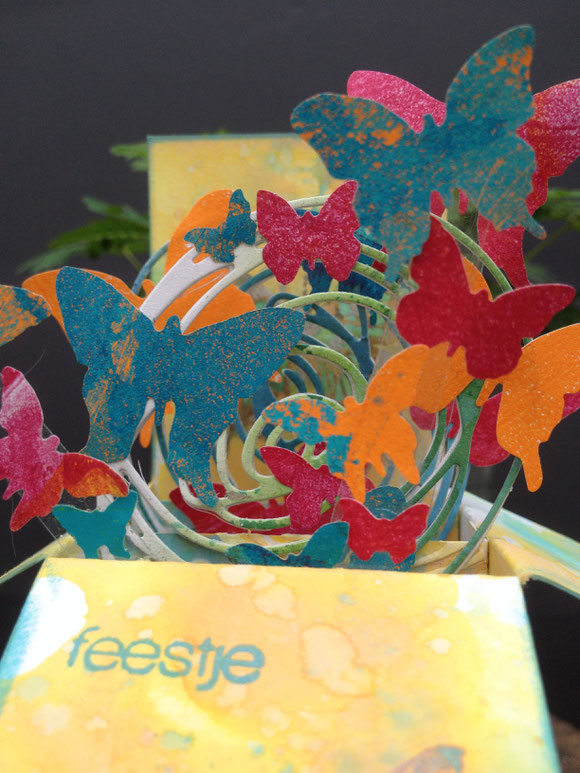
This year all the people that get a real birthdaycard from me, get these popup boxcards.

When I was asked a few weeks ago if I wanted to be a guestdesigner on the blog of Els Brige, I said immediately : "I would love to ! ".
Els is a young local designer and to my joy she makes stamps ! Nice Dutch textstamps are not so easy to find and she has now her own and I love them ! And she even has some dies from them too...Definitely worth to have a look at her blog and shop !
Guestdesigner and crazy for popup cards... well.. what else could I show ?;)
A few days before the request I recieved the long-awaited distress oxide inks from Tim Holtz.
This card is one of my first attempts and experiments to use the inks.
If you would love to make your own, here is a little tutorial :)
First you start with a sturdy 300 gr paper.
In the downloads ( choose English or Dutch) you can see the sketch and the measurements and also where you have to cut and score the card.
The measurements for this card makes a card that fits in a regular A5 envelop.
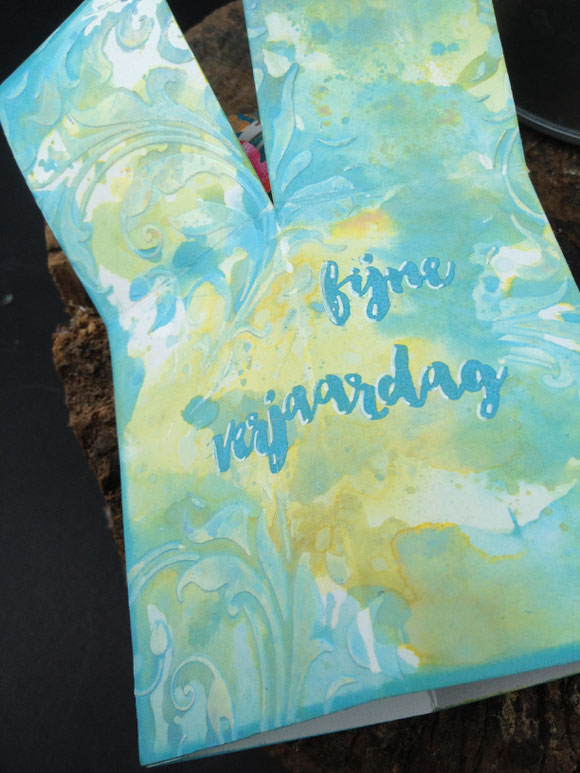
I first brought texture on my paper with texturepaste (optional). I just scraped the paste through a stencil (Tim Holtz) and let a dry.
I put a bit of distress oxide ink on a smooth underground, spritz it with water and then dragged the card through the colors.
I spritzed drops of water on it, while drying with a heatgun.
This process was repeated several times until I had a result that I liked with several colorlayers.


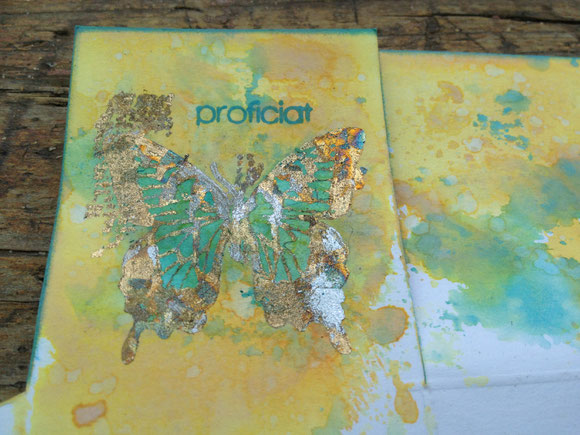
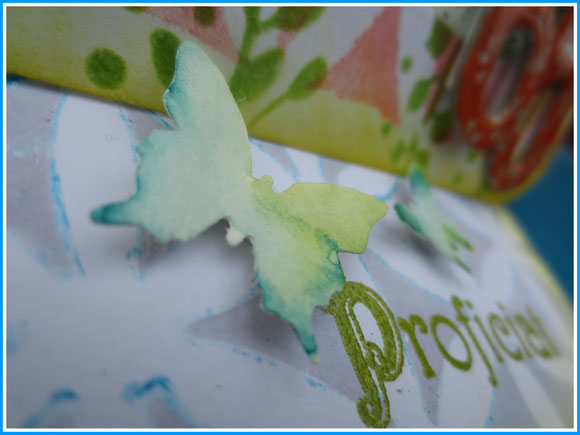
"fijne verjaardag" ( Dutch for happy birthday) is one of the textstamps of Els from the set "'t is je verjaardag". I guess this is one of her stamps I use the most !
I inked the stamp with the distress oxide ink broken china. To hightlight the word a bit more, I added a white shadow on the left with a white gelpen. It's a little detail, but really makes the word pop.
Another detail I always add is inking the edges of my card. I really find that it draws the eyes of the viewer to the inside.


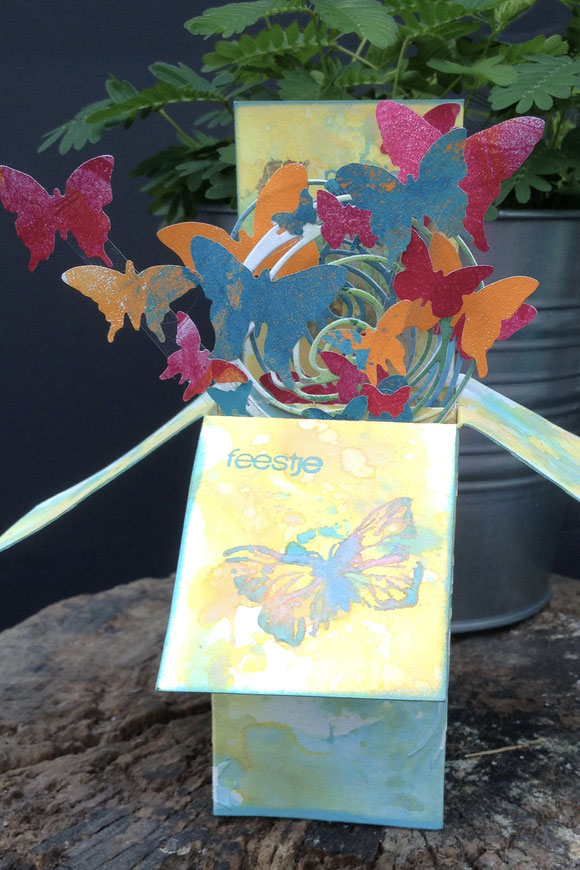
More textstamps were added from the birthdaysstampset ("proficiat "en "feest") AND a butterfly covered in metal flakes (peacock flakes of Indigo Blue).


One thing I also really, really like is make my cards from scratch: this means starting from a white piece of paper.
By adding paint, ink, stamps,... you can make a unique background.
I did bought embellishments in the past and I admit, there is gorgeous stuff outside, BUT... I don't seem to use them !
Give me some white paper, some ink and a stamp or a diecut and I make something myself.
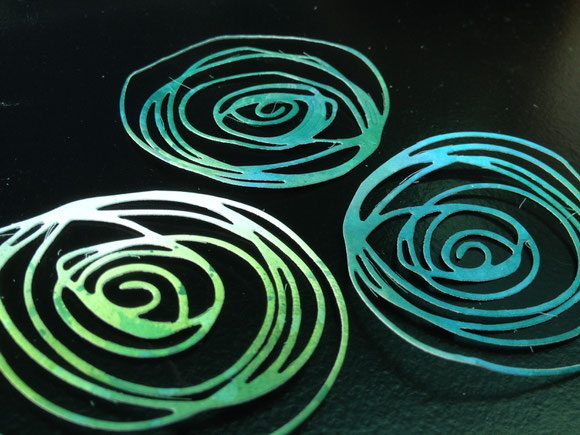
That's what I did with the circles: paper colored in layers with the distressoxides and then I cut them out with diecuts from Tim Holtz.
Aren't they gorgeous ???? I like them a lot.


I also "hoard" leftover pieces of gelliprinted paper. My gelliplate is one of my tools I really couldn't miss in my crafting.
When you need one of a kind butterflies, what better way to use up these scraps and diecut butterflies with a Tim Holtz die ?
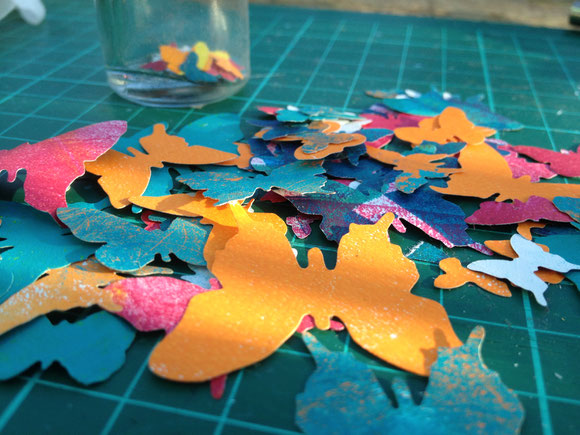


When all the "preparations" are done, then it's time to start the assembling.
To make the butterflies "fly", I add them to strips of plastic that are pieces of packaging ( yes, I hoarder that too ;)
The box is assembled (see on the PDF download how). Two strips are added in the box. That's where all the fun stuff is added on !


All the embellishments are added on the inner strips.
One thing that's important is to check constantly if the embellisments stay inside the box if you fold it.
So I add for example a butterfly on a plastic strip. There is doublesided tape on the bottom of the strip. I don't push it down hard, but first fold the box flat to the right. Does it fit in , then I can secure the strip by pushing it, if not, I pull it off and move it a bit.
This is a process that I repeat with everything I add.
This is how the boxcard looks when it's flat.
It fits in a regular A5 envelop and needs no more postage than a normal letter.
When the reciever, get the boxcard out of the envelop then is when the fun and the surprise starts !


I hope you liked this explanation of how I made this popup birthdaycard.
Most of all, I hope you get inspired to try them yourself and make them for yourself of your loved ones as a gift !
greetings from Belgium
Inge
PS: would love to hear what you think of them and if you made them !
vr
14
apr
2017
taking back my colorful life...

I'm back.. I think so... I hope so...
But not sure if I make promises again as I did past year..
It's more than a year ago since I blogged... not that I didn't want to, but the beast that CFS and fybromyalgia is, ate more of my life then I wanted.
Lots have happened in the past year !
I'm still sick at home and not in my dreamjob in my Poppyclass with severely handicapped children.
There has been panic for months that I would not be able to go back to school.
And I will probably never be able again... cause I'm still struggling daily with pain and being tired in a way only people with chronic pain, cancer,... can imagine.
I just arrived in my fucking fifties... so does this mean : "this is it ? This is my life ? "
No, of course not !!
Things can happen, dreams can be born, develope,... while recovering in my couch or my outside bed..;)

I have been listening to podcasts for months now about creative entrepeneurship, how to run your etsyshop,... and there is a new future growing in my mind step by step,..
Not being able to do what I want, I learned a lot...
I learned from my mistakes,from overdoing myself in good moments, searching for balance, finding out about bulletjournaling that helps to get more grip on my life as it is,...
I learned that I'm like the turtle in the tale " the turle and the hare" from Delafontaine...

The turtle is slow, very slow,... the hare runs around and much faster than her, but she has a goal and she goes on and on and on... and it the end, she reaches her goal..:)
I learned this is MY tale.. not giving up, get up and out of bed every day again, looking at the bright side of life knowing there is so much to live for and be happy for, thankful for all the opportunities and possibilities I still have.
Lots have happened the past year...
Lots have changed, even our 94 year old house got a new future, a make-over..!

And even as a turtle I managed to turn the ruin (that my house was in the middle of the renovation..) into a colorful haven, my cocoon, my little heaven on earth where I go up the spiral of life, sometimes going in circles, making new roots and then back up the winding road on a journey that is life..
I have lots to tell, lots to show you !
Hope you will be here with me again !!
greetings from Belgium
Inge
zo
17
jan
2016
paper, paint, a gelliplate... and a colorful wedding !

Almost a year ago I was invited by a friend and ex-collegue to have a dinner with some other ex-collegues. Just a nice, chatty get-together..
But my friend brought her computer and without saying anything she showed us a hidden board on her Pinterest..
Everyone started yelling, laughing,... She was going to get married !!!
My friend has been a single mom for about 8 years and there was only one "emptiness" in her life: someone who loved her and her son ànd whom she could give àll her love.
Some time before, she met someone online and they seemed to be a match. After a year she decided to leave her job at our school where she teached for more then 15 years... and moved to his house, miles from where she used to live and work.
Her friend has two young children and you can imagine that this new family needed time to form a new family. But especially when I saw the little girl and my friend together, you could see they were to hands on one belly.
The girl lovely named my friend her "plus-mama" and I think that's such a sweet word instead of "stepmother"..
She had a mum.... but now she has two ! :)
And what my friend never thought would ever happen in her life was getting real: a big family with three kids ànd someone who loves her and wanted to marry her.
We were so happy for her !
They both wanted a "do-it-yourself" wedding in their garden, so when I suggested I wanted to make her bridalbouquet with paper flowers, she agreed happily.

She shared with me the colors of her wedding: lime green, hot orange and teal blue.
So if that were not colors right up my alley !! ;)
I monoprinted several papers with my gelliplate.
Because I wanted some "movement" in the colors and that they were not "flat colored", I added several hues of the colors on the gelliplate. I didn't use any stencils cause that didn't show up after the flowers were made.
The colorful papers were cut with the die of Tim Holtz tattered pinecone.
I love the sight of the stacked cut flowers ! Yummy colors and a great choice of my friend !
Then I started making the flowers....

It took me some days to make the more than hundred flowers.
It costed me blood (not really..), sweat, tears (burned fingers from the hot glue...), time... but a lot of love was poured in while making these :) Happy thoughts were constantly with the new couple !


The flowers were glued on toothpickes and then put in a styrofoamball with a dot of glue under the flower.
I used the oranges in the middle with some green flowers around and then the blues were used to fill in all the gaps.
An orange flowerborder underneath, some diecut green leaves and tule on the bottom.
The bride can hold the bouquet at the wooden stick I glued on the underside. The wooden stick was wrapped with flowertape.
But when the bride holds the bouquet you can't see the stick.

My friend was very happy with this one-of-a-kind bridesbouquet and I was happy she allowed me to make this for hér very special day.
But I made her another handmade gift... but more on that in another blogpost !
greetings from Belgium
Inge
ma
11
jan
2016
writing a new chapter in my book of life...

I've been quiet on the online world for 1,5 year...I'm sorry for the persons who kept visiting but saw nothing new on my blog !
Allow me to give some explanation about my "dissappearance"..
Followers of my blog could read in some blogposts the physical struggle I had the past 5 year.
I have fybromyalgia since 1993 and it has always been a struggle against the constant pain and tiredness.
Sick or not, feeling exhausted or not.. I never missed a day in the years before 2011 to be in my Poppyclass with my handicapped children. It took his toll to be present and I did survive on daily painkillers and the adrenaline I get from my job.
In 2011 I really crashed with 4 hernia's.. first time my body rang the alarmbell so hard I HAD to listen.
Since then, I crashed now and then, was out for some months but came back, still fighting pain and being tired...
I adapted my life a lot to keep going: every spare moment was used to recover and gain energy so I could be in my class and do my job.
No more social contacts in the weekends, no more blogging on sunday, few time to create... due to lying flat in the couch for recovering.
I even ran to the doctor on the first schoolday of 2015, saying I needed more medication to keep the pain bearable so I could sleep, cause I wanted to be in my class !
My body seems to be much more clever then me...
Half october I came home from school, talked to one of the workmen who have been busy "in the big build" in our house, when I felt my heart almost jump out of my chest and I fainted..
ALARM...bloodpressure too high... exhausted... house-arrest now for already 3 months..
This year I become 50 years old and I always say I want to become 94...
Spending hours and hours in the couch gave me a lot of time to think: who am I? what am I doing ? live or surviving? Is this the life I want to live ? What do I love to do? How do I see my next 44 years?...
After 5 years of crashing... I'm sick of it...
Time to start another chapter in my book of life..
But which book to choose?
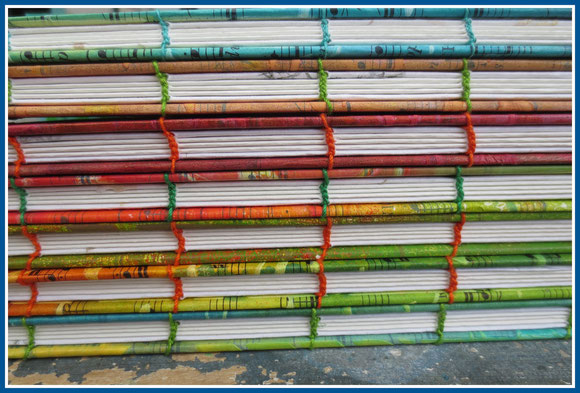
I made in the past some books for the poems of a Flemish poet Thomas Rubico. The poems are the same in each book, but I made every cover different with gelliprinted paper.
Maybe I could stay the same on the outside but could write another story in MY book?

I still want to be a teacher and mentor in my school.
I love my Poppyclasschildren, the children of the Triangleschool, the parents of my children, my collegues...They are an important part of my life, they give me joy, they are my passion,...
BUT... I want to be as good as can be BEFORE I start working again. No returning too early this time.
And I will not work 4/5 anymore, but halftime.
This means I have to say more "no", give other people the chance to develop themselves instead of wanting to do it all myself,...
I want to be in my class and don't spend hours on the computer for paperwork anymore ( so that's a job for someone else...)
In my class: that's where my heart lies, with the children..
I hope to be able to work alternating days so I have moments to recover.
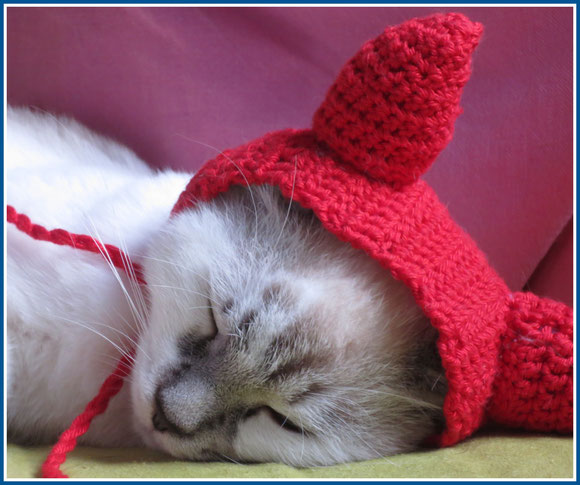
Mostly I recover with one or another cat on top of me...
But in my recovery since october, two of my beloved ones are soooo missed...
Missamissa, my bedcat, my little "baby",.. was run over by a car the 25th of september..
Another favorite of our 7 cats ran away on my birthday on the 28th of september.
Neo was 13 years old and my daughters "softy"..
Probably he got scared off by the noise of the workers on our roof :/
He didn't return and we didn't found any sign of him since..
What a bummer for this catlady: losing two cats in 3 days..

I still have 5 cats to lie under in the couch... but I do not want to be in the couch so much anymore !
I want to renurse my creative ME !

In the new chapter of my lifebook I started with making some good intentions for 2016.
But I wrote down intentions that are reacheable for me:
- more SELFCARE
- taking recoverytime when needed and not when it's too late...
- working halftime in my class
- following workshops so I can be a student again.
- learn to "handletter" ( I already payed for a handlettering workshop on the 20th of february !! Sooo looking forward for this)
- create for the fun, for myself in the first place..
- start blogging again (I missed the sharing and hey... with this blogpost I did it !! )
- learn to Instagram: fast photosharing of my life and creative projects. (Ticked the box ! you can find me on Instagram now as "pinkepinkecreative")
- restart my Etsyshop: neglected for years... you can find my "to buy" stuff on www.etsy.com/shop/pinkepinke
- pin again on my Pinterest
- being a teacher online (sharing my projects and "how to's" on my blog) and giving workshops at home as soon as I have a veranda again ! (They demolished my creative space during the "big build"..)
- restart the local round robins and maybe participate myself again in "round robins from all over the world"
- restart our local "birthdaycards"club
- living more with less money
-
- cook and bake more myself again
- less car, more bike
- sew my own clothes again
- buy second hand again
- after finishing the "big build" decorate my renewed spaces in our house myself: I have all the colors and decoration visually in my mind already... just have to wait a bit longer for everything to dry out..
- last but not least: short trips... especially to the UK with Wienne, my husband (and hopefully meet my UK friends again! )

I'm totally ready for more and different adventures..
No worldshaking adventures... just being myself... evolving.. taking care of myself more, in sharing with others.
Hope to see you here again too !
greetings from Belgium
Inge
za
02
jan
2016
be a little light in 2016..

"Everyone can be a light in the life of another living being..
I hope a lot of twinklelights make 2016 brighter !
It's a wish for you and a promise I'll try again to be a twinklelight..
It's not always easy and a commitment every day... but I will also try not to forget selfcare this year ;)
greetings from Belgium
Inge
ma
18
aug
2014
a white Poppy cabinet...
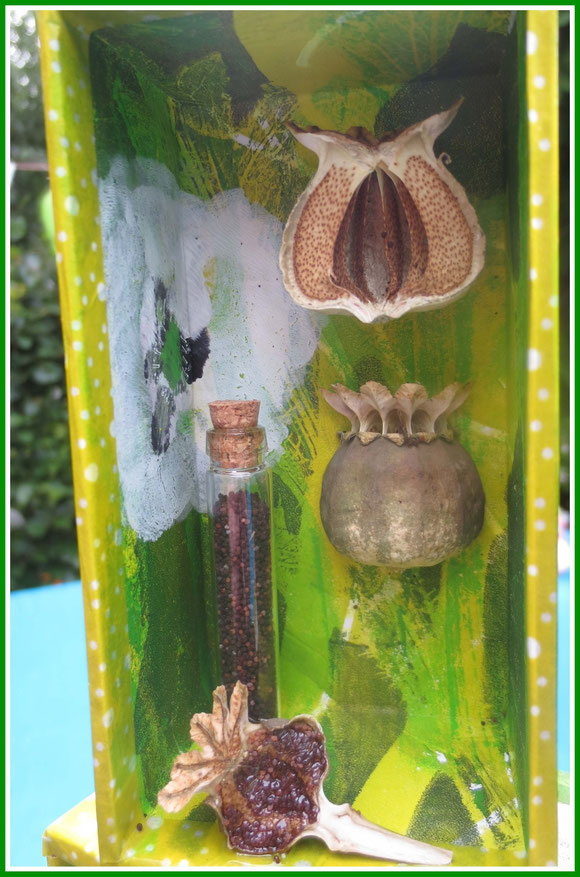
My mom loves Poppies, just like me and for her birthday I made her next to her Poppycard, also a white Poppycabinet...
I started again with the "throw-away" cardboard boxes my husband brought home from technical supplies in the hospital.
I made gelliprints about poppies to cover the box. I love to experiment with the gelliplate and add layer on top of other layers.
Fun is, that if you don't like the result, you just put another layer over it and sometimes even magic happens :)
In the different layers on the gelliprints I used real Poppyflower leaves from my garden as masks and made a positive and negative print in one.
With leftover packaging plastic I made masks of Poppyseedboxes. While I was drawing them on the plastic I had real Poppyseedboxes on my table.
I discovered that each different Poppy in my garden also has a different shape in their seed boxes. So by doing this I became smarter in botanical knowledge ! LOL
I also used the swirl mask from Tim Holtz in one of the layers.
Mostly I use my stencils I have from the crafters workshop, but the masks from Tim were a bit snowed under in my drawers... and now I discovered I could use them in my gelliprints too !
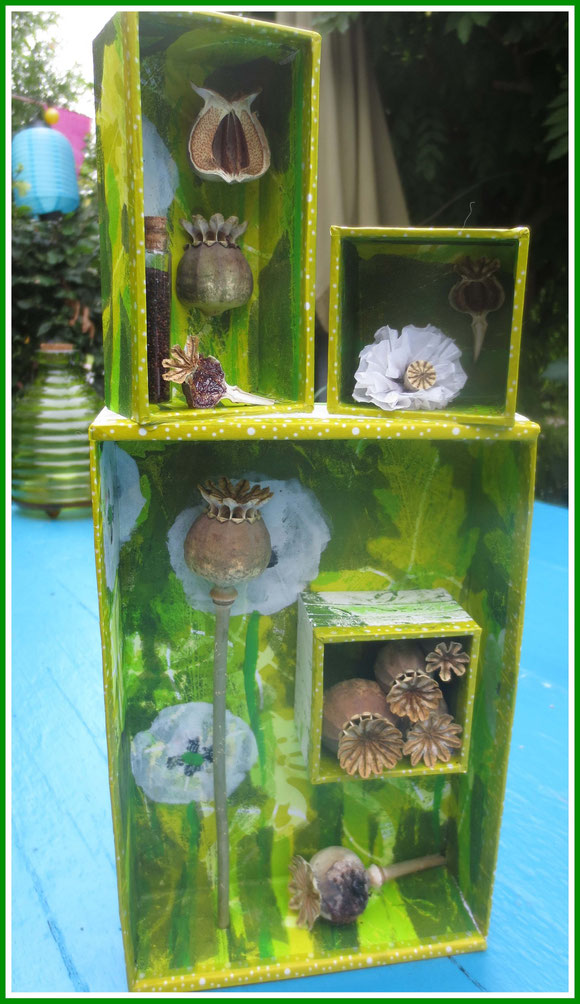
I use the cardboard box as a base, but make small display boxes by making them with sheets of sturdy cardboard.
I mostly make 1 larger one and two square ones, but if I use them all or how I use them depends on the project itself..
Here I used one small inside the box and a small one and the larger one on top.
This gave me some more "playroom".
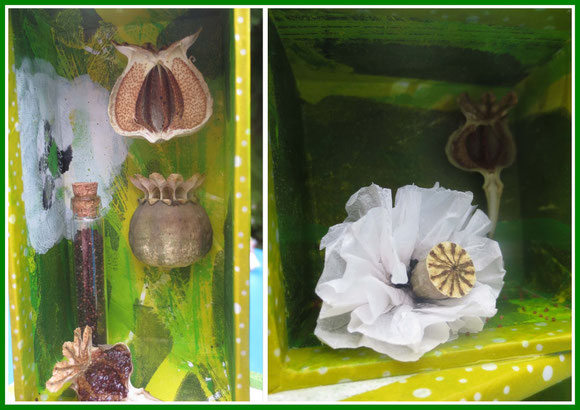
I had place in the box to display a dried poppyseedbox from my garden, but still show enough of the gelliprints.
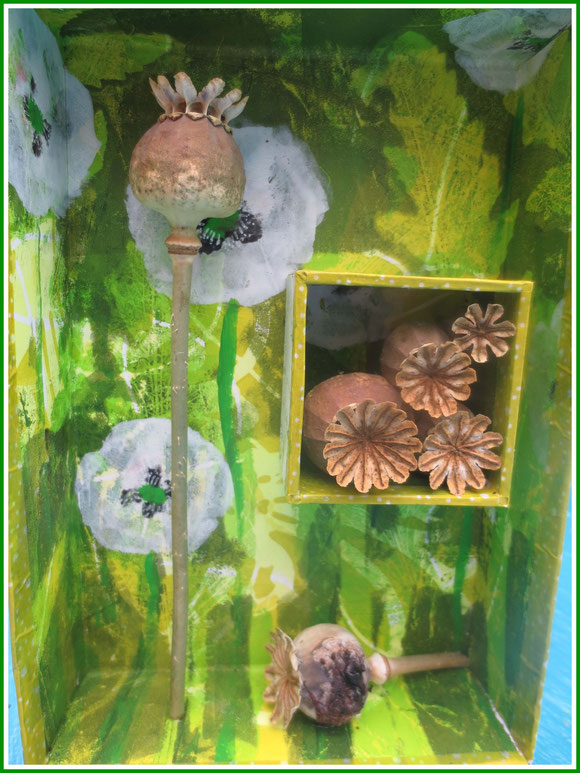
Inside the square box I glued more dried poppyseedboxes in different sizes.
You can also see here the layering of the gelliprint.
As final print on the paper I added white paint and some black dots and a green dot to suggest a blooming white Poppy.
In the end I added a green paint line for the stem of the Poppy.
In the large box on top are more dried seed boxes. I cut one open to show the inside structure.
Another one was also cut in half but I added gloss accents so the seeds stays in the seed box.
When Poppyseedboxes dry, the top comes open and through the little holes fall the seeds.
And they DID fall !!
I was drying bunches of these and ended up with Poppyseeds all over my craft room!
I gathered some in a glass vial, others are ready to be sew in my garden again to give me new Poppies next summer.
I don't know if and how you can dry the flowers themselves...so I made tiny paper Poppyflowers with a small poppyseedbox and white tissue paper.
A bit of a frilling job, but I like how it ended up.
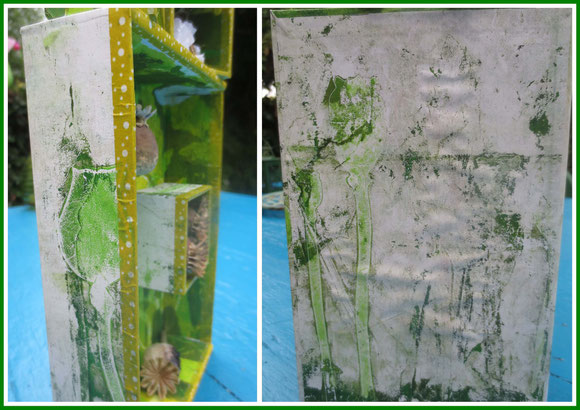
The gelliprints on the outside and back of the box are actually "waste paper".
After all the gelliprinting I had paint residues on the gelliplate. I added a layer of white paint and this is the paper I ended up with !!
This is one of the gorgeous results of gel printing you can't plan in advance, but I love this kind of cleaning up my gelliplate !
My mom got her box and was very pleased with it. If found its place in her home next to her white poppy paintings.
In another blogpost I share more variations of Poppyboxes and how they were created.
greetings from Belgium
Inge
zo
10
aug
2014
poppies peeking out..
I love poppies... after all I'm with a reason the teacher of the Poppyclass ànd here in Belgium the red poppy has a special meaning, remember WW1...
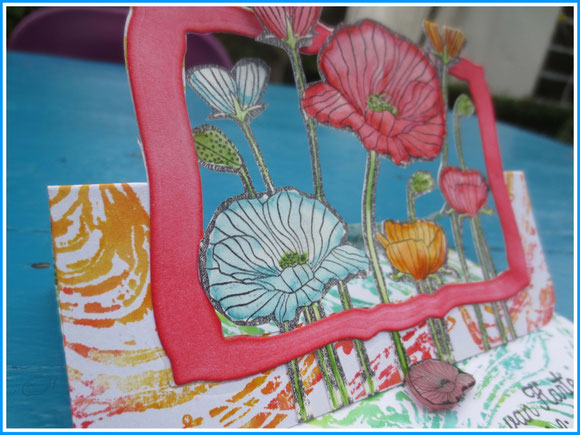
I had some birthdays around me and I made them all a flying easel card, everyone with a special touch.
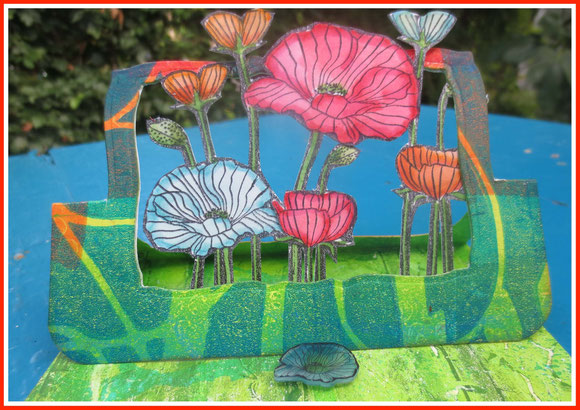
I love flying easel cards, although in these cards there is nothing really flying, but I use the "open space" a flying easel card has.
I started with a gelliplate print of poppyseeds. I'm completely hooked on my gelliplate and made a lots of prints that I also use in my projects.
Here I glued on the inside and outside of a card a piece of gelliprintpaper.
Then I did the partial diecutting so the front piece of the card can stand up.
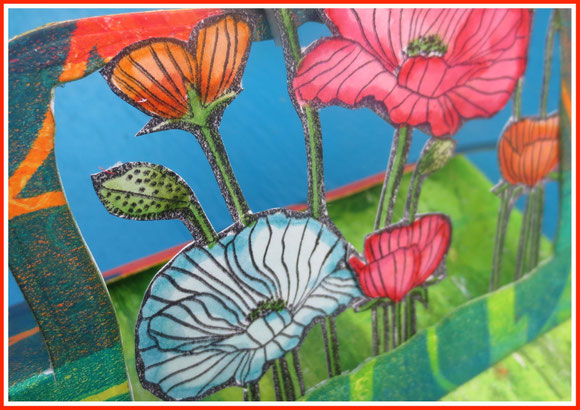
I have a new hero arts stamp with poppies...the "elegant poppies stamp" and it's actually a stamp which has a full background and the poppies are lines.
I stamped the poppies with a permanent ink on watercolor paper and colored them with distress markers. Another current addiction..
I cut around the poppies with an exacto knife and glued them in the opening.
To let the card stand up, I stamped on shrinking plastic, cut it out and colored the poppy with distress marker and shrinked it..
Voilà.. perfect card"stopper".
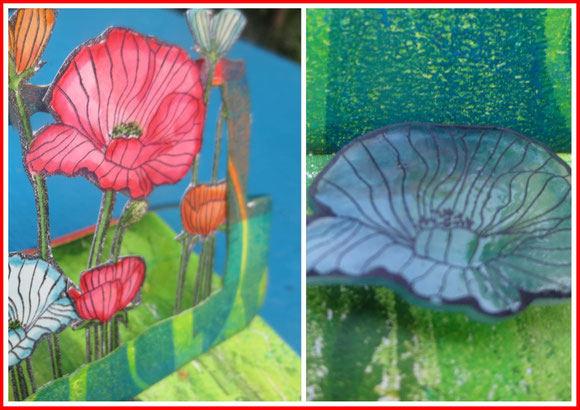
My mom loves white poppies and although they are rare, I DID have them in my garden..
Next to the red poppy, the white poppy is also seen as the "peace-poppy".
She's currently working on a whole series of paintings and drawings of white poppies for the exhibition she will have next year.
She got this card from me with a white poppy, but she also got something else with a white poppy..
Just wait for another blogpost :)
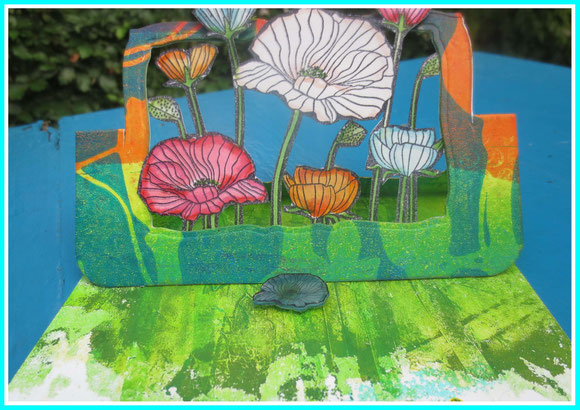
Here again a poppycard, but this time the background was stamped with the background "marble" of Tim Holtz which I colored in with distress markers and then stamped off on the card.
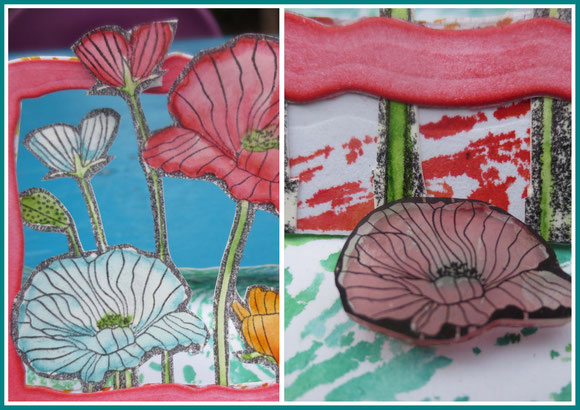
Some more details..
I love how you can color in the poppies in any color you want. Never had a Himalaya poppy with the gorgeous blue color in my garden, but I do have red, orange, pink, raspberry colored poppies.. to enjoy !
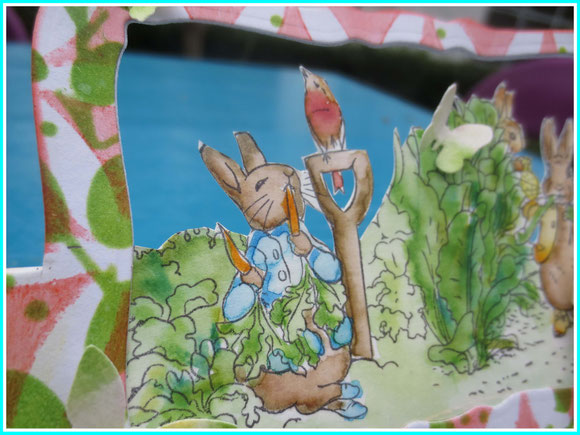
I had another birthday and although I think she would like a poppycard, she got a special one for her.
The lady is a former teacher and huge Peter Rabbit addict and every year I make her a " Peter Rabbit" card. Although I only have 3 stamps with Peter Rabbit, I amaze myself how you can differ every time a card with "only three stamps"...
So, this one is a addition for her collection.
A long awaited package arrived from the USA...
In it, the butterfly and dragonfly die of Tim Holtz, but also his small butterfly and confetti strip dies !!
My fingers are itching to experiment with them all, but some of the tiny butterflies found a space on this card.
Lots of other projects in my mind.. so off to creating something else !
greetings from Belgium
Inge
zo
03
aug
2014
a handmade typography cabinet...
Making something from almost nothing... thàt's what I love about creating..:)
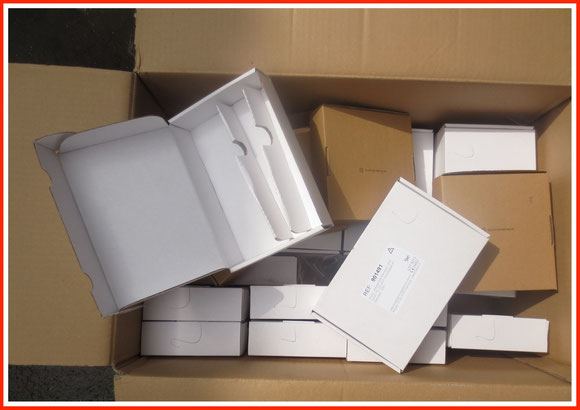
Do you remember that I told you in my previous blogpost about a big box full of "throw-away" cardboardboxes ?
Well... here she is..
My husband once said : "never marry a teacher... you can't imagine the amount of stuff they bring home".
After 27 years of marriage.. HE is the one who brings stuff home for me..I think I got him infected...LOL
As soon as I saw these boxes I was happy he didn't threw them in the recyclingcontainer.
Such nice cardboardboxes.. I immediatley knew I could do something with them.
I already upcycled some of them into "cabinets", but here is the promised 4th project : a Graphic 45 typography cabinet...
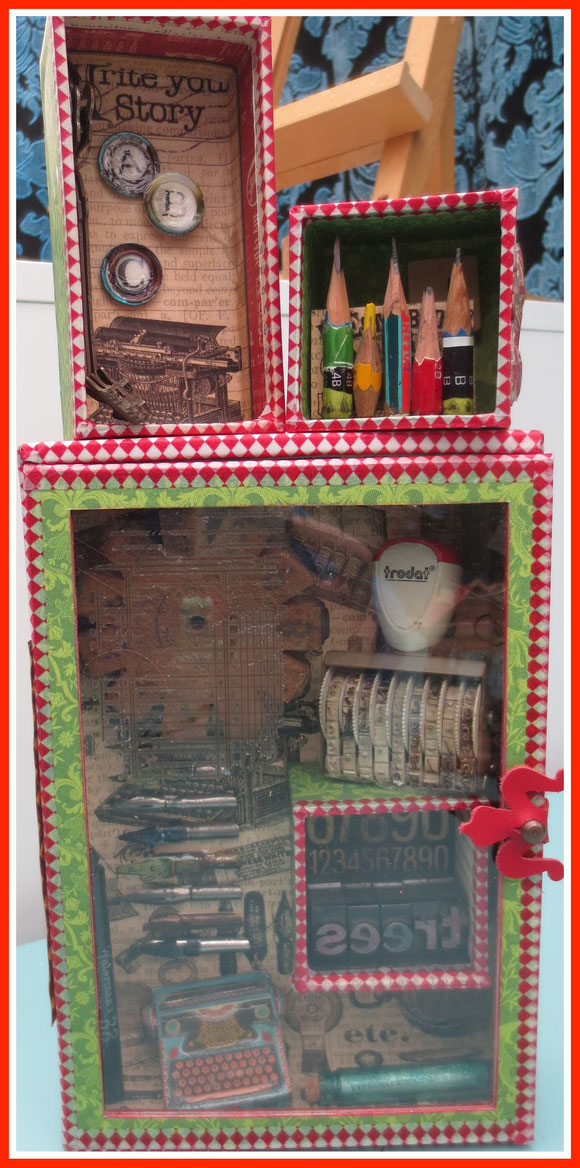
I used the cardboardbox as the big cabinet and made 3 little cardboardboxes myself with a sheet of sturdy cardboard.
I covered them all in Graphic 45 papers and washitape.
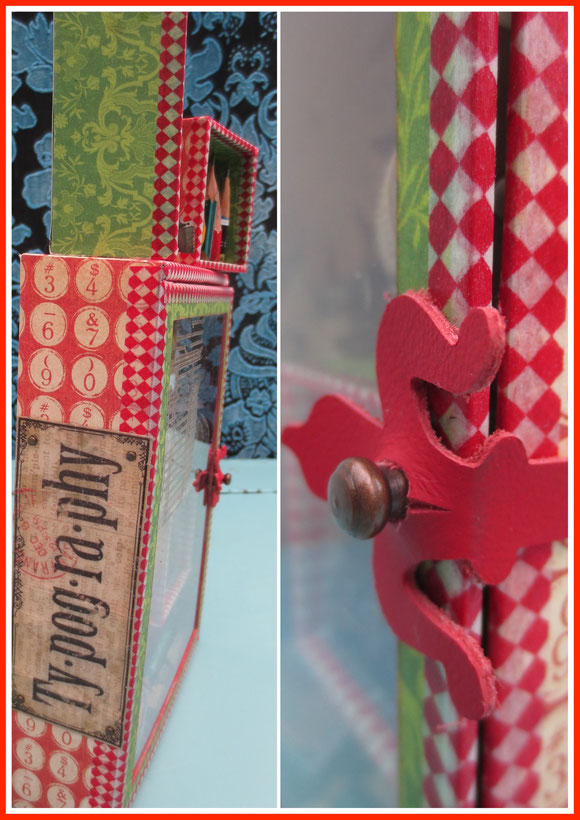
Here you have a sight on the sides of the cabinet.
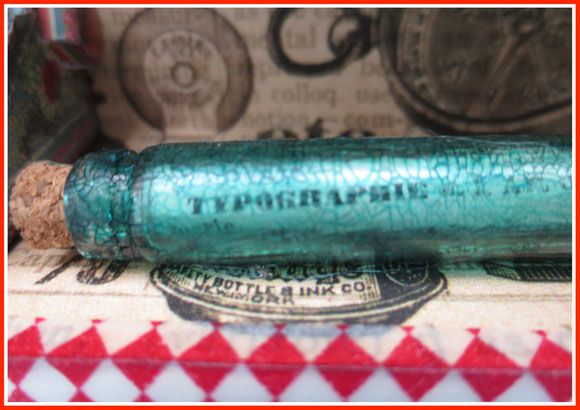
On one side the text "typgraphy" which I covered in 3 layers of UTEE.
On the right you see the closure I made with a hitchfastener from Tim Holtz and a leather strap I cut with his "metal findings"die.
I cut a rectangle out of the cover and placed a plastic packaging sheet between that and another piece of cardboard.
The cabinet now has it's "glass"-door and can be closed.
I added some stamps and rub-ons on the plastic to add some interest, but it doesn't blur the view.
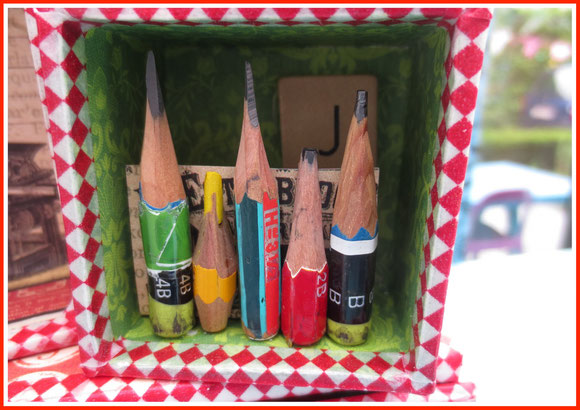
My mom draws and paints... She uses pencils a lot until they are almost gone.
Then she put them in a glass jar...
Understand now where my "hoarding" comes from ?....:)
She gave the little glass container to me so I could do something with them.
These little stumps are perfect for my typography box !
I glued them down so they could stand up in one of the little boxes on top of the cabinet.

In the larger box on top of the cabinet I added some metal parts of an old typemachine I have. It's a bit broke, but I couldn't throw these parts in the bin.
My savings gave me a perfect embellishment for this box!
On the left you can also see a metal number of Tim Holtz covered in paper.
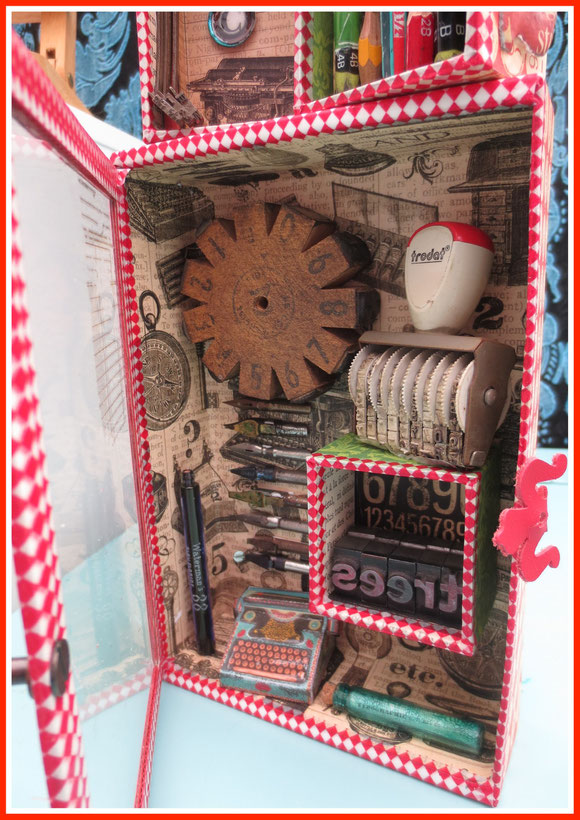
When you open the box, there is a little collection of stuff I had in my drawers: an old wooden numberstamp, a datestamp, metal stampletters, inkpens, a glass inkbottle,...
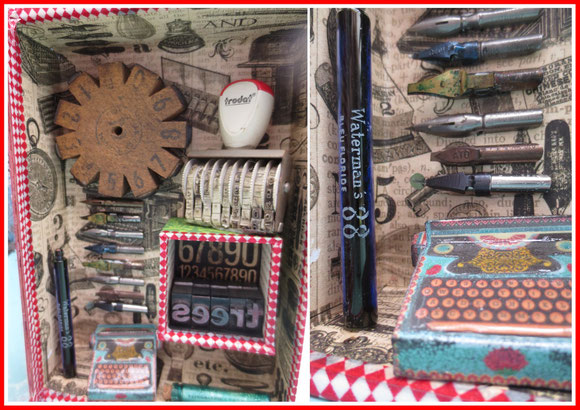
I also resized the typewriterprint to fit the box.( see for the link on Etsy in my previous blogpost if you are interested. She has lots of other nice paperstuff too)

In one of my vintage dictionaries I found the explanation of the word typography.
I tore it out, made a small roll of it and put it in a glass bottle (Tim Holtz)
The bottle was aged with crackle paint and alchoholinks.
These cabinets are such fun to make.
I already made 8 of them...with different themes, gelliprinted papers, bits of my stash finally find a visual place outside of my drawers...
I'll show you more of them in the future.
In the meantime... dig in your cardboardboxes and stuff and create one for yourself !
greetings from Belgium
Inge
zo
27
jul
2014
going Graphic 45

Am I still on this world ?
Yes, I am !
I'm sorry for the people who came by on my website and didn't found any new blogposts...
The past months have been difficult because of healthproblems and every time I thought I was back again... well my body protested and took away my energy...
But I don't complain... I'm feeling better now than I was since months, so I cherish these days.
It's also vacation now, so there is more time to slow down and rest if needed and I finally have the feeling I get more done then just the "basics".
And I'm happy to say I can create a lot again ! So I have lots to show and tell and hopefully I will be able to share it with you on a more regular base than the past months.
Fingers crossed for again weekly posts... but no pressure :)
I'm in the designteam of my local craftshop and now and then I get soms stuff, mostly papers, to create something "as I wish".
Although I think there are scrapbookpapers to die for... I rarely buy it, because they are too beautiful to cut apart... and mostly cause I love to make my own papers from scratch with inks, paints, sprays, stamps,... so it's a challenge for me to create with ready made "scrapbook"paper.
I do have to admit Graphic 45 has a real own distinctive style and lovely papers, so I was quite excited when I got 10 sheets from some of their latest papers
Curious what I created with them ?
Well , let me take you on a tour :)
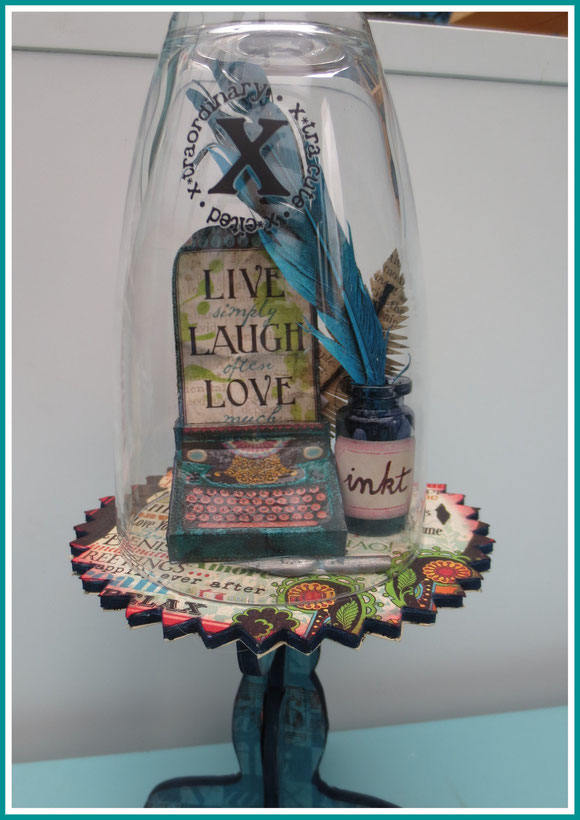
I first made this cupcakestand with a belljar.
The belljar is made with a drinkingglass from IKEA, a curioknob of Tim Holtz on the top and a rub-on.
The cupcakestand was a cheap one I bought, but altered to fit my project.
I glued papers of Graphic 45 on the stand and added more stamps, inked the edges with distress inks...
The typewriter is a beauty I bought on Etsy from SkyGoodies.
It normally is a deskcalendar and I made it like that, but I also resized it several times to use it in another scale and on different projects.
This one was inked over with distress inks and distress markers and then I made it look old and tattered by the chipped enameltechnique.
The text is from a graphic 45 paper and I added some splatters with Tim Holtz layeringstencil.
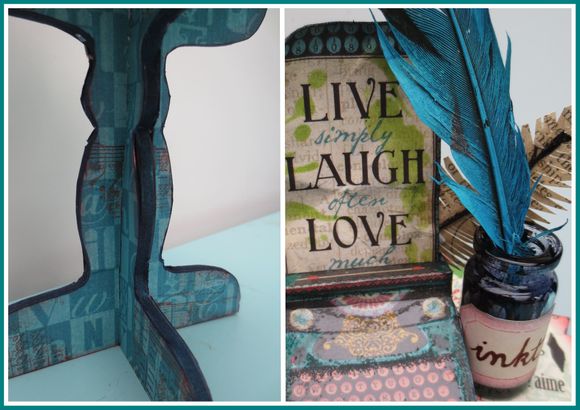
Different ways to create letters, so next to the typewriter I also added pen/plume and ink.
The inkbottle is a small glass bottle from Tim Holtz in which I poured real ink so the sides got coated and then I poured the ink out again. I let it dry.
I made a paper feather with vintage paper, but my favorite is the blue feather !
A feather found in my garden that I used in my gelprinting as a mask, but now it has a beautiful color that suited my bell jarproject perfectly.
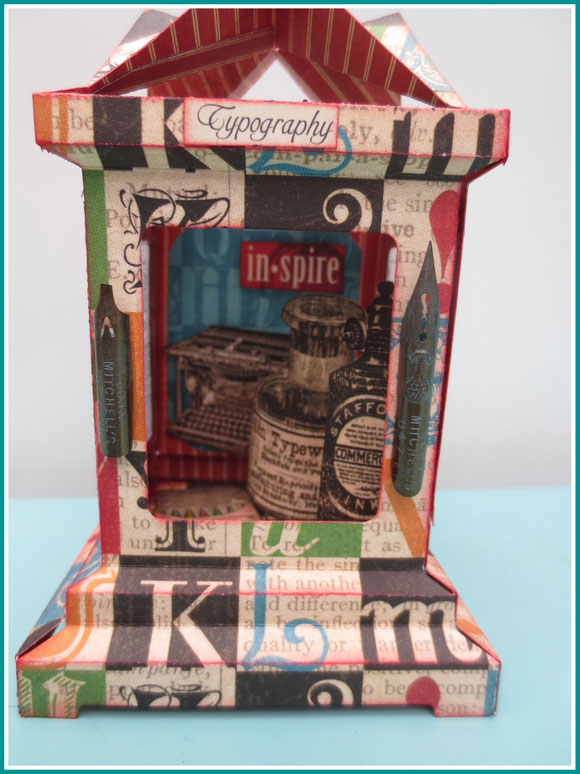
One of my favorite dies from Tim Holtz is the 3D luminary die.
I love to make this into a lantern ( see previous projects here and here) but it's also perfect as a little 3D display for any kind of theme.
The luminary itself was made with a Graphic 45 paper. Edges were inked with distress inks and I added two old pens on the front.
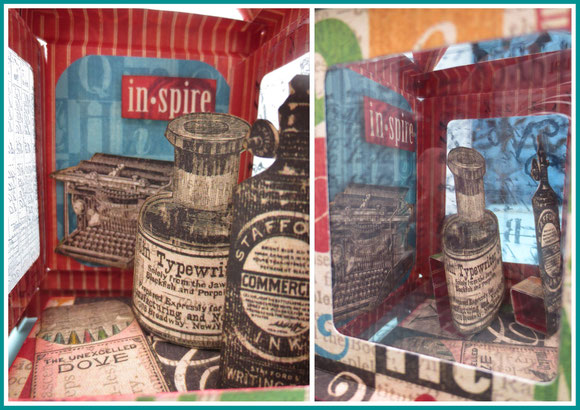
I left the front side open so you can have a peek inside. Left and right opening are see through, but I added a piece of packaging plastic on which I stamped with a Tim Holtz stamps and Sta-zon ink to give it some interest.
The back of the luminary was blocked with another Graphic 45 paper.
The typewriter, inkbottles, pencilbox,.. were cut out from Graphic 45 paper and added with foam to give some dimension or a papertab so the bottles could stand up.
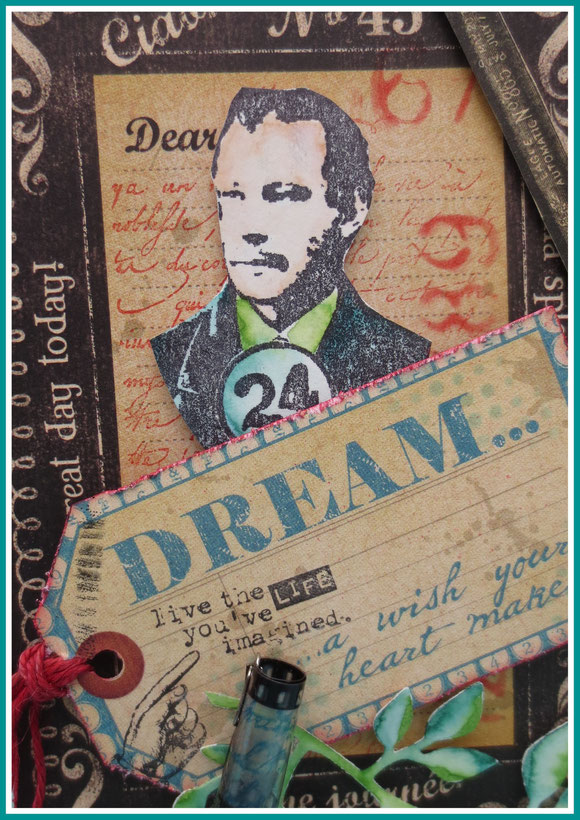
On one of the papers there was a large "card" so I made it into a standing card with Tim Holtz "small easel" die on the back.
I added some more text on the card with a stamp and added numbers with one of Tim Holtz layering stencils.
The man is a stamp on watercolorpaper, colored with distress markers.
The tag "dream" was also from the Graphic 45 papers, but I added a quote from Tim Holtz, the pointing hand and splatters. If you have a first look you don't notice them but the splatters in distress ink add so much more depth on the paper label.

I added a filmrollstrip on which I stamped with a textstamp and stazon. This is the best ink for sleek surfaces.
The little branch is a Tim Holtz die from watercolorpaper, which I gave color with distress markers and spritzed with water. I love how the colors wick into each other.
I have one more project made with the Graphic 45 papers, but that's for another blogpost.
A little hint : what do you do when your husband comes home with a big box full of little cardboardboxes in the same size... packaging material from technical stuff in the hospital that they would throw away...
And what do you do with all those little findings and collections in your drawers..
Well... you create...;)
greetings from Belgium
Inge
zo
18
mei
2014
happy 21 !!!

No more children, no more teenagers... adults in the house !
21 years ago, a little girl was born at home : my daughter " Gaia" !

She was born at home in the presence of my housedoctor Bruno and midwife Geert, brother Freek ( then 4 years old) and Aran ( 2 years old) were there too, accompagnied by my mom-in-law.
She lost her first baby after 3 days and had a very difficult delivery of my husband Wienne, so she was thrilled to be witness to a normal birth ànd the birth of her granddaughter.
I couldn't have done it without my husband Wienne, who was there all the time and on 18 may 1993, at 18.36 there she was : a tiny girl with lots of black hair !
Of course giving birth is intense but it was a good, very peaceful birth in our own house. All good memories...
I wrote the text on her birthcard to reflect this moment.
On the front of the card was a drawing, made by a friend where little creatures look into the circle to see her name "Gaia".
Her name means : "the earth as a godess" and I'm still very fond of her special name :)

In a blink of an eye 21 years have passed... and she was my last teenager until today !
Now I have adult children... does this means I'm old now ?:)
As a birthdaypresent we went with her in april to a convent in Bonn, Germany: Hobbitcon, ALL about the Hobbit and Lord of the Rings...
But I could not pass her birthday without another present and I got her a photo-cake.

She was photomodel for a friend, Marieke De Bodt, who's studying photography and I took one of these colorful photo's.
Gaia changed her black hairs from her birth a lot the past years, but she's still a special one :)


I also made her a flying easelcard.
As she's creative and draws and paints a lot I made her a card in her pinks and blues and with paintbrushes.

"because you're special...21..."

I enjoyed my daughter as a little child, as a teenager and now I'm enjoying her seeing her go her own path in life as an adult.
I hope we can have YEARS together to enjoy !!
Big kisses and hugs my daughter !
greetings from Belgium
Inge
wo
26
mrt
2014
needed: healing thoughts...
I need healing thoughts...
I could use some healing thoughts sometimes, but I'm not asking them for me but for little baby Ruth...
Little baby Ruth is the niece of one of my collegues.
She is born on the 24 th of february and as a proud aunt, my collegue told us all about the little new girl in the family.
Past sunday I got a devastating textmessage: "if I could make something for the parents of Ruth because on friday, two days before she became 1 month old, she was diagnozed with acute leucemia..."
A routine investigation suddenly turned the life of this young family completely upside down in an instant..
She has some chance to survive and hopefully she does, but it will be a very tough long road..
I don't believe in any god since a long time, but I still do believe in people...
Very skilled doctors, nurses with angelhands, people and friends who can support the family and help them carry this heavy burden,... but I also believe in the energy between people... even if they don't know someone personally, I want to believe that positive thoughts can help, whatever help this may be.
So, I need healing thoughts of you all...keep this little baby and her family in your mind and heart..
How could I make something for this family that expresses how I feel about their grieve, how can I , as a stranger for them, mean something for them..?
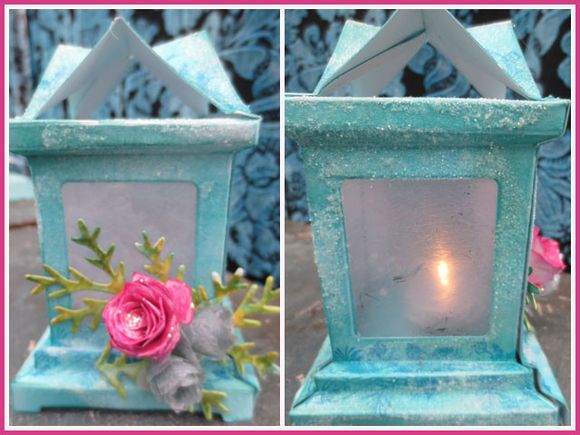
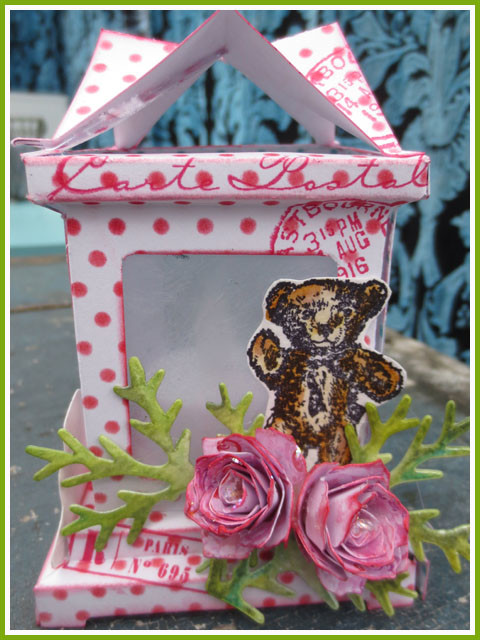
I have my muse and my creativity...so I made a little lantern, based on the birthcard of Ruth...

Ruths birthcard has white dots on a blue background, pink words and roses and a little retro fawn.
I wanted the lantern to reflect this card.
The little fawn represents Ruth for me and hopefully she's strong... just like Bambi..
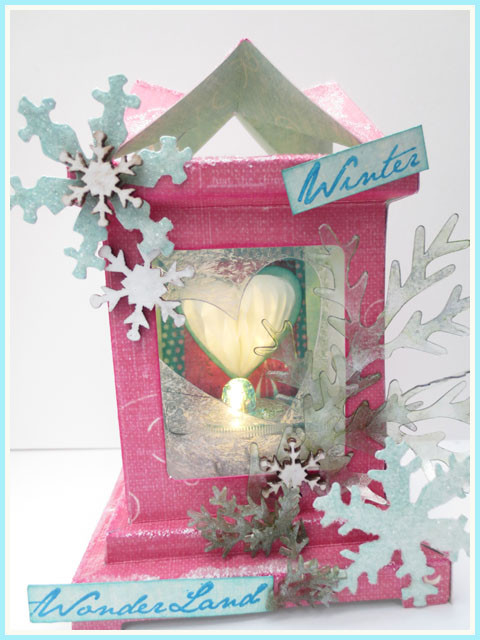
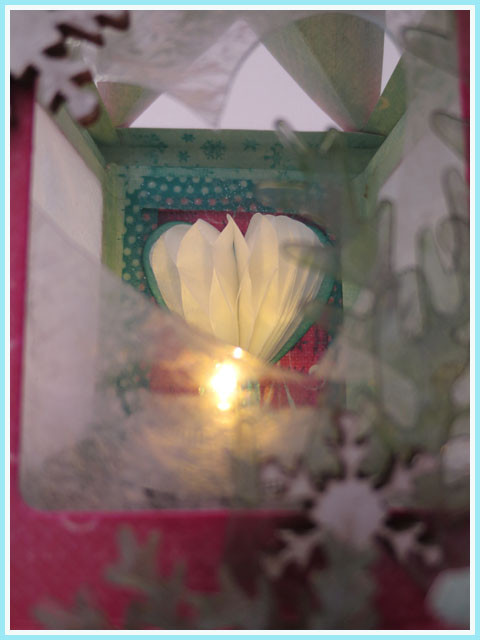
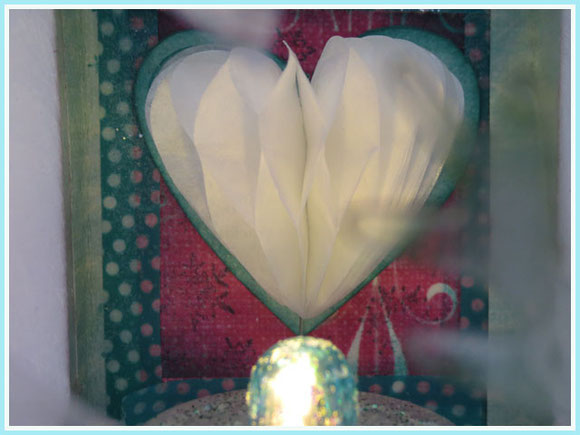
Inside I added a white heart : white because she's just such a little innocent baby.
A 3D heart made from honeycombpaper... 3D because a heart is "full" and although she's here on earth for just one month, she's in the heart of many people.
Ruth has a little big sister of 3 years old... I added a battery operated candle, so whenever they want it, this big sister can light the candle.
The words "gaarne zien" mean " love and being loved"
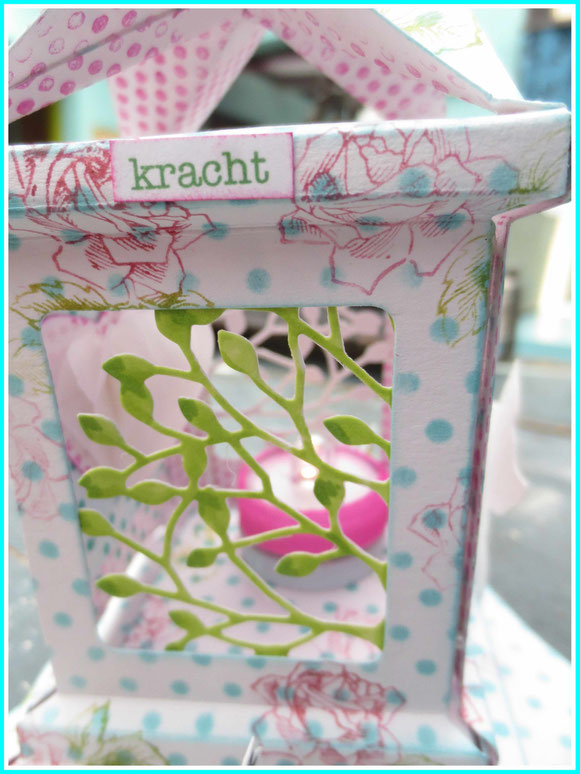
For the moment this family's life looks like a dark forest, but hopefully they can see the light now and then between the trees and the leaves.
I added the word "kracht", Dutch for "strenght", cause that's what they will need a lot.
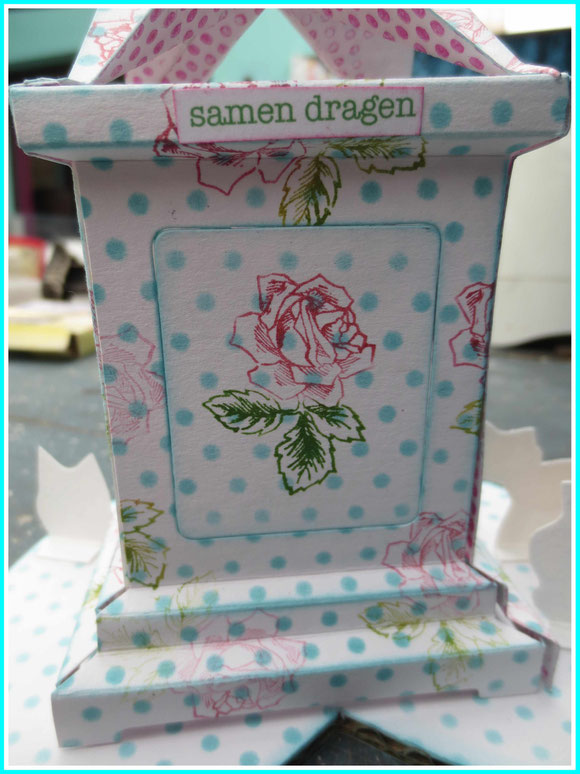
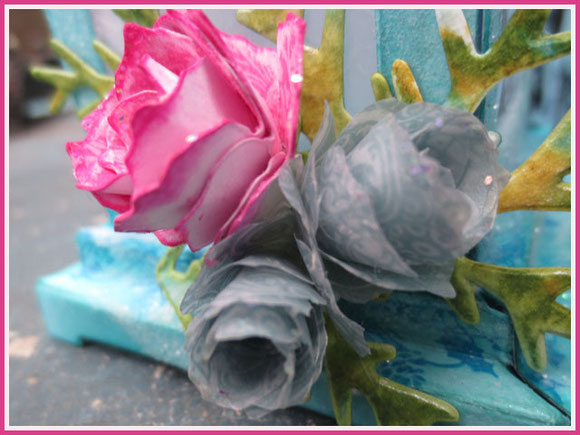
A rose has beauty, but torns too... just like life..
But when the torns hurt ... it's better to carry the burden with other people... this family should not carry this all alone and I know they won't have to.
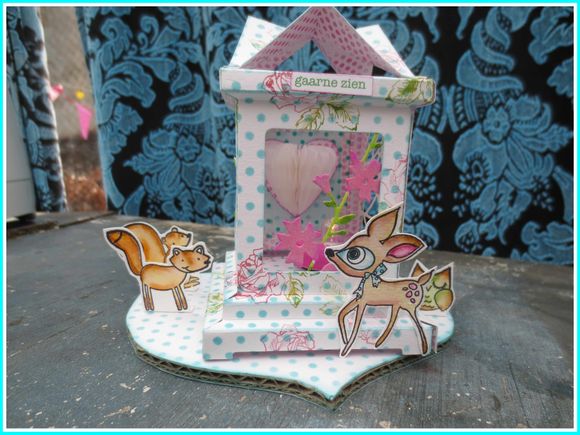
The lantern is on a little heartplate and surrounded by other little animals, representing all the people, wherever they come from, whoever they are... who wants to surround this family by being there physically or in heart and mind.
I put a piece of myself in this lantern... and hope it helps..
greetings from Belgium
Inge
wo
19
mrt
2014
my own little heaven on earth...

I have my own little heaven on earth...
and I was sooooo happy today to return to it today...
Some of you saw me on facebook yesterdayevening...:)
I'm almost never on photos and never take a selfie, but how I looked yesterdayevening... well, I needed to share this with you..
Relativating yourself isn't a bad thing..;)
On the left is how I looked from 4 PM to 10 PM.
On the right how I looked when they expected me to start sleeping at 10 PM..
I didn't leave my room.. did't want to scare someone !

The reason for this outfit is that I had to do a sleep-monitoring-test (or how do you call such thing...) in the hospital.
I'm a bad sleeper since years and pain is a huge cause of it.
Having trouble with my energy more and more and crashing now and then ( I'm home from work since december..), my doctor said it was time to check my sleephabits and sleeppattern.
I had lots of sweet and funny comments on my selfie and a lot of you also wished me a good night.
Well... it was a rubbish night...getting awake several times, having to pee twice ( and I had to ring the nightnurse to disengage me from the monitoring..), waiting for the nightfairy to come, but she was visiting other people...and when I was finally asleep, the nightnurse came to wake me up putting the big lights on, because there were some problems with bad connections...I knew when the sun was coming up, cause I heard the birds..so I guess I wasn't sleeping around 5 AM..
Well... rubbish night...awake at 7 AM, but still tired, high heartritme, headache... but I was happy.
Mission accomplished !!
Image you sleep like a baby on a moment like that !
This was a night like I have a lot at home, so I really hope they see something and can give me good advice or help for a more energy-giving and recuperative sleep.
There is always hope :)
Although there was a cold breeze, the sun was shining when I went home and I felt happy.
Back to my little heaven on earth : my house ànd my garden.

For almost two weeks now we have real sunny days and even the temperatures are warm for spring.
This means I dive in my outside bed twice a day to regain some energy.
I don't sleep, but I close my eyes, feel the wind, hear the birds,...
At noon the sun peeks through the white blossoms of the old tree and gives a little warmth.
In the evening, I can see the sky change colors when the sun starts her sundown, birds are twittering and singing and when the sun is gone, they are suddenly quiet..

Of course I still need a blanket, but a cat also keeps me warm..
And when the night falls, the lights in my garden are lit : my "path of Alice in Wonderland" and little solarlights.

This is the sight I have when I'm in my outside bed...
I love the solarlights of Ikea and have them in several places in my garden.
Past week I found new ones : BIRDS !

When I can't see and hear the real birds anymore, these little ones give me some light.
I have put them on the wall next to my outsidebed between the ivy.
Chilling out in my outside bed... my own little heaven on earth :)
greetings from Belgium
Inge
zo
02
mrt
2014
manly, flying birthdays… and a bit of pink..
We had some birthdays the past 2 months in our family. Some are from the men in my life.. so a challenge to make a card :)
My husband Wienne became 53 at the end of january !
Although a lot of men don't really care about cards ( or they pretend to...), I made him a personal one.
I discovered the flying easelcards a while ago and wanted to give this one a try.
Wienne is a" technical" man...and I know there are no gears in a computer... but the gears had to represent his technical skills :)
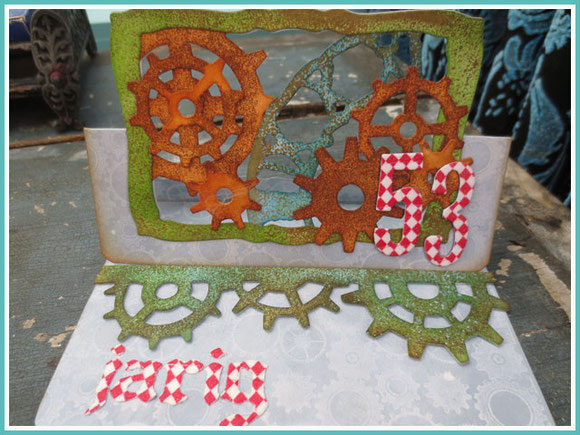
Flying cards mostly have something to "dangle" or to " fly" in the open space created by partial diecutting, but I love the see through effect you can make in the opening.
I cut several gears and the clock with Tim Holtz dies, colored and inked them with distress inks and embossing powders and stack them behind the frame or attached them to each other to make the "see through layer".
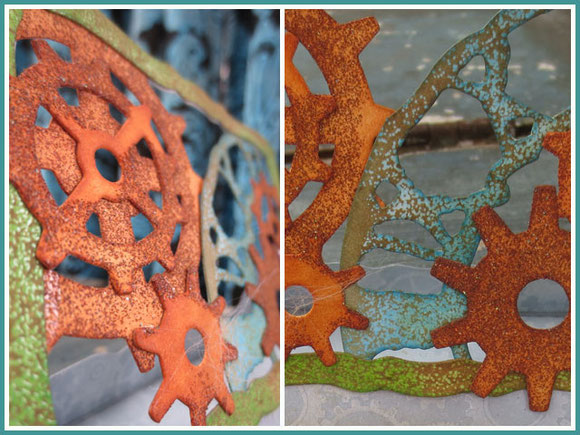
For the gears I used distress powders and you can see how "gritty and rusty" they are now.
For the clock I used the rusted enamel technique from Tim Holtz : inking with peacock feather distress ink, putting clear embossing powder on top and flicker some off again, melting the left over embossing powder and then overinking with a dark brown distress ink like vintage photo.
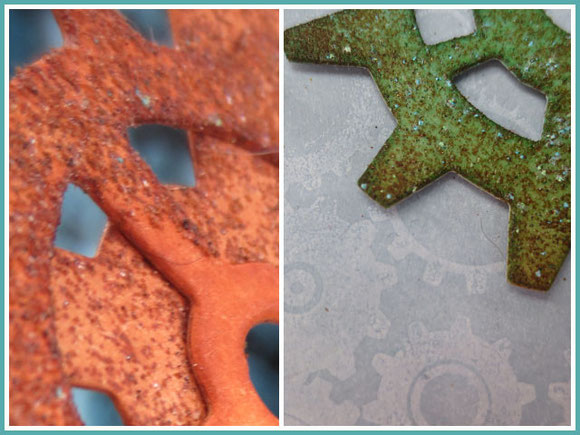
On the gears ( made with the gears edge die) which make this card in an easel-card I used blue as a base color and added some verdigris embossingpowder on top of the brown distress powder to add a bit of color.
The backgroundtechnique I used for the card was "resisting with white ink". I stamped a large gearstamp with white ink, dried it very good with the heatgun and then overinked with iced spruce distress ink.
A subtle background but more interesting then a plain background.
Another man in my life is my father-in-law : together with my mom-in-law they really accepted me as a "daughter" in their family.
No horror-stories for me about bad mom-in-laws !!! LOL
Although he's been struggling with his health for years with all kinds of problems, he always pulled through and we are happy he's still with us.
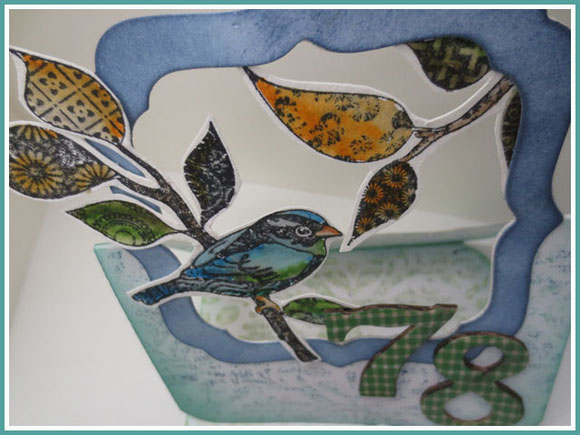
78 years old ! That's already a honorable age.
He always quitched special birds for a hobby and because of his health he had to size down, but lately started again with four new colorful birds :)
His love for birds inspired me to make his birthdaycard.
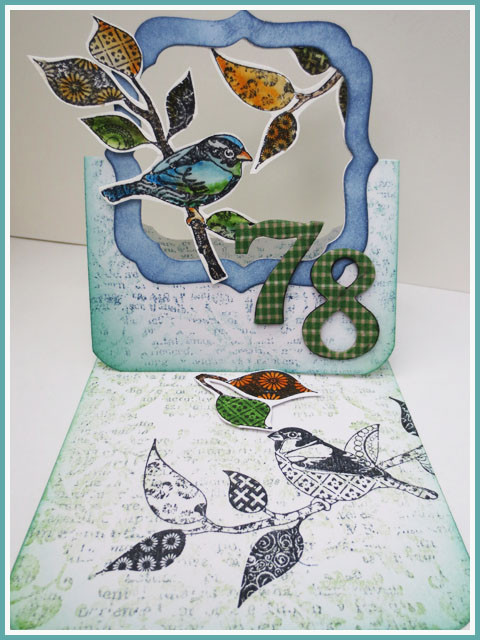
Background was made with the "kissing technique" in which you make stamps "kiss" and then stamp.
Ever wondered how you get text or another pattern in certain spaces of a design ? Look here for a tutorial on the kissing technique.
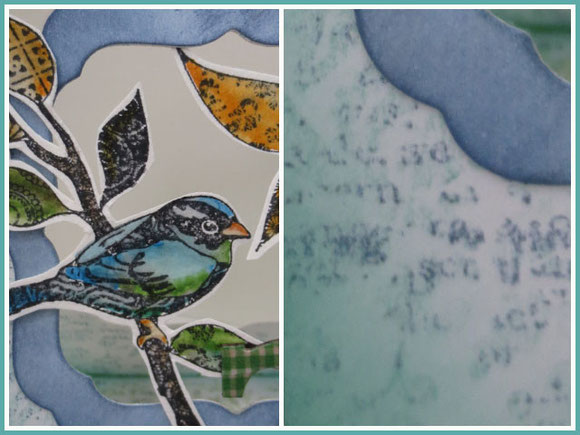
The bird was stamped with permanent ink on watercolorpaper and colored with the distress markers. Always a colorful result !
Past tuesday, one of my other favorite men, son Aran, became 23 !
He loves cats, so his birthdaycard has some cats on it.
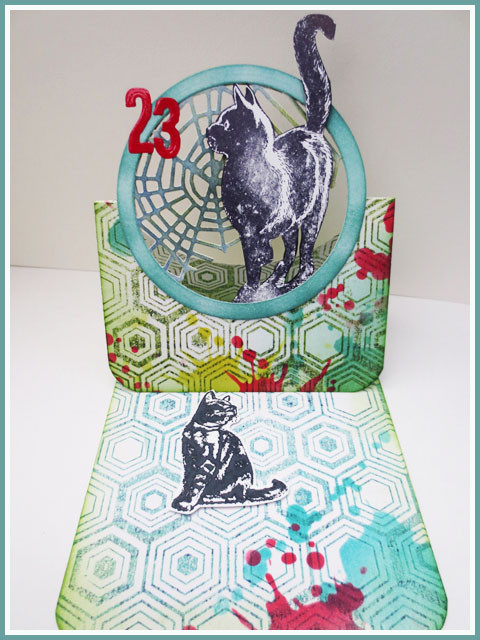
In the past I often made my men-cards in two colors ( mostly greens and blues...), but following the online cardclass "his and hers" makes me stretch my colorpalet for boys much further.
I chose a graphical stamp for the background, also a tip from the onlinecardclass I keep in mind when making a manly card.
I added some more layers on the background with stencils and distress inks.
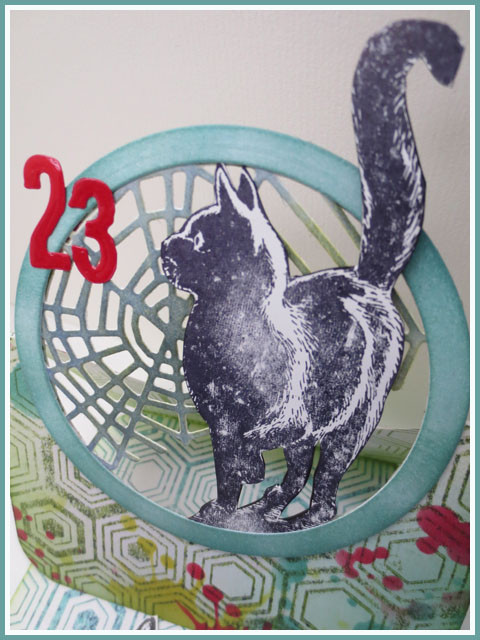
Here again I love the see-through effect. I created this with the spiderweb-die from Tim Holtz and a cut out of a stamped cat.
I had a workshop yesterday in my home where I teached " manly labelcards and flying easelcards".
The cards I made for the birthdays were perfect examples for what I wanted to teach, but I also made a real " flying" easel card as an example.
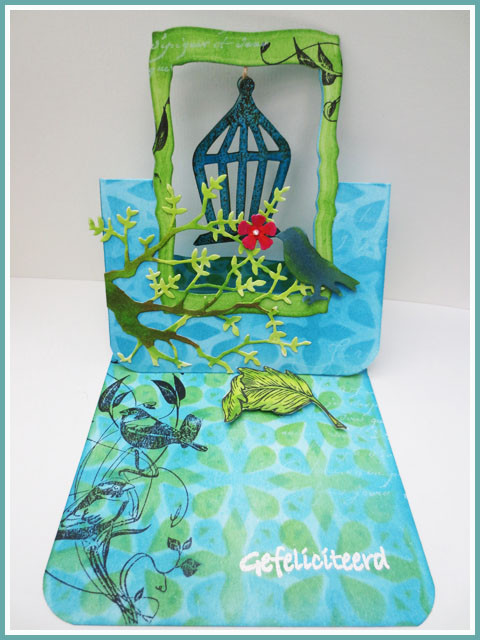
You have a partly see through by the diecut of the branch, but the birdcage is "flying" in the opening.
I used the enameltechnique again on the birdcage.
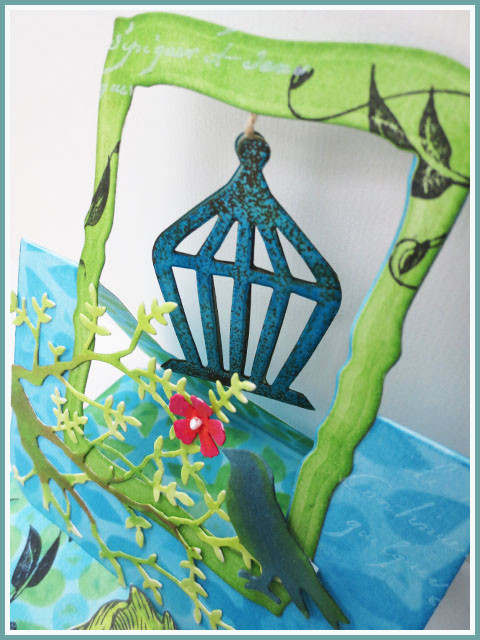
I love different layers in my cards, so next to inking the background with distressinks, I ink once or more through stencils, add stamped images in black, white,...
This layering is definitely my cup of tea !
I also promised you a little "pink"...
Dorien had her birthday in the beginning of february and I made her a handmade card and present.
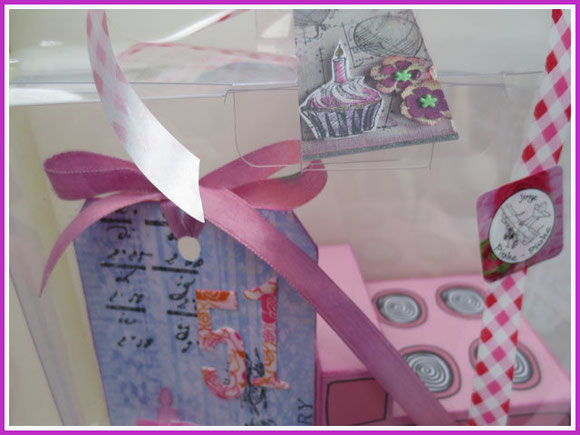
When I saw the vintage "paper" ovens on Pinterest, I fell in love immediately !
They are a design from Claudine Helmutt and she sells this ànd other retro -drawn stuff on her etsyshop.
I ordered this printable ( and some others...) and after paying you get a link to download the printables immediatly.
This one comes in 5 colors and I chose a pink one for Dorien, to match her card...
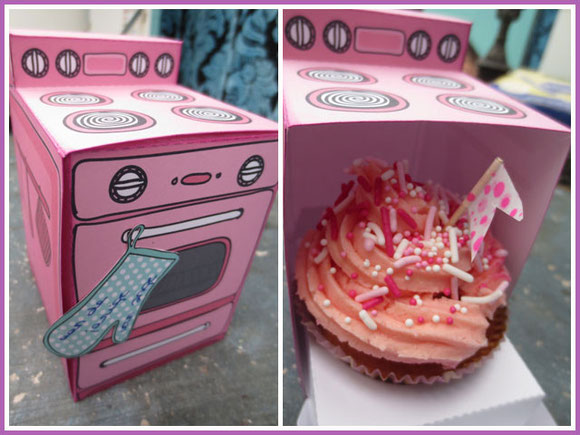
They are quite easy to assemble : just follow the instructions with the pdf.
I baked cupcakes with nutella and made pink frosting.
I'm not so fond of the frosting myself... I love all the gorgeous decorations people make on cupcakes, but I myself don't like the taste of it..
BUT... it lookes good, so I decorated one to put in the oven as a gift.
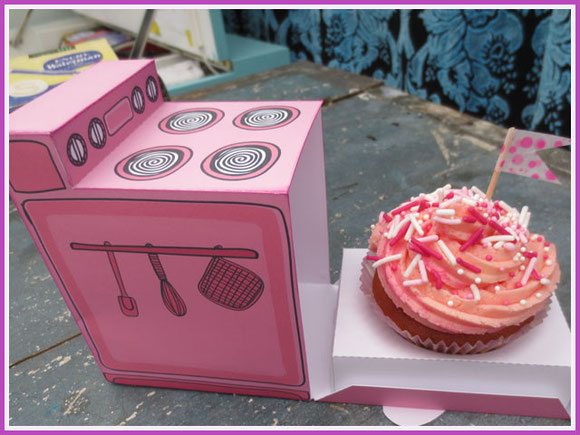
Inside the oven is a paperholder to put the cupcake in.
I love this oven to give a little gift !
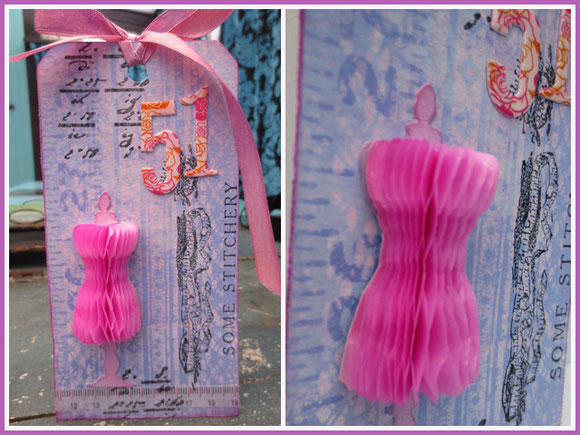
For years I make Dorien something with sewing, corsets,... as a theme.
I made her a labelcard with a 3D-dressfrom made with honeycombpaper and a die.
Background was again made with the resisttechnique with white ink and different layers on top.
Another addition for her "papercollection from me" :)
I'm working in my active moments on other creative projects..
But more of that in another blogpost !
greetings from a sunny Belgium
Inge
vr
14
feb
2014
I love… I love… lots of things :)
I got a sweet textmessage from Ellen, my collegue this morning to wish all the people she loves a happy day... I first thought: " why today ? "
I guess I was NOT awake yet :)
A happy Valentine's day to you all !
I don't really participate in all the fuzz about Valentine, but I love to make a red display about who and what I love !
I surely love my three kids, but this display turned out especially about/ for my daughter...
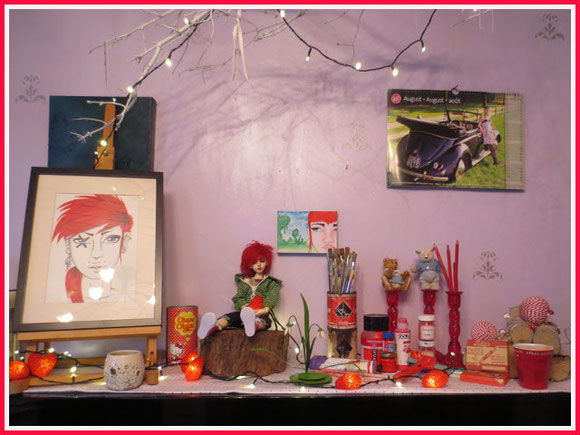
First I started collecting all kind of red stuff I found in my house: red heartlights, a painting with a red haired girl made by Gaia a few years ago, but it's still one of my favorites, paintbrushes in a vintage paintcan, red candlesticks, her ball jointed doll with red hair...
And while collecting I thought why couldn't I make it a little tribute to my creative daughter ?
What Gaia loves most is drawing and painting, just like my mom.
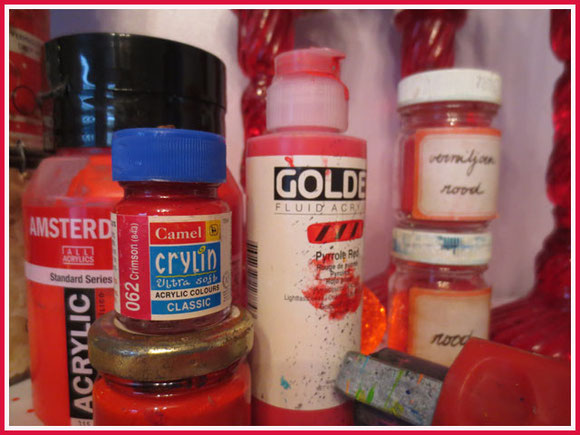
First she had her own paints, but I see her more and more dig in MY stash, even my craftstuff to use it in her creations.
And collecting... it seems we have a range of reds in different bottles and jars :)
Gaia also loves to do her own make-up and she experiments a lot with colors and shapes, and yes, sometimes people turn around when they see her pass.
I smile when that happens : she sure brings color in the world !
She has her own style and I was thrilled when she said she was asked to do a photoshoot for a calendar ànd she could completely be herself !
When the calendar arrived here in january, there were real woman on each page : large, small,.. no photomodels from the magazines, but all women with a personality.
I complemented the guy who ordered these photoshoot for promoting his business of vintage volkswagen cars for this and he replied : " we sell real cars and we love real, not photoshopped women" :)
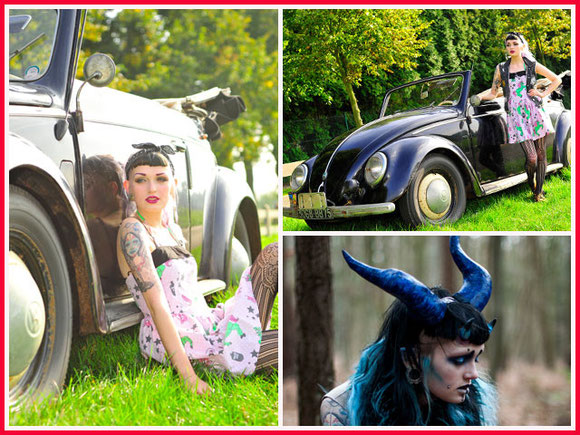
Gaia is the calendargirl for august...but she's already on display now :)
I not only got the real calendar, I also got all the photos of the photoshoot from the photographer on CD.
Wow, photos of my daughter ( do you know it's hard to get photos from your children when they get older ?...) ànd a whole lot, real nice shots.
Another photoshoot that Gaia did was for a friend who had to make a photoshoot for school about " beautiful freaks".
Gaia turned herself into the icedemon again as she was in autumn with her selfmade props.
Another red item on the display is a chupa chupsbox with ... hello Kitty. Gaia loves horror-and fantasymovies.. but is also a fan of Hello Kitty...
When she was 14 years old we went to Elffantasy in the Netherlands. There she found out about ball jointed dolls and she bought her first one, ready made.
This little guy has been in a lot of displays the past years.
But because she loves to paint and to do make up, she wanted to give him a new face up.
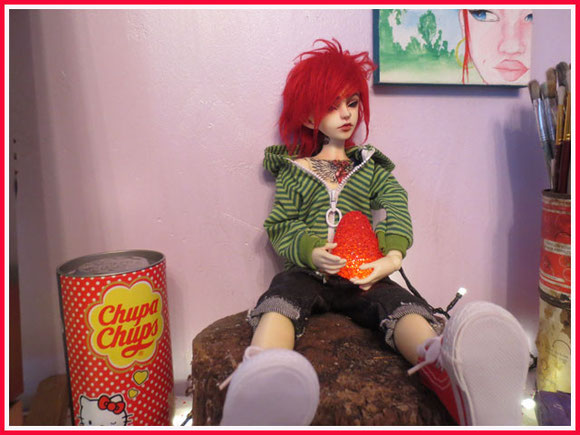
Gaia also loves tattoos ànd her boyfriend Sam.
One day I found her painting Wolf, the ball jointed doll on his chest and I was amazed...
Wolf got a tattoo on his chest and neck ! And not just a tatoo, but the same tattoos Sam has in real !
If you know how small a ball jointed doll is, you know how small the crown is on the neck...
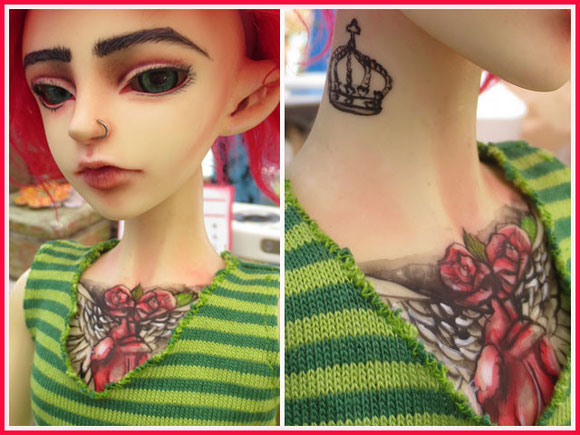
I love the details and shadows she painted in the tattoo, just like a real one..

More red stuff.. even my gelliplateroller was added.
My little bears sit on top of red candlelightholders and as "uneven" numbers look more interesting ( and I have no third bear), I added three red pencils in the third candlelightholder.
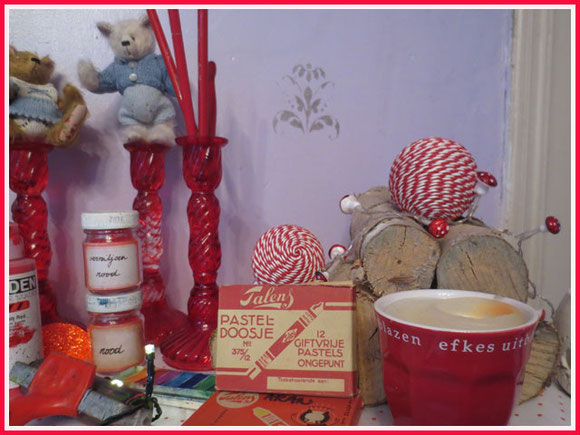
In my stash I also found old oilpastels in vintageboxes.
On the red candlecup you can read the text " efkes uitblazen" ( Dutch for : "take a break") and passing by this display and seeing this quote I get reminded to take much needed rest, to have some quiet time between busy moments... we all do need this more in this rushing world..
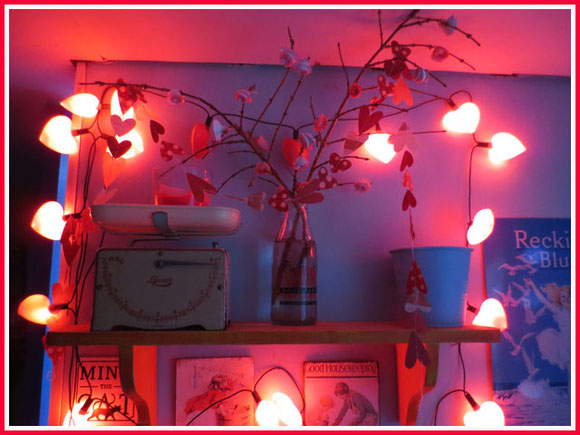
When you come in my house through my backdoor, these little red lights ( who turn up white in this photo ?...) give a warm gloom.
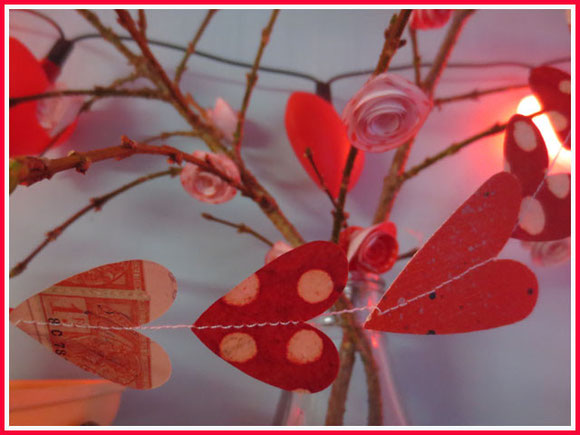
A vintage milkbottle holds some branches cut from the garden.
I added handmade paperflowers in reds with the heatgun to the branches.
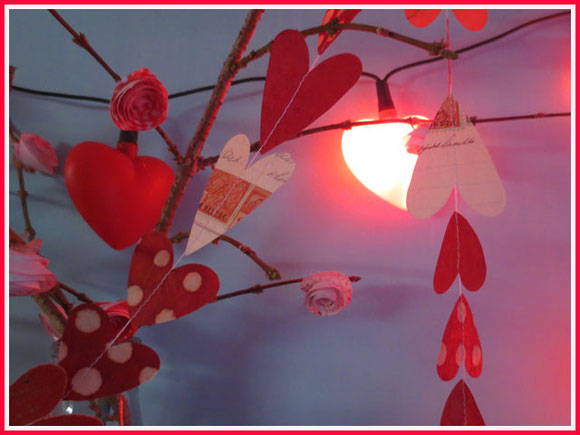
The papergarland was made with leftover papers from previous projects. You know those scraps that you can't throw away ?
Well, some of them found their purpose here.
And someone else whose going to be loved is little babyboy Ferre, the first son of a collegue of my husband.
I loved the birthcard ! In bright red, cats in different spots and silhouettes..
If I get a birthcard I try to take inspiration from it to make my own gratulationscard.
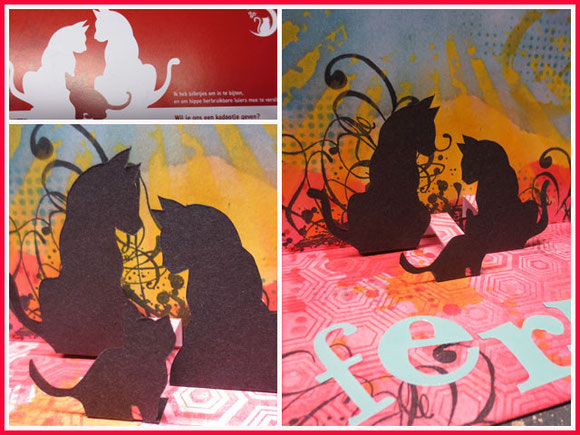
Still in love with pop-up cards, so I made a cat-pop-up card for Ferre.
Lots of distress inks and paints, layering stamps and stencils,.. loved to make this one !
When I cut branches for the display in the milkbottle, I cut too much. The little twigs that I had to cut off to get the branches IN the bottle..I couldn't throw them away.
I found an old bottle with red labels in my cellar, added water and put them in my veranda.
Outside there is not much sun, lots of rain and wind... but these branches hold a secret in them...
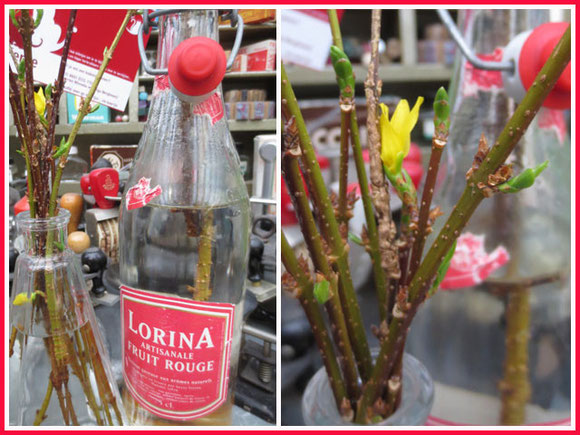
The branches hardly had any buds when I put them in the water two weeks ago... and look what's happening ?
Don't know when, but I love to be assured spring will come ! :)
greetings from Belgium
Inge
di
04
feb
2014
little lighthouses… little homes...
When I have the energy, I try to create... and bit by bit creative projects get finished this way :)
I created some little "lighthouses" the past weeks...
It all started seeing what Shelly Hickox did with the 3D luminary die of Tim Holtz past year.
I definitely wanted the die, not yet knowing the range of possibilities it has.
As with a lot of new bought stuff, it arrives and sometimes it sits there for weeks or months before getting used...
Then I finally gave it a go. I sprayed some paper with Dyan Reaveley's inks and I managed to get the luminary together.
I added paper pinecones made with the pineconedie (Tim Holtz).
Not bad, but it still looks a bit simple and not so interesting...
Winter came.. let's say "official" winter came, cause we don't have a real cold winter here in Belgium. Lots of rain and cloudy days, but nothing to be nagging about, knowing people get snowed in or floods wash away houses...
Let's be happy with our Belgian winter..
But I still like a wintery feel with blue and icy colors, lots of lights in the house, so I transformed the top of my piano in a "winterwonderland".
These little luminaries would fit perfectly in the scene and I made two identical ones.
I started with plain white paper, stamped images on the white paper and inked them up with distress inks.
I cut panels for the inside from packaging plastic and "frosted" them by spraying iceflowerspray on them.
I had to let them dry completely before touching the plastic so the spray would not smear, but this product does not only work perfect on my glasswindows in my house, but also on this plastic !!
You can't see it on the photos but there are iceflowers on the plastic.
Rock candy glitter over the whole luminary adds a "frosty" feeling to the luminary.
It looks like it sat overnight in an icecold night and in the morning you see a thin layer of ice...
The pineconedie was used again, but this time I made roses with it.
A pink rose, colored with distress ink and two translucent ones with printed vellum.
It's a bit more tricky with vellum because it easily tears, but it worked in the end.
Tiny bits of glitter were added to the pink rose.
When I added the little lights ( with batteries) the luminaries looked like little lighthouses in the dark of the evening.
I love how you see there is a light within, but how it's muted by the frosted windows.
I made some more winterinspired luminaries to give away... and the more I made them, the more I liked to make them.
Ideas were coming... These luminaries are not just for the winterseason : they can be used throughout the season and for every theme.. so they don't need to be tucked away in a box after the holidayseason...
More presents to make... and customized !
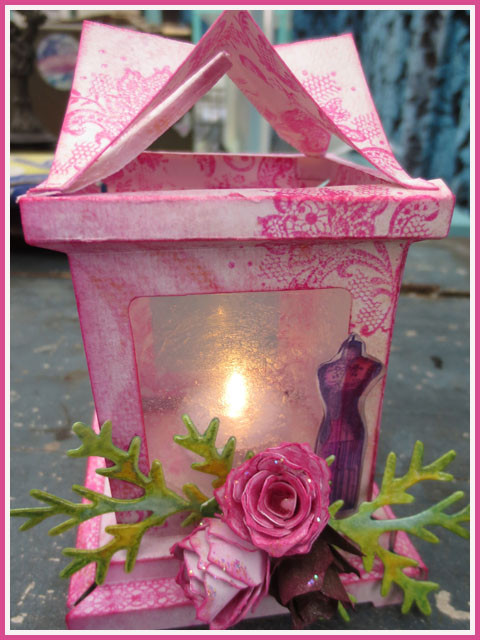
A pink luminary for Dorien....
In the past I already have made her several projects inspired by a corset. This means I helped her start a papercollection that suits together both by color and theme :)
For this pink luminary I used several lace stamps to add images to the white paper.
A dressform ( oxford impressions) was stamped with permanent ink on shrinkplastic, colored with copics and shrunk.
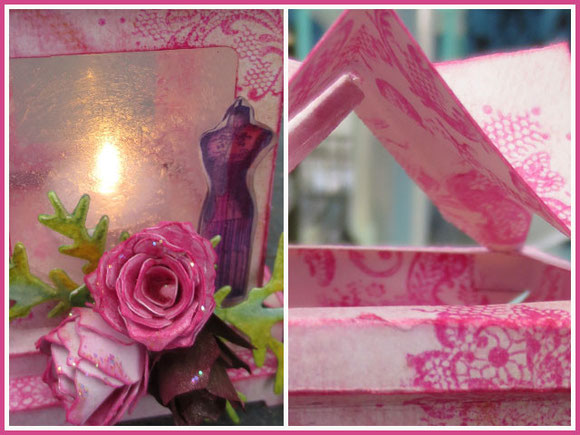
I love to start with plain white paper and customize it completely as I want it with stamps and inks.
I also add stamps on the inside of the luminary and ink it, cause when you take a look from different angles, there are several places where you can see the inside and I don't like it to be plain white.
Another luminary customized for bearlover Ann.
I know she likes dots and red and bears, so she also got a luminary that suits previous papergifts.
For the moment I'm one of the members of the designteam of my local craftshop.
Mostly we are given some scrapbookpapers and some embellishments and can create what we want.
I'm not a scrapbooker and often feel limited by the (sometimes indeed gorgeous) scrapbookpapers.
I have bought nice scrapbookpapers in the past and I try to use them on cards and projects, but often I get stuck and grab my white paper, stamps and inks...
This is what I love the most: starting from scratch..
But I hàd to use these christmaspapers for the designteam..
Time was a bit limited and as the holidayseason would be over soon, I made something "wintery".
Luckily themed scrapbookpapers often have backs with less themed prints or colors..
..
This is what I ended up with.
When I was watching videos from Tim Holtz, I saw him use honeycombpaper and dies.
What a fun way to use this "old fashioned" paper !
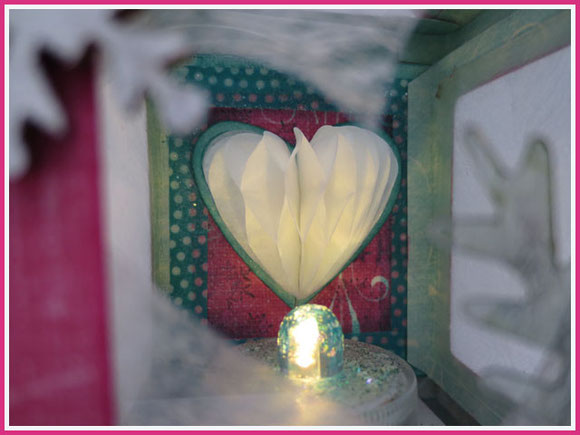
It got my inspired immediatly and I combined the idea of the honeycombpaper with the luminary.
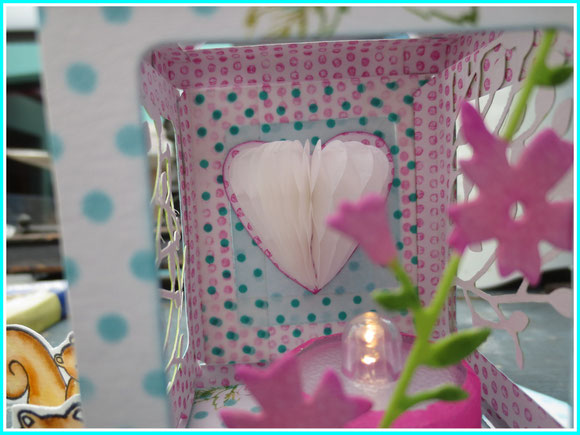
No frosted windows on all the sides, but two on the left and rightside, a plain paper for the back and a heart cut out of the frontpanel, so you get a little peek inside...
The little light inside lits up the different layers of the honeycombpaper !
When you peek throught the heart-hole I wanted you to see the paperheart as the focal point.
Even the small light was a bit too bright and distracted the attention. I added a bit of blue distressstickles and this worked to tone the light down.

I love the bright pink of the paper, but to keep the luminary wintery enough I added more embellishments in pale blues, wintergreens..
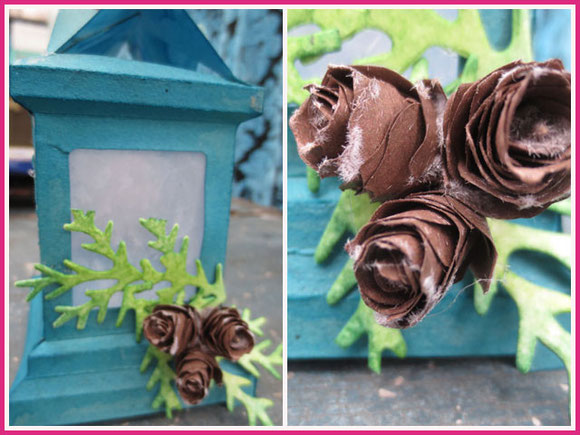
The leaves of the pineconedie were cut out of packagingplastic and colored with alcoholinks. I heated the edges with my heattool so I could curl them a bit. Not too long or too close or the plastic would melt !
Distress rock candyglitter on diecut paper icicles and wooden icicles from my stash, colored with distress paint, were also added.
On the front again the leaves from the pineconedie but this time cut out of shrinkplastic ( colored with alcoholinks) to add some variety in the sizes of the leaves.
We haven't had snow and I'm not sure we will have some this winter, but I did have my own little Winterwonderland on display in my home.
These luminary-projects are still evolving... I made one into a little "home" to display my love for sewing , but it was a project for Valentine for the designteam and don't know why, but I forgot to take photos !
I promise to share that project in the future when it comes back from the craftshop....
In the meantime... good moments with energy are used to create... this keeps my spirit lifted :)
greetings from Belgium
Inge
za
25
jan
2014
home again, home again...
"Home again, home again..." a beautiful song from Michael Kiwanuka.
I love to be home: lock me up in my house and I will be happy, always knowing what to do.
But I don't like to be home because I'm ill and all I can do is spend my days in the couch :)
I've been struggling with my health since the end of november : a nasty virus that normally only stays for a day of seven felt at home with me for 5 weeks.
Most ennoying was that I could not go to my Poppyclasschildren because I felt ill. No balancing with my energy because of my fybromyalgy cause there wàs nothing to balance with...
At the end of the holidayvacation I finally regained MY 100% energy. I was completely ready to start 2014 in my class: I made stuff for the children, baked a epiphanycake for my collegues cause the first day was the 6th january, I baked a cake for my Poppyclasschildren and their parents,..
I had special sweets to give away to show how happy I was to be back again.
It all started well that 6th january until I felt suddely very sick at 11.30 in the morning in the kindergarden where I support a child with special needs.
I ended up in the emergency with blue lips, icecoldfingers and feet, shaking,.. and a heartbeat of 130 in rest...
To make a long story short... I'm knocked off my feet again...and home since then.
Latest information from the doctors is that everything is OK with my heart itself, but I have had a sudden collapse of my bloodpressure that day.
I still have a high bloodrythm probably caused by pain,being tired ( I relate all that to my fybromyalgy and bad nights) and an infection.
It seems that my my white bloodsoldiers were 3 times higher then normal that 6th january. Which infection I had ? Nobody knows.. another nasty bug... Makes me feel very humble again as a human against those tiny creatures !!
Together with my housedoctor we are figuring out what still causes the huge lack of energy : seems there are some problems with my thyroid gland also...
My biggest intention for 2014 was to take even more care of myself and my health ( after the shingles in september, the epicondilitis radialis ( problems with my elbow due to overburden) since october, the struggle with my fybromyalgy for 20 years..)...
I didn't know I would have to act so quickly !!!
Although I would love to go working again, I'm now convinced I must be patient and give my body a bit more time.
We only get one, you know... This is the body I have to cope with and I better take good care of it when I want to become 94 !!
I'm taking lots of rests, but if there is ANY energy I try to do something and if I can... I create :)
I have some projects from the good moments the past two months..
And there are some "houses" involved...

More about that in another blogpost hopefully this week !
In the meantime... you at least know WHY I'm quiet here...
greetings from Belgium
Inge
wo
01
jan
2014
welcome 2014 !

As a lot of children with their New Year's letter on the first day of the new year, I'm here with my wishes for you !
I've been been knocked out by a nasty virus since the end of november and it ,most of all, ate all my energy, but my energy is coming back, so I' m back too :)
I would like to wish you all, wherever in the world, a good 2014...

Some things we have in our own hands, some not...
I first wish you a good health, as good as possible.
I wish you energy and the force to cope with whatever lies ahead for you this year.
I wish you "a wet cloth" to erase what's not important or does not make you happy in your life.
I wish you people around you who really care for you, who are really there when you need them, who can listen when necessary and who will help to make a burden feel lighter because you carry it together,...
They also will bring color in your life ( like a pink rose on a black chalkboard :)

I also wish you lots of little happy moments which will add the glitter in your life !

And whatever talents you have.... I wish you a good environment where you can develop yourself, keep growing in what you are good at and that you"ll be able to make other persons happy with your talents.
So, here I stand on the first day of january, with open hands, open to give and open to recieve...
And where will my creativity bring me this year ?
No idea yet, but it definitely gave me blue inky fingers on this first newyears day LOL (I have been working last night on cherishboxes for my mom and parents in law... and stains... well they stain...)

2014... well here I come !
greetings and hugs from Belgium
Inge
di
19
nov
2013
reflections of autumn
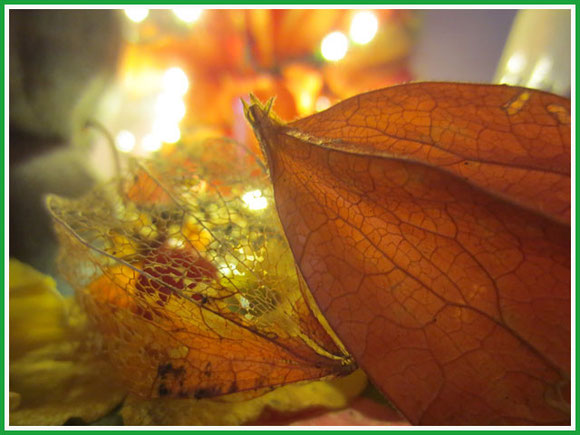
It's really autumn here in Belgium, not a sunny one which makes all the changing colors burn, but dark, grey, rainy, cold... no sun since 2 weeks...
I sometimes nag about it... and then I think I have no reasons to complain... This is how our climate is and all by all I consider ourselves lucky in this part of the world.
No demolishing storms who swipe over the country, letting the people behind with human losses, no house, no food,...
Human kind thinks it's ubermighty... but we are so small in the universe and just a peanut against the strenght of nature...
When things like this happen, I feel so helpless... I don't watch TV anymore, cause the images make me physically sick. I keep updated by the radio and the news, but I don't need to see it with my own eyes to know there is help needed.
I once thought as a teenager I could "save the world"... I still want to change the world, but in little steps in my own little world around me, my family, my school, my handicapped children,... and I monthly support organisations who are able to make a difference in the bigger world.
I could save the money monthly for myself and sometimes need it, but as I donate monthly I actually don't réally miss it.
We both support humanitary organisations ( Unicef, the Red Cross, Doctors without borders, we adopted a streetchild in India so she can go to school and Invisible Children, an American organisation who tries to get childsoldiers leave the army of Kony and help them to return home), but I also support Greenpeace cause the environement needs our support if we want an earth where it's good to live for future generations.
Maybe it's just a drop in the ocean, but I'm convinced it helps...
So, if you donated to an urgent cause like the Phillipines now, consider a small donation monthly. The organisations can change lifes for better, but they need a constant support to do their jobs.
This grey autumn makes me reflect on my life... and maybe that's not so bad :)
So, yes, I will be happy to see the autumnsun, but let me show you some of the good sides of this grey autumn...

This is how autumn looks in my garden. Is it because the sky is grey that the colors of my hedge look more colorful then usual ?
Look at all the shades of colors there are in a simple hedge ! This must inspire for a creative project...
And if it's grey and dark outside, let's go inside in my house.
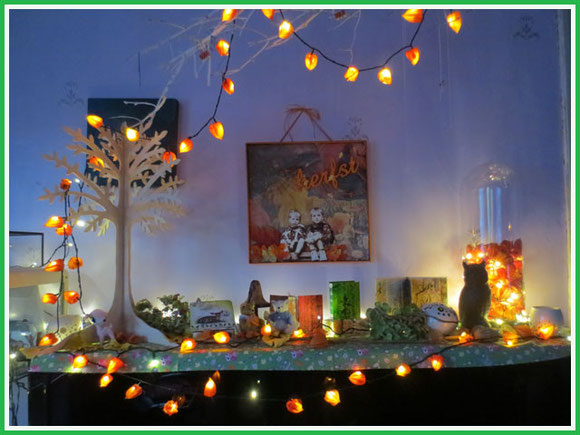
I gathered all the physalis in my garden and put them on my LED-lights above the piano.
It's the first thing I do in the morning ... getting these orange lights on. They transform the room from dark to warm.
When I come home from school, these lights immediatly make me feel cosy at home.
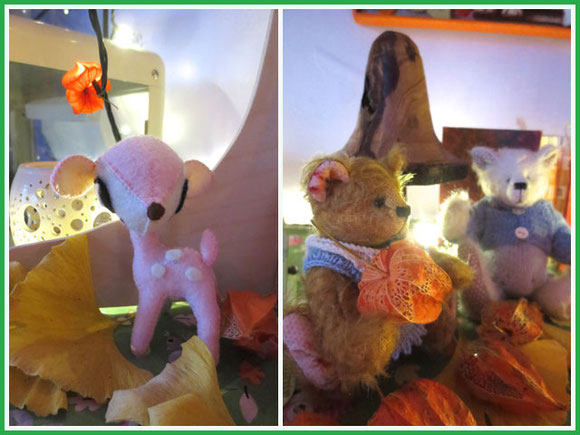
Halloweendecor changed to an autumndecoration. It's far too soon for me for Christmasdecorations.
These will come AFTER the childrenscelebration of Saint-Nicolas (6 december) and will leave the day after Epiphany.
I hate to find stuff in stores months before the event. They talk about " going back to school" in june... when summervacation even needs to start, in september they promote toys for Saint-Nicolas and in october you can visit Christmasfairs in the shops, in february you already find chocolate eastereggs...
I refuse to buy stuff months in advance... Part of a celebration is the longing for.. but not months in advance... At least that's my idea :)
It' s autumn here, so this gets reflected in my home.
Leaves of my Gingko Biloba, hydrangea and the physalis in my garden, the leaves of the Parthenocissus with the beautiful oranges and red from the wall of the old factory behind our garden, give an instant autumn color to the display.
They are for free, no need for storybought ones, just pick them up on your walk outside :)
The little pink fawn was one of my latest handmade beauties I bought. I saw this little feltfigures on a craftshow but they were quite big. I asked the elderly woman if she would want to make me a small one. After a few weeks i got the call: "it's ready" :)
The handmade bears of Annebearheart are part of the scene of course and carry a physalis that the insects already started to transform.
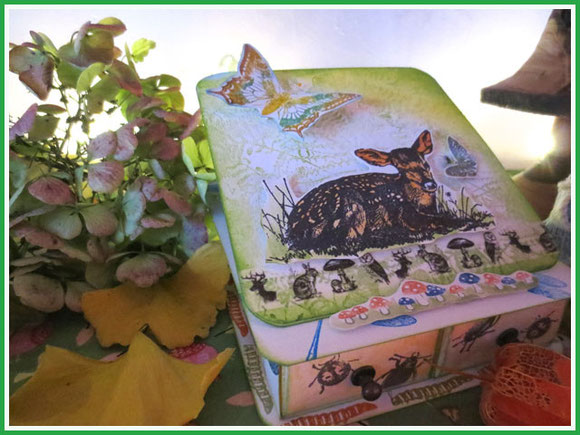
A selfmade easel-4 drawer box I made to sell, first finds a place between the leaves. Lots of stamping, distress inks, distress markers,washi tape...always fun to change a white sheet of paper in something pleasing for the eye :)
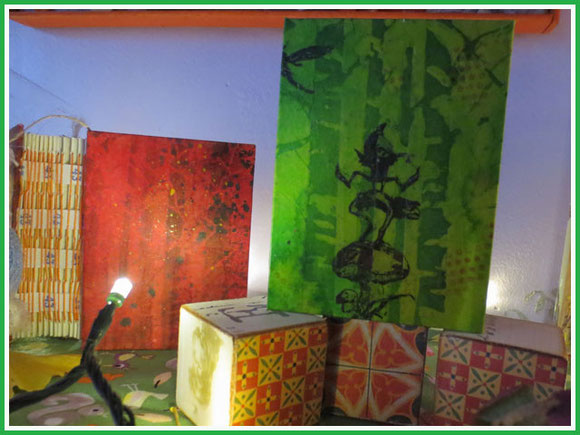
My "halloween" ATC book in orange made with stencils and sprays and my green waxpaper ATC book fit in the colorscheme, just like my halloweenblocks that I just turned to show another side...
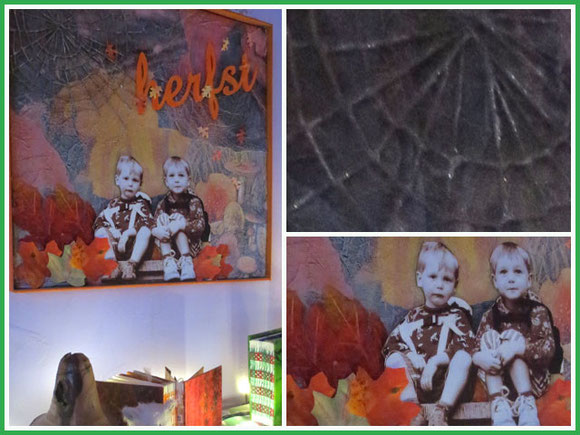
A few years ago I made 4 canvasses, one for each season.
This one was a collage with glossymagazinepapers that I whitewashed. I added soms fake leaves and sew through the canvas with thread to mimic a spiderweb.
Spiders love my old house... and often I find a beauty between the most different stuff, like between the stems of my brushes... I always leave them for a while.. I can't make such a web, so why destroy it... Then one day I grab the spider and put it outside, where their web may last a bit longer...
The two kids are my sons, now 24 en 22, but then 5 and 3 years old sitting on the frontdoor on Aran's first schoolday... Time flies, so savour the moments as they present them to you... don't rush into the future... it comes sooner then you think...
I printed their photo on photopaper and glued it to foamboard. I then cut it out with a craftknife and glued it on the canvas.
I did the same with the word "herfst" ( "autumn").
I love to use these handmade canvasses each season. They make me smile seeing the "vintage photos", bringing memories back immediately.
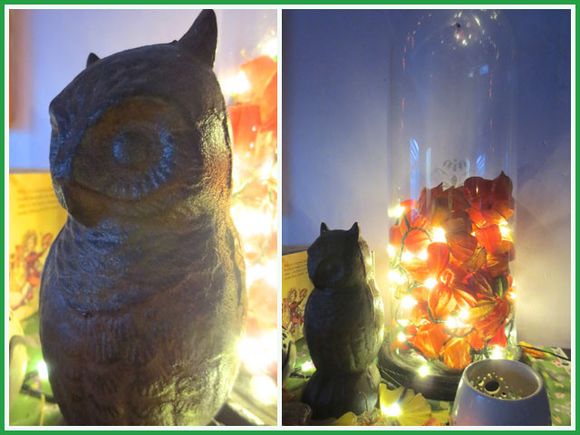
A metal owl overseas the whole scene, considering if he's a wise owl or a ninny... I think he's like me... sometimes wise, sometimes a ninny...
My leftover physalis are in an old glassdome with LED lights... Love this homemade lamp :)

Reflections of autumn... they are not bad ... make me convinced I'm a happy person, enjoying the little things in life...
And this photo of a light in a physalis...makes my muse awake... hmmm. these would make gorgeous fairywings...
greetings from Belgium
Inge
do
31
okt
2013
Jack and Bill in Wonderland….
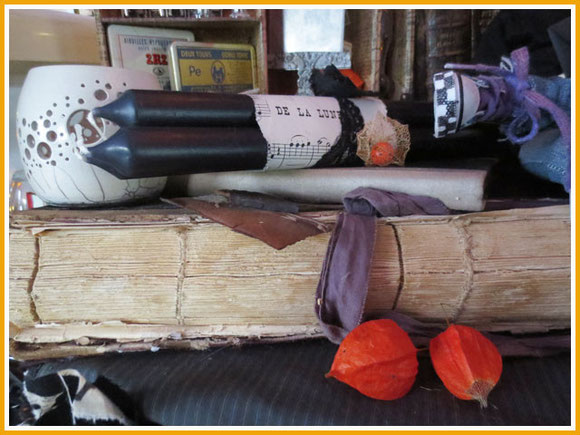
Halloween might be over, we enjoy this season some more days and my daughter Gaia has a party at our house this evening :)
I love to make little seasonal vignettes and love to make it more and more with handmade stuff instead of storybought props...
There is always something each year that makes my mind spinning about the theme...
For my birthday in september a got a "pampering" box from Lush from Gaia and her boyfriend Sam ànd a Jack Skellington doll !
Since the kids were little we are huge fans of Tim Burton and especially his "nightmare before Christmas" .
For previous birthdays and new year I got a cookiejar from Jack and a snowball.
With this new gift I had my theme ! " Jack and Bill in Wonderland"...
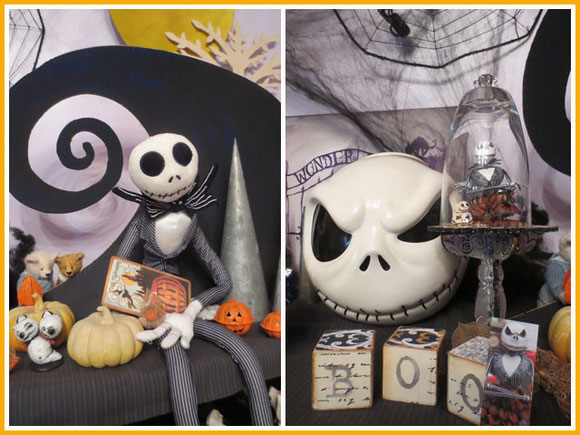
The scroll, the moon and pumpkins are part of the world of Jack.
I drew a big scroll on cardboard and painted it black and blue. A cardboard moon was painted with yellows and golds.
Jack in front of it and some pumpkins from my stash made the first scene.
My Jackcookiejar, a painting of my daughter Gaia from a few years ago about Wonderland , BOO blocks and our Jack in the glassjar made the second scene.
If you want to see Jack in the glassjar more in detail, have a look at my previous blogpost on how I made him and corpsbride Emily, a collaboration between my husband, my daughter and me :)
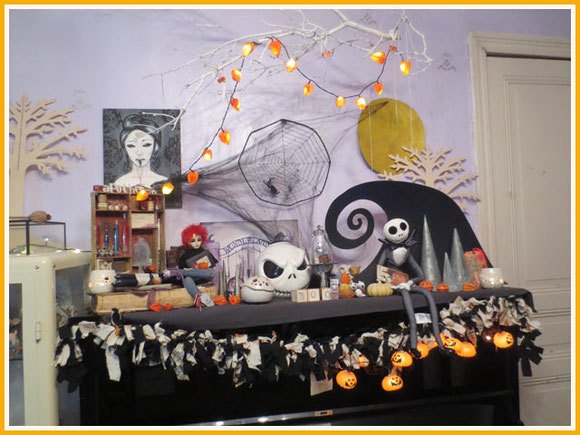
This is how the complete setting on the piano looks like with the lights on, but I like it more in the evening with the little lights on...
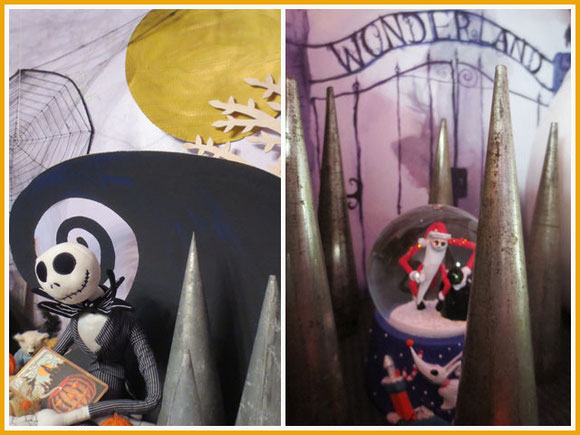
And my little handmade bears (made by Anne Bearheart) ?
They come over and have a safe peek behind the scrollmountain...
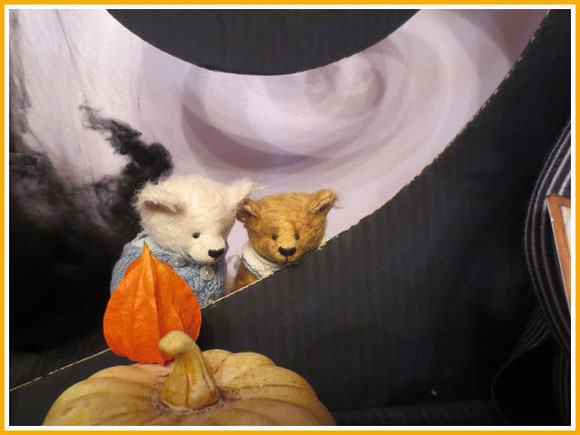
My daughter loves to draw and paint and she has a quirky own style. Her paintings decorate my house, but this lady asked to be in Wonderland this year...
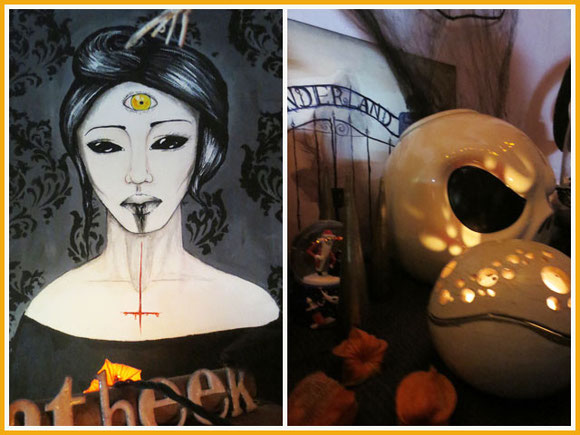
I love how candles in handmade ceramic candleholders threw their light through the holes on the props in the evening. A spooky effect..
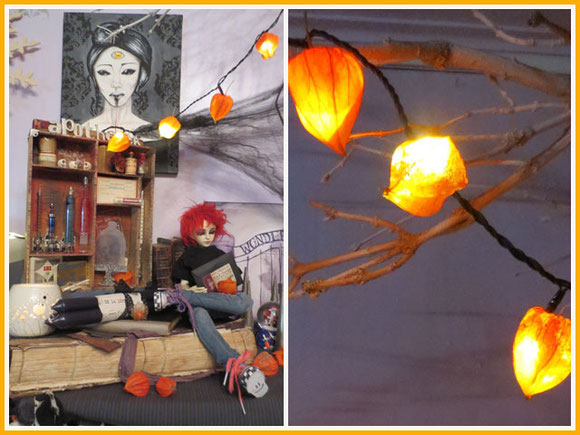
On the other side of the Wonderland scene sits Bill on a 100 year old Atlas I once found on a fleamarket.
Above the scene are little LED-lights with the orange fruits of the physasalis, just picked from my garden.
Because they are LED-lights, there is no firedanger and you just pop them on the lights. Little work but great effect and perfect orange/yellow lights.
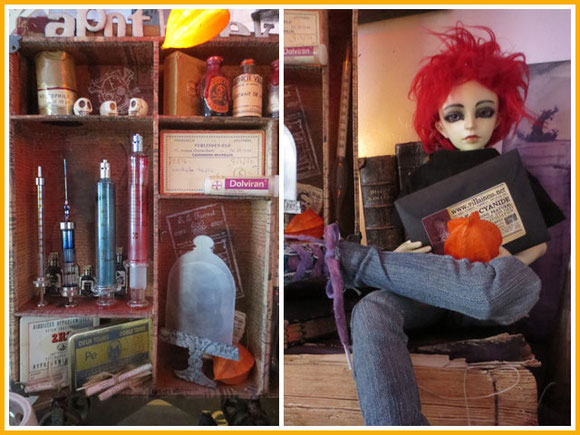
My apothecary configurationbox was a project from halloween a year ago. I collected old apothecary and medical stuff I got from my husband and now they fit perfectly in this apothecary.
You can see this one more in detail here.
Jack is holding a package of "cyanide", actually the name of a piece of soap from Villainess, a compagny who sells soaps and beautyproducts with quirky names ( like "blood", cyanide,...) but they work perfect and do smell so good !
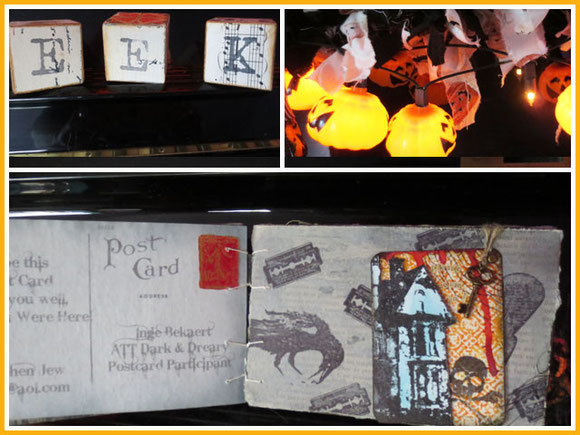
More handmade stuff are the wooden blocks with letters that form " EEK", " BOO" and "HALLOWEEN".
Easy to make and fun to display.
The fabric garland behind the pumpkinlights were gifts in a Halloweenexchange I did a few years ago.
The book is made from the "dark and dreary" postcardswap we did on ATT some years ago. Handmade :)
On my mantle on the other side of the room I made a second display.
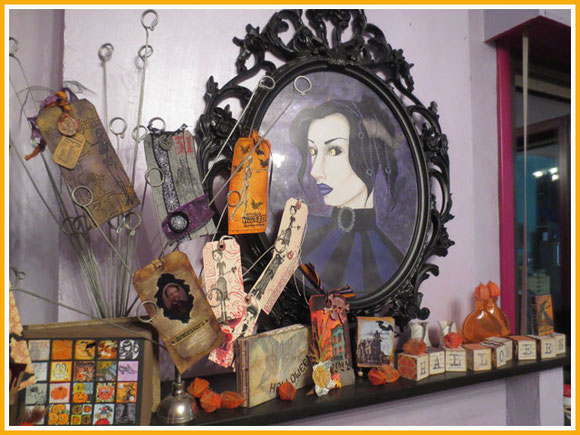
Almost all handmade stuff, made by me or others...in different creative exchanges.
The lady is one of our "freaky ancestors"... she COULD be an ancestor. Whom else do we inherite our quirky minds from ?
It's a painting from my daughter that will find a place in her future home, but now is a decoration in my house throughout the year..
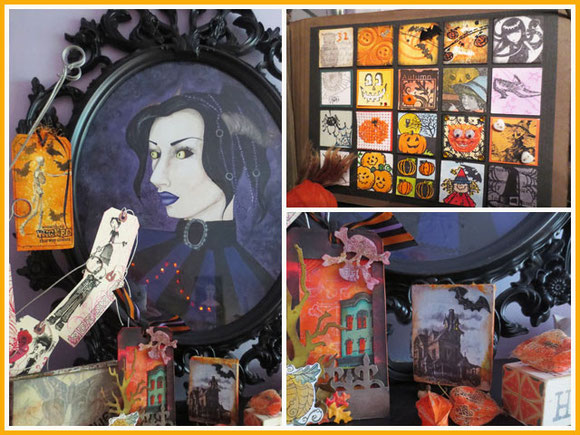
A lovely exchange I would love to do again is the "halloween inchie"swap. They are so fun to make, not much work, but little pieces of "art".
I glued them together in an old photobook.
Another handmade halloweentag and a 3D fat halloween ATC we did on our European All Things Tim group a while ago.
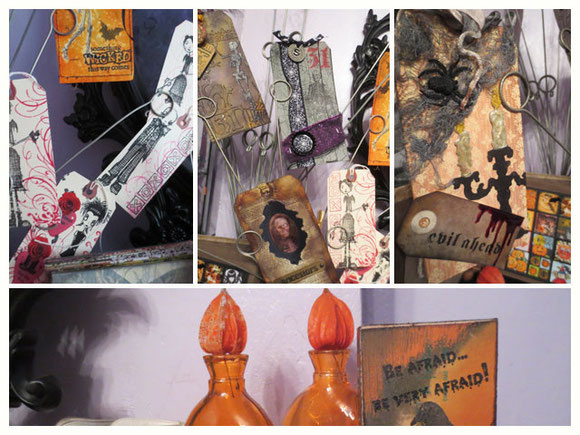
More handmade tags I cherish are the tags I got from Michelle Ward with the stamps of stampotique and some of her own.
The same for the 1 to 1 exchange I did a few years ago with Stephen Jew. When I saw the halloweentags he made on his blog, I asked if we could do an exchange... And he agreed from the first moment on :)
I should do exchanges and challenges more... most are from a few years ago... but the older I get, the more time seems to get shorter and flies by faster and faster...
You already saw some of my daughters paintings...
Here she is on the left... and on the right how she will look when she decides to do too much botox and facelifts in the future ...
Sorry...just a little joke.. it's a facepainting she did this week. She followed a course visagie for a whole week with an international teacher. They mostly learned to do beautymake up with airbrush and liquid make up, but you know how my daughter is... she also had to try something different :)
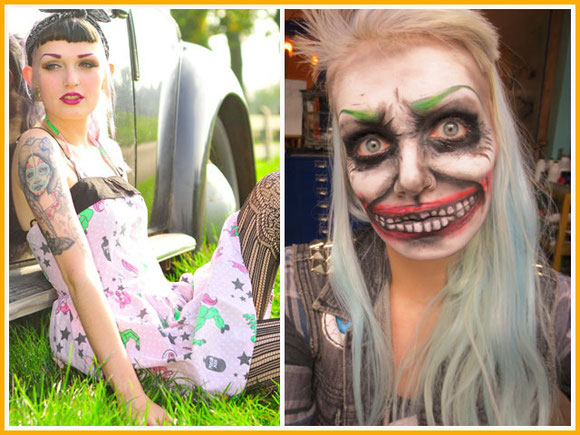
Gaia even gave her brother a beautymake-over..
Damn, I think I have such ugly kids...
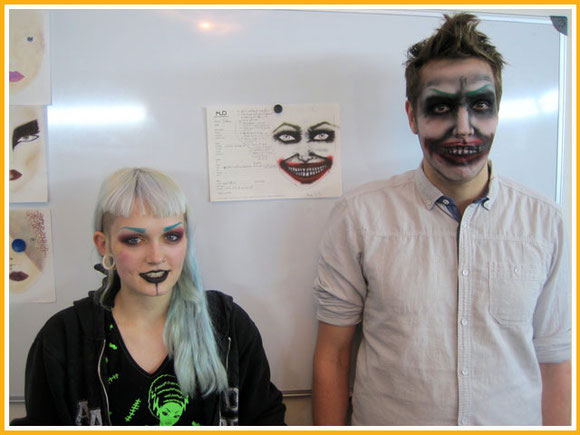
Gaia might be so damn ugly as the Joker, but I think she's a beautiful demon...
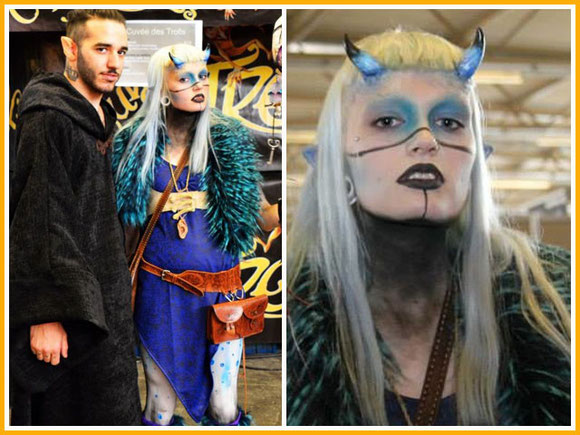
Half october we had FACTS here in Belgium, our local "Comicon" event.
She and her boyfriend Sam have been creating for months for this event and this is how they looked like :he as a hero, she as a demon...
She made several props : her demonfeet, the skullstaff, armour,...
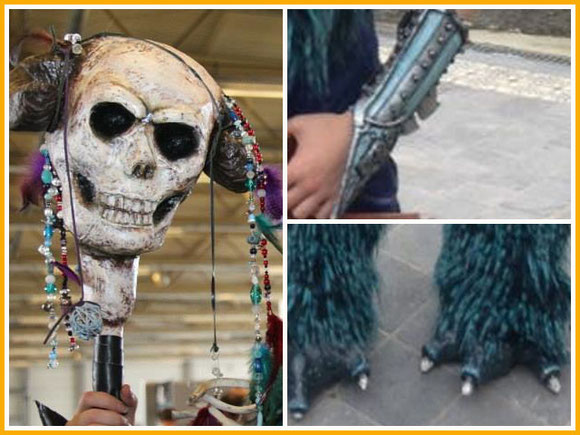
They went to Facts with friends and even Hermione and Harry are their best friends !
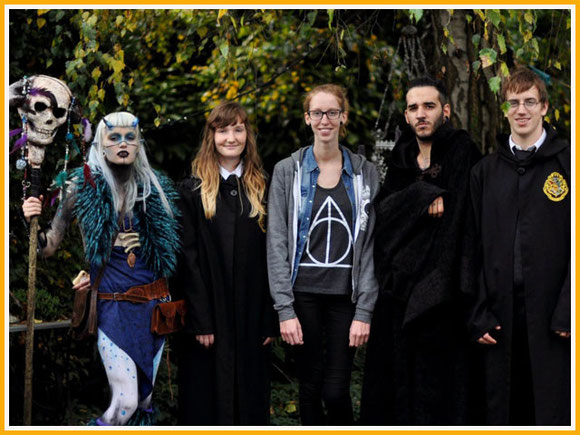
Yesterdayevening, just before the course ended, the international teacher said Gaia she wanted to ask her something. She had seen Gaia drawing in between...
"Oh my god, she surely will ask me if I'm mental..." Gaia thought :)
But no... the lady asked Gaia if she would make her a painting for her apartment ! Gaia sure was flattered !
And so what... if people think she or we as a family are "not completly normal", I just will recite this:
"Have I gone mad"
asked the mad hatter sadly.
"I'm afraid so", said Alice
"you're entirely bonkers.
But shall I tell you a secret?...
All the best people usually are."
quote from Alice's adventures in Wonderland by Lewis Caroll
greetings from Belgium ;)
Inge
zo
06
okt
2013
flying again ! ...

I'm flying out again :)
The first weeks of september were tough and very intense, but I learned a lot of myself... again...
Growing older, growing wiser :)
Two weeks ago I could finally have my first schoolday of the schoolyear and it felt soooooo good to be amongst my children, my parents and my collegues again.
Then it's proved again to myself that working with the handicapped children in my Poppyclass still is my dreamjob. This is the job that I love to do although it can be hard ( for me, mostly physical) and I hope to be able to keep doing it for some more years... IF I take care enough of myself :)
That's the biggest lesson I learned the past weeks...
This afternoon when I was taking my rest in my outsidebed, I saw a butterfly...probably one of the last we will see this autumn. Days have been sunny the past weeks, so butterflies are still present in my garden.
It made me remember of my "butterfly" belljar that I made in summer, but never showed to you.
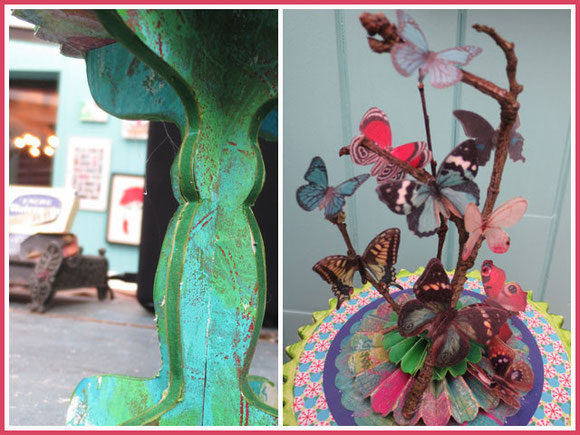
Gelliplateprints come in handy for all kinds of creations, so they did here.
I covered the base of a cheap cupcakestand with a gelliplateprint.
Part of the design on top of the original cupcakestand was quite nice, so I only covered an inner circle with a gelliprint. The outside edges of the round base was colored with a green copicmarker.
I cut out two sizes of rosettes with Tim Holtz alterationdie, again out of gelliprinted paper. Love the layers and colors in the rosettes !
I searched a branch in the garden and added with hot glue vellumbutterflies I once bought. You could also stamp butterflies and color them in and use these if you don't have something similar.
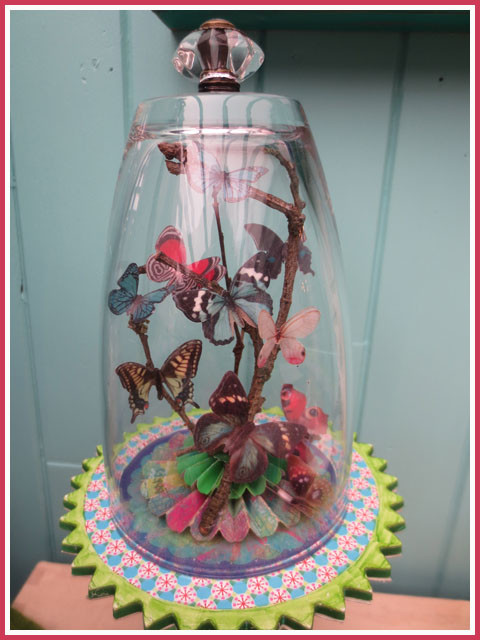
I glued a glassknob (Tim Holtz) on top of an ikeaglass with glossy accents as I did for my Jack and Emily bell jars.
I put the glass over the butterflybranch and added it to my summerdisplay on my piano and enjoyed it the whole summer :)
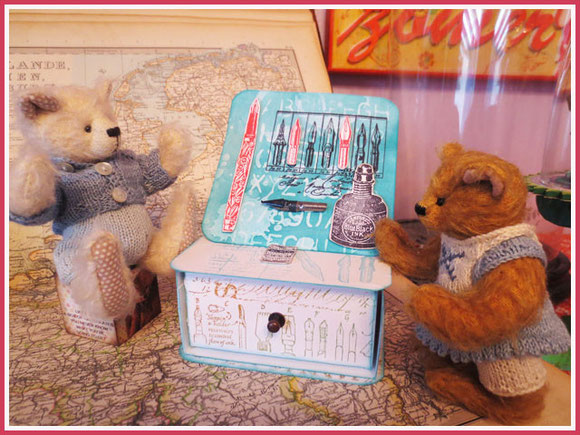
Another handmade project that colored my pianodisplay was this inkbox I made for Katrien.
Katrien had a housewarming party a week ago because she had two new frontdoors... she became 50 ànd she bought her first house, an old house from the 1930's.
Katrien is a calligrapher and as a little gift I made her this inkwell-box.

It's based on the easelcard-four drawerbox (from one of the CD's of Technique Junkies), but it has only one drawer.
I love making these boxes from scratch. Plain white flat paper, folded, colored and you end up with a handmade unique gift.
I've been watching Tim Holtz video's on this new stencils and although I use my stencils of the craftersworkshop a lot, I "needed" Tim's...
The technique I used is Tim's resist technique with white distress paint and then putting layers of ink and splatters and stencils on top.
I've not only been flying again, I stretched my wings too...
My local craftshop was looking for members for their designteam and I'm one of the four lucky ones !
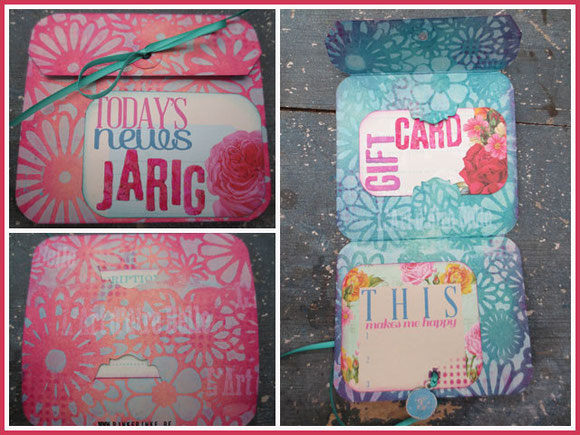
For october I got a bag with some scrapbookpaper from Prima, paper flowers, two metal embellisments, some trimmings,two large Rangertags.... and the commission to make something :)
I love scrapbookpaper. I think there are awesome papers with gorgeous designs... but I never use them...
I try, but mostly I end up making my own paper with stamps, inks, paints, stencils.. That's what I like to do most.
Now I needed to USE that Prima scrapbookpaper ! Definitely a challenge for me, but that's why I wanted to join the designteam : " to be challenged further then my own comfortzone"...
With the first large rangertag I made a giftcardtag. I used white distress paint (the flowers) and white ink (text " l'art d'être belle) as a resist with one of the craftersworkshopstencils.
I decorated both out and inside of the tag. Outside in pinks, inside in blues. Here and there I added another layer with distress inks and Tim's stencils.
The scrapbookpaper was used on the frontlabel on which I added the word "jarig" ( "birthday"), cut out of the same scrapbookpaper with Tim's chipblock stripdie.
On the inside I made a "giftcard" with the scrapbookpaper trapped between two slits made with a set of movers and shapers.
I added another label made with the scrapbookpaper on which someone could write to the recipient what she hopes she will be happy with.
On the label I added some dots with Tim's stencil.
The metal embellisment was a coin that I colored with blue distresspaint and sanded a bit after drying.
First project done !
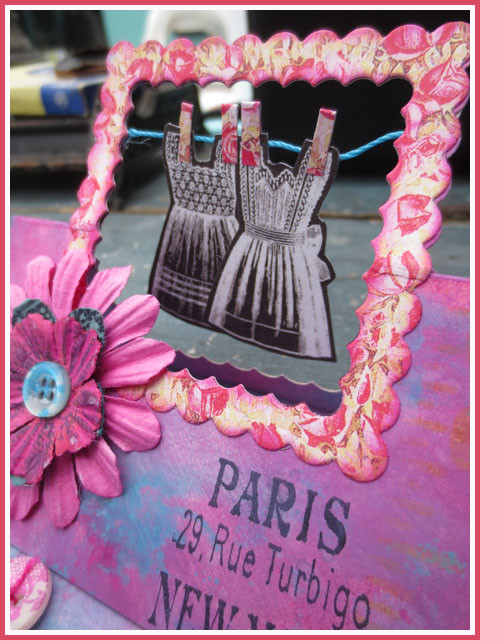
On the sizzixsite you can find Karen Burnistons "flying easelcards" and Shelly Hickox made also one very detailed.
They use one of the pop-updies from Karen and Sizzix, but you can make it easily yourself with dies and partial cutting.
This is something I learned on one of the "onlinecardclasses" from Jennifer Mc Guire. (don't forget tomorrow starts Tim's online class "creative chemistry 102" : definitely a must follow onlineclass for more insight in products and techniques!
The large Ranger tag was colored with distress paints, again the outside a contrasting color of the inside.
The dresses were cut out of the Prima scrapbookpaper and I made a "vintage clothesline" with my flying easel card.
Flowers were beige... an ugly color for me, but with distress stains and paints and some stamping they fit my colorful project :)
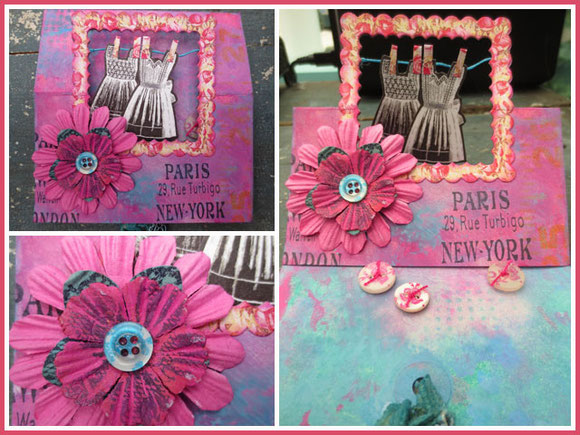
Plain white buttons got some color and design with a lacestamp and stazon ink.
The fun of this flying easelcard is the moving element in the pop-up card. Definitely a must-do-more: my autumn/halloweendisplay is developing in my head and maybe a flying easel card would be a nice extra.
I hope the customers of my local craftshop are inspired by my projects and I'm already looking out for the next challenge.
I love to be busy again, but when my wings get tired, I dive into my outside bed...
It's colder now, but with two blankets and two cats, the dark sky and twinkling stars above me... I feel "warm and cosy".
greetings from Belgium
Inge
ma
02
sep
2013
viva my outside bed !

On the 1st of September school starts again in Belgium... but not for me... I'm NOT in my Poppyclass...:/
I had a good schoolyear past year: it's was physically tough after being home the previous year with 4 hernia's, but with a weekly visit to my manual therapist (kinesiologist), dietary supplements for my fybromyalgy, painkillers,... and the will to go on because I love my job so much, I made it.
My vacation was very welcome to reload my batteries and every time I felt tired, I went for a rest in my outside bed.
I felt how energy came back and I was able to do more what I wanted to do: create every day, do my household,...
But then my manual therapist with his golden hands was suddenly diagnozed with coloncancer... He is still not well and has a very long way to go to come back, IF he ever comes back...
I freaked out a bit... Next to the much needed rest, I needed extra help for my body and the backpain.
I really, really wanted to start on the 1st of september in my class.
Luckily I found an osteopathe with a different approach, but we immediatly made a connection and I felt in good hands.
Only downpart : it' s more expensive and not every week, but every three weeks, but I kept hope.

My outside bed stayed an important piece in my recovering and due to the very good summer we had in Belgium, I've been able to rest here almost every day.
A week before we had our first schoolmeeting I did something in the garden and felt a lot of pain in my back... Damn, not one of the hernia's again ?
The pain stayed and spread out to the front of my body. I have a very good musclebalm that I kept on massaging on the painful places.
My skin was supersensitive, it felt like I had burns, but I still thought that was because of the "hernia", because there was nothing to see.
And then one morning there were a lot of spots on the painful side. Damn those mosquitos !! Why did they attack me on a place that was already painful ? ...
A week ago we had our first meeting at school and I felt full of energy and desire to start again. I'm still in my Poppyclass with my sweet collegue Ellen and the handicapped children have complex needs, but we had a lot of nice experiences for them in mind for the coming year.
My back killed me in the evening, the spots were itching and painful and then it suddenly occured to me I might NOT have a hernia, but herpes zoster....
A visit to the doctor confirmed my fear... and he prescribed me to stay at home. I didn't want ! I wanted to start in school !
A sleepless night from the pain, worries... and a migraine- attack made me realize my doctor, my mom, my husband were right...
The herpes zoster, the migraine... are signals from my body that it's in need and that ignoring won't cure, only make it worse.
I cried from anger, dissappointment,... I had been so good the past weeks to take my rest and still it's not enough....
I know the fybromyalgy undermines my immunesystem, the constant fight against pain from the fybromyalgy and hernia's take a lot of energy of my body and I had indeed had emotional stress the past months....
My 22 year old son with Asperger was heading to a depression because of a huge vitamine D shortage, identityproblems and the stress for school.
We sorted some things out before vacation. He quit school and we are still on the search for help and support for his future, but he smiles again and jokes again, so I thought we were doing well.
I have a strong will, but it seems my body is not as strong...
I luckily have my creativity to keep me sane... and my outside bed :)

The old iron bed is in a corner of my garden behind a wall of my house, next to an old tree.
I have sight on my garden, the tree and the sky above me. I feel the wind and the sun, I hear the birds in the trees, ...
An outsideposter of soldered pendants remind me constantly of my creative projects...

I'm also never alone in my bed. No matter where my cats are, when I get in the outside bed one or two of my six cats come to keep my compagny.
They make me smile, their purrs make me calm and if I want to get out and disturb their sleep, they put their nails in my skin to keep me IN the bed...:)
I feel like they are one of my guardianangels.

Even the newest cat, Missamissa, who we adopted in july, comes to make me laugh by jumping in the ivy like a rabbit...
I shed a lot of tears the past days, knowing that I could not start today in my class.
But then I think I'm a lucky one... I have no cancer, no lifethreatening disease... I live in Belgium where I can take my rest and I'm not a mom with the same worries as me in a country like Syria,....
Thàt and all the sweet mails and textmessages I got the past days from collegues, parents,... make me see that my glass is still half full.
I will be back :)
Inge
za
10
aug
2013
burried under gelliplateprints ? ...
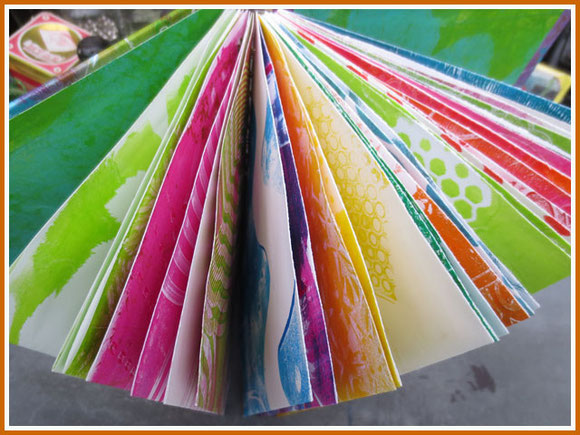
Playing with the gelliplate is addicting and fun !
In a short time you end up with piles of gorgeous paper...
But what do I create with them ? ...
That's a question I ask myself when I'm almost burried under the gelliplateprints :)
First of all: share my experiments and experiences with this new "hype".
In a previous workshop I gave, my "students" asked me if I have heard of the gelliplate.... I had to admit I already HAD one and loved it, but I could not teach a workshop with it because it's too expensive to provide all my students with a gelliplate.
Making them myself for them all was one option, but timeconsuming...
And would I teach them if they ordered one for themselves ? Of course !
I searched the internet and found a supplier in the Netherlands: happyscrappy.
The same day I mailed my question about the large quantity and if she had them in stock, I got a mail back.
I payed with paypal that same afternoon and in the morning my postman rang me out of my bed with a huge box full of gelliplates !!!
Time to prepare an extra workshop for my students !
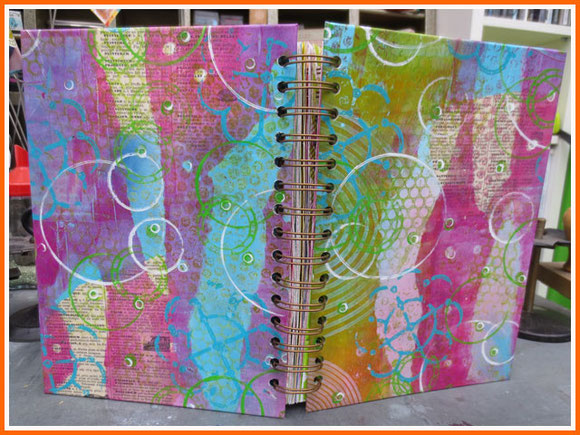
I made almost 20 different papers, with techniques and different materials and then I have not even started making multiple prints on top of each other.
My purpose was to show them possibilities and then it's off to them to combine the different techniques and materials and make layered papers.
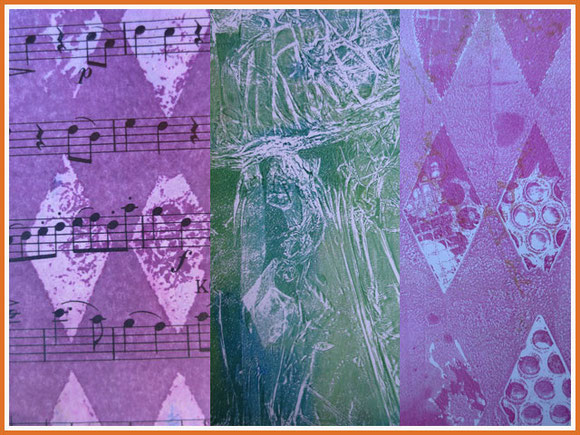
My prints piled up... and I was asking myself how I could present them to the students in pleasing way..
Of course ! Make a book with them !
I made a gelliplate print with the "gelli transfer packaging tape" technique and made two covers with them. On the inside another gelliprint and then spiralbound them with the cinch.
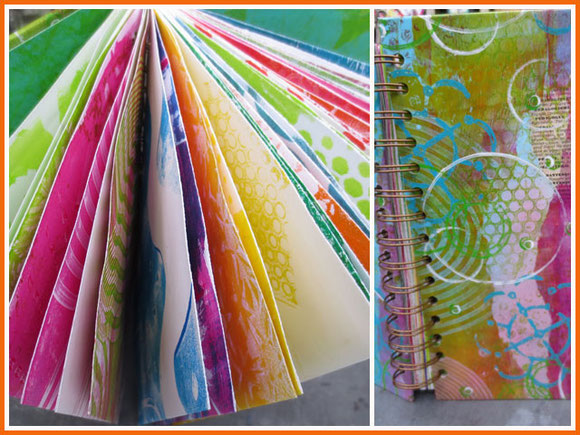
Look at all those yummy colors !
I can keep this book as an examplebook for gelliprinting, but I can also turn it into a journal.
And what else can you make with the gelliprints?...
I had some leftovers and I cut them in squares of 20/ 20 cm ( 8,5/8,5 inch).
I always loved origami and watched some youtube videos on how to make the origamiboxes to get in the mood again.
They fit perfectly on plain christmaslights and now they decorate my "summer"display on the piano.
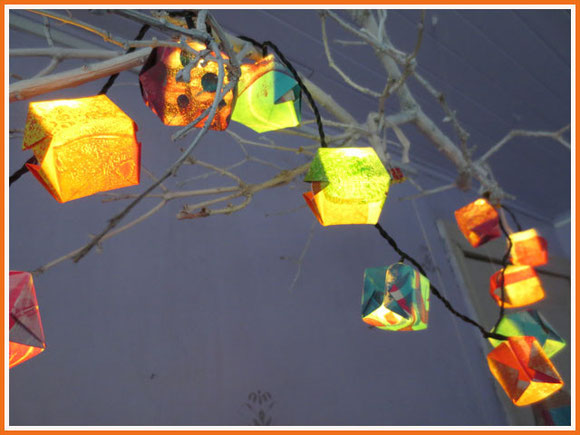
And that scrap of paper you roll the excess paint on each time ?
That looked so colorful in the end and now I have paperlanterns!
An origami-butterfly landed on the finger of Gaia's balljointed doll...
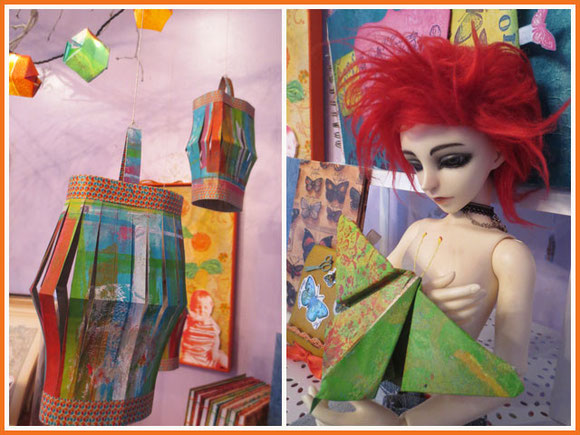
Yesterday Sam, Gaia's boyfriend became 21 years old !
They had a very joyful outdoorparty in a field surrounded by trees. Lots of tents, music, good food and friends..
I made him a personal birthdaycard. The telescoping card didn't fit in a regular envelop I had, so I made a custommade one.
Several layers of gelprinting and images of skulls and his name made this envelop personal.
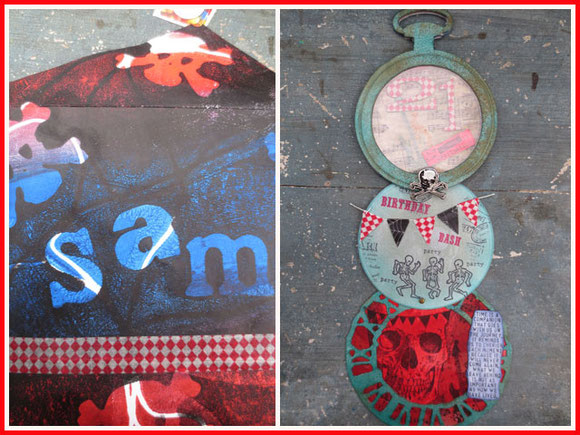
Not always easy to make a card for a guy.. and especially not when they are young and have a certain style.
Sam is the singer in a hardcore band and I know he loves guitars, music, skulls,..
The card definitely needed some "rock"..
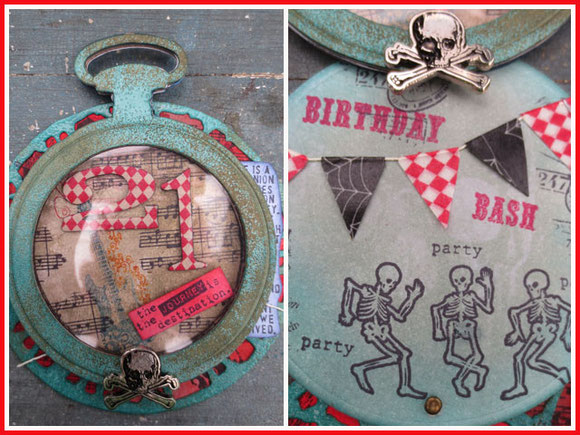
I made this card using the masking technique Tim Holtz shows in his monthly tagchallenge on the front card and several similar techniques I mentioned in my previous blogpost about the telescoping cards.
On the second circle some dancing skeletons and a washibanner. On the background of distress inks I stamped with a skullstamp with water which created a ghostly effect.

On the last circle a smiling skull, a guitar, musicnotes and the quote.
I like this quote. It's an important one to keep in mind.
Sam is glad he finally is 21, but I hope he cherishes the memories of his youth and savour every moment of his life, cause time flies "very" fast...
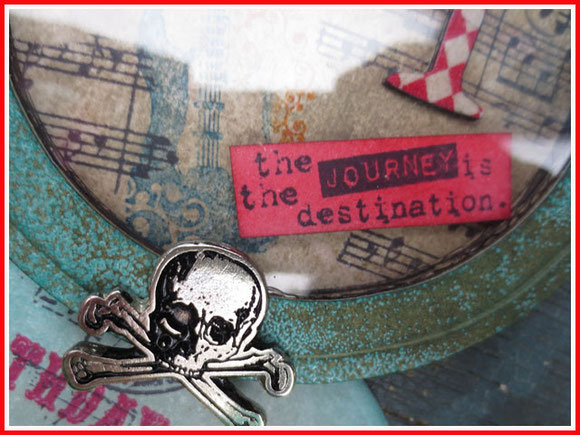
Instead of a plain brad, I used a skullbrad that I had. It fits perfectly on this card !
Sam was pleased with his card and it was "cool" :)
A big week ago my mom became 73 years old.
She 's painting poppies the past month on cards, on canvasses,...I think she painted hundreds !
So I couldn't resist the urge to give her a birthdaycard with a poppy :)
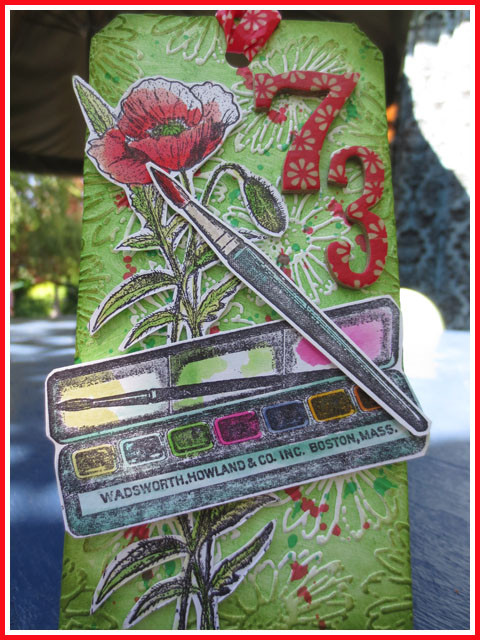
The poppiestamp, the paintbox, the brush were colored with distress stains and mounted on a tag.
It stands up with the easel from Tim Holtz.
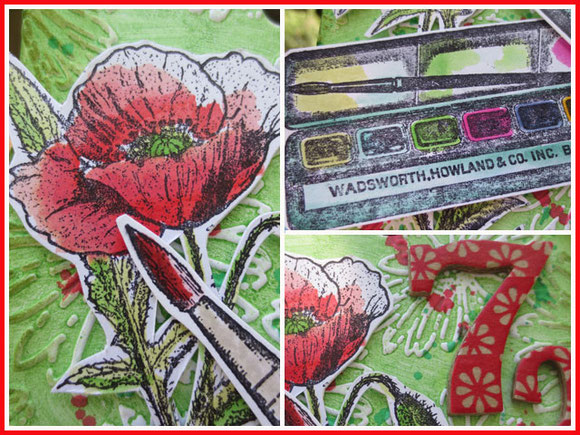
I can't paint like her, but I did like the result of my "watercolor"painting !
I hope she stays like she is now : energetic, full of ideas, always busy and constantly creating or thinking of creating :)
greetings from Belgium
Inge
zo
28
jul
2013
craft or die...
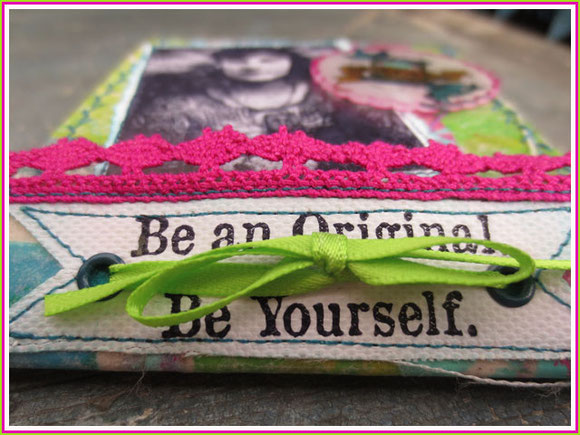
I need to create... at least a little bit every day... or I do think I would die...
It's vacation and between the household and the needed restmoments, I do have time to create every day.
I've been playing a lot with the gelliplate past weeks and I'm making projects with them, but more of these in another blogpost.
What to do with all the beautiful scraps of these handmade papers ? Keeping them in a box to "save" until the lid falls off because of "too full" ? ...
I gave a workshop two weeks ago and one of the techniques I teached was making fabric paper.
All my little scraps of gelliprints, marbled paper,...could perfectly be used in this technique.
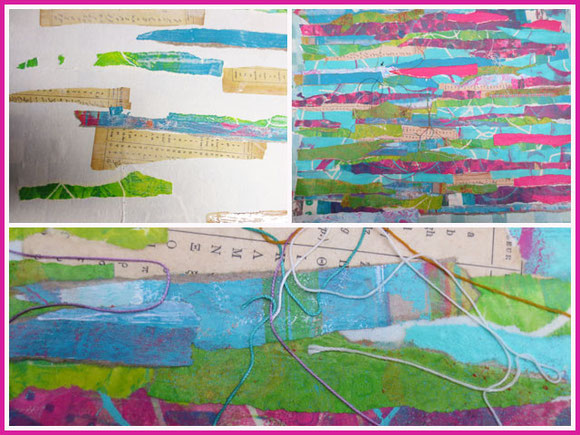
Water down PVA glue until the consistency of running yoghort.
Put a piece of plastic or plasticbag on the table and brush glue all over it. Put a piece of cottonfabric on top ( perfect use for old bedsheets...) and soak it completely with the PVA glue.
Tear paper in strips or pieces and glue them on the fabric. Put PVA glue over every scrap of paper so they are really, really glued down ànd covered in PVA.
Cover the whole fabric with the paperscraps until you have a "collage" that you like.
You can even glue down pieces of sewing thread ( my cut-offs when I'm sewing, go in a box for this purpose) or you can add paper flowers, diecuts,...
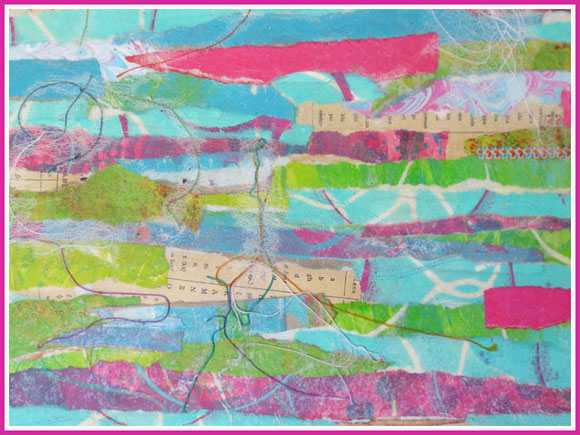
When you are finished you add one piece of white tissuepaper over the whole piece and cover it completely with PVA.
And then.... let it dry overnight until it's completely dry.
The next day you can peel the fabricpaper from the plastic and there you have a flexible paper you can easily sew !
You can use handstitching, embroidery, machinestitching,...
I used a piece of my fabricpaper to make a sewingbook.
I'm asked to be a guestdesigner for Gecko Galz for august and this is one of the projects I made for them using clipart/digital stamps from them.
My other projects will be shown in another blogpost...
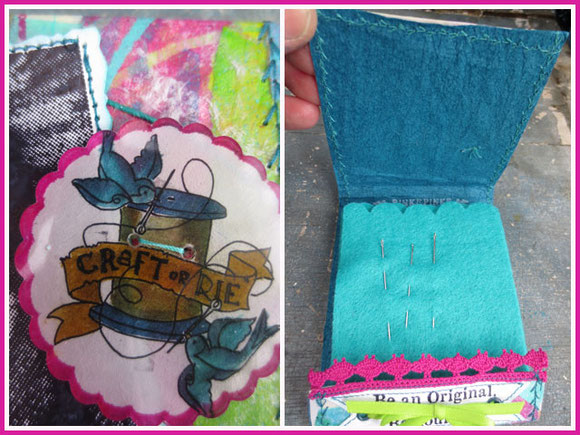
When I saw the clipart/ digital stamps I had to use from Gecko Galz, my eye was caught by this digital stamp " craft or die".
The image immediately made me think of tattoos and maybe I should have this one tatooed too...
I tried to print it on shrinking plastic but I still have the wrong one and the ink bleeded.
So back to drawing... A print with the digital print under the shrinking plastic and drawing the design with a permanent pen.
I colored it both with distress markers as with copic markers.
The back of the fabricpaper is lined with a sheet you put in the washingmachine to "catch floating color". The white sheet must had picked up some colors, cause it came out completely in blue and... "my blue" !
I kept for a while knowing I would use it one day and now it found it's purpose.
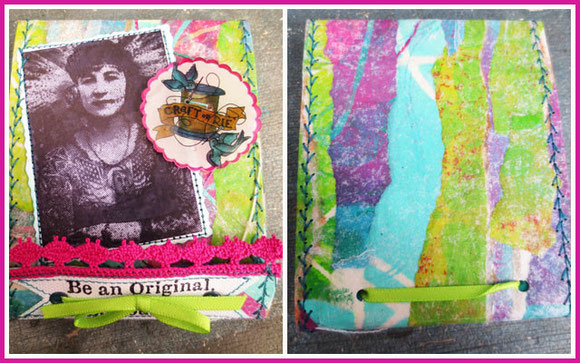
I cut the fabric paper for the sewing book with the Tim Holtz die " matchbook set". The fabricpaper cuts like butter.
As the digital stamp made me think of tatoos, I wanted a tatooed lady on the front. This stamp and the quote " be an original, be yourself" is from Oxford impressions.
The photostamp was stamped with permanent ink on specialty stamping paper and glued on the sewing book. I stitched around the photo with the sewing machine.
The quote was stamped on canvaspaper, cut into a banner and sewed on.
I then lined the sewing book with the dyed washingmachinecloth and I stitched everything together with a featherstitch.
For the needles, I added felt on the inside and everything is held together with a fabric ribbon.
I love how the sewingbook turned out and wanted it for myself,... but I already have a selfmade one...
I gave it to my daughter for her sewingneedles as she's a "creative tatooed lady" too and she surely is "an original" .:)
Half of August I have another workshop in which I will teach the students to make a telescoping card and several techniques.
I already started making examples.
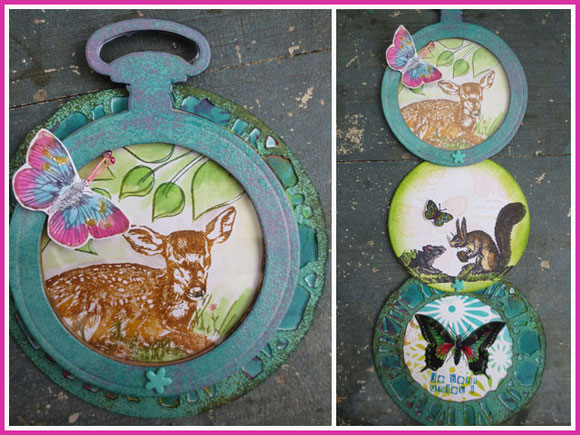
This is how the telescoping card looks when it's closed. When you pull on the topcard, the card opens. You can see Shelly Hickox telescoping card in action here.
I worked with three circles, but you can use any shape.
For the front circle I used the pocket watch frame of Tim Holtz. I cut it out of cardboard, colored it with peacock distress ink, embossed with clear embossing powder and flickered some off. After melting with the heatgun I overinked with raspberry pink distress ink.
This is one of the techniques I want to learn the students.
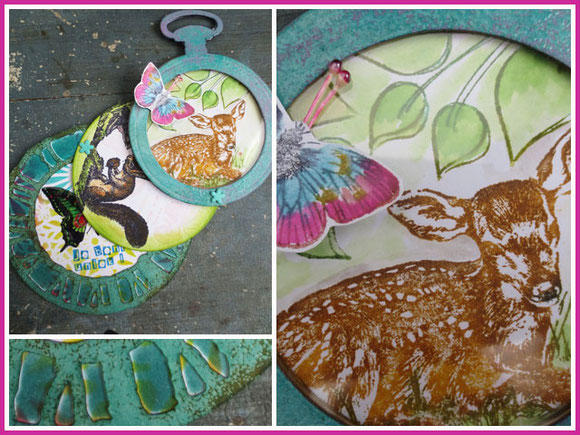
Another technique is stamping with distress markers. That's how the little fawn was done.
The leaves of Dyan's stamps were colored in with distress markers.
I cut the pocketwatchframe a second time in cardstock( circle cut out) and once in clear packaging plastic ( completely without the middle cut out).
I layered them all and created a little 3D box.
The butterfly was stamped and colored with distress markers.
The moving part of the card still works when you make the card thicker as long as you use a split-pen that's long enough.
The weathered clock for the third circle was colored with the same technique of distress inks and clear embossing powder.
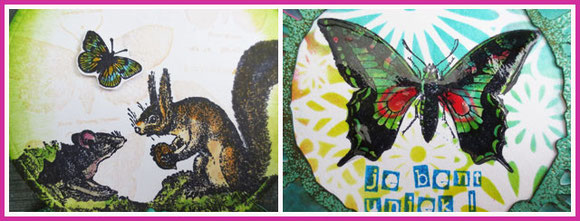
Stamps on the second and third card were colored both with distress markers and distress stains.
The butterfly gots it's thick shiny finish by putting glossy accents on top.
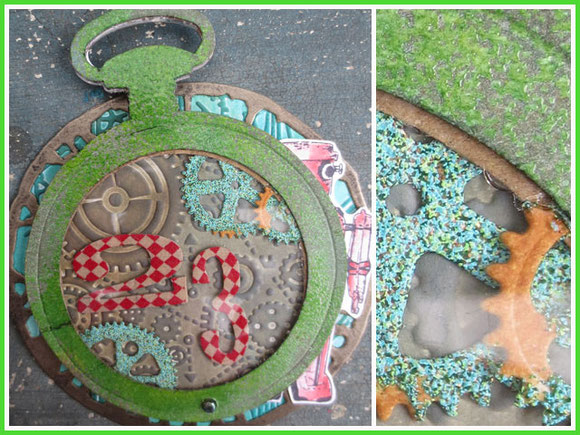
I made a second example, but I won't be able to show it to my students cause I already gave it away for the birthday of my son's best friend Sion :)
For the pocket watchframe I used the same technique but this time with mowed lawn distress ink.
The gears were embossed with verdigris embossingpowder ( Ranger).
Instead of stamping on the first circle, I embossed this one with the gears embossingfolder (Tim Holtz).
The numbers are washitape on cardboard cut out with the Word Play die.

Here you can see again how the telescoping card opens.
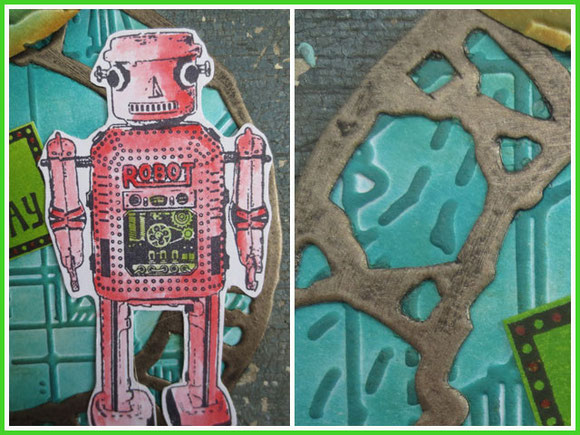
I love this robotstamp ! It's from Dark Room and I found it when I was at the craftshow in London past spring.
I thought this one was perfect for the sweet geek Sion is :)
Stamp was colored again with distress stains.
The weathered clock was embossed with metallic embossing powder, colored with black distress paint and then wiped off again. A technique I learned from Shelly Hickox and one I want to pass on to my students.
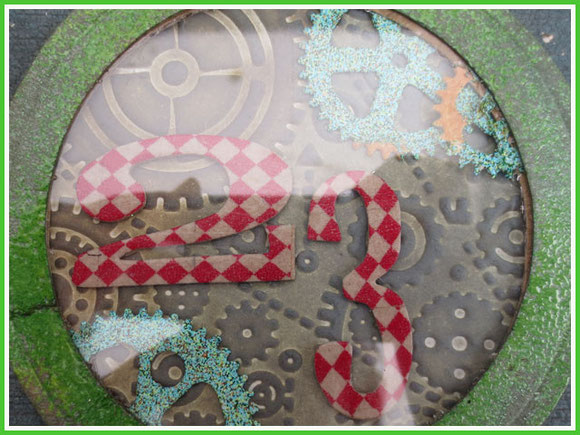
A close up of the front card and you can see the reflection on the clear packaging plastic.
Vacation is also sale-time and time to finally go to the shops and get what I need ( I don't like clothing shopping or shoeshopping....craftsuppliesshopping is something I DO like...)
I needed new Birkenstocks as my previous ones were falling apart...
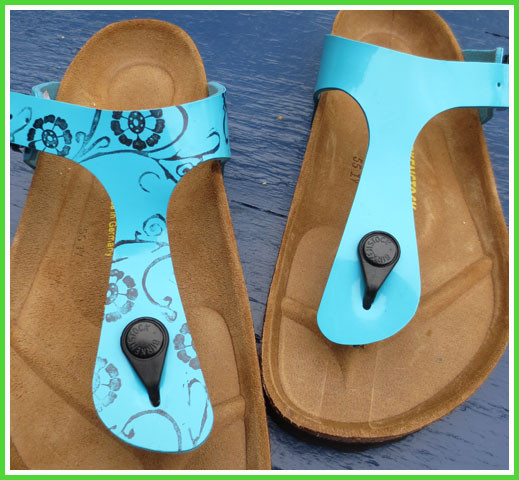
They had nice Birkenstocks in nice colors, but no fancy prints...
So I customized mine with stamps and stazonink :)
Happy feet again !
greetings from Belgium
Inge
ma
08
jul
2013
little books still traveling...

Vacation is... finally finding the time to blog again...
It's not that I don't have anything that I would love to tell or to show you, but the last months I had the feeling I was running behind deadlines constantly...
June wasn't any better with working on the schoolreports for the children and the last 14 days I've been creating several creative projects for collegues who are leaving our school looking for another direction in their teachers life.
I hope to be able to show you one of the projects in a coming blog...
In january 10 ATC books left for a journey for several months in our local round robin.
The journey was not easy : people moved, others bought a house,people were not feeling well... so the 3 weeks deadline wasn't always made and books got stuck in some houses...
BUT.. they are still moving, not in their planned journey, but moving, so that's good :)
Suddenly three books arrived at my door...
I was in the middle of the hectic schoollife of june, but I took the time to create in each book. It also was a moment to de-stress...

First ATC-book I worked in was my mom-in-laws and her theme was "summerflowers and their visitors".
We sadly haven't seen much butterflies in the garden yet ( bad spring ? ...), so I made them come alive in paper.
The ATC-books were send on completed with all the little enveloppes sewed in, but they are all white so the participants can ink, paint, draw,... on them.
Every other enveloppe has also a heart cut on the front that was made with a mover and shaperdie in the enveloppedie before the enveloppes were sewed in.
I had a vellum paper with butterflies on. I cut it with the enveloppedie and glued it over the original enveloppe that was stamped with a text stamp.
In the middle you can still see the heartopening.
For the closures on the back I stamped with permanent on shrinkpaper with a butterfly and dragonfly stamp.

The holes to sew them on were made before shrinking.
I love to make little embellishments like this with shrink paper. No store-bought ones for me... give me a stamp and shrinking paper and I make one :)

In a workshop I gave I teached the participants how to make waxpaper.
One of the papers was musicpaper stamped with butterflies in permanent black ink.
They were colored with distress stains and then the whole paper was waxed with beeswax.
When the paper is saturated, there is as much wax melted off again with a heatgun and that leaves you with ... waxpaper...
I cut one of these waxed butterflies out of the paper and mounted it with 3D foam on the enveloppe ( I used glossy accents to strenghten the binding of the tape because of the wax...).
Flowerstems were used to make the mandibulae.

In the enveloppe is this ATC.
A collaged poppyflowerstamp stamped with permanent ink and colored with distress stains. The flower was covered with glossy accents to make it pop.
On the back of the ATC, more butterflies: stamped and inked, but also a torn piece of the waxpaper with the butterflies.

The wings were partly cut out and a foamdot was added. This makes the butterfly dimensional and you can see the stamped background of the ATC under it's wings.
I also love how the paper becomes translucent in the waxingproces and how it reveals a bit of the background.

Rita's ATC book is all about inks, pens, pencils, writing,...
I imagined how she got a special enveloppe sended from far away....
The original enveloppe was covered with an enveloppe cut out of old ledgerpaper.
I added some stamps with red ink and red embossingpowder.

The ATC has a stamp with (Egyption?) writing.
I added more poststamps in red, a inkpot and a real pen.
On the back a special specimen.. a butterfly... luckily not a real one, but again a piece of the selfmade waxpaper with the butterflies :)

You can see here how I repeated the previous technique of partly cutting out the wings of the waxed butterflies and putting them on foam.
The last book I worked in was Jenny's.
Her theme was "dresses of the twenties".

I digged out one of my fashionmagazines of the 1900 and tore a page out of it..... Maybe a shame to use it... but now it has got a new life :)
Same procedure here: covering the original enveloppe with a new paper ( new... it's only 100 years old...)
I stamped on it with lace stamps in blue and overinked the whole paper lightly with distress ink.
For the closures I stamped with the lacestamp in pink, punched out a circle and covered it three times with UTEE to make it look like a real button.
This time the heart-opening on the front was not covered, but cut out.

I stamped with pink stazonink on packaging plastic and added it on the inside of the enveloppe.
Now I have a see-through to have a peek on the inside, but it's also a bit hidden by the lace...

This ATC houses in the enveloppe.
No twenties dresses without a real seamstress ! The stamp was embossed with adirondack embossing powder.
On the back of the ATC again a piece of the old magazine. I whitewashed it with white distressstain.
I added a girl with a dress from 1910 and some white and black rub-ons.
These ATC books already left my house to continue their journey.
Just a few weeks to go and then they will be home again !
greetings from Belgium
Inge
ma
03
jun
2013
creating with gelliplate fun !
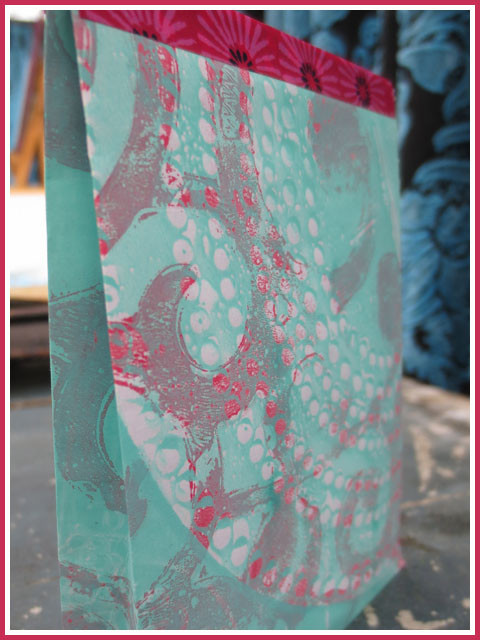
"fun" is definitely the word that should accompagny the word "gelli plate"...
I don't know why it took me so long to buy a gelliplate from Gelli Arts...
I have been experimenting in the past with monoprinting on a selfmade gelatin plate and I both enjoyed doing it ànd the results.
The fact that it takes time to make the gelatin plate and that it desintegrates quite fast, didn't make gelatinprinting into a regular craftmoment.
I've heard the buzz on the blogs and on pinterest about the gelliplate of Gelli arts, watched some videos and when they released recently a big plate (12/14 inch or 30 cm/35,5 cm) I finally bought one.
It's not cheap, but knowing that it will last ànd knowing I will it use often, makes it worth the buy.
It arrived from the Netherlands past monday.
Being busy with the reports for my handicapped children of my Poppy class means lots of hours behind the computer... This means stress, a heavy head full of thoughts, tired eyes,...
So, why not pulling out the plate just before getting in bed and give myself the perfect relaxation ?
It works :)

Every night I watched a video on gelliplate printing to get some ideas and every night before heading to bed I played with the gelli plate.
Fun, fun, fun... and lots of nice papers and if not... just print over it !
I used one of my papers to make a little bag with the "in the bag die" ( Tim Holtz).
Pefect to hold an ATC with a soldered pendant on.
This was a commission I got from Evi, one of the nurses in our school.

She lost her mom and her grandparents. She and her husband are also longing for a child for a long time, but nature is not sweet for this couple.
Hopefully the doctors can give nature a helping hand... hopefully very soon...
She wanted a pendant which remembers of her lost loved ones and with a tree that represents her childwish... And if I could incorporate the ashes of her mom and grandma in it ?
And so I did... On a leftover scrap of stamped paper I embossed a green tree ( green is the color of hope).
On the left three hearts with the first letters of the names of her loved ones.
On the right a heart with her husbands first letter and an extra heart... hopefully to be filled with several letters of future children...
I glued some ashes on the bottom of the tree. Her loved ones have taken care of her in the past and her "roots" will stay connected with them for ever.
They will give her strenght to grow in whatever the future brings.
I loved to make this pendant for her because it means so much for her. Hopefully the love I felt in making it, wearing it with love,... will make dreams come true? ... I hope...

As the gelliplate I bought is big, it's perfect to make all the papers I need to make my photobooks.
This birthbook is a gift for a friend, commissioned by an excollegue.
She provided me with the birthannouncement and some photos of the little Julian.
I took the colors of the birthcard as an inspiration for the colors of the bookcovers.

I used several colors ( yellow, orange, red, green) on the gelliplate and rolled the paint open in strips.
I added some texture with an "orange bag net" and then printed the paper.
When it was dry I added dots with one of Dyan Reaveley's stencils and heavy gel medium and let it dry overnight.
I cut the letters of the name " Julian" out of two sided tape with the wordplaydie ( Tim Holtz). I decreased the stickyness of it by taping it on my tshirt and pulling it off again, because I needed the letters as masks and the glue may not pull off my paint when I remove them !
I added the masks on the paper and inked my gelliplate with two blue paints, added rubberbands randomly and printed the covers.
I let the paper dry and then sanded off a bit of the paint on the dots made with gelmedium.

I made a collage with the photos and printed it on canvaspaper.
With some batting in between I sewed this collage on top of the paper.

Then it was time to cover the cardboardboards with this paper.
I made new papers for the inside of the covers and the protectionpapers on the first and last signature.
I used rubberbands again as masks to create visual interest.

I used some leftover strips to cover some of the backs of the signatures to add a bit of color on the spine.
Then it was time to assemble to book and sew it with the copic stitch !

DONE !
I'm really curious how the mom and dad of Julian will react on this completely handmade book...
I really had fun making it and the gelliplate is my favorite friend to make all my papers for future books.
But I won't forget experimenting with the gelliplate for fun and relaxation !
greetings from Belgium
Inge
zo
26
mei
2013
seize the day... before you're old !
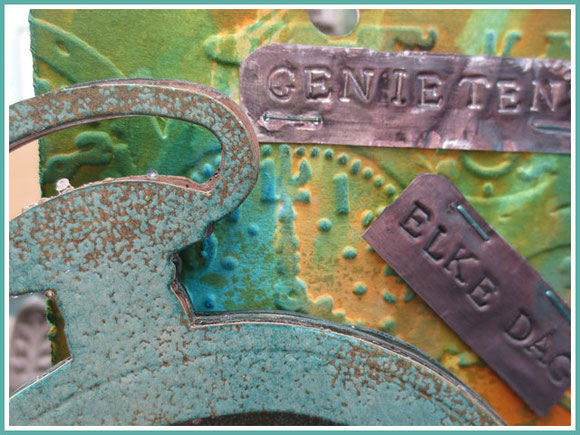
I have not any teenager in my house anymore !!!
We had two birthdays in our family the past week...
Gaia became 20 on the 18th may and yesterday my eldest son, Freek, became 24...
This means..."no more teen-agers in the house..." cause Freek, Aran and Gaia are all in their twenties now...
I'm still remembering their birth at our own house as it was yesterday, but it's not... 20 years has flewn by... does this means I'm getting old ?..
Maybe :)
But it reminds me most of all that we have to seize the day as it comes and enjoy the happy moments every days has, even some less better days...
You never know how many days are given to you and the older you get, the faster time seem to fly...
My grandmother once said : " the day goes open and closes in a blink..."
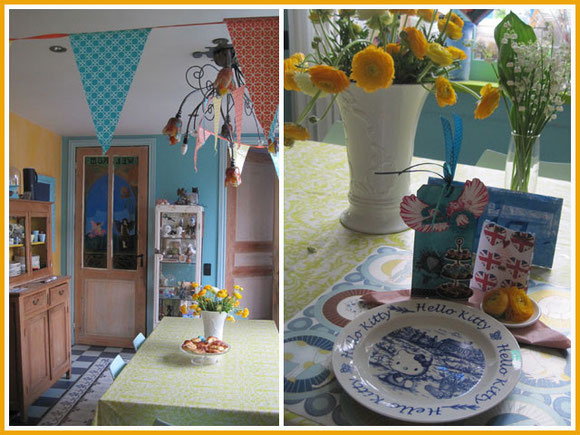
So we hung up colorful garlands, put bright flowers on the table, a handmade birthdaycard and present and her favorite plate of hello Kitty ;).....and celebrate the luck we have to have her already 20 years in our family !
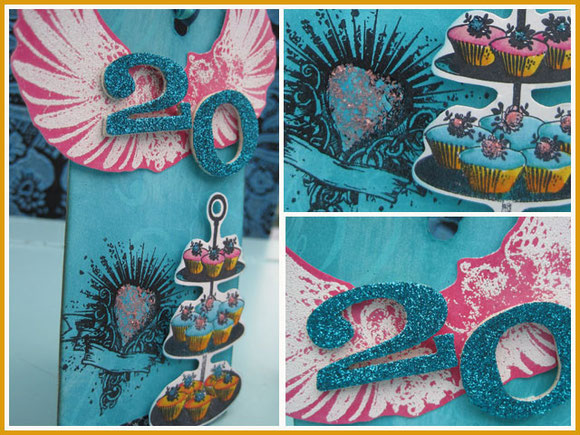
This year, everyone that gets a birthdaycard from me gets a tagcard that can stand up and their age in bold numbers..
For the background of Gaia's card I stamped with white ink, let it dry and then overinked with distress inks. The white ink acts as a resist. A subtle background, but a technique with a result I like a lot.
The wing were white embossed and overinked with raspberrypinkdistress ink (still very happy Tim Holtz brought some bright inks in his range of distress inks ! )
The cupcakes... my daughter loves cupcakes, both making ànd eating, were stamped and colored with copic markers. The flowers on top of the cupcakes got a little sparkle with distress stickles.
I cut out the number 20 several times with the wordplayday and layered them until they had the thickness I liked.
One 1 and 2 had doublesided tape on them so I could easily adhere glitter to the numbers.
She's 20, but she says she feels she's stuck on her 18th... Who does not recognize that ? LOL
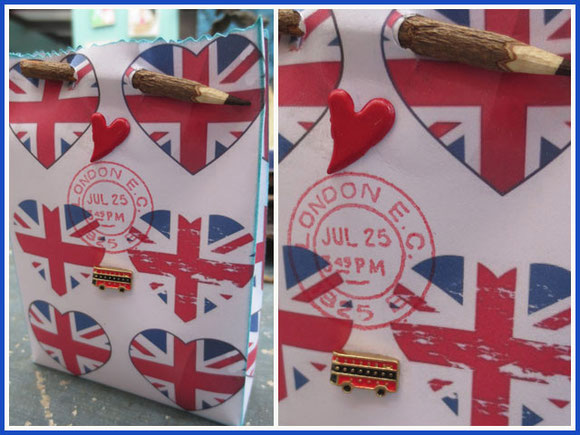
When kids grow up it's sometimes more difficult to find a good present for them. Mostly they like money they can spend themselves.
No problem with that, but I don't like to give it in an envelop... I want at least the feeling it's a "present"...
Gaia goes at the end of june to London with the make-up school where she follows a course, to thé biggest make-up event in the world.
She really looks forward to it: lots of workshops to look, hopefully participate, lots of compagnies with products you can't get hands on here...
But she needs some money, as we already pay her trip.
I went to the bank for British pounds and put it in a little bag.
I ordered Tim Holtz stamps from France and the UK, but they didn't arrive in time, so I could not use them on this bag.
I searched the internet and with the help of photoshop I made a paper with the union jack and hearts and cut it with the "in the bag" die of Tim Holtz.
With a London stamp and a little red bus ( a little gift from one of my UK friends) I got the perfect wrapping for the pounds !
Gaia will happily spend them all, she said :)
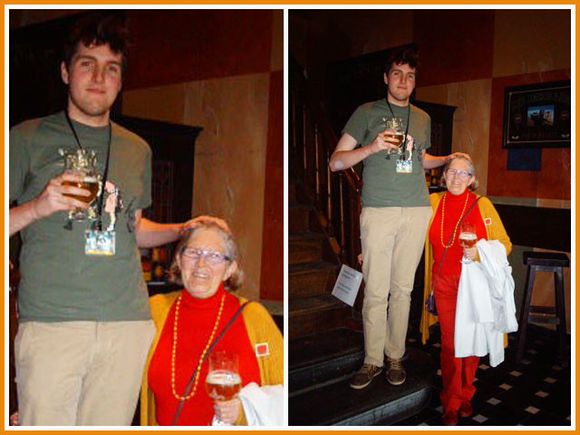
little boys grow fast... litteraly !
I got this photo from him and my mom when they met in Ghent where he studies.
Freek is always in for a joke.... he IS tall ( 1m 86 cm), but not such a giant as he looks in the first picture. ...
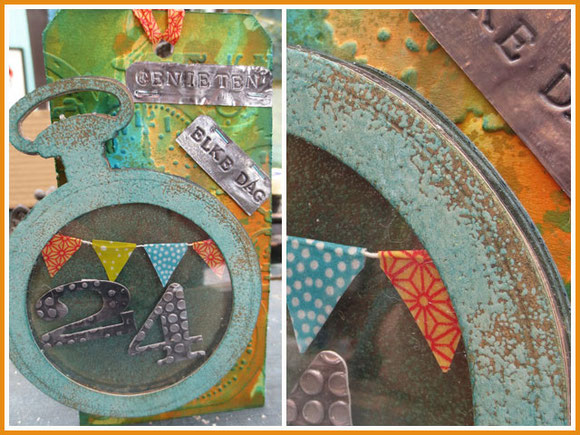
24 years old...
I already had two little children at that age...
He's still free as a bird, enjoys his youth and studying at university.
Other choices then mine, but I hope he does not regret them. I don't regret any of mine :)
I made him a colorful tag with a background colored with distresspaints and embossed.
I hammered the quote " genieten... elke dag..." ( enjoy every day) in some metal, leftovers from something on my husbands work they would throw away but he salvaged it...
Thanks to the ATT Trading Post I was able to buy the metal punches from someone who didn't want them anymore and was happy to sell them.
I cut out the pocketwatch several times out of leftover cardboard and layered them so I created some depth.
On the last layer there is plastic on the back to mimic the glass of a pocket watch.
Inside the watch the number "24" and a garland with washitape.
Lots of watches and time... a hint to my son to enjoy every day of his life.. now...
Two people also enjoy their life and their marriage and their son gave me the commission to make a special card for their 30th weddinganniversary.
He asked if I could do something with a tandem and their heads...
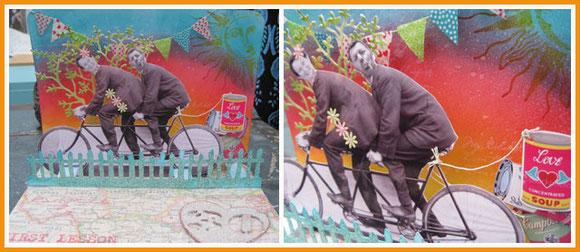
Photoshop was used to alter a vintage photo of two men on a tandem in the couple...
I don't say my photoshopskills are perfect, but all in all I was quite happy with how their heads looked on the bodies...
I printed some Andy Warhol tincans and added them to the tandem.
It's a pop-up card, so it completely folds down, but once you open it you see the 3D composition of them riding on the bike with some tin cans flying around behind them.
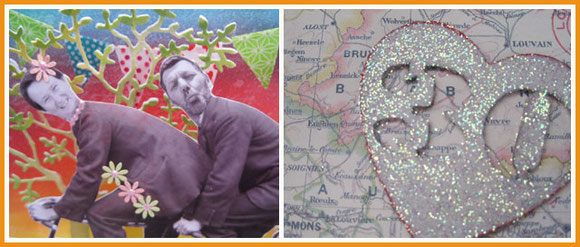
There is also a cut out of a tree that pops up and a washitape garland on an inked and stamped background.
A bit of glitter on a heart with the number "30" cut out.
Another challenging and fun commission I got was to make a weddingbook for the best friend of my sweet collegue Ellen.
As an inspiration I got the two weddingcards from the couple... Two ?
Yes, there was one funny card in which the couple asks their friends to the party, but their children Wolf and Lou had their own "weddingparty" too !
This already gave me inspiration : these people are colorful,enjoy their life, enjoy a good laugh and moderate themselves...
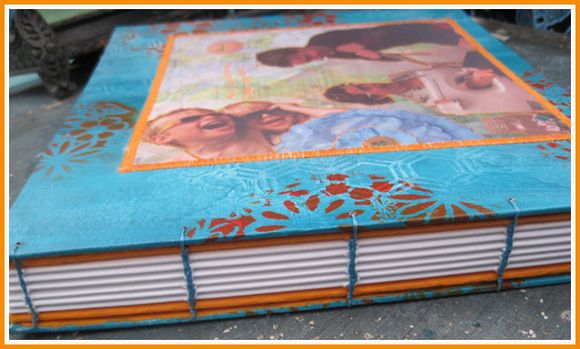
I made them a handmade book, handsewed with the copic stitch.
On every first page of every signature there is a stamp with a quote or image that makes me think of them.
I made the paper for the covers of the book with gel medium, acrylic paints, stencils,...
Once all the layers are dried, I can sew on the digitale collage I made.
The collage is printed on canvaspaper with fiberfill between the collage and the backgroundpaper.
When I stitch this, you get a "puffed" effect, like it's quilted.
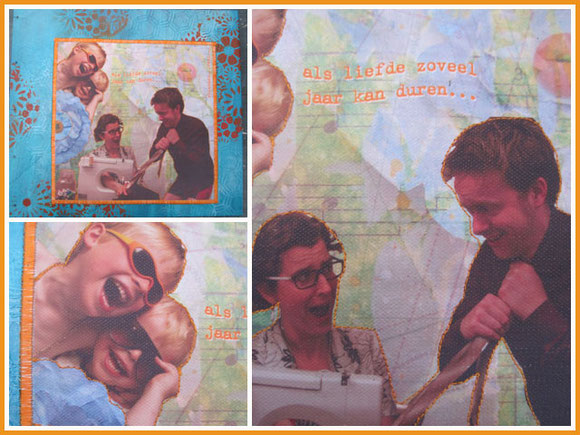
In the collage I used the images of their weddingcards and put them on a layered background.
They love music, sewing, bright colors, fun, friends, gardening...
It's all in there.. I used images of projects I created myself and layered them all.
I love it to know that my own creations are in there and are used again in new projects.
My collegue couldn't wait until the wedding yesterday and gave it to the couple on wednesday so they could use it as a guestbook... That's what she told me, cause she admitted, she was just inventing a reason to give the book as soon as she could :)
Yes, this projects give me some "candymoney", but I admit the biggest joy is knowing that some people get a smile on their face when they recieve my creations..
Enjoy your life !!
greetings from Belgium
Inge
vr
10
mei
2013
tic, toc, tic, toc.... and creativity in the castle of the rats...
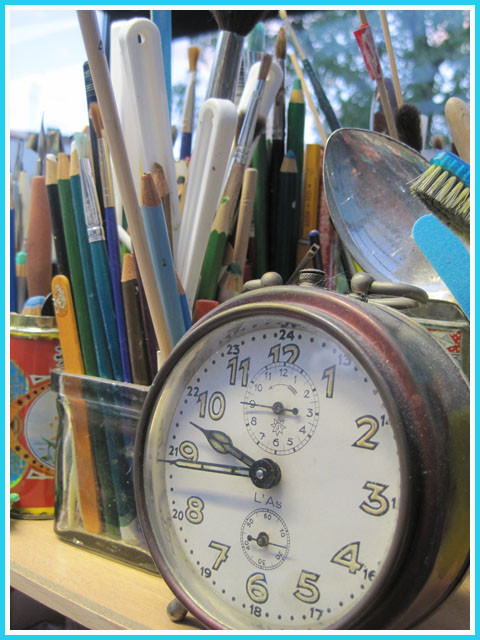
time keeps on ticking away without me having any control about it...
I hardly can believe my last blogpost is from march...
I'm sorry that I let you down... but past weeks have been a constant struggle between a mind that wants to go on and do things, has to do things , needs to do things, longs to create... and a body that refuses to cooperate...
But.. I'm back... energy is reasonable and free time can be used to create instead of lying in the couch :)
I'm glad about that, because we had "Ratteljee" past weekend, our 3 th creative event in the castle of the rats !
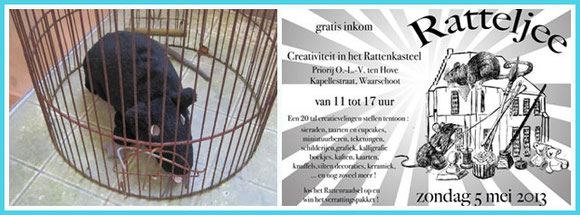
A sunny day, lots of creative booths in the castle and a lot of interested people!
I had a soar throat in the evening because of all the talking and explaining about my "passion" LOL
It's a pity you couldn't all be here because you really missed good creativity !
To ease your pain about that... a little tour around all the booths...
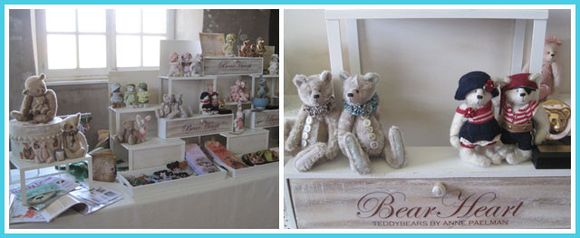
One of our most rewarded artists : Anne Bearheart with her handmade minibears. She did win in the past several first prices in Germany, Swiss,... and they are well earned ! Her bears are gorgeous and unique and perfect in every detail..
Not everyone can afford one of her bears, but she has little bearmagnets, a birthdaycalendar, cards, broches,... with photos of her bears.
You can find more about her here.

Another well rewarded artist we had was Moniek Vandenberghe... what she can do with flowerarrangements is "art"..
She has been publised in several magazines and books, gives workshops all around the world...
An artist from our own little town...and we were proud to have her in Ratteljee.
You can find more about her and her projects here.
We are not all artists in Ratteljee, but we do have one thing in common : "passion for our creativity"... and thàt was something we wanted to share with our visitors.
Hopefully we have stimulated some of them to start creating and find their own voice in what they create.

Luc's paintings are mostly inspired by nature and his surroundings and the bold, bright colors really pop from his paintings.
Dorine had paintings with colors, but her series in greytones of "50's" scenes made with gesso, charcoal,...are really special. I have never seen anything like her work.
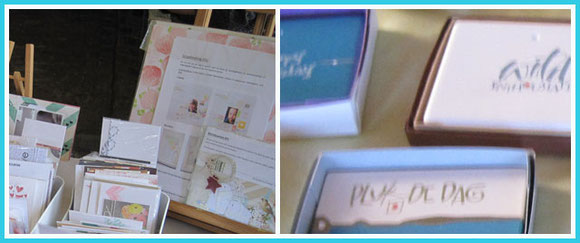
Els is a scrapbookartist, makes lay-outs, cards,gives workshops,... She often designs for Basic Grey and has been published in several magazines.
Whenever I see something from her on Pinterest, I KNOW it's hers. She truly has an own style in this paperworld.
You can read more about her and follow her on her blog.
Bea is calligrapher. Sadly the photos were a bit blurred but she had wonderful cards, text on stones, little books,...
I really like what she creates with her calligraphy.
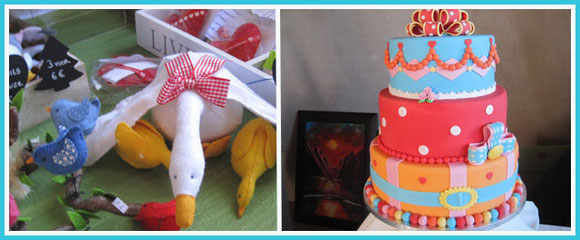
Whenever you see Christel, she has a needle in her hands and is sewing one of her little felt creatures.:)
She had a full booth with lots of felt creations ready to decorate your house or your clothes ( a little birdy on your jacket ? )
More of her feltcreations on her facebookpage.
In need for a colorful cake for a birthday, a wedding, a whatever ?... Fond of cupcakes made with fresh ingredients or decorated in the theme you like ? Sonia makes them for you !
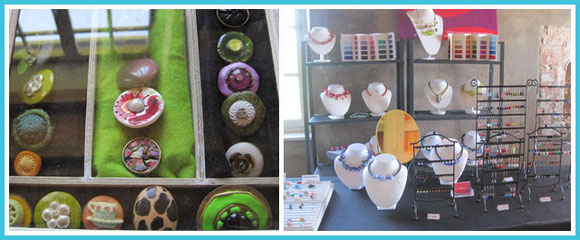
Karla had a booth with several items: little babybribs, gift for babies, boxes,... but her jewelry catched my eye the most. I don't know which materials she uses but they are one of a kind.
Anneleen is a colortherapist. We discovered her a while ago on the internet and went with 4 women for coloradvice. We had a lovely evening with her : a really sweet person with a passion for her job and lots of good advice to adapt our wardrobe to make us all look at our best.
She also makes jewelry with Italian murano glass in the colors that suit your type. You can see more of her jewelry here and if you live in the neighbourhood, contact her for coloradvice !
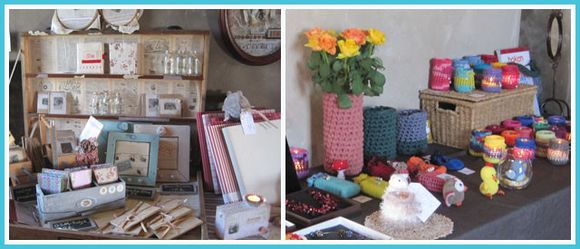
Dorien had a booth full with little goodies to decorate your house. Books covered in fabric, wood blocks with quotes, glassframes with collages...and no more dirty clothes with her sewed aprons !
Marieke is "hooked" on crocheting. Past year she had mostly jewelry, but this year she started crocheting little figures, handbags, little bags for your phone, colorful covers for candlelights,...

Carine is a teacher who started working with clay with her children in the class and then got hooked herself on creating with the material.
She has lots of ceramic figures from children to adults in several "workoutfits". She has an own website.
I'm proud to say we had 3 women of our family in Ratteljee : my mom, my daughter and me, all with our own style.
My mom had brought some watercolorpaintings with her combined with calligraphy. No photos of her graphic arts but they are one of a kind too.
Past year I brought some creations from my daughter with me, but this year my mom and I were so proud that Gaia herself wanted to present her work.
This was her first booth and her first real come-out as an artist.
Her boyfriend Sam was with her and he's a driving force behind her. It's so nice to see how proud he is on her creatings and how he wants to "promote" her.
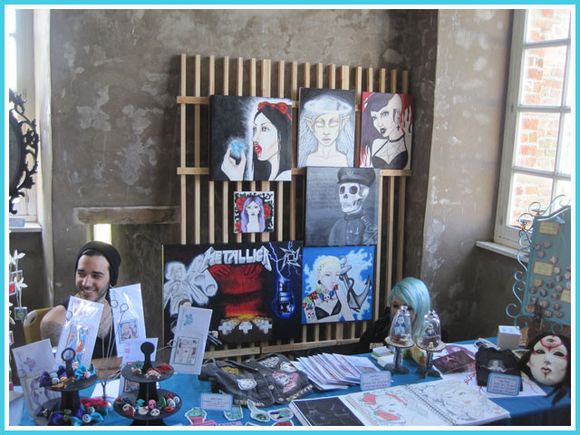
Gaia really has an own style. I don't know how I can exactly describe it... She surely is influenced by tattoo-art, but also by the mexican "dios de los muertes" art, rock and gothic, zombies, vampires, fantasy,...
I know not every one likes her style, but she surely can draw and paint ! ( I can't what she does...)
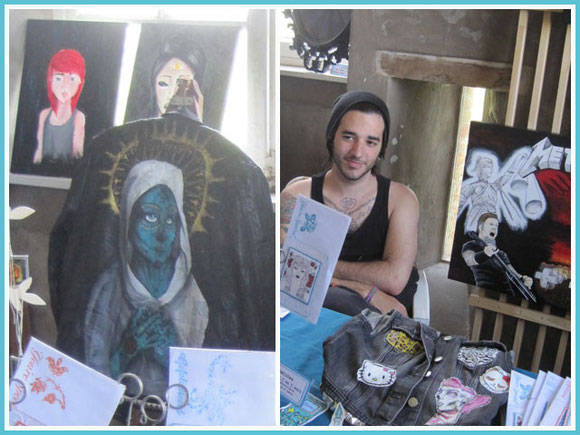
On the left some of Gaia's paintings and a painting she made on Sam's leather jacket. Sam is constantly wearing it, so he's a life billboard for Gaia !
On the right Sam, Gaia's jacket with her own painted patches and on the right a big painting of Metallica.
Sam's stepfather is a huge Metallica-fan and Gaia made him a painting inspired by albumcovers of the band for his birthday.
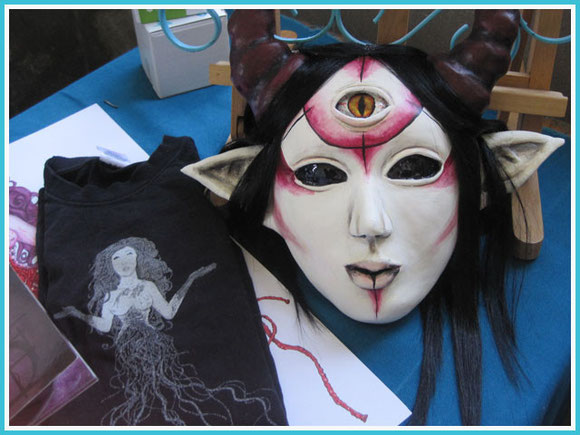
Gaia's mask was made with airdryed clay on a simple plastic mask. She completely builded the face up with the pointy ears and horns.
I love how she painted the face.
One lady wanted to buy the mask, but Gaia was not yet ready to sell her first made mask ! But she had fun making this mask, so more will surely follow.
On the left an original painting she designed for Sam's metalcore/deathcore band "the wrong kid died".
So cool to see her artwork on the t-shirts and CD-covers !
And to see Sam wearing the t-shirt of his band with her work on it..
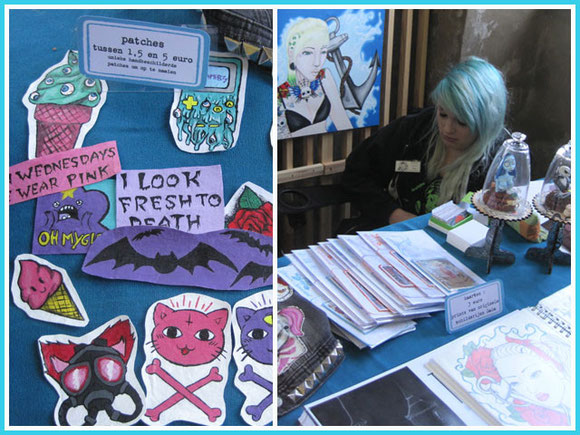
These one-of-a-kind patches were painted by Gaia in my green couch... " I really ruined your couch..." she said past week... "Maybe", I said, " but the stains in the couch can't ruin the joy I have, having you at home and seeing you create..." :)
On the right Gaia sitting on a low chair... a bit hidden still, but she did promote her own work.
We made some cards with prints of her paintings and not-for-sale but just-to-show were her figures of Jack Skellington and Emily.
I made her also a book so she could put paintings and drawings in it or prints of bigger paintings, so she could show the public the range of style and skills she has.
At the end of the day an older man looked twice through all her books and wrote Gaia a "poem":
" To Gaia...
She askes if it's possible that everything is hers
the universe she creates at night
with towers and castles and unicorns
where the moon is a big square
Is everything really mine, she asks again..
the shadow of a orphaned skull
de smell of her woven hair
a skull that comes alive again
Everything is possible, you say to her
Maybe indeed ...everything is hers..."
Marcus Voorstrijs
I love it... and I'm so proud of my daughter :)
You can find more of her work on "slightly bizarre"
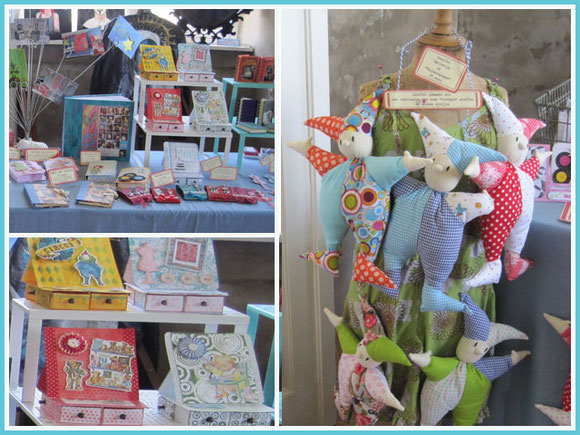
At last... here is my booth...
Of course my handmade harlequins... my little books with copic stitch and selfmade covers, lots of cards with several mechanical cards, my handmade photobook, easel-card boxes,...
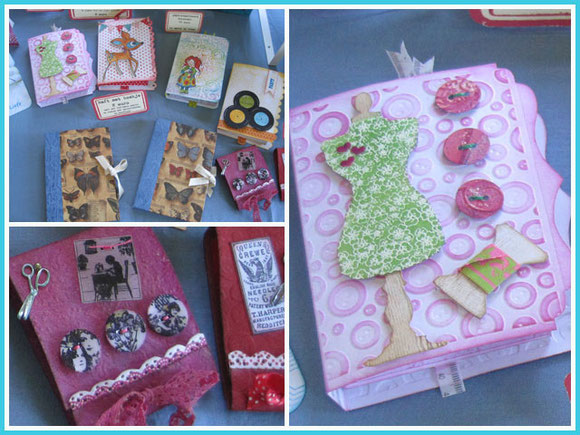
Little folders with Italian paper and a handsewed book in with beads on the spine, my sewing books and several giftboxes with tag and decorated candles inside,...
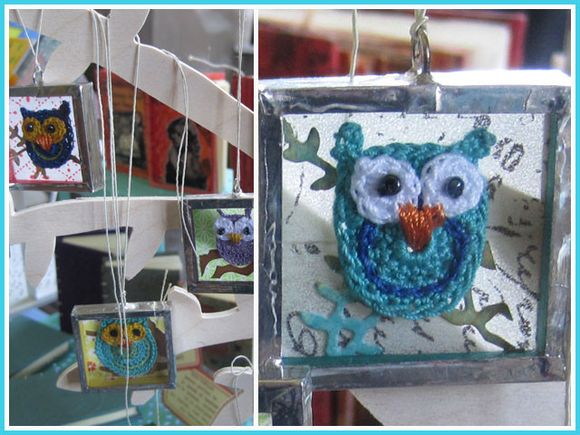
Past year I had crocheted hearts in soldered pendants.
This year they are accompagnied with little owls on a branch and cupcakes.
The pendants are 3,5 / 3,5 cm tall ( 1,37 inch/ 1,37 inch) and some people asked surprised if I had made them myself ?...
Of course, that's what the fun is all about ! Crocheting with a very small thread and crochethook, decorate a background with washipaper and inked papercutouts, putting them between glass and soldering them... Yes, completely selfmade !
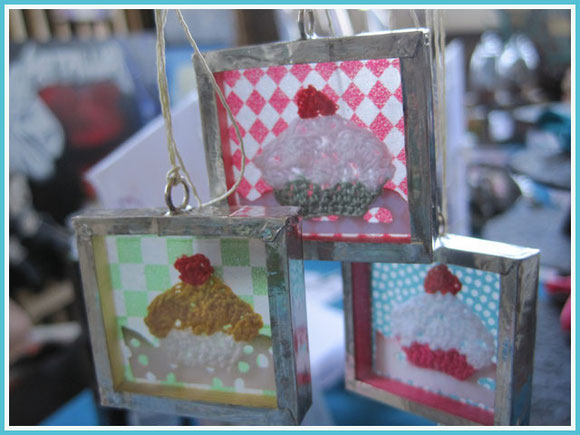
"Life can be as sweet as a cupcake, but you have to mix the ingredients yourself..."
That's what I try to do every day...
Make yourself a sweet day !
greetings from Belgium
Inge
zo
24
mrt
2013
save the date ! ... 5th may 2013...

It's going to happen again !!...
For the 3th time we have our creative event " Ratteljee" where 20 creative people share their passion in the "castle of the rats"...
So, save the date if you're in the neighbourhood : sunday 5th may from 11 until 17 hours !
I'm busy creating for the event for a while and I'm not yet where I want to be, but ... still have some time :)
just some sneek peeks from my "booth in progress"...

crocheted... and ready to get soldered...

present ? box ? card ? .... stamped and inked paperstuff...

a box to hide a present ? .... stamped tealights hold the space...

stamped, inked, cut...some sewing goodness...

cards... lots of cards....mostly in bold colors... and yes pop-ups !
a card for every occasion... handmade and one-of-a-kind...

I hope to be able to create more in the coming weeks, but hopefully I tickled you to at least grab your weekly planner and save the date !
Ratteljee... 5 May 2013.. castle of the Rats in Waarschoot, Belgium :)
Inge
zo
17
mrt
2013
tattered flowers go... Gaudi !
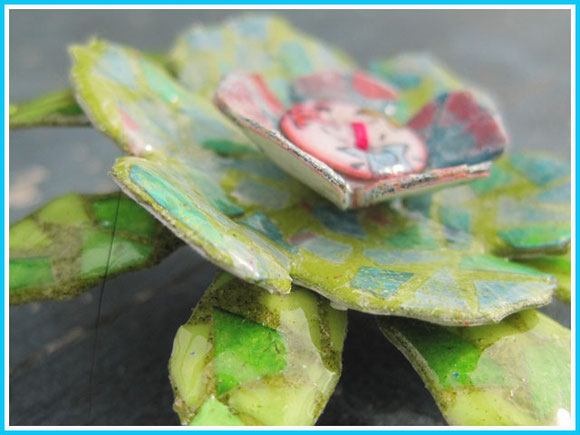
I've always loved Gaudi ...
I fell in love with Gaudi's creations years ago. This total-artist was a Catalan Spanish architect who lived more then 100 years ago, but his work is still alive and in progress.
You can read more about him here and google for images of his work.
His unique use of left over tiles, bottles,... and how he incorporated them in the decoration of his creations is beyond imagination.
I love his use of colors, colorcombinations, fluid designs, ... inspired by nature ( he's one of the most famous Art nouveau artists).
He was not "just an architect" but a total artist who had eye for the design of the doors, the furniture, the doorknobs, the sitting places, the shadow places in the garden...
When we moved 19 years ago in our old house from 1924 I wanted to do something in my house inspired by his mosaics.
I used glassmosaics to make a frame for my plain bathroommirror.
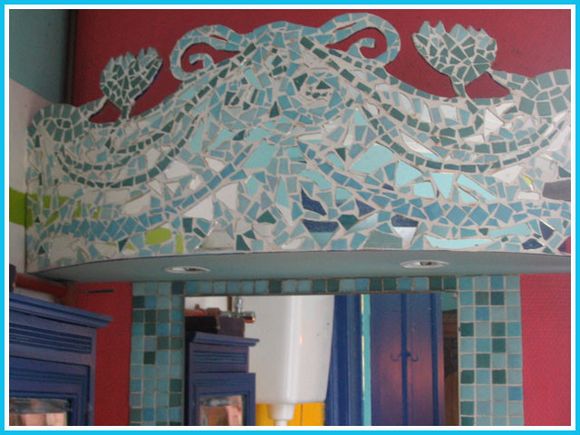
I also made a mosaictop to put the lights in above the sink...
An artnouveaudrawing of waterlillies was my inspiration and I cut this out of bendable wood, so I could adjust this to a rounded board.
Then I covered it with my leftover glasstiles, pieces of old tiles and broken mirrors.
I'm still proud of my first Gaudicreation :)
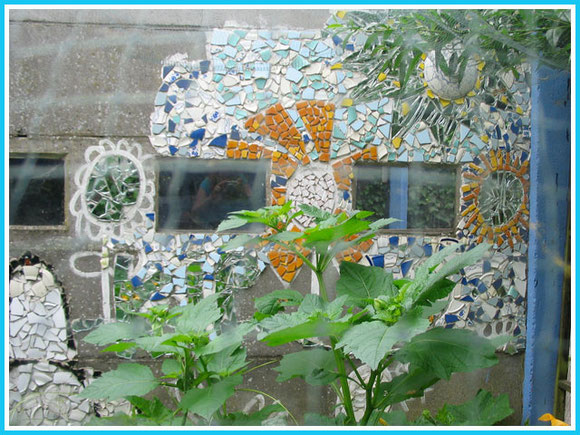
Second creation is my chickenrun..
When my kids were small I let them draw on the walls and painted their drawings in white paint.
Then I started filling in the spaces with broken and left over tiles, cupboards, plates and mirrors..
It's still a work in progress, but hey... Gaudi's Sagrada Familia is also not finished yet :)
I have had the luck to visit Barcelona once a few years ago and visit the Sagrada Familia, Parc Guell, casa Mila, casa Battlo,...
My hope is to once return to Barcelona and dive into his creations once more..
In the meantime Gaudi keeps on inspiring me in smaller projects...
When Tim Holtz posted his Tattered Flowers Challenge, I wanted to participate.
Finding time was an issue, but when the days flew by, finding the right inspiration was a bigger issue.
So many people already created so many beautiful and unique projects, that it was hard to find "my project".
And then suddenly, the muse and Gaudi got me inspired...
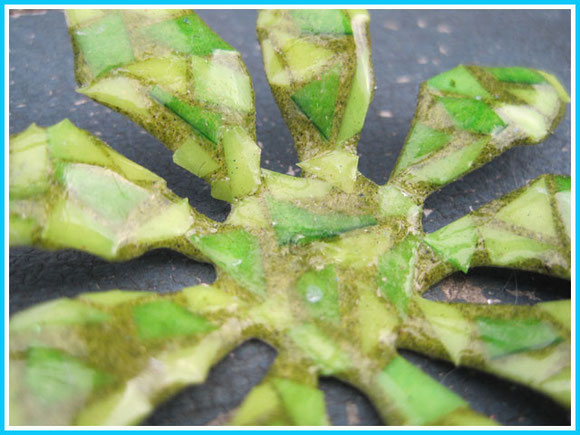
I had a workshop at home yesterday and one of the techniques was how to make unique embellishments for your cards instead of buying them.
One technique was one that Tim showed a while ago : making a mosaic piece...
After the workshop my head started spinning...
I cut out the flowershapes with the tattered flowerdie from heavy paper covered with doublesided tape and cut small pieces from left over scraps.
When I decorate papers myself with paint, inks, sprays,... there are always leftovers too nice to throw away.
These handmade papers add something more because they are not "flat" but there are already different "layers" in them.
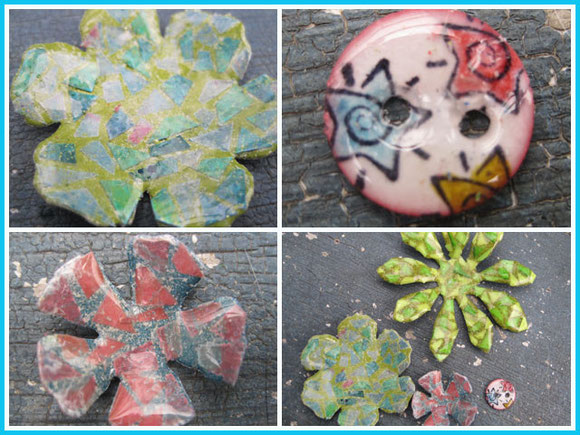
I covered the different flowersshapes with the small pieces.
For "grout" I used different embossingpowders: I used both adirondack embossingpowders as distress powders. They just give a different look and feeling.
I then covered the different pieces with 4 layers of UTEE...
This transformed the pieces of paper into " ceramic decorations"
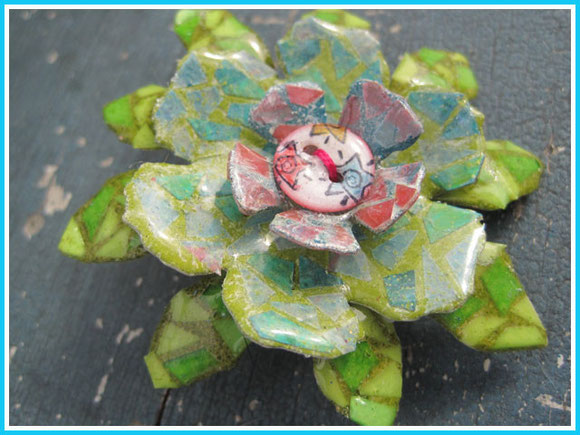
I punched holes in the "selfmade button" and the flowers and sewed them together.
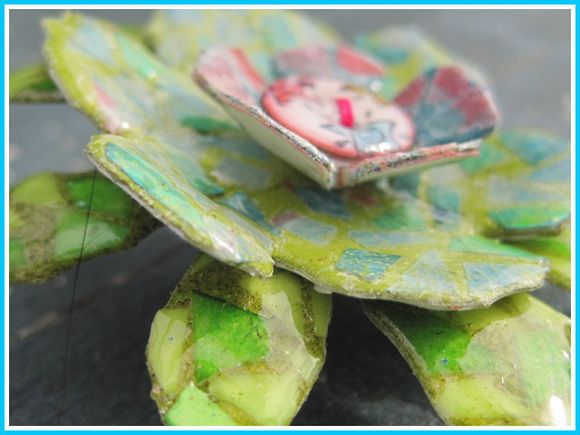
I glued a pin on the back and voila...
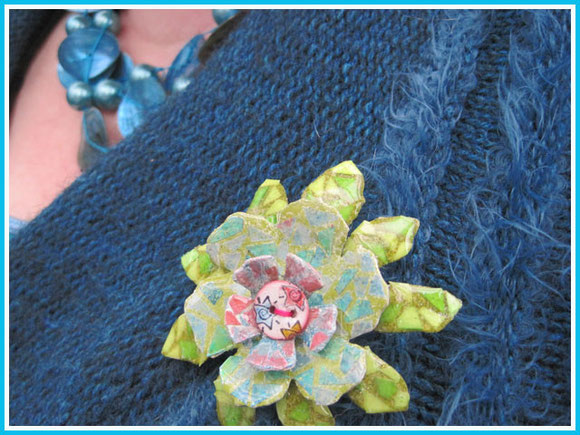
... a tattered flowers Gaudi-inspired brooch ! :)
Inge
zo
10
mrt
2013
a little book goes wandering...
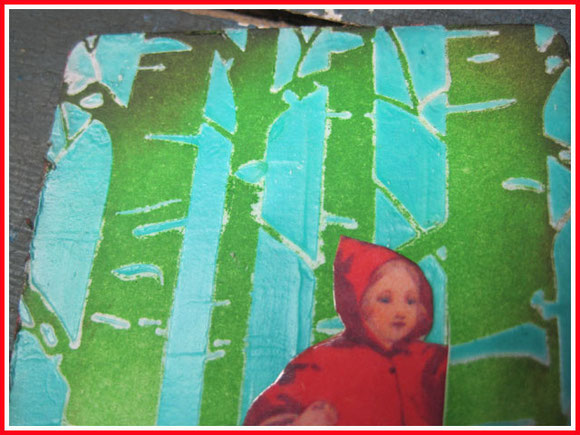
A new round robin has started... 11 small ATC enveloppe-books left their home in january and are wandering around now...
My theme is " once upon a time..." and invites all the participants to make an ATC about a fairytale and make an adapted envelop for this ATC in the ready made books.
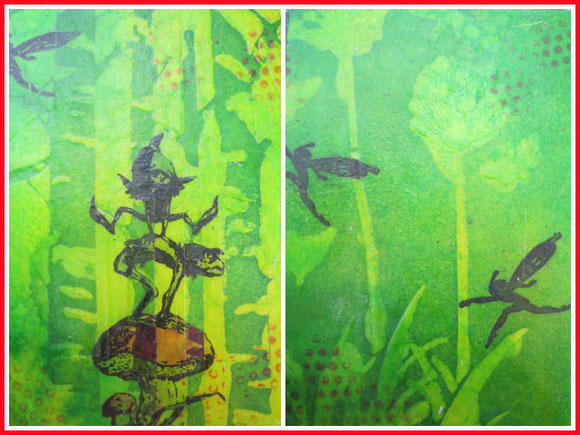
These are my covers, made with a favorite technique of me : coloring plain white paper with distress inks, then make a pattern with gelmedium through a stencil ( my favorite stencil : aspen trees from the craftersworkshop)
I overinked with another green distress ink and added some dots with a dotstamp and red ink.
The fairies are a selfmade stamp that I made using a drawing from Brian Froud, my favorite fantasy-artist.
I stamped them with permanent black ink and colored them in using distress markers.
Everything was waxed then with beeswax and melted off again, leaving some wax into the paper and giving it a special texture.
After the covers were finished I used the mini-enveloppe die of Tim Holtz to cut 15 enveloppes and sewed everything together to an ATC-enveloppebook. How I made this small book ? Read until the end of the blogpost :)....
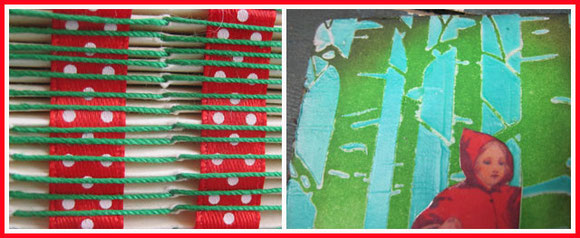
On the right my ATC I made for my first enveloppe. I made the background the same way I made the covers and used a copy of red ridinghood from an old fairytale book.
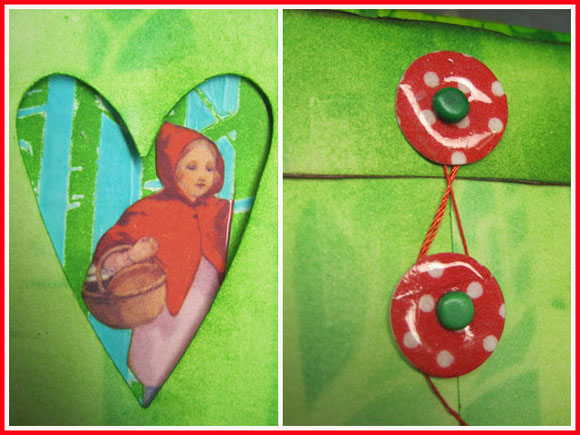
All the uneven enveloppes have a heart died out of the enveloppe.
This creates a peeping hole to see a bit of the ATC inside it...
On the back of the enveloppe I made closures by adding washitape to paper, punch them out and putting 3 layers of UTEE on them.
Then my book went on it's way for several months. Every three weeks we get a new book to work in.
First one I got was from Katrien and it's all about letters and the alphabet.
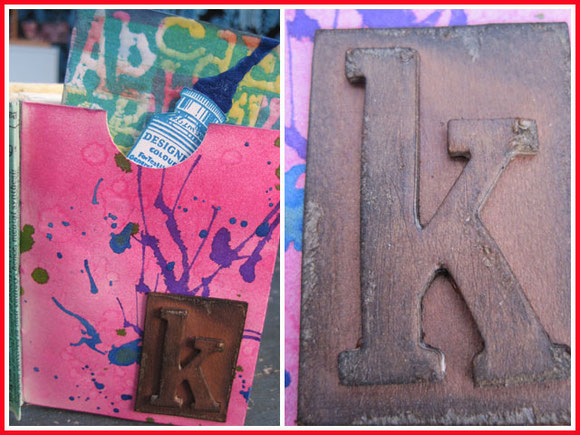
I picked the letter "K" for her name and because the world "color" in Dutch is written " kleur" with a "K"...
I made a faux wooden stampblock by cutting out the letter "K" with the wordstampdie from leftover cardboard. I colored the letter and a rectangular piece of cardboard with brown distress stains, sanded them a bit after drying and inking the sides with black soot distress ink.
Katrien added some leftover printouts of colors in blocks. She invited us to do something with it...
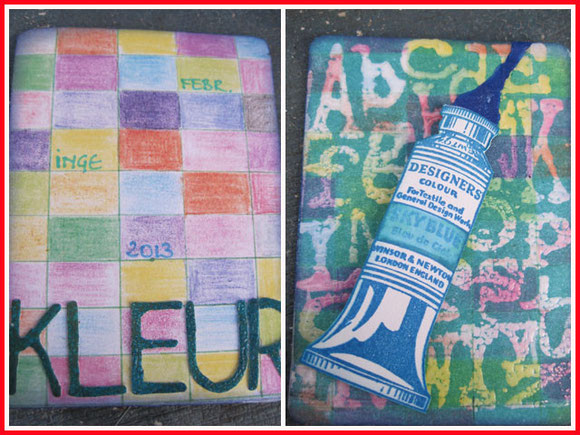
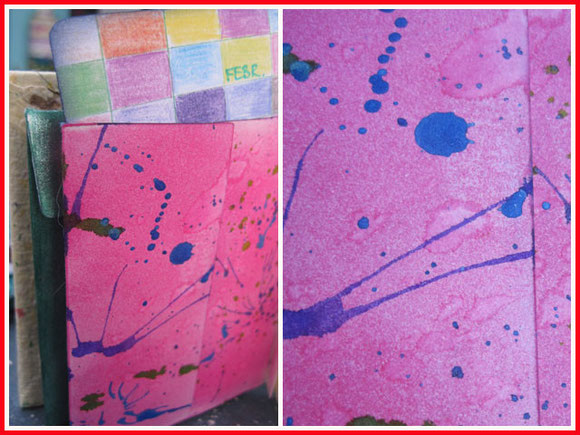
The enveloppe was colored with the bold distress ink picked raspberry and splattered with water.
On top of this I dripped some calligraphy ink and blew it open with a straw to create more splatters.
Next minibook is from Singrid and is all about " weird houses"...
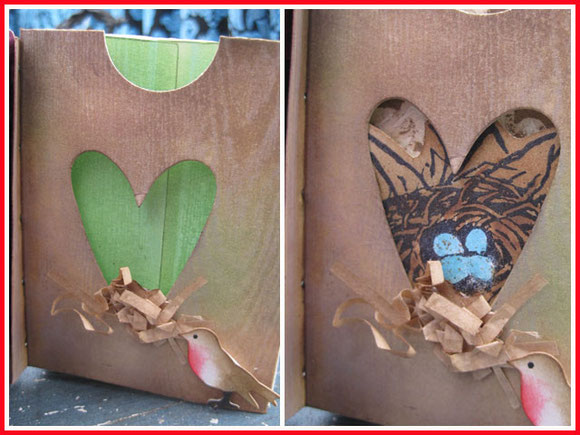
I immediately thought of the houses some birds make in trees.
I know a robin doesn't make holes in trees for it's nest, but hey... it's all about imagination...:)
I imitated the bark of a tree by using an treestamp and stamped it with white ink on the enveloppe.
I let it dry and then overinked with several brown distressinks. The white ink resists the distressink and makes the bark show through.
I did the same on the inside but added green inks to make a contrast with the brown outside.
On the right how the "hearthole in the tree" looks with the ATC inside...
Look, there is a birdsnest with little eggs !
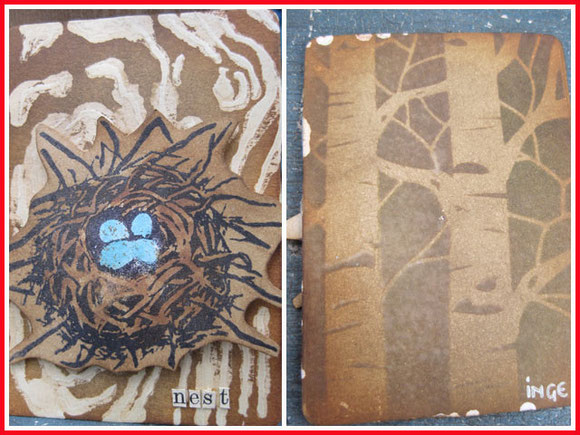
Background of the ATC was made with gelmedium and a stencil.
The stamp is a selfmade stamp I made years ago because I couldn't find a nest that I liked...
The blue eggs were colored with a distress marker and splattered with brown distress stain to add "speckles".
The back is again the aspentree stencil used with several distress inks.
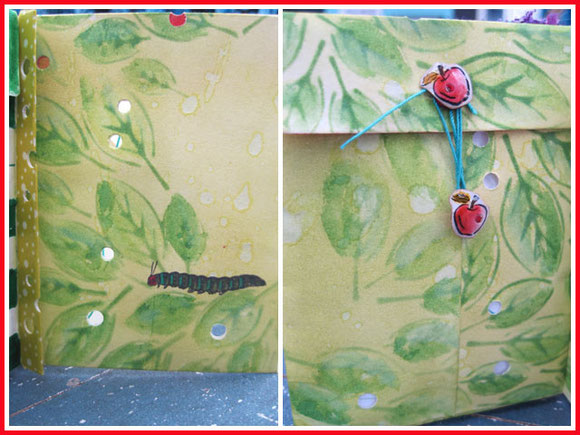
Last ATC-book I worked in for the moment is from Krista.
Her theme is "metamorphosis"...
What better metamorphosis do you have then a catterpillar and a butterfly ? At least that was the first that popped in my head when I saw the theme.
I used a leafstencil and colored them with distress stains. I added a hungry catterpillar who ate through the enveloppe !!!
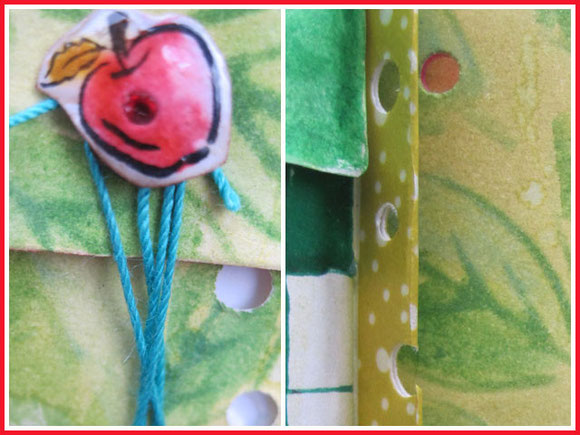
The catterpillar even ate through the spine of the book... and the apples I made as closure...
I stamped a little apple with a stamp, colored it with distress markers and punched a hole in the paper.
I put them on top of red split-pins and glazed them with glossyaccents so they looks more like yummy shiny red apples...
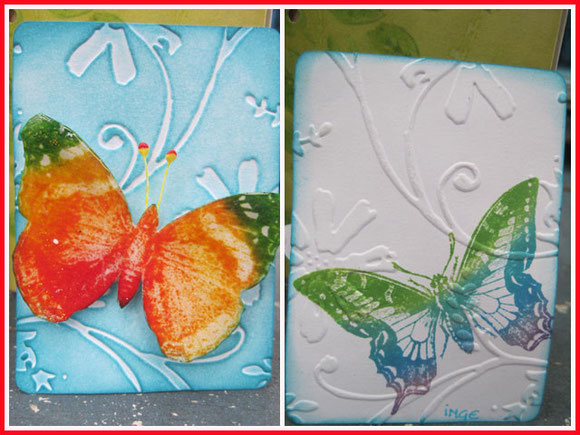
Inside a quite simple ATC for the metamorphose to the caterpillar.
I inked a butterflystamp with my selfmade rainbowinkpad ( made with stampingfoam and distress reinkers), cut it out and added two stamen as antenna. Much easier then cutting the tiny antenna from the stamp...
I mounted the stamp with 3D foam so it's ready to fly off.
On the back a stamped a butterfly with the same rainboxink and embossed the paper.
Thumbs up, if you read this whole post ! :)
I have a little give-away for you all : the tutorial how to make a little ATC-enveloppebook as all the participants of our roundrobin did.
Please don't use this tutorial to sell or teach, but use it for your own pleasure and if you make a book, give me credit and show me !!
Inge
di
05
mrt
2013
hip hip hurray ! ...3 times :)

Time keeps on flying by... and we get older day by day :)
Life kept me from blogging again, but luckily not from creating,cause I had some birthdaycards to make !!
End of january my husband became 52..
He is a "technical" man so gears and stuff suit him well.

Background is made with the new gears embossingfolder from Tim Holtz.
The gears were made with the gears edgedie from cardstock ( from an old pizzabox). First I inked the background with rusty hinge distress stain and let it dry.
I added embossing ink and vintage photo distress powder. Before I heated it, I flicked some embossingpowder off, so that's why the rusty hinge background shows through.
I love how the distressembossingpowder really make them look ànd feel rusty.
The numbers from his birthday are from the expensive wordplay die. I love this die a lot...not because it's expensive (!) but because I can make custommade letters and numbers in any color/pattern I want and I use it a lot so it's worth the money.
The numbers are done almost the same way as the gears, but I used platinum embossing powder instead of the distress powder.
My husband hopes to fly once in an airballoon with me... but I'm a "feet on the earth woman"... so I guess I will have to find other compagny for him. One day I will give this to him as a gift...

Second card is for another man/ boy I love so much... my sweet son Aran became 22 years old past monday !
Boy, oh boy.. do I remember the day he was born ? Where do the years go ?...
He's a smart boy, but because of his Asperger syndrome it's not easy to find his way in school and in this world.
But.. he's a happy boy and that's what is important for me. We give him time and time will sort things out and he will find his place in society one day.
I HAD to use the new picturewheel... this die is all about childhoodmemories: I had this as a child, my kids had this and I'm saving them for my "future" grandkids in a box in the attic.
I aged the picturewheel by using the same technique as above on the numbers and gears.
I love this technique and how you can create a different outcome just depending on the kind of embossingpowders you use.
I love, love..... washitape... I added some new ones to my already growing stash past week.
I taped the red-white washitape to cardboard and run them through the wordplaydie.
I also used the washitape for the rosette ànd to make the paperribbon on top of the tag.
I love the bold contrast between the blues and the red. This is a colorcombination I like and try to use in different ways.

The last man I love is my father-in-law. He and my mom-in-law accepted me as their daughter and not just a "daughter-in-law" :)
He became 77 past wednesday. Although he suffered from cancer, heartproblems,.... he 's a survivor and goes on day by day :)
His card was made almost the same way as my son's card. I added the filmstripdie I cut out of packaging paper and colored with alcoholinks.
The large oval with the "men" stamp was covered 3 times with UTEE so it looks like an enameled photo.

A little crown for the birthdayman...
I bought a metal punchset second hand thanks to the trading post on ATT.
I used this on a little metal sheet I had, to punch " geniet" ( Dutch for "enjoy"). This is what I hope my father-in-law may do for some more years.
Live day by day and enjoy the little moments in life that makes life big...
Inge
do
14
feb
2013
I love, I love, I love ...

Happy Valentine to everyone who loves and is loved and needs to be loved :)
About two weeks ago I removed my "winterdecoration" in my home. My intention was to make a display for Valentine, love,...but I didn't get started, was tired, had other things to do...
Past week Shelly Hickox posted her Valentine pop-up tag in her blogpost and the story about her friend ignited some ideas...
If you want to see what got me inspired, read her blogpost !
14 february is Valentines day... I don't do anything very special on this day, so I didn't want to make a display only for this day, but at least for the whole month of february...
And what do I also love ? ... sewing !!
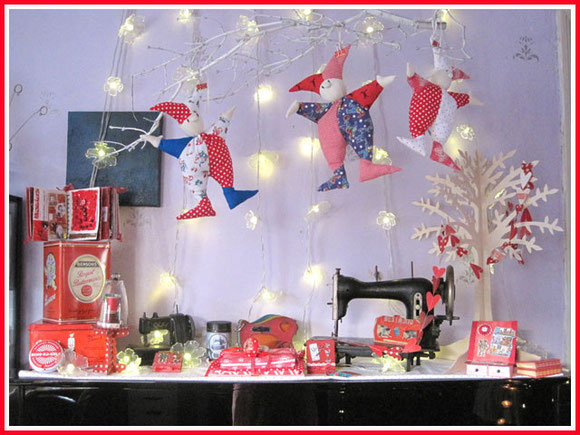
So, here is my "love" display in my house !
The overall color needed to be red and as I'm also in a white dotted period, I combined it all.
When making displays in my house, I try to use what I have.
I know you can buy lots of Valentines stuff, but what do you do with it afterworths ? Put it in a box for another year and hoarder it ? ( like we do with so much stuff already ?...)
I just made a tour in my house and picked some red items like vintage tins I use to put stuff in (these here are housing my scented candles...)
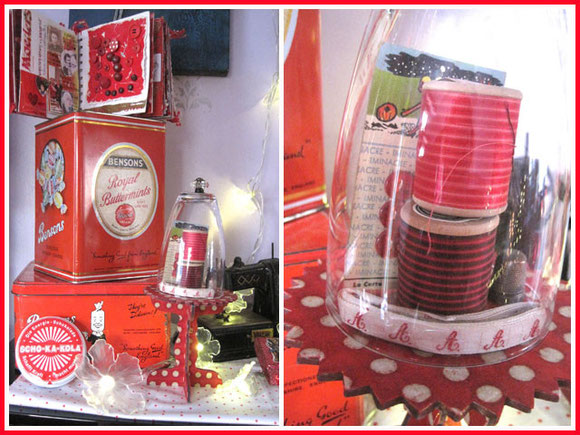
I also love to make some new little things myself for my displays like the cakestand and the bell jar.
I made some for my halloween display with Jack and Emily and back then I knew I would make more.
I bought the cardboard/foam cakestands very cheap, but they can be altered very easily and make a unique cakestand.
This time I covered the base with my last piece of this gorgeous red with white dots handmade paper. I always find it hard to cut up handmade paper, but this one I did use for several purposes in the past and was now used up to the last inch...
The bell jar is made with a drinking glass from Ikea and a know from Tim Holtz ideaologystuff. The knob is glued on with glossy accents and it sticks !
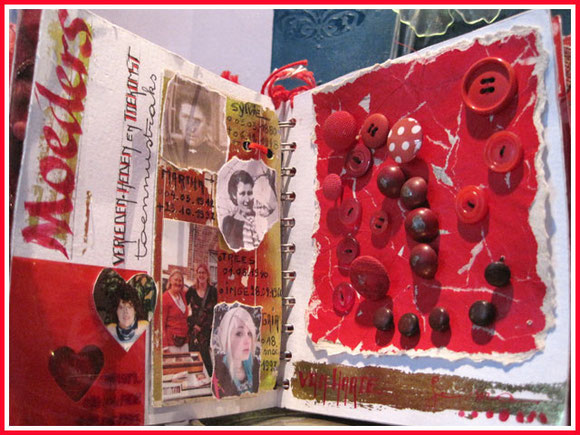
This book is my book from a roundrobin we did some years ago about "love".
This page was made by my mom and holds vintage buttons and the quote : "mothers are like buttons, they hold everything together" :)
My mom also incorporated photos of my daughter, my sister and me, me and my mom, my grandma and my grandgrandmother.
This line is females do all have the genes of creativity in them :)
In my fabricstash I use to make my harlequins are also some lovely red patterned fabrics. Folding them and wrapping a red with white dots ribbon around it make another part of the display. On top a vintage mushroom crocheting spool..
Behind the fabrics... a sewing machine book !
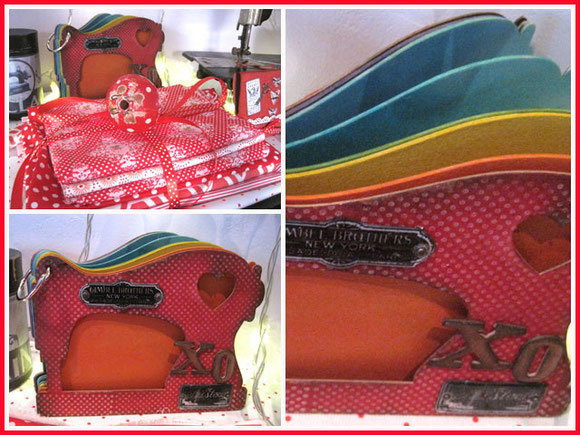
When we were in London past year at the craftshow and we met our UK friends, Bethan had this little cardboardbook for us.
Rummaging through my stuff for items to make my display my eye fell on this book... perfect !!!
It was still plain cardboard, so I started decorating it with distress stains and some stamps.
It 's not finished yet, just the start of a "samplesbook". I think I will add pieces of fabric that I like in here, or selfmade pieces with patternstamps I like...
I colored all the cardboardpages in a different color of the rainbow. I love the sequence of this colors ! Every page will be decorated in each colorscheme...
Thank you Bethan for this book !!
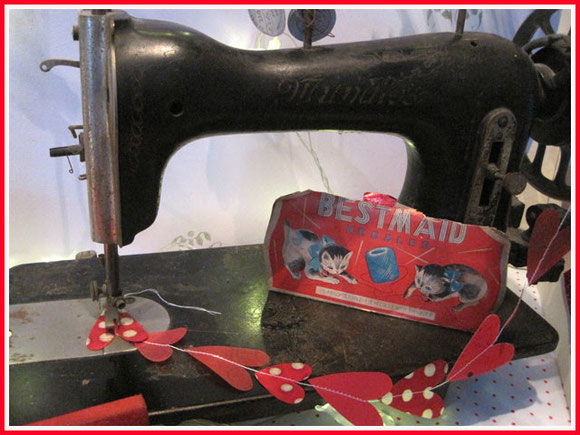
This photo shows the direct inspiration from Shelly's blogpost...
The stitched hearts she saw in her friends house, was used in her pop-up tag and got me started to make my "love sewing" display :)
I searched for some paperscraps with red hues and used the movers and shapersdies of the hearts of Tim Holtz to cut the hearts.
Just run them through my sewing machine to attach them together and make a garland of it.
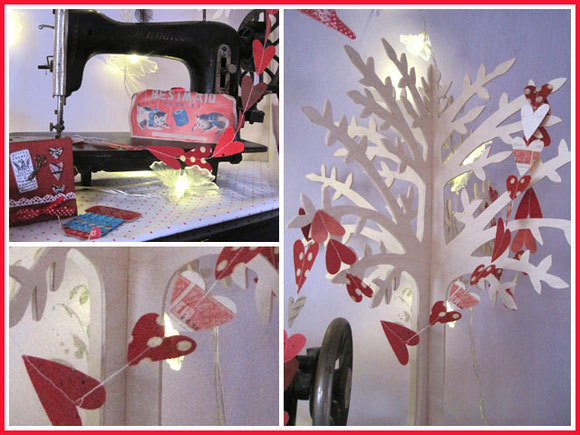
I attached it to the feet of an old sewing machine and wrapped the garland on the wooden tree.
I have two old sewing machines I scored at the fleamarket. I had them for years, but they take a lot of space.
I disassembled them and the sewingmachines are on a mantle in my sewingroom.
The metal parts of the sewingtables are now in my garden. With a large floortile on top, they make perfect gardentables outside.
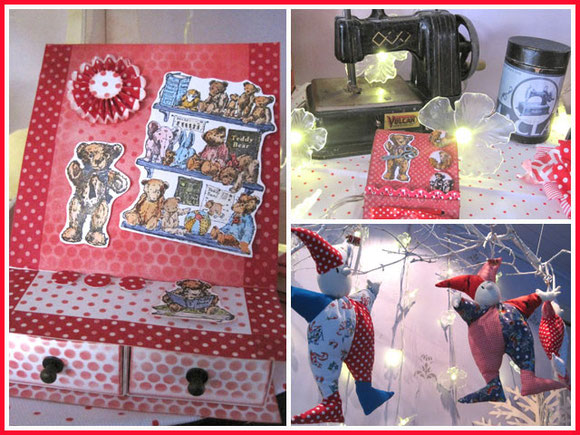
I also brought downstairs the vintage childrenssewingmachine I have.
A handmade easel-drawercardbox, a sewingneedlebook and some of my handsewed harlequins fitted in the colorscheme.
I love pop-ups and already made several in books and cards, but I never made a pop-up tag like Shelly Hickox did.
Why not trying this different size ?
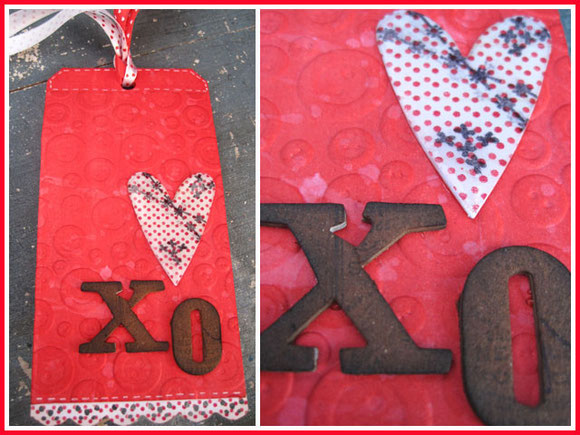
Front of the tag is embossed with a buttonembossingfolder.
The heart is a piece of paper covered with washitape and cut out with the heartsdie.
Some years ago I did not know what XO meant.... until my online friend Michelle Ward made me a blogpost about it !
In Belgium we knew the X as a kiss, but didn't know the O was a big hug !
The XO is made of cardboard, cut out with the wordplayday, inked with vintage photo distress stain and overstamped with a textstamp.
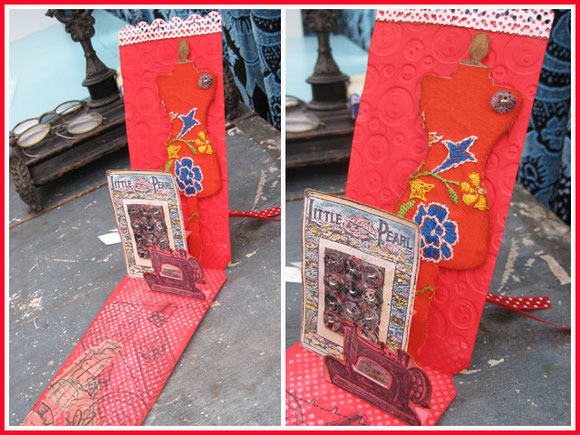
When you open the tag, a little sewing machine and a buttoncard pop up !
I don't have the special dies to make pop-ups but these pop-ups are easily made with tabs. I used this technique in the past to make all my pop-ups.
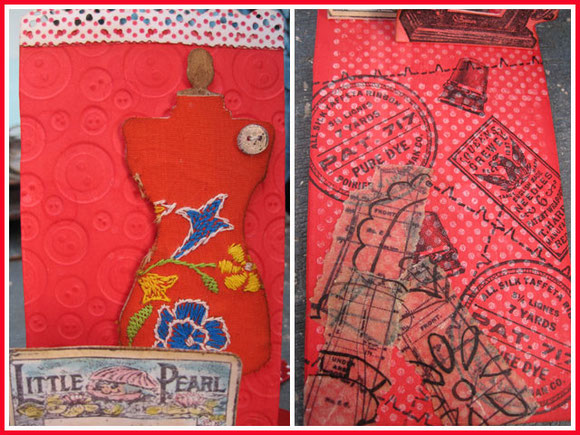
One of the things in my stash was an embroidered card... I don't really liked it as a card, but the embroidery was handmade... so I couldn't throw it away.
It came in handy to use in this sewing tag.
I cut out the fabric with the dressformtag and glued it on a papercutout with the same dressform.
It has some orange hues, so I inked the sides with vintage photo and mounted the dressform with 3D foam on the back so it stands out enough.
The part of the tag that lies down is stamped with stamps of Oxford impressions on a white dotted stamped red background.
I also had some patternstamps I stamped on vintage patternpaper and added them on top of the background.
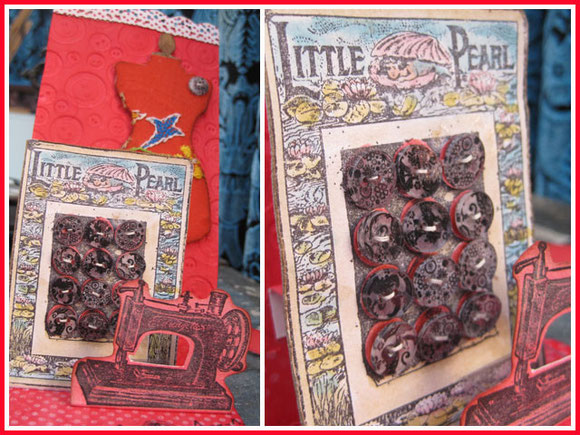
The buttoncard is from the same stampset of oxfordimpressions.
I colored the detailed background in with distress markers and made "real" buttons for it.
My latest addiction ....making embellishments from shrinking plastic :)
One of the things I still have to try is : do the ink stays on the buttons if you wash them. If so... I can make my own decorated buttons to sew on selfmade clothes !
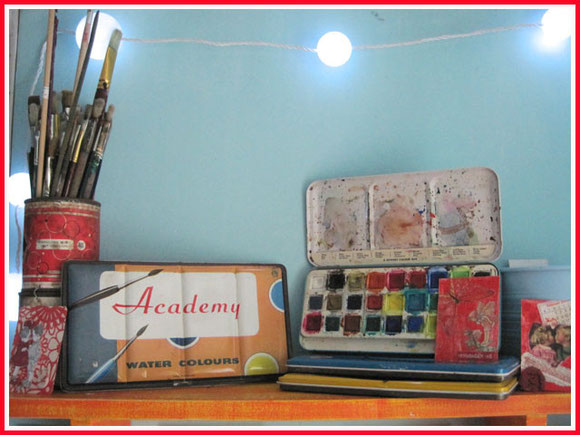
The second display is on a shelf in my laundryroom. This is what you see when you come in through the backdoor in my house...
I love sewing, but I also love paint and vintage paintboxes...
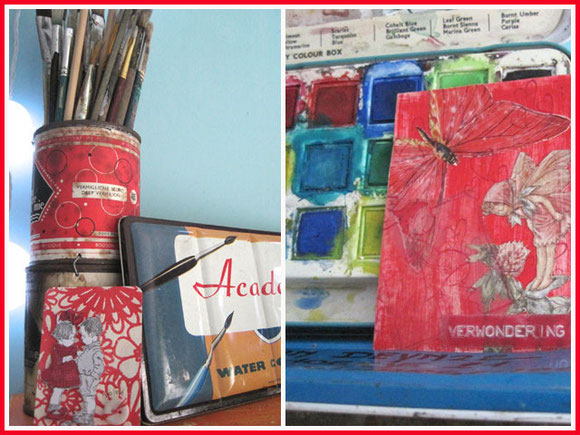
I added some "love" ATC's I made in the past.
I love to incorporate handmade projects in my house and the displays I make.
Every time I pass the displays I have to smile... It gives me a happy feeling to see nice things.
I love... so many things...
Happy Valentine to you all !
Inge
zo
10
feb
2013
sew colorful...
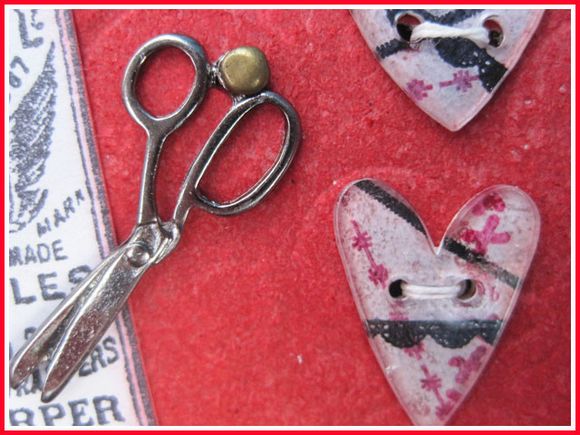
We have a break from school for a week and I embraced the time to create...
If feels sooo good !
One of my friends, Dorien, became 50 yesterday ! I told her she has still the half of her life to live, so we had to celebrate this special birthday :)
For her past birthdays, new yearsgifts,... I always made her something pink, sewing related or with a corset,...so I stick to that tradition so she can "collect" my gifts.:)
I made her a tagcard, based on the tag from Tim Holtz tagdie and the easeldie so it can stand up.
For the background I inked a detailed stamp with white ink and dryed it with the heatgun. When you overink with distress inks the white resists and shows the stamp subtle in the background.
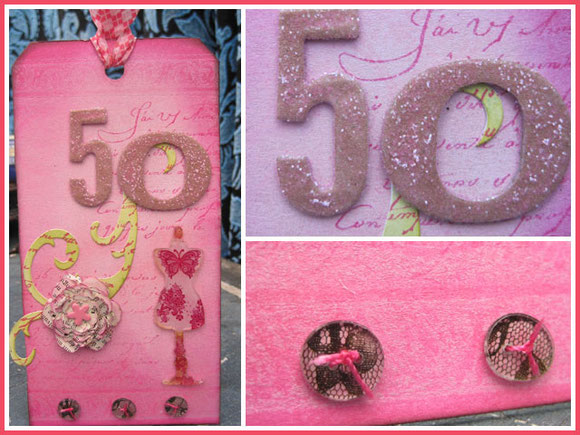
A textstamp in pink added even more interest to the background.
Even me, at 47, finally needs "glitter", never thought I would like glitter, but I do love it on cards :)
I cut out "50" from cardboard with 2 sided-tape on with the worddie and added pink glitter.
I cut out 3 buttons with the "sewing" die of Tim Holtz out of shrinkplastic, inked them with permanent black ink and stamped the lacestamp on the shrinkplastic. And then I shrunk the plastic with my heatgun : voila, custommade lace mini-buttons.
The dressform is also made with a cutout from shrinkpaper. I love how the lacestamps come out on this.
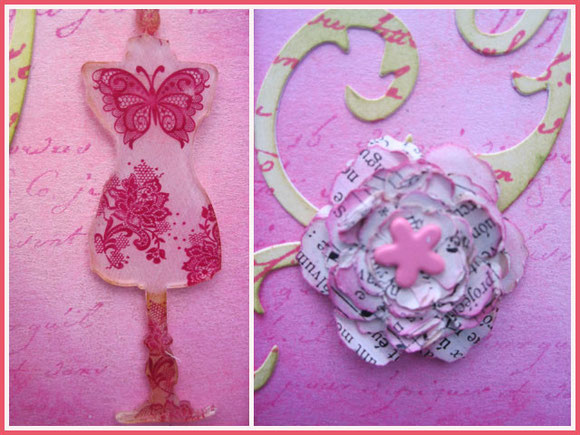
One of the techniques I learned the students in my workshop past week is to overstamp an inked background. Much nicer to see then just an inked scroll.
A paperflower made with very thin old musicpaper adds some texture to the tag.
I while ago I bought the matchbookdie... but haven't used it yet. Time to USE what I have in my supplies !
I pinned Tammy Tutterows "for my love" matchbook a long time ago, so she was an inspiration to get started.
My friend loves sewing too, so I made her a little book to hold her sewingneedles together.
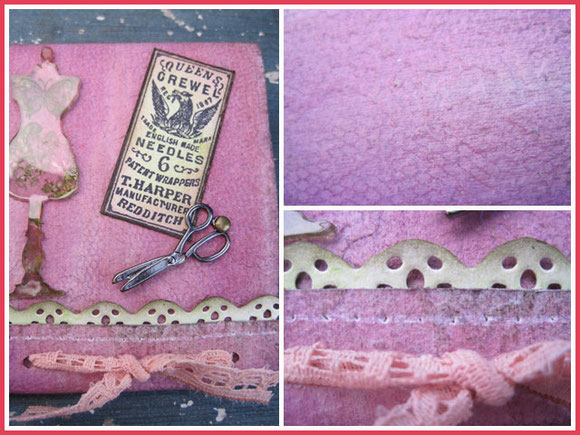
The matchbook was cut out with the matchbook die out of grungepaper.
I colored the grungepaper with distress stains in pink and the white one.
When it was dry I stamped on it with a lacestamp ànd embossed it with an embossingfolder with "fabricprint".
With the laceborderdie of Tim Holtz I cut out a little border of white paper and aged it with distress inks.
I pricked little holes under the border and connected the dots with a white pen so it looks like it's stitched.
The dressform was made the same way I did on the birthdaytag.
A stamp of "sewingneedles" from Oxford impressions and a metal scissorembellisment finishes off the front.
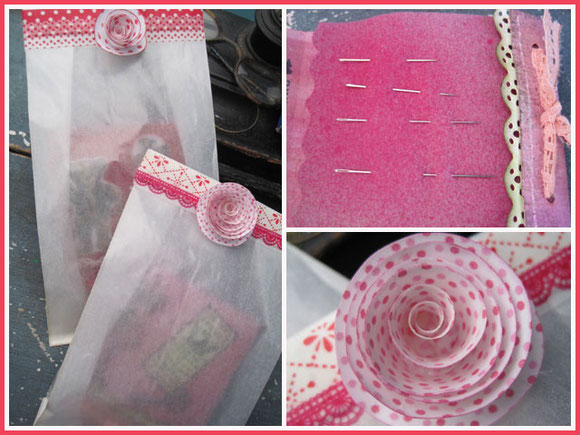
On the inside I added pages in felt to put the needles on. I only got gray felt and I colored it with dylusionsspray "bubblegum pink" to match the book.
The edges got some decoration with an edge die.
Half of the present is how it is presented..
I put the gift in a bag, added tissuetape on top ànd one of my favorite Pinterestfinds : an easy to make flower !
This was fun to make, so ... I made more !

I found out both grungepaper as grungeboard work perfect for these sewingbook.
You could make them from sturdy paper, but this sewingneedlebooks needs to be sturdy because they will be used a lot.
I think that waxed paper would be a good alternative, but I have to try that out in the future.
All the distressinks work perfect on the grungpaper/ grungeboard, so I made some really colorful :)
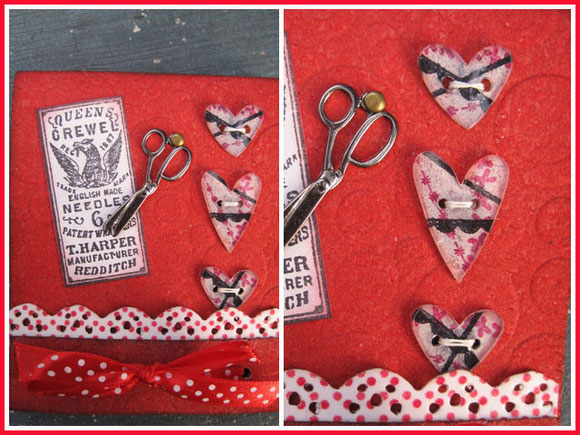
This one is made from grungepaper and embossed with a buttonembossingfolder.
The heartbuttons are my favorite on this one.
Hearts were cut out with the movers and shapers heartsdie from shrinkplastic.
I stamped stitches with a permanent black and reddish ink ( Stazon). I punched large holes in them and then shrunk them with the heatgun.
I overinked the back of the buttons with white permanent ink to make them stand out more from the background because they are clear.
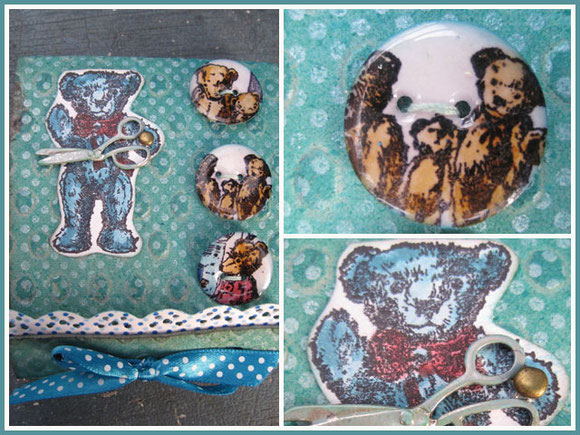
A blue bear-needlesbook...
On this book and the next one I used dotted grungeboard I have in my stash for .. years... but didn't find a good use for it until now.
After coloring with blues of the distress stains, I stamped over it ( after drying) with a permanent white ink and a little dotsstamp.
I did the same on the next book but then in red.
No shrinkplastic this time for the buttons, but plain paper...
I stamped bearstamps with permanent black ink on heavy paper.
Looking through the circlepunch I looked for nice details and then punched three circles.
I punched little holes so I could stitch them later to the grungeboard.
All images were colored with distress markers.
I have these for almost a year, but don't use them very much. I still prefer/ preferred the few copic markers I had for coloring, or using the distress stains with a waterbrush to color in.
The distressmarkers often leave strokes when you color and you can hardly blend them. The paper starts pilling often too.
But that changed :)
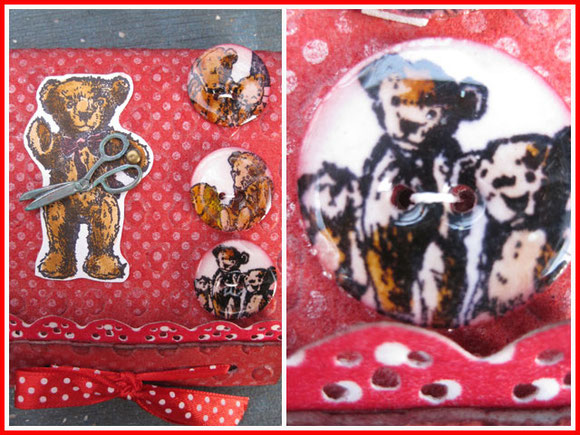
On Tim' last video on distress markers ( distress marker coloring here) I learned that it all depends on the paper you use and the distressmarkers DO blend, but only on good watercolorpaper which I don't have.
BUT.. Tim showed another technique... Picking up a drop of water with the distressmarker and then start coloring. You start light but end up with your usual color of the distressmarker.
I tried this out and it works perfect on my cheap paper !
I could create different shades in my coloring and I love how this technique worked !
After drying I added four layers of UTEE on the circles which create the glossy buttoneffect.
Isn't that bearbutton cute ???
I love this technique to create my own embellishments.
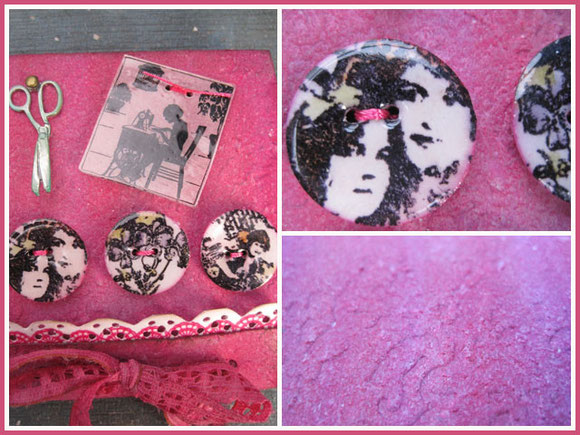
Another needlebook, but made in grungepaper and a pink one...
Almost all the same techniques as above, but an extra embellishment in shrinkplastic ( the lady with her sewing machine)
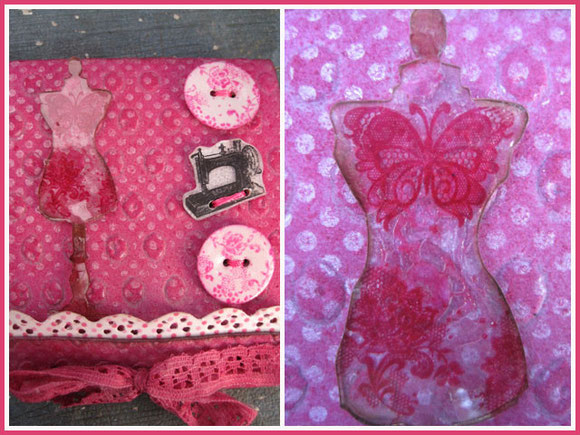
Another pink book but made with dotted grungepaper, made in the same way as the blue and the red bear-books.
I also added a shrinked sewingmachine on this one.
These needlesbooks will be on sale on our yearly creativity-event Ratteljee which we will have on the 5th of may !
I know I have still some time to make stuff, but I need the time to make more cards, paperboxes,.... so I have something to show...
But I did not only create to sell... I finally made myself a needlebook !
I had my needles on some felt pinned together with a safety pin, but now I have a real needlebook :)
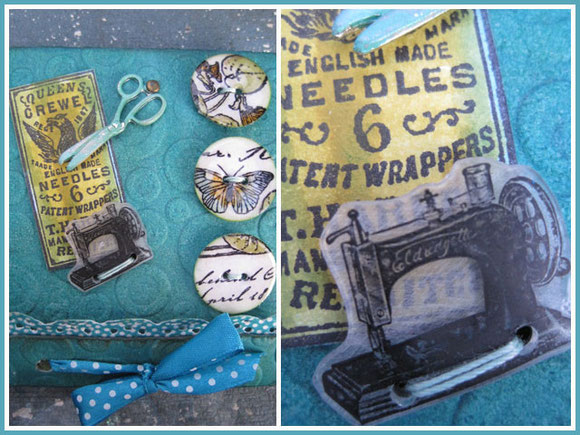
In my blues of course...
All the same techniques as above !
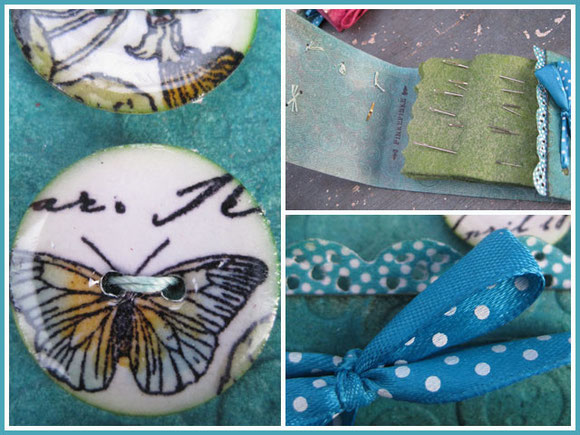
I love my selfmadebuttons... just one large art nouveaustamp I like and then picking some details to punch a circle out.
I used my needlebook constantly the past days, cause now I'm busy handsewing my harlequin softies !
I love how making a present for someone, evolved in making more varieties ànd a gift for myself :)
Inge
zo
03
feb
2013
Can I give you goosebumps and a stepladder card? ....
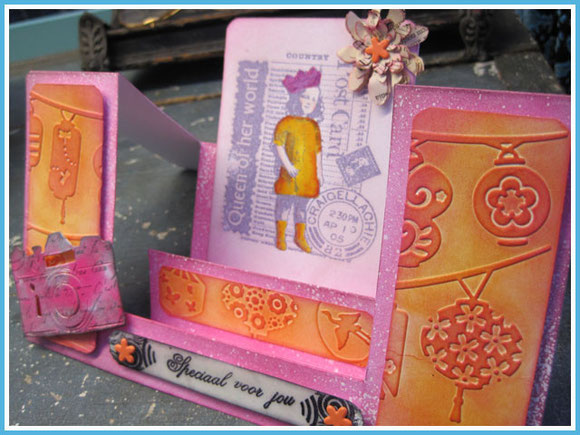
I created a new mechanical card. At least "new for me" : a stepladder card !
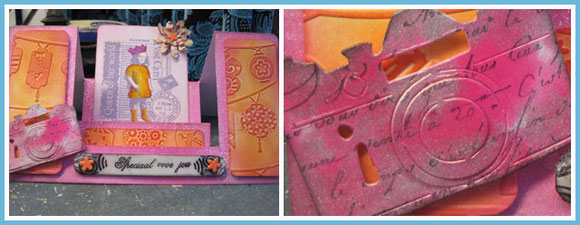
There are tons of mechanical cards to discover and I want to learn to make them all :)
For the workshop of "Pinkepinke" in my home I wanted to share with my students my most recent discovery : a stepladdercard.
I found this card on a Technique Junkie CD I bought a while ago.
I started to make some examples, but because the measurements are in inches and not in centimeters, the card didn't fit in a regular European enveloppe.
So I had to adapt all the measurements to make it fit, to keep the mechanism moving and let the card fold open and stand upright and to keep the sight of the card coordinated.
After some attempts I got it right.
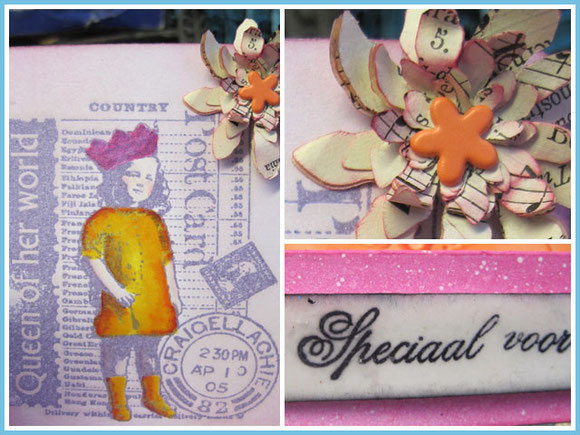
I wanted to learn my students the mechanism of the card, but also incorporate different techniques they learned in the past and some new ones.
We created the background of the card with goosebumps: a product of Tsukineko that creates white splatters on the card that resist the ink you put on top.
I showed a " universe-card" with this technique in my previous blogpost, but the cards of today show the versatility of the product in any color, in any theme.
Using the product also got me thinking...
This product is hard to find here in Belgium ( I bought it on Blitsy in the US), so can I create a substitute for my students ?
Can I give you my "goosebumps" ? ... Here is a little gift for you: my recipe...
Put some regular gel medium ( glossy or matte) in a spray bottle and add warm water in little amounts. Shake everything and add water if needed until you get a consistency of running yoghurt.
That's it !!
Spray on your paper and let it airdry. When dry, ink over it with distress inks in any color ( darker or intenser colors make the white dots really pop).
Wipe the nozzle of the spraybottle after use so the nozzle don't get clogged by dryed gelmedium. If so, just use a needle to open the nozzle.
This is an alternative that works as good as the goosebumps of Tsukineko. You can make it yourself if you can't buy it locally ... and it's much cheaper...
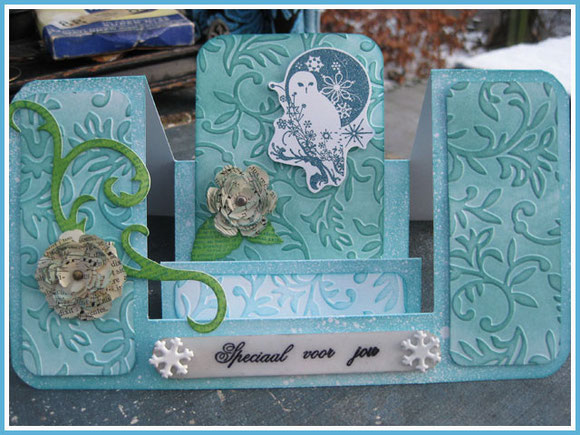
Another example I made for the workshop.
Goosebumpsbackground in peacock blue distress ink.
Most of the panels are dry-embossed and inked with distress inks.
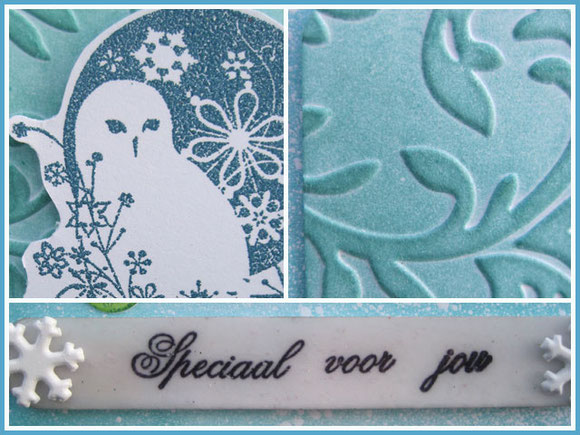
With the dry-embossing we also practiced the inking with distress inks so they blend very well and you don't get streaks or marks.
I also wanted to learn them more about the different embossingpowders and which one to choose depending on the results you want.
I especially wanted to show them how you can emboss a detailed stamp.
The Adirondack embossingpowders are very good for this purpose.
Another technique was how you can make a fake-enamel label.
For most of the students the UTEE was completely new.
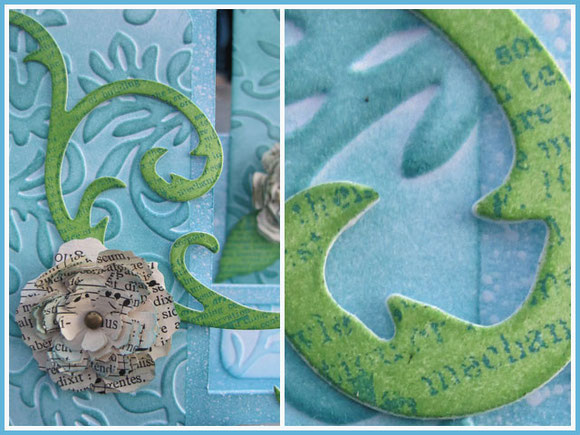
More techniques : how to make a flower with the decorative flowerstrip ( Tim Holtz) and how very thin musicpaper layered in several layers makes a nice flower.
The last technique : inking a diecut with distress inks and overstamping with a textstamp. Easy peasy, but so much more interesting then just inking.
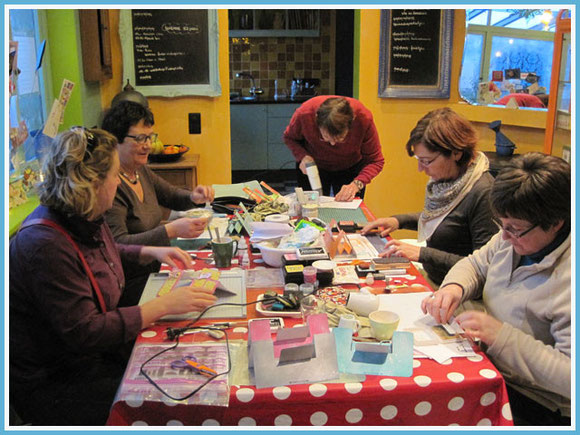
Only half of my regular students could come because of birthdays of grandchildren or a 91 year (8) old mother, or a birthdaydinner,...
I'll be looking for another date to repeat this workshop for them so they at least get the chance to learn this stepladdercard.
The students who were there showed this stepladdercard is awesome !
They all worked very hard, very detailed.. love this students :)
Their creations are all unique, although we used the same techniques.
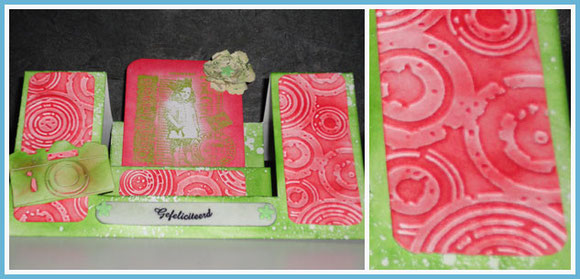
This is the card of Patricia.
I love the combination of the red and green: not at all a christmascombination, but a happy, girly colorscheme !
The mowed lawn green distress ink really shows the effect of the goosebumpsproduct.
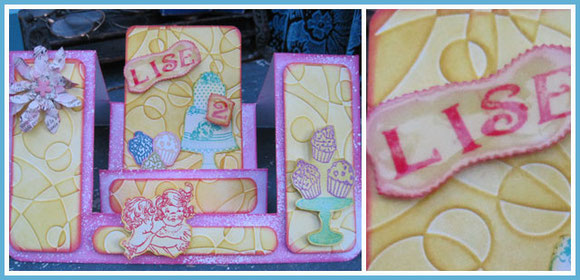
What I love about Katja's card for the birthday of her 2 year old niece Lise is the colorcombination.
I never used pink( picked raspberry distress ink) and yellow ( lemonade distress ink) together, but this is a colorcombination to remember and use !
I also love the use of the embossing folder. I love this one, but haven't used it a lot yet. Katja shows how playful this one looks.

A birthcard for Loïc from Katrien.
She surely uses my favorite colors, but she also shows here how gorgeous the blending of the distress inks can be. Love the use of the circlesembossingfolder here too to create a playful background.
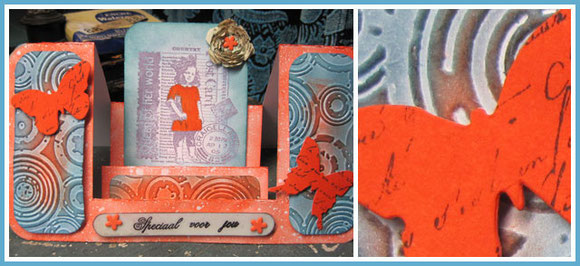
Another birthdaycard for a girl and again an more anusual colorcombination for me, but the red and the blues work perfect together.
Leen used the textstampingtechnique on the cutouts of a butterfly.
I forgot to take a photo of Kristine's card ! If she send a photo to me I'll show her card to you too.
We had a lovely afternoon yesterday and my students didn't only learn from me.
I learned a lot from them too ! :)
I hope you like my "goosebumps" and get inspired by all the creations you see here !
Inge
zo
20
jan
2013
enjoying this winter moment...now...

I'm enjoying the moment...now...and it makes me happy...
I was able the past 3 days to create a lot.
First I made two examples for my workshop for children on the 16th of february. We will be making " dioramacards".
This is one of the mechanical cards with a big impact.
You can send it flat through mail, but once opened you have a chunky card...
I know there will be children between 6 and 13, both boys and girls, so I wanted examples that speek to both.
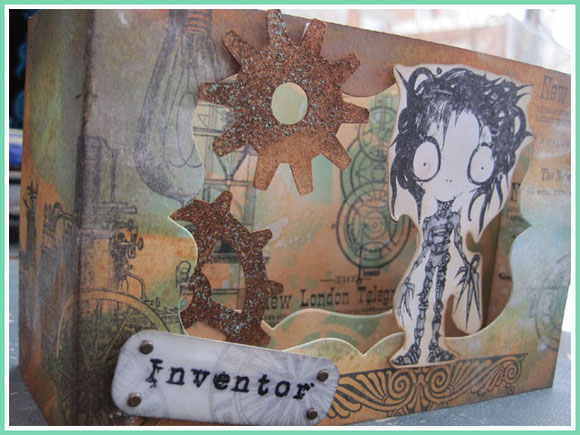
If you are a regular visitor you'll know that I'm a fan of Tim Burton...
I was very happy when Anja, a friend I met online, sended me this "Edward Scissorhands".
I had him for a while, but now he finally got his setting...
I used stamps of the several steampunk stamps of Oxford impressions to create his world.
The gears are diecuts of Tim Holtz, embossed with vintage photo distress embossingpowder and a bit of regular verdigris embossing powder.

The start of the dioramacard was sturdy white paper which I colored with distress inks and stencils and the front part with distress stains.
I love how this one turned out. I don't think the children will know Edward Scissorhands, but it's the moment to introduce them to the world of Tim Burton :)
And if they don't like this one... no problem.. it's just an example. They can actually choose the theme they want. I help them with the techniques and materials, but in the end the endresult is completely their choice.
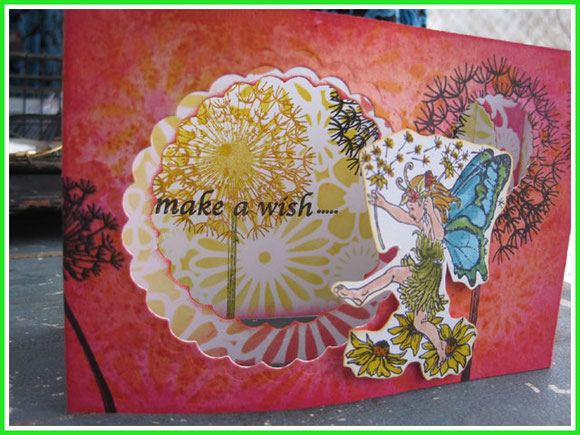
This is the bright or girly (? ) example...
For the peek-through-holes of the first card I used the ornamental mover and shaper of Tim Holtz.
Here I used two different scallop dies of nestabilities to cut out the holes.
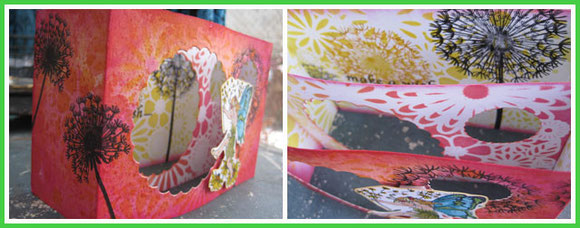
Distress inks, distress stains, distress markers,...that's what I used to alter the white card and turn into a colorful card.
I had several creative to-do's on my list when I got an email of the mom of one of my Poppyclasschildren.
Could I make 8 birthdaycards for childeren between 4 and 8 ? She sended some photos and some specifications about the interests of the children.
This is something I also like to do: make custommade stuff...
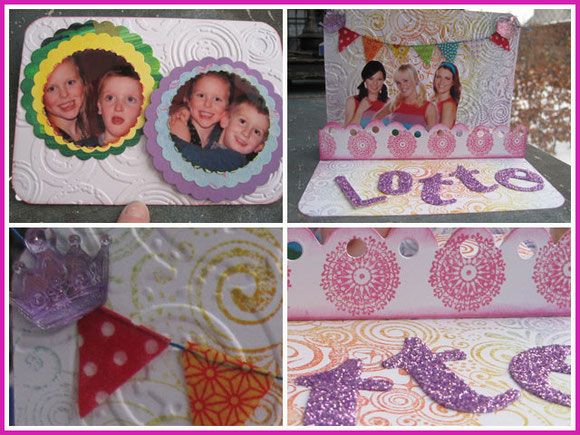
Lotte is a K3-lover, a Belgian girlmusicgroup that's quite popular with the young kids for years...
I made a pop-up card for Lotte with the 3 girls of K3 who pop up when she opens the card.
Lots of rainbowcolors which K3 use a lot in their dresses;
Lotte's name was cut out with the wordplaydie of Tim Holtz ( an expensive die... but I use it quite a lot, so in the end worthwhile the money).
I glittered the letters with the glitter from Ranger I bought on Blitsy a few weeks ago...As they had a good deal on these, I ordered several colors...
Now I have to use them :)
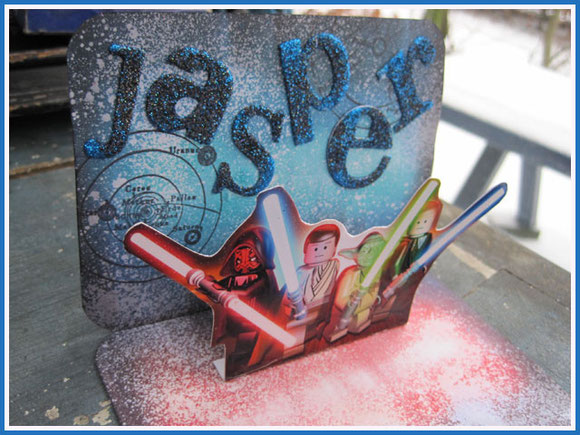
Jasper is fond of Star Wars, so I made him a card that looks like the universe...
A great product to create this "stellar" background is "goosebumps" from Tsukineko. Just spritz on your card, let it dry and overink with distress inks.
I downloaded a Star Wars legofigures image and printed them on photopaper. They pop up when the card opens.
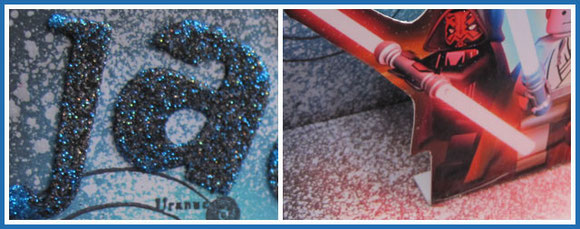
As it is Jaspers birthday he needs a bit of glitter, even he is a boy :)
Black and blue glitter on his name...
More birthdayboys... 4 years old...and fond of "ROX", a childrensoap on the Belgian televison about... cars...
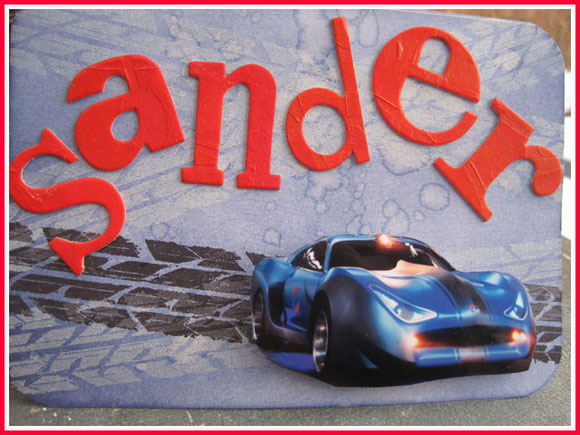
Luckily I recently bought the roadtrip stampset of Tim Holtz in Blitsy.. never knew it would come in handy so soon !
Background was inked with distress inks and splattered.
I stamped the wheel marks first with white ink as a subtle background and added a black one too.
When I have a commission like this I google images.
Seeing the images of the cars immediately gave me an idea for the colors of the cards.
I also downloaded the image of the car of ROX.
The car is mounted on an action wobble spring which make the car wiggle when the card is moved.
I think the 4 year olds will like this..
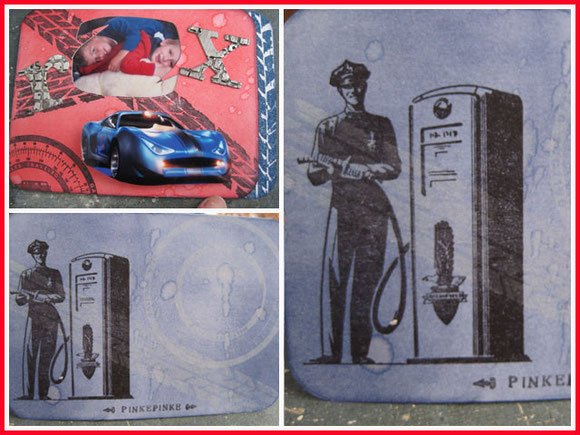
For one of the ROX cards I used the ROX logo and inserted the photo of the birthdaykid Vince and his friend in the "O".
On the back more stamps of the "on the road" stampset.
Two birthdaycards for 4 year old girls..
These needed at least a bit of pink !
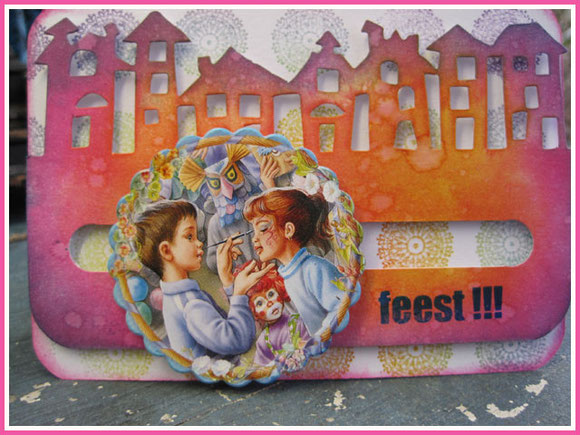
These are spinnercards: another favorite mechanical card.
When you move the card the circle turnes round and round.
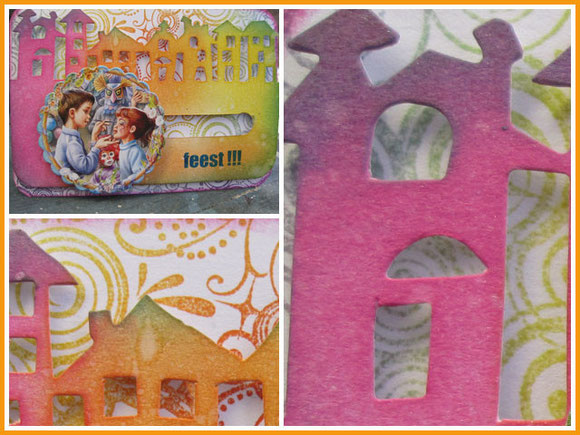
I'm glad the distress inks have finally some bright colors in the sets too !
Love this "picked raspberry" pink !
It blends beautiful with the other distress inks.
Tibo, who's mom gave me the commission for this cards is one of my Poppyclasschildren with a mental and physical handicap.
He is almost always happy and has loooots of energy.
He loves watching television ( like most of our kids...) and in Belgium STUDIO 100 is a compagny that makes several kidsprograms, but even as a teacher I have to say they are good...
One of Tibo's favorite characters is "kabouter Plop" ( "gnome Plop").
Tibo becomes 6 next week and I wanted to make him a birthdaycard he can handle himself, so it needed to be sturdy and waterproof...
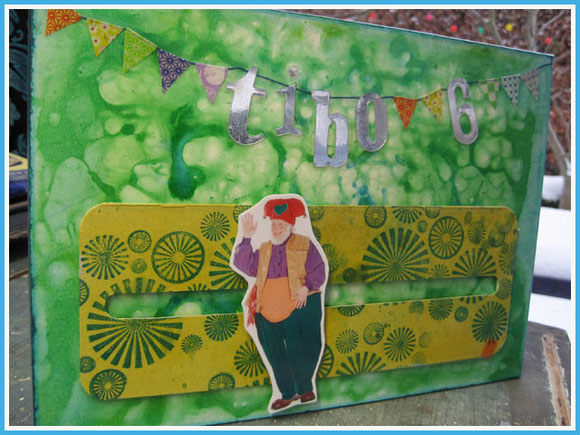
I took a large sheet of cardboard and colored it with distress stains.
I made a garland with washitape and the name TIBO was cut out of mirrored cardboard.
I think Tibo will love this shiny mirrors on his card.
To make the card "Tibo-proof" I sealed everything with sticky plastic, so the ink won't come off if he tastes his card...
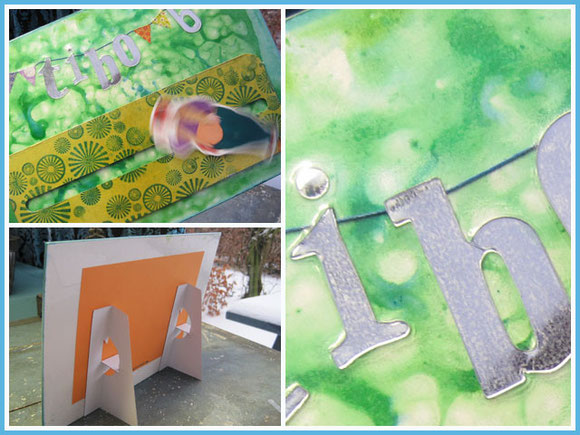
It's a huge spinnercard and gnome Plop spins from left to right.
Maybe Tibo can do this himself or with the help of mom and dad or his little brother.
The card can stand up by the help of the "easels" to enjoy the viewing, but I hope Tibo has fun moving his card.
Lots of creativity the past days in my veranda.
Outside everything is still white and today it snowed the whole day...
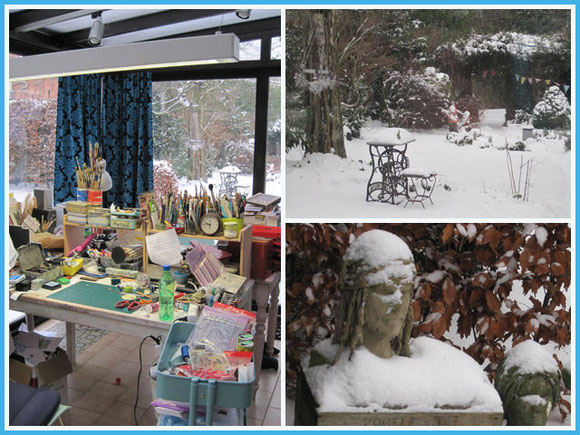
This is the view I have from my veranda into my garden...
I suddenly had the thought " I feel happy... right now..."
What a perfect thought to celebrate ! :)
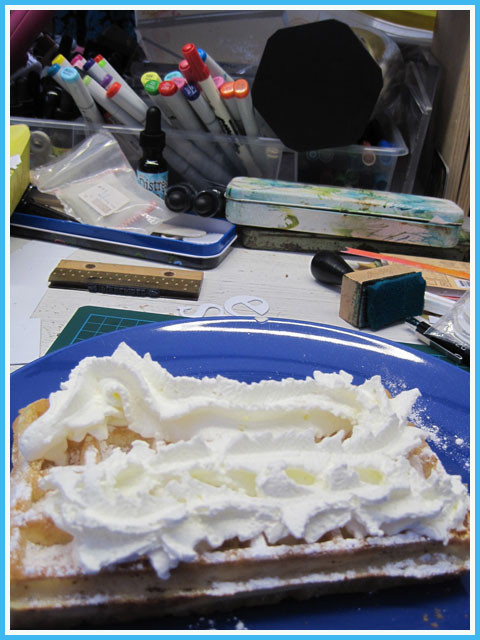
MMMM... a warm Belgian waffle with whipped cream...
I enjoy the wintermoment...now...:)
Inge
di
15
jan
2013
joy from Pinterest...

What did I say in my last blogpost ? No winter yet ?...
Yesterdayevening it started snowing here in Belgium and this morning I woke up in a white world !!
Forgive me my excitement, but we don't have snow often and yes, I'm scared to go driving with the car,but... I'm still glad as a child there is snow !
I arrived safely at my school this morning and I had survey on the playground before school started...
Snow everywhere.... The children from my school with a mental handicap were also over the moon with the snow...
How can you teach them how you make a snowman ?
By making one yourself !!
We started making huge snowballs but then the bell rang : time to go to class...
In the morning I normally had two hours for paperwork in which I don't have children at that moment...
Should I ... would I.... yes... I do...:)
I grabbed a shawl, some bottlecaps, rubberboots, searched for twigs in the garden of the institute and I finished the snowman we had started in the morning and the one I had pinned from Pinterest.
As soon as I had seen this snowman on Pinterest, I had promised myself : " IF it snows in Belgium...I'll make this one..."
Lots of laughs and excitement when the children got back from the classes to the playyard...
They had a snowman and he looked like this...!!!!

A snowman standing on his head ! Or is he doing gymnastics ?...
I had so much fun in seeing their faces.
Pinterest and this link brought some extra joy in our schoolday !
I love you Pinterest !!!
Inge
a 46 year old who sometimes act like a child...but enjoys it ! ;)
di
08
jan
2013
blue and white cosiness...
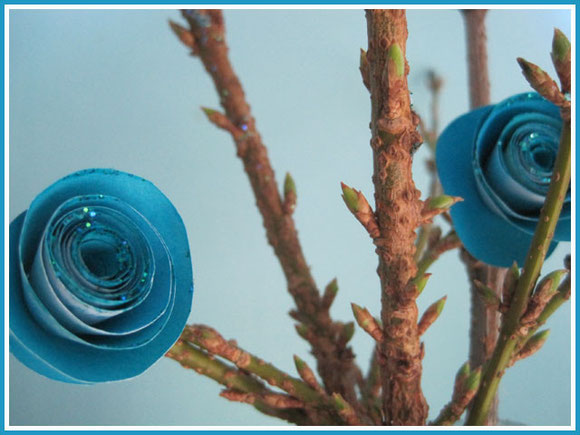
For the moment it's not really winter here in Belgium...
Not exactly cold, but no sun, some days pouring rain, but no weather to stay outside, so I love to make it cosy inside my house.
I was very late with my decorations for Christmas due to busy at school and being exhausted once home, so two days before christmas I finally found the time to get rid of my autumn display...
I immediately decided I skip the christmasdecorations and make a more "wintery theme" in the house in white and blue with lots of lights...
I love lots of little christmaslights inside the house during the wintermonths. Every morning I lit them all. And then comes a day I start forgetting it... that's the sign darkness is going by and I have enough "light" in my day again.
The lights are my treat against the winterblues: cheap and very effective !
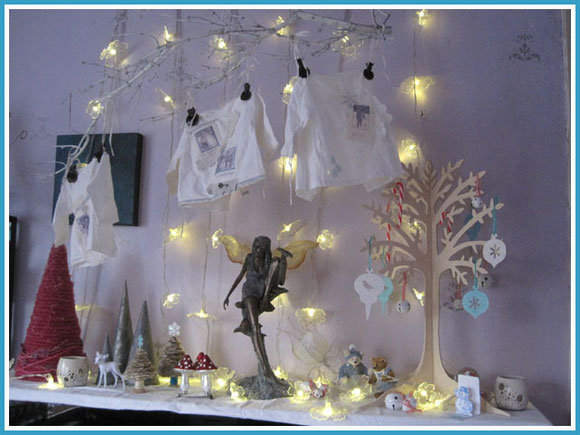
This is the winterdisplay on my piano, my favorite place to make a little vignette.
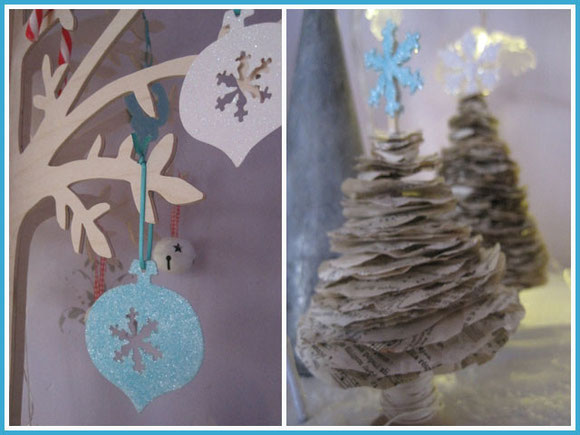
The weeks before the christmasvacation I longed to "create" some new christmas/ winterdecoration.
As a pinterestaddict ( yes, yes... I really admit and I'm not ashamed of it...) I found lots of nice stuff to make.
One of these want-to-do's are the trees made with papercircles : super simple but such nice effect.
Thanks to Els of Bestamped I got some tips to give some room between the papercircles by adding here and there a little piece of cardboard.
The trees are made with several circles I made with circledies in several sizes and just pinned on a wooden skewer.
For the base I grabbed a wooden spool and just inserted the skewer.
For the top I glittered icestars I cut with the movers and shapers die of the icestars.
I'm not a glitterwoman, but since I saw how Jennifer Mc Guire used glitter on one of her cards in one of her onlinecardclasses ( they are worth their money !! ), I used glitter for the first time in my life.
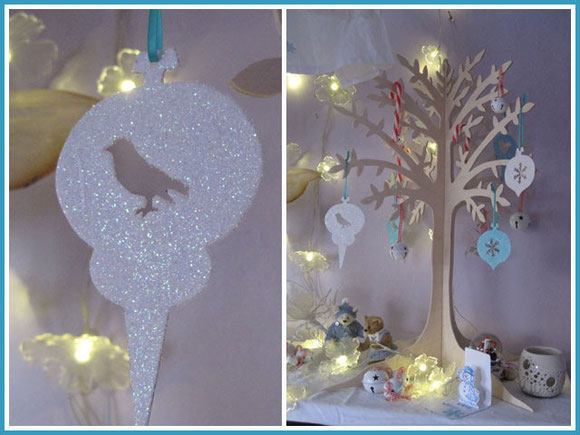
The icestars are diecuts as are the ornaments. I just added wide strips of doublesided tape on boths sides of cardboard until they are completely covered.
Then I diecut the shapes I wanted adding a bird or an icestar mover and shaper into the ornaments.
Adding glitter to the tape and voila : ready !
Super simple, but I love the effect. I'm a glittergirl now...
The tree was a find on a christmasmarket I found in the beginning of december. It's made in an institute for handicapped people and as soon as I saw this in their booth, I knew this was a must-have.
You will see this tree in coming vignettes.. changing from a wintertheme to a blossoming tree changing to ...
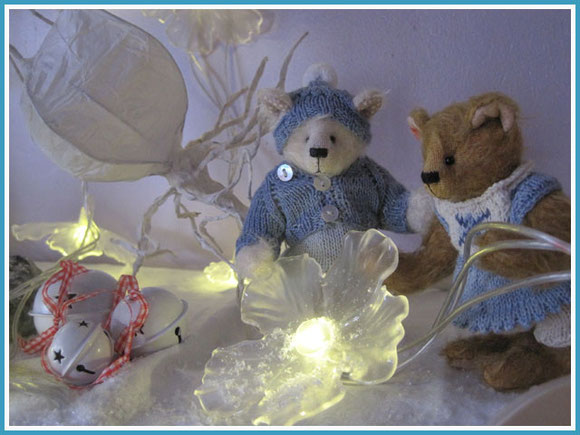
The handmade bears I got from my mom past year and made by my friend Anne Bearheart, are wandering through my winterwonderland...
The big white flower was made with metalwire and tissuepaper and was a project from my daughter in school 2 years ago. I love to use this one in my displays too.
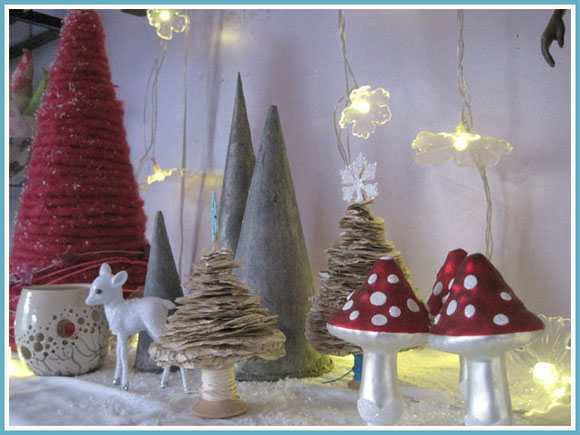
Another part of my winterscene...
Glass toadstoolornaments in red with white dots: I love the combination of red, blue and white.
The paper trees and metal cones my stepfather used in the past to make candles. I love circles and balles, but I am also fascinated by cones...
The pink cone was a handmade "tree" I bought in a flowershop past year : it's made with pink felted dreadlocks, a bit of thread around it and stars made of wax.
A little white sparkling fawn from our trip to London in september finally found it's place in my home.
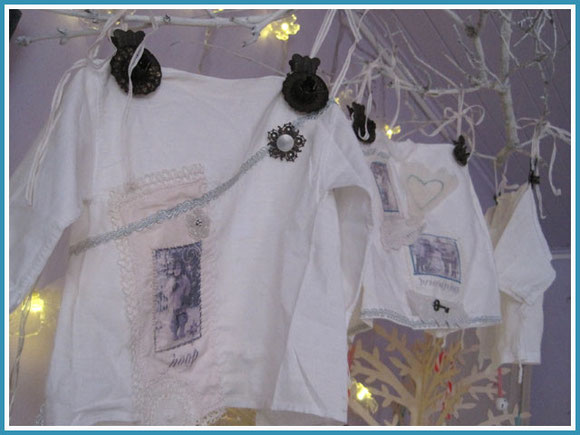
Above the piano hangs a white spraypainted branch. It hangs there the whole year: perfect to hang something from it in an easy way.
I made these fabric ornaments some years ago with vintage first babyshirts: altered photos of my kids as young children in the snow transferred on fabric and sewed on.
I added some vintage brooches and other findings, lace, trim, felted heart,...to finish them of.
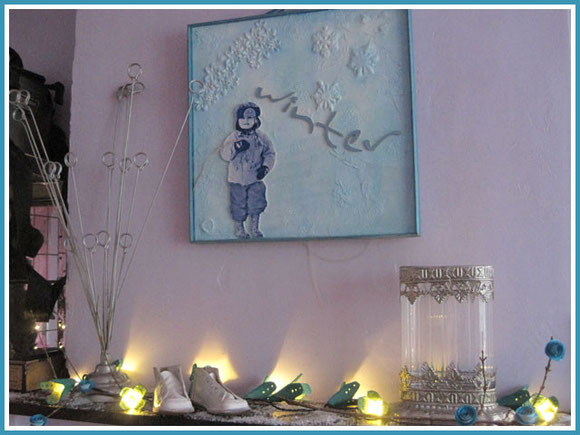
Another winterdisplay in the house on a mantlepiece.
My wintercanvas with my daughter as a 3 year old ( she's 19 now...). Lots of layers with paper, lace, embellishments, paint,...
The photo of my daughter and the word "winter" are cut out from foamboard so they add some texture to the canvas.
On the mantlepiece itself two newly made decorations...
Branches with paperflowers and fairylights made from eggcartons...
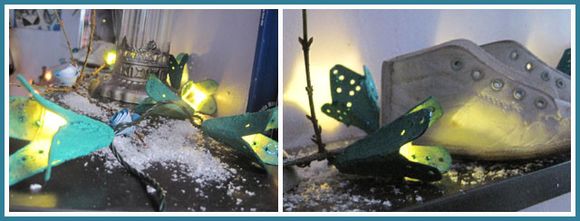
Another cheap, fastmade, lovely pinterestidea.
You can find the original blogpost how to make them here ( as soon as I find it on my pinterestboard.. :/).
I spraypainted mine with dyslusionsinkspray in different blues and added distress inks on the edges.
The holes are made with a crop-a-dile.
Just put them on ledlights and there you have it : custommade, unique fairylights !
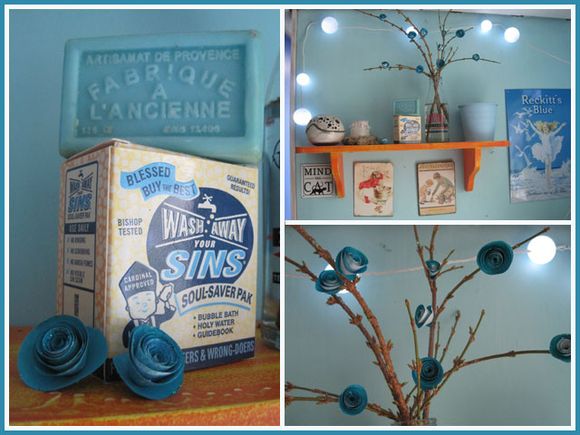
The last display in my blue and white cosiness is in my laundryroom when you come in through the backdoor.
In my collection of vintage soaps I found a perfect blue piece of soap and a bubblebathsoap box... "wash away your sins"... perfect as a starter of the new year and the box had the perfect colorcombinations for my display :)
Branches of my garden with selfmade paperflowers.
My last pinterestidea for this winterscene and a how-to you can find here !
I colored my papers with distress stains in different blues, let them dry and then cut circles out with two different sizes of circledies.
Then you cut the circle in a spiral, rolling the flowers starting from the outside of the spiral, some hot glue to let the stay together and some icicle stickles from Ranger.
With hot glue they adhere perfect to the branches.
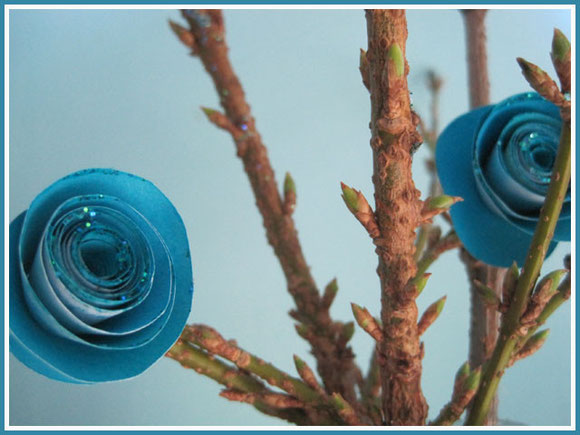
Can you imagine these flowers in pink for a springdisplay ? I do...
Do you see the little knobs on the branches ? ... The branches are kept in a bottle with water and I wonder if the branches witll start growing and if the yellow flowers of the forsythsia will appear...
A little bit of spring ready to appear when the right time comes...:)
Inge
ma
31
dec
2012
thanks 2012, welcome 2013 !

I hope 2012 was a good year for you.
I wish 2013 may bring you lots of happy days, strenght to go on when it's tough, people close to you to surround you and the ability to savour the good things every day.

My new-years-cards are handmade.
It's about 10 years I make them myself and I always make them in ATC size and in hues of blue and white.
I cut this years ATC's as a double ATC with Tim Holtz "ATC and corners die".
On the outside I embossed with an embossing folder that lookes like "firework-outbursts".
On bluecolored paper I glittered with stickles. The numbers were then cut out with a cuttlebug alphabetdie. Because of the doublesided tape I put on the back before cutting, they are very easy to stick down.
The meaning of the front size of the card is that I wish a "sparkling" 2013 to everyone !
When you pull the card open... well ... a snowman pops up !
Because of my addiction to pop-ups this year I couldn't make another newyearscard then this one !
Although there is hardly snow here in Belgium in winter, using a snowman expresses my hope we can at least make one this winter and enjoy the snow like only children can ( I know... snow can be boring too...)
A cold snowman, but "warme wensen" ( Dutch for "warm wishes") and a sparkling snowflake finishes the inside off.
On the back of the ATC I write my personal message for everyone.
I do admit I don't send hundreds of cards, only about 30 I think, but I always include a personal message.

My biggest present the past days was my son Freek who came home on saterday after 4 months studying in Finland !
I tried not to cry when I saw him in the airport, but tears welled up and I completely ruined his "arrival-photo" ( totally blurred...LOL)
Freek had an unique experience the past four months : studying abroad, making lots of international friends ( so you see, it's people who create borders between people, but there can be bridges built also ! )
Past week he traveled 900 km with the train from Helsinki to Lapland ( Suomi land).
He was invited to celebrate christmaseve in the home of Leevi, a student he met in Helsinki, but who lives in Rovaniemi in Lapland.
What an unique experience : celebrating christmas in Santaland :)

On sunday we celebrated christmaseve and New years eve together in our home : family completed :)
That's what it's all about : make your own life, stretch your wings and fly, but know there is always a home you can return to...
XOXO from Belgium
Inge
zo
23
dec
2012
farewell my sweet girlfriend...
I buried my sweet cat Zita this morning...
Zita was 14,5 years a member of our family.
She was sick since spring : problems with her kidnies and nothing to do about it.
She still had a good summer and regained some weight after giving some special food, but the past 14 days she grew thinner and thinner... and the past days she hardly wanted to eat or drink...
Past week we knew she was dying, but as she still seemed happy, she still could purr when she was sleeping with me in my bed, we hoped she would die in her sleep at home.
We hoped she would make it until next saterday when my son Freek comes home after 4 months in Finland...
We never let her alone anymore, carried her upstairs in our bed cause she really was my "bed-cat" for years : always on the lookout to come with me when she saw me preparing for going to bed.
On fridaynight I wasn't home and my husband moved from our bed to the couch with Zita, cause she didn't want to stay in our bed. That was so sweet of him !
Yesterday she threw up blood.... We always have said we would let her go, but not in pain, so we went to the vet and put her asleep...
It feels so hard to let her go and we all feel such a missing in our home, even there are still 5 cats left...
We strolled throught our cat-photos from the past years...
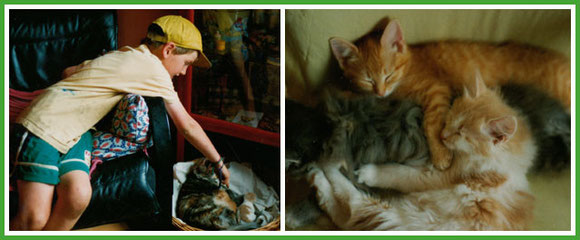
Zita was born in the summer of july 1998.
When Freek came home from youthcamp there was a huge surprise for him : Hennie gave birth to 3 kittens : Red Zita and Tommie and Vlek.
We kept them all, but Tommie and Vlek didn't survive the busy road we live in. They were hardly 1 year old, but Red Zita stayed...
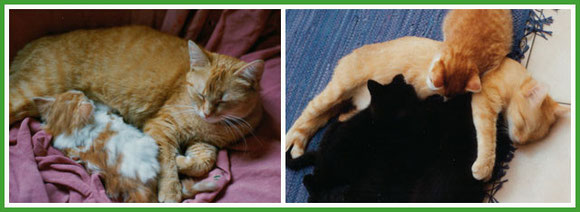
Her mom Hennie gave birth again and didn't take care of the one kitten Zea she had.
Amazingly Zita took over the role as a mom and even nursed Zea!
Zea was adopted and years later gave birth to Aureya.
We adopted Aureya in 2003 and Red Zita and Aureya became best friends.
Another example of how caring Zita was..
Black cat Helmer gave birth to 5 kittens. A week later Zita gave birth to 3 kittens...
Because the feeding was hard for Helmer we put one of the kittens in Zita's nest...
In the end the 8 kittens had two mothers... and when they were hungry they went to either Helmer or Zita.
On the right you see Zita with one of her own kittens and three of Helmers kittens !
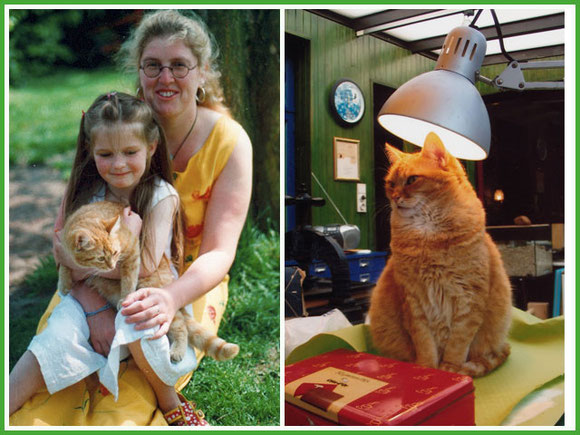
Zita was such a gentle, sweet cat : no biting , no hissing, no stretching out her claws...
Maybe she wasn't the smartest cat we have... but she surely knew how to let the light shine on her :)
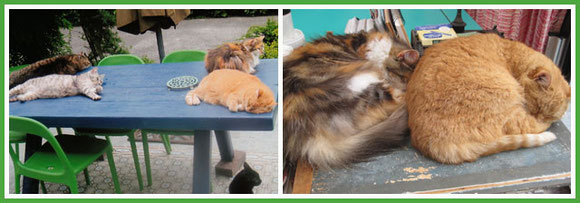
The wealth of cats...
The past 6 years we constantly have had six cats. This seems to be our number.
If we have more : something bad happens. If we have less... a cat arrives at our door...
Like all creatures, you have persons you like and others that are not your best friend..
Zita en Aureya were friends. You could often find them washing each other or sleeping very close.
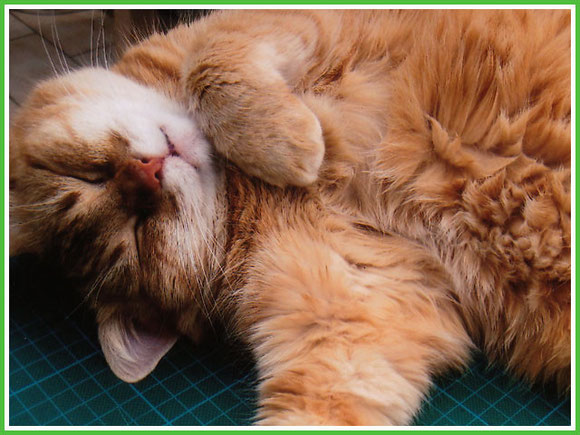
Zita gave total confidence in us... showing her belly while sleeping.
When we were eating in the dining room, her favorite place was under the glasscabinet. Often she was waiting, lying on her back, belly uncovered and helding her frontfeet curved.
She soooo looked like an orange seal then !
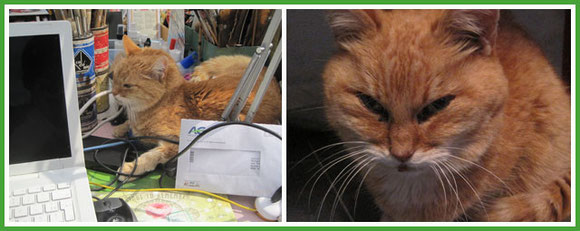
She had her habits...
- waiting on the stairs when I prepared to go to bed, so she could surely accompagny me
- jumping on the bed and asking attention to be crawled for awhile before she went to sleep herself. She stayed mostly the whole night until we get up the next morning.
- when I was sewing with my sewing machine, she loved to sit close (because of the vibrations ? ) and when she wanted attention , she started biting in my sewingthread...
- waiting patiently at the diningtable or if it took too long, miowing until she got her tray of milk every morning.
- when she got the special package of food since spring, she always was so excited and miowed in a special way, she alarmed all the cats in our house. So we ended up giving them all something extra...
- when I was in my veranda, being creative or on the computer : she was always around. Very close mostly, even in some inconvenient places with hardly some space to lie down, but she was there...
- ...
I'll miss all her habits and her constant quiet presence...
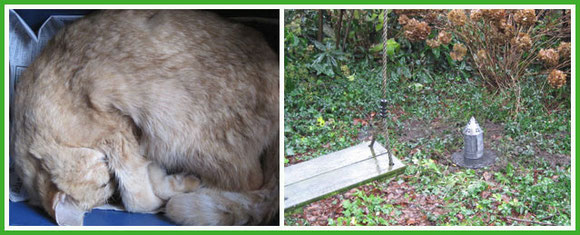
After the vet gave the injection she died in my arms...
We put her to rest in one of her favorite positions and that's also how she was burried this morning in my garden.It just looks like she is sleeping...
Sweet Zita,
I give you back to the earth...
In spring flowers will grow on you and you will bring joy again
A rock with your name will mark you place
you're not alone
you're in the same soil as several of our previous cats
Thanks for your sweet soul and compagny the past 14,5 years..
Miss you !!
Inge
zo
09
dec
2012
they are coming ! ....
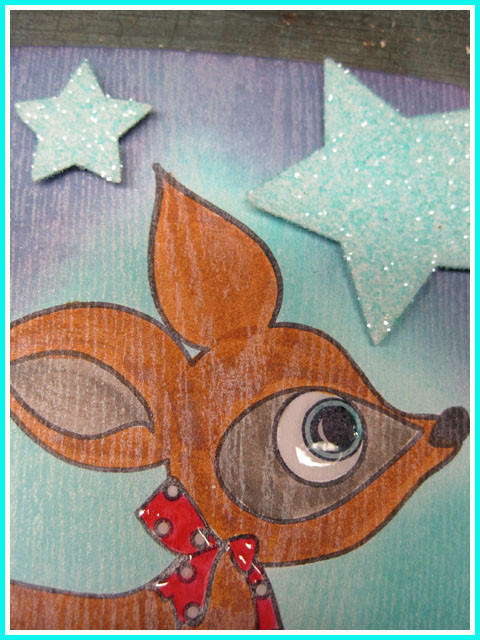
They are coming !!!
No panic... no aliens or enemies, but GOOD things are coming.
Good things come if you make them come :)
In Belgium we have a special celebration, a special childrensday : 6 december is the birthday of Saint-Nicholas and that day he brings presents for the children.
Most of you know that I work with severely handicapped children and Saint-Nicholas is also coming to our school.
For years he gets the help of a service club : club 51, a group of women who engaged themselves at their 51st birthday that they would bring joy to people.
They take care of Saint-Nicholas and his friend Piet so he can come every year to our school, they help to provide a little present for each child and they bring pancakes, puddings and chocolatmilk, so we have a party at school.
This year I wanted to give this club a present back for all the years they have been good for our children.
I made them a Saint-Nicholasbook : " he's coming"..
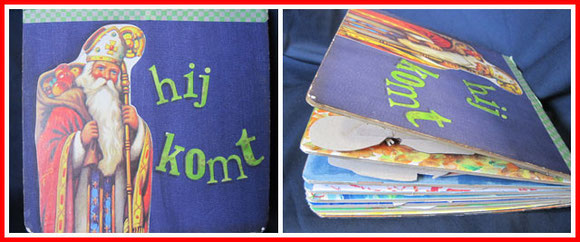
I altered a childrens boardbook in a pop-up book.
When the book is opened our children pop-up on every page !
Because of the privacy of our children I had to "change" their face, otherwise I'm not allowed to show these on the internet.
A bit sad you can't see their smiling faces, but just "imagine" them... It's there !
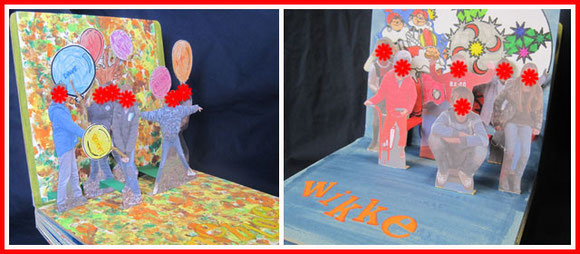
In our school we have 51 children between the age of 3 and 14. Mentally they behave like children between a few months and 6-7 years old.
Several children have multiple handicaps : mentally, physically, autism, emotional and behavioral problems,...
It's a tough but satisfying job.
With the help of my collegues I was able to take pictures of them all and it's fun to see how the personality of several of them shows through in the photos.
Each teacher of a class provided me with a backgroundpaper the children made in class.
On top our "Zonnebloem klas" ( "sunflowerclass") and " de Wikke" ( "Vicia"class ).
The sunflowerchildren wanted balloons for Saint-Nicholas, so I added the balloons with clear plastic strips to the pop-up figures.
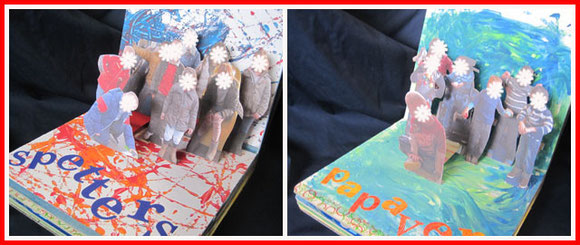
On the left our " Spetters klas" ( the "sparkle" class) and my "Papaverklas" ( "Poppyclass").
The Spetters dipped marbles in paint and let them roll over a paper in a box.
I handpainted with my Poppychildren with paint and shaving cream.
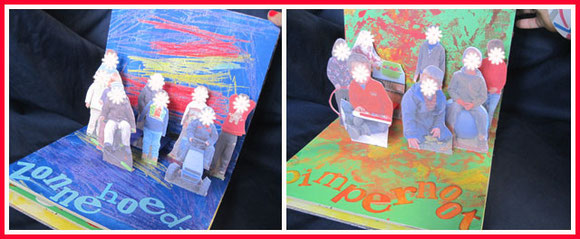
Our " Zonnehoedjeklas" ( "echinacea class") scribbled with waxcrayons on paper and overpainted with blue ink.
Our "pimpernootklas" ( "bladdernut" class) painted over leaves and printed them on the paper.
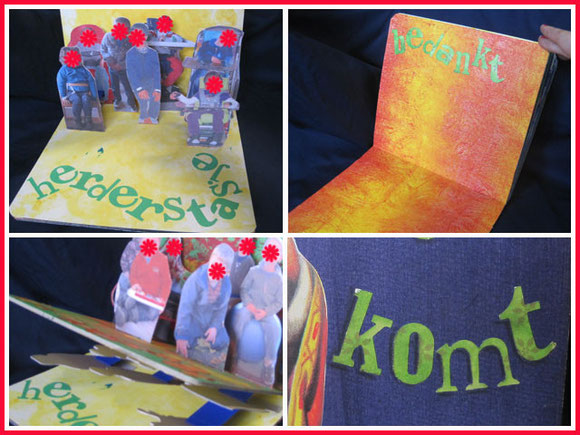
The children of the "Herderstasje class" ( "Shepherd's purse" class) also handpainted with paint and shavingcream.
I added an extra chipboardpage with " thank you". Here will come some photos of the visit of Saint-Nicholas of this year.
I made the background with wallpaperpaste and paint.
My "wordplay"die of Tim Holtz came out very, very handy to cut out all of the letters of the classes names.
Past tuesday "he came" to our school and the club recieved the book. I wasn't there that day, but I heard from my collegue they were moved by the book and it will be cherished.
Some people said the book was too nice to give away... and although I feel some sadness to see it go after all the work I put in, it also feels very good to give something away and know it will be in good hands.
There are more good things to come : holidays, christmas, new year, new promises, new goals...
It's up to us to make them positive and good!
I made some holidaycards the past two weeks, experimenting with techniques and materials, inspired by the holidaycardworkshop of onlinecardclasses, pinterest,...
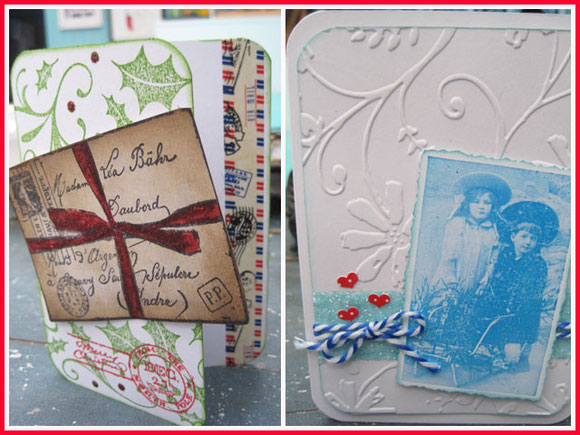
Time to use my new "stamp" washitape, trying out glittering with two sided tape and looking to adapt a common embossingfolders into a "winter"theme.
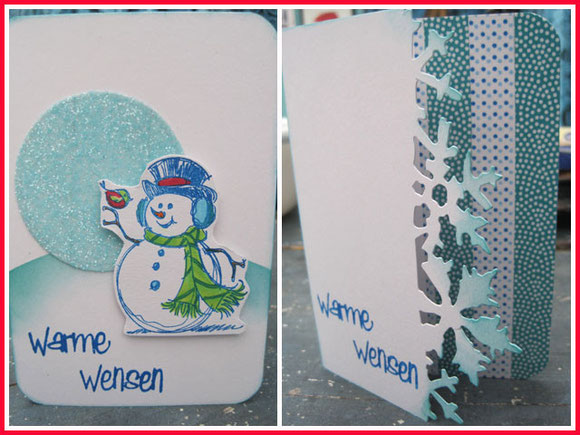
A tough job... trying to keep my cards "clean and simple".
Although I'm not a glitterperson, I really fell in love using this blue glitter.
I just add wide two sided tape on paper and cut out a shape that I want ( like the circle here ). Peel of the top layer, add glitter and burnish on.
More washitape on the right....I know washitape is not meant to just hoarder, but I have to push myself to USE it too...
Love the icestar of Tim Holtz edgedie.
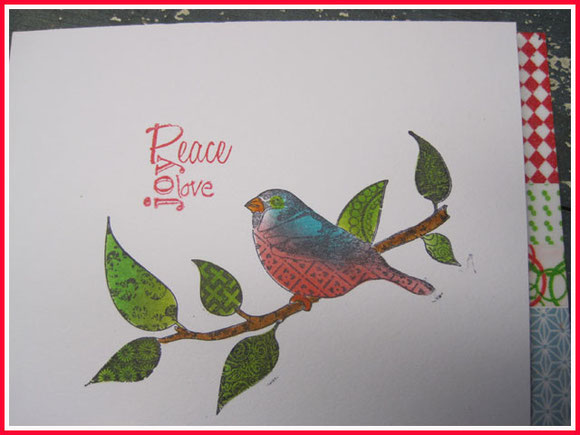
Definitely an idea I got from the holidaycardclass !
Cut off 1 cm on the right of your frontpaper and stick a strip of patterned paper on the next paper.
Instead of patternpaper I used washitape...
In the class I also learned how to color in an stamped image quickly with distress inks and selfmade stencils.
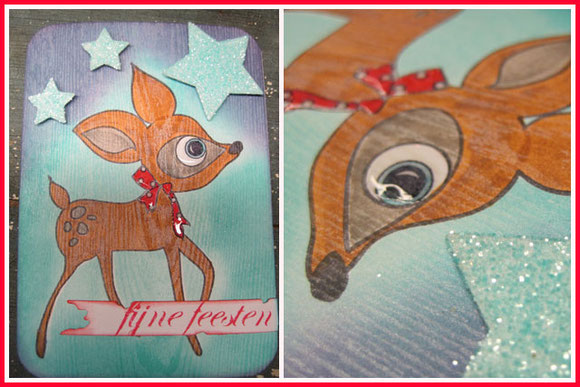
I'm not a 'cutie" stamp lover, but when we were in London in the craftshow I've been hunting for a "vintage fawn". It was a tough search, but in the end I found this one !
The technique I used is definitely a "must-do -more" technique. I stamped with white ink ( archival brilliance white ink) and a woodgrainstamp.
I dried the ink with my heatgun.
I then stamped the fawn with permanent black ink and colored it in with distress markers.
The white ink resists the ink and the distressmarkers and the woodgrain shows through the coloring !
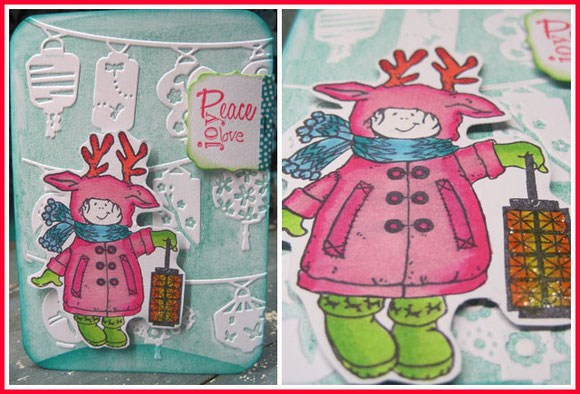
Another "cutie" stamp that I do love... I colored in the girl with copic markers and gave her a glittery lantern with rock candy distress stickles
The lantern embossingfolder is also an "all year around" that you can use for any theme.
I loved making the cards. It's relaxing and you have a result in a short time.
But now I'm working on a "mermaid's adventure" tunnelbook... But more on that, next time !
Inge
di
20
nov
2012
hidden in the woods...

Unknown things are hidden in the woods...
Are you scared to know or are you just as curious as me ? ...
When my enveloppe tagbook started almost a year ago in our local round robin, I was curious what the title "into the woods" would mean for them... Which creatures would they create ?
Some gave me pages with the animalworld that you can find in the woods, but some saw through the hidden layers in the woods and found a dragon, a fairy,...
When my book came home, there were 3 enveloppes not decorated ( we started with 15 enveloppes with 12 participants, so I knew there would be left over pages.
Perfect for me, so I could create in my own book and put some more hidden secrets into the woods...

First I wanted to create a twopagespread that had a mysterious feel to it, making a viewer curious about what is hidden there.
I colored sturdy pages with different sprayinks ( dylusions) and let them dry. I added some more layers and in the end I sprayed with selfmade glimmermist through a treestencil ( craftersworkshop).
Through the glimmer you have a slight vue on Aspentrees.

When I was a child there was a couple of singer-songwriters, Elly and Rikkert Zuiderveld and they made imaginative songs about the chewinggumtree... and "het Oinkbeest" (Dutch for "Oink-animal").
This was a musical story with different songs about a strange creature that arrives in the woods during a huge storm.It's not from this world, but where does it comes from ?
It feels lonely and cries, but can only communicate through the sound "oink".... That's why the little fairies call it the "oink-animal".
They take care of the little creature together with all the animals in the woods and protect it against the evil in the woods.
The story ends well and the 'Oink-animal" is able to return to it's home in the end...
I always loved this story ànd the music, so when I started this book I hoped someone would put an "oink-animal" in my woods... but no one did ( maybe they don't even know this heartwarming story ! ), so I decided to give it a home in my book.

I scanned the original images from the original LP.. and sized them to suit in my book.
So, if you open the flap behind the shimmering aspentrees, you see the meeting of the little fairy and the "oink-animal" together with a squirrel and a fawn who are also curious..
This is a pop-up-scene... ( you know I love pop-ups and did one in every enveloppe tagbook, but I didn't made one for myself yet ! )
The back of the scene has again the aspentrees but with other sprays and a shimmering moon.

I stamped the group of toadstools with a masking technique so it looks the toadstools are in a group and standing before and after each other.
They are colored with distress markers, just like the fawn and the squirrel.
The branch and the leaves are cut outs of Tim Holtz dies. The large branch was colored with distress stains, the leaves were cut out of sprayed paper ( with dylusions ink).
But there are more secrets hidden into the woods...

On these pages I wanted to evoke the feeling that you go deep in the woods, through shrubs and then you find a path... leading to a little door with a butterflyknob...

I used a stencil with leaves on the right page and in the innerpart I used the treestencil.
With a piece of torn paper I inked the edges to make it seem there is a wooden door between the leaves...
If we go in... CAN we go in ?
Where do we arrive ? ...

Look... we aren in the house of gnomes !!
These must be the gnomes that fix your sewings deep in the night...

They have a little sewing machine and cute red buttons.

The gnomes are on little tabs and fixed to the background so they pop-up when you open the page.
They are on a "floor" made with a buttonstencil and their thread is on a "wooden spool" ( paper cut with the Tim Holtz sewing die, stamped witha woodgrainstamp and inked with distress ink)

Here again ou can see the tab that makes the gnome move. I inked it with the same pattern as the floor, so it's less noticeable.
On the back I inked over the sprayed paper with the woodgrainstamp so it looks like the house of the gnomes is on the inside of a tree.
They have a garland in their house with buttons of course...
The button is cut out with the sewing die of Tim Holtz, stamped with dots or toadstools and covered 4 times with UTEE, so they look like real buttons.

My inspiration for this scene came from a vintage tinbox I found some years ago on a fleamarket for only 1 euro !!
In this cute box all the stuff you needed for your sewing machine was kept together. This means you got this box for free when you bought your sewingmachine ?
Why don't they do that nowadays...:/
I scanned this box and printed the image on canvaspaper months ago waiting for a project.
Now I sewed the canvaspaper to the big tag and used the images also for my pop-up-scene.

The large tag was embossed with a button embossingfolder.
On the back side I added stamped tissuepaper with a selfmade stamp of patternpaper.
A selfmade button and a needleholder ( stamped) were added.
I'm really happy with how my two pop-up scenes came out. I still have one enveloppe left to do, but ideas are coming...
This book will be part of an exhibition I have from coming saterday until the 24th of january in our local library.
In the exhibition I show most of the books and roundrobinbooks I collected through the past years.
It's Art with the little 'a', but I love to be able to show what you can do with creativity.
There will also be 3 moments I'll be present in the library so people may hold the books in their hands, touch them,.... and ask me about the how and why's...
I'm looking forward for this encounters !
Inge
ma
12
nov
2012
autumngatherings
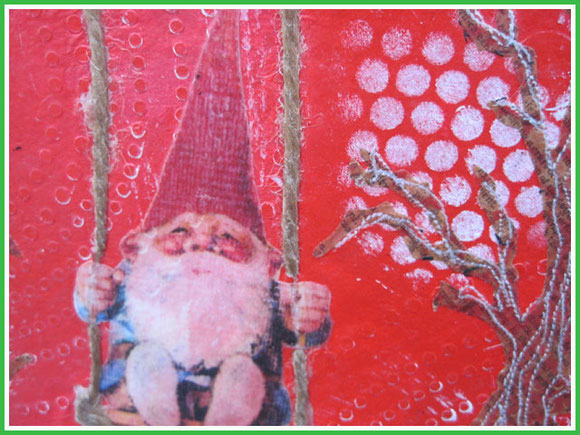
All the remnants of halloween are gone both in my house and outside...
I'm absolutely not yet ready for Christmas and the holidayseason, although I'm making cards now and then.
When I'm looking outside the windows of my creative room, this is the sight I have :
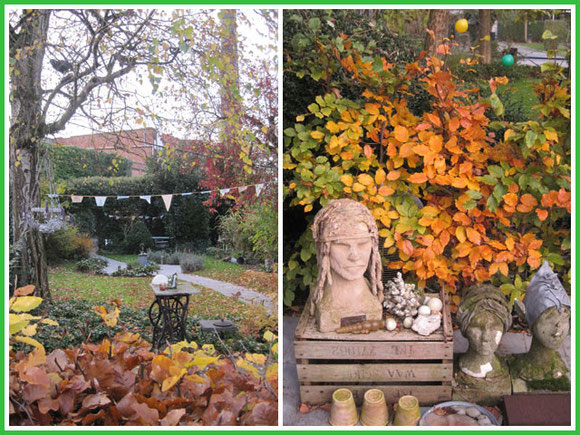
The garden is changing color and whàt colors : greens with reds and bold oranges !
Yes, here in Belgium we have a real autumn with a changing sight each day.
Some trees already have bare branches, others are holding on on their colorful leaves until another autumnwind passes by.
It's too early to decorate for winter or christmas and I hàd to bring autumn inside in my house.
I made an autumndisplay on my piano both with findings from the garden and creative projects from me and other persons.
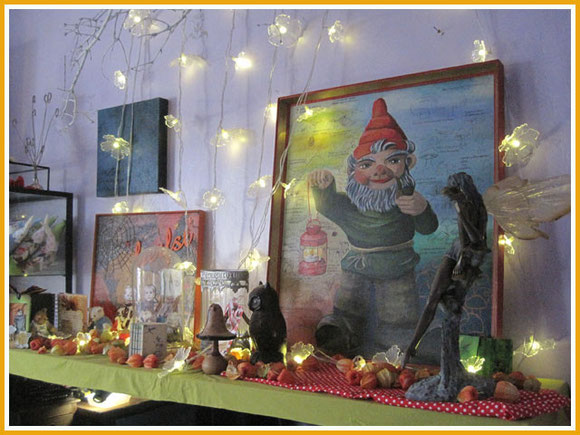
A few years ago my mom made this painting for me of a garden gnome I have in my garden and a background filled with mushrooms.
The fairy is one of my 3 woodlandgardenfairies I bought in the past at the Elf fantasyfair in the Netherlands.
In the summer they find their home in the garden and although they are made of cold cast bronze, I prefer to keep them safe inside in autumn and winter.
When I saw these I fell in love immediately and I saved each year some money to buy another one... You can find them here.
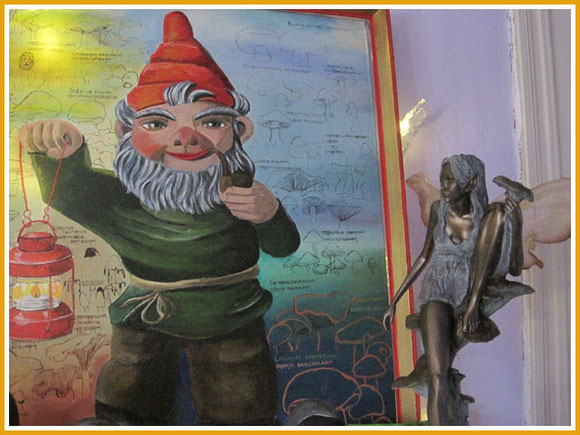
More handmade creations: the tag with the gnomes is one of the tags in my "into the woods" enveloppebook you will see a bit further.
The wooden toadstool is handmade by someone my mom knows. He has them in different sizes and I'm a lucky one to have one in my possession.:)
On the right the covers I made for an ATC book : it's not ready yet, but the covers suited perfect in my autumndisplay.
The covers are made with dylusionsinksprays, gelmedium, stencils of thecraftersworkshop and a selfmade stamp ( based on the drawings of Brian Froud).
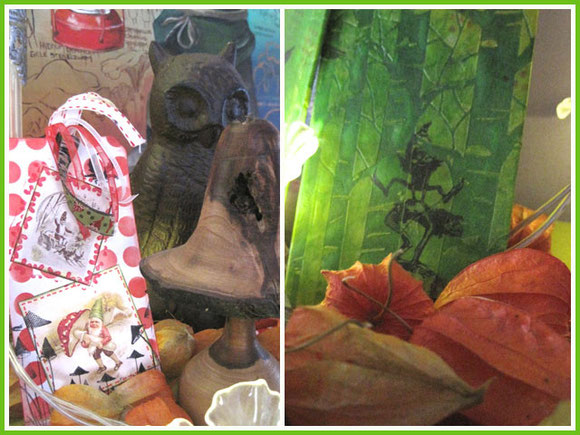
The orange lanterns are from my own garden ! I took me 1,5 hour to pick them all from the stems but I wanted to save them all. They dry perfectly and add such a vibrant touch to my housedecoration.
In the past I put these on christmaslights !
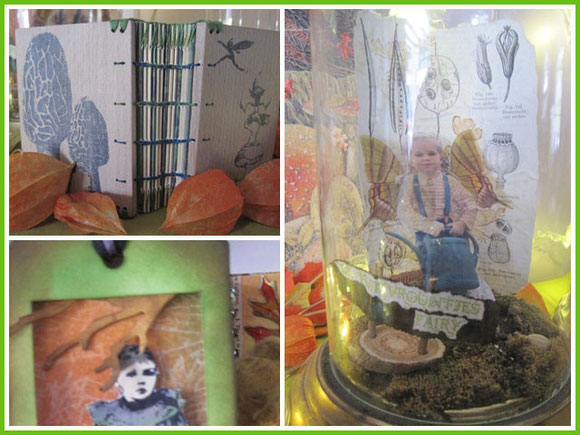
I put a green piece of fabric on the piano, but covered it completely with these orange lanterns.
The wooden book is made in bookbindingclass with the double Ethiopic coptic stitch. I love how stamps can be added on the wood covers and even in plain black ink they make an impact.
On the left a glimp of the autumn 3D tag I made for the childrensworkshop a few weeks ago.
On the right : my own gardenfairy.
I giave my daughter Gaia as a two year old wings with photoshop and printed her on a transparency.
She' standing on moss and little stones in an old glass belljar: I love to reuse these glass ornaments and give them a new life.
On the back of the glass I added a vintage bookpage of ...poppies ( you know : one of my favorite flowers ! )
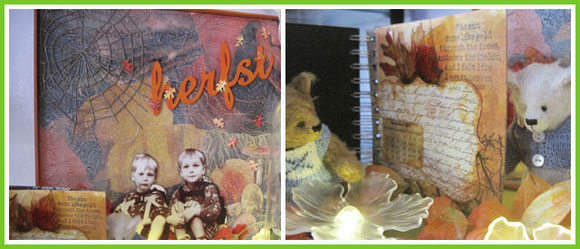
On the left an autumncanvas with my two sons when they were 2 and 4 years old.
I collaged the background with magazinepaper in autumncolors and whitewashed the background.
I handstitched the spiderweb through the canvas and added glitter with stickles to represent the dew-drops you find in the mornings.
The word "herfst" ( "autumn" in Dutch) was cut out of foamcardboard and painted in orange.
The photos of my sons were also glued on the foamcardboard and cut out so they have a 3D effect. I added leaves at their feet as embellishments.
I made such a canvas for each season all with photos of my children and me as children.
I love to have personal creations as decoration in my home.
On the right a bookpage of a calenderswap of ATT I was in a few years ago. The page is from Betsy Brown ( USA) and I love the colors on her page and the alcoholinked plastic as leaves.
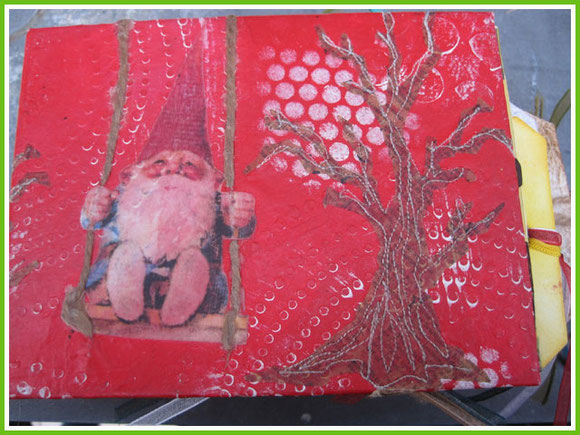
Another decoration in this autumndisplay is my " into the woods" enveloppetagbook that came home at the end of august after a year traveling in our local round robin group.
It started as an empty enveloppebook, but now it's FAT !
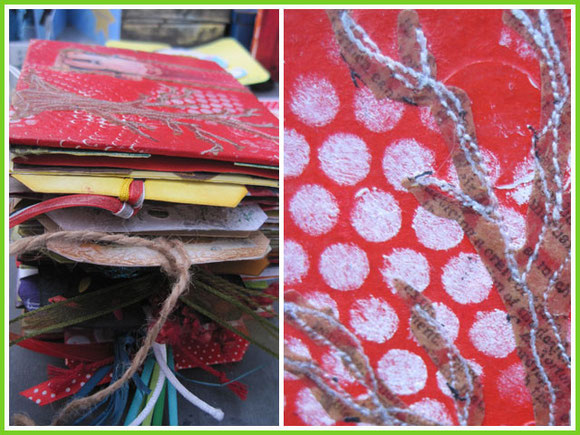
Look at all those tags sticking out and you don't have yet seen the pages !
There were 3 empty enveloppes left and I'm working in the book myself to fill it completely.
It's all about pop-ups.... but as this is already a long blogpost : I'll show you more of this book and the pop-ups next week :)
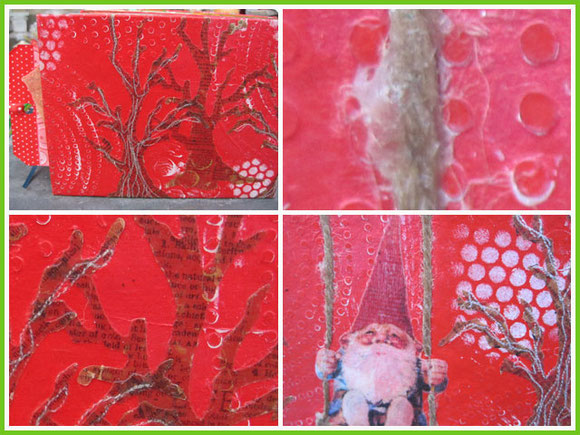
I showed you this book before it left off for the round robin, but that was in a blogpost on my previous website, so I wanted to show it again.
The covers were made with stencils, gel medium, paint, selfmade stamped waxpapertrees stitched on the paper. The trees are cut out with the die of Tim Holtz.
After I covered the bookcovers I completely covered it again with wax, let it seep in and then melted it off again.
I love the effect this has on the paper.
You can see a bit of the leftover wax on the string of the gnomes swing..
That was the outside of the book : next week more of the inside !
Inge
wo
31
okt
2012
halloween is here....
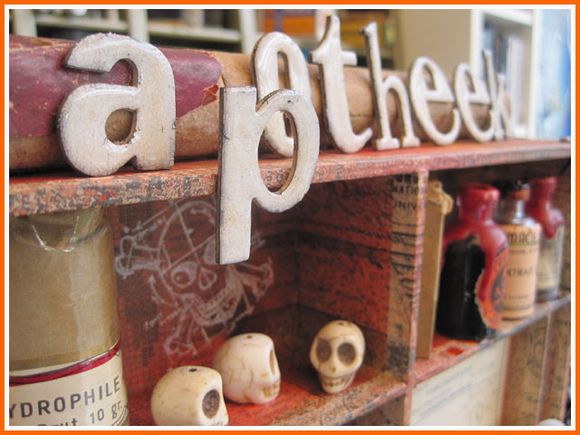
It's finally here....
Strange how halloween seems so far away during the year and you start preparing for decoration and a halloween party... and then it's finally there !
Even Freek in Finland is having a halloween party this evening just like us at home here in Belgium, but HIS party will be surely multicultural.
Gaia is having a party with her boyfriend Sam and 5 girls. Not sure yet if Sam is blessed tonight or I should feel sorry for him to be surrounded by 5 19 year olds...
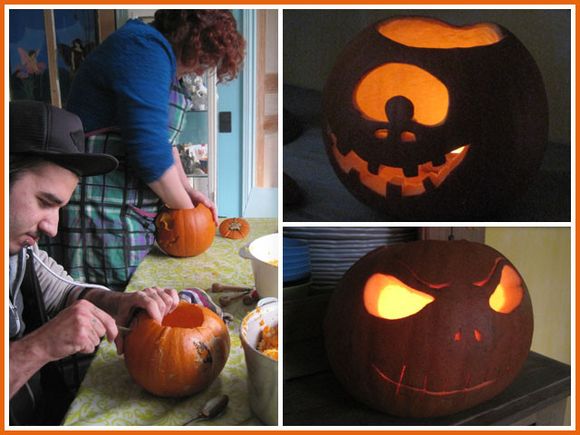
Gaia is happy with Sam for almost half a year now. Although they had their worries... Sam got hit by a car a month ago and broke 3 of his vertebra and he's out from work for at least 3 months.( but it could have been MUCH worse...)
He's supposed to rest a lot, to lie down on his back and keep quiet... He luckily has a special corset who enables him to walk and to sit now and then.
For a young boy who's a bit a "nervous type", the being still is very difficult for him. Sam lives an hour and a half driving from us and Gaia spends a lot of days at his home taking care of him and keeping him "amused"...
Sam's finally able to make a long travel in a car and he's at ours for a week for a change in the "environment"...
We revived childhoodmemories for him yesterday carving pumpkins ! For us it's a yearly habit. A lot more halloweens may come seeing all the ideas for pumpkindecoration on Pinterest !
We ended up making a cute monster and a jack skelington.
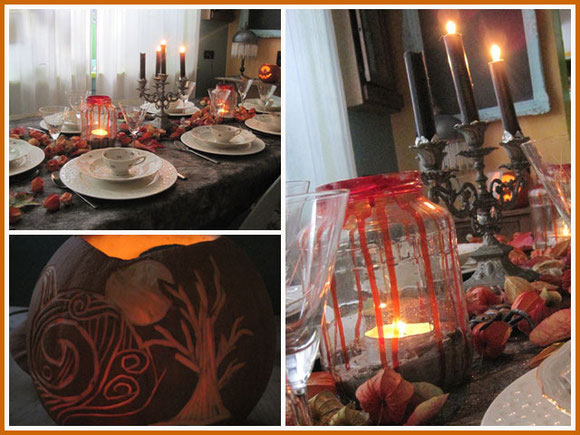
On the other side of my monster I carved out a tree, the moon and a decorated scroll. For the tree I taped a cut out of Tim Holtz tree die to the pumpkin and used it as a template... a bit of cheating :)
This is how the table for tonight looks in falling daylight : a black tablecloth covered with leaves and "lanterns", spiders, black candles and large glasscontainers with dripped red paint...
In the dark this looks more spooky...
Gaia painted her pumpkin in "dios de los muertes" style and this one is used to serve the pumpkinsoup.
The rest of the dinner is " worms in bloody sauce" served in a fishbowl and white bones ( cakepops that taste very good, but don't look so cute as we wanted... we definitely need to follow a workshop on how to decorate cakepops... We wanted Jack Skellingtonfaces, but that's NOT how they look...so they are "bones" now...)
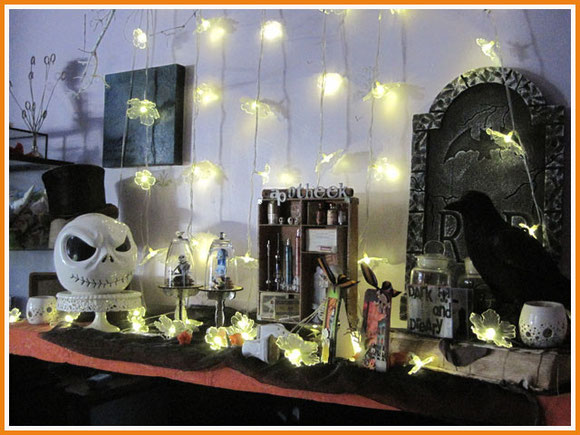
Let the young ones have their party... I had fun making my halloweendisplay on my piano..
Some bought stuff, but lots of handmade stuff...
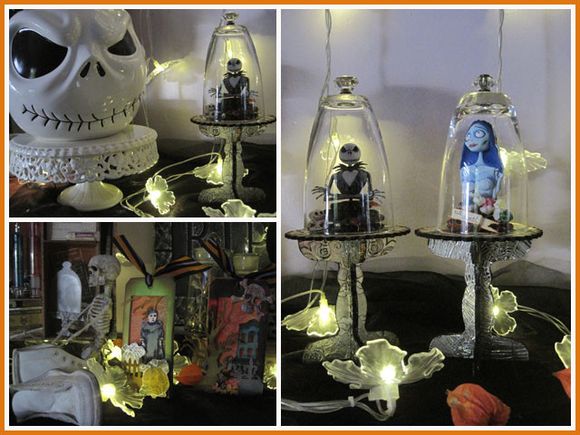
The Jack skellington jar is a found in the Disney store in Antwerp. Don't tell anyone, especially not Freek, that this is the jar we hide our skittles in...
Next to him, Jack and Emily, the collaboration of Wienne, my daughter and me for this halloweens decoration. You can read and see more about them here.
Also in the display the two 3D tags I teached the children of my collegues past saterday. Some old white babyshoes, a skeleton, old books, jars, a thumbstone, a pageswap book " dark and dreary" from some years ago... and a newly made "old apothecary"...
My husband works in a hospital and sometimes he brings old medical stuff at home he rescued from the bin... Some months ago he brought a whole box with old glass hypodermic syringes and metal tins with lots of injectionneedles.
Nice... of course...but what could I DO with this except just hoarding cause it was nice ?
Some of the old stuff I gave to my housedoctor to display in his "doctor's glass cabinet", but I'm still left with lots of them...
When he brought home a vintage thermometer, old bandages, little bottles ,... and I got a little box from a friends father with labels on with a skull and "poison", the muse started whispering : " an apothecary of a wicked man"...
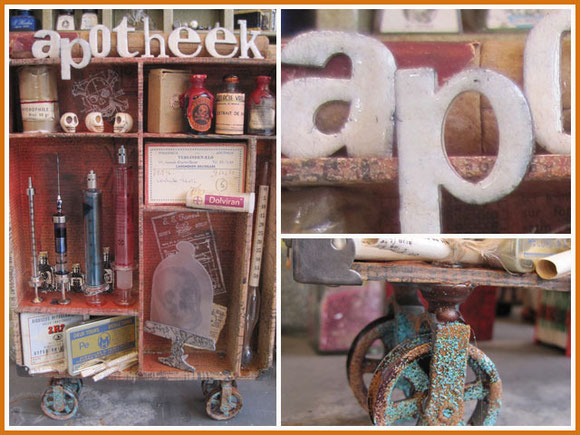
After making the configurationbox of my officesupplies myself, an apothecary configurationbox was just a small step further. Making it custom makes it easier to fit the stuff I wanted in it, to suit the boxes.
I layed out the stuff in groups on the cardboard and divided the box in smaller sections depending on the hight of some things.
The cardboardbox was made, covered in vintage papers and the edges were taped with Tim's washitape. To make it look old I sprayed it with different inksprays and rubbed it with distress inks.
With the wordplayday ( expensive die but great letters...) I cut out the word "apotheek" ( Dutch for apothecary) from cardboard. With Shelly Hickox technique to make "faux enamel" I changed the cardboard in old white enamel letters.
The wheels of Tim Holtz got also a "making old" treatment : I inked them as much as I could with versamark watermark ink and then covered it with distress embossing powder and verdigris embossing powder and melted the powders with my heatgun. i repeated the treatment until they had the look I wanted.
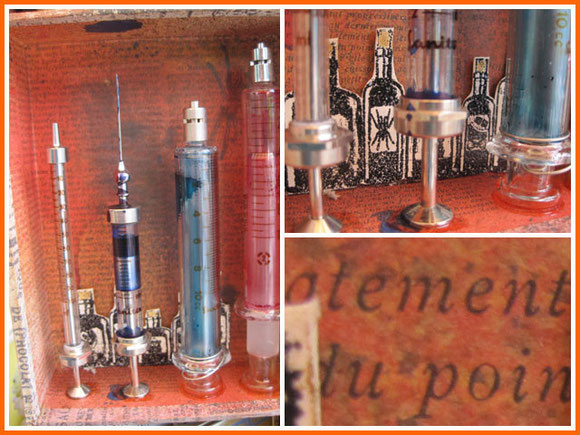
On the back a black embossed stamp of "artistic outpost". In front some of the glass hypodermic syringes I colored with alcoholinks.
This pharmacist seems to have collected royal "blue" blood...
They were glued with glossy accents to the cardboard and although it took a long time to dry, now they are sturdy adhered to the box.

On the top left vintage bandages still in their package. On the back I stamped a white skull from Tim Holtz latest sets.
On the right 3 small bottles. There was a fluid in that was for injection, but I replaced this with black ink and spiders for the arachnid legsbottle.
The tops of the bottles were covered with melted red sealingwax.
The labels are real vintage labels, treasures from fleamarkets and gifts.
I can't resist a vintage box when I see one on a fleamarket, so the "pharmaciebox from an apothecary in Bruxelles" is in my collection for years. now it finally found it's place.
The bottle with Dolviran pills is from a friends old father. I did replace the old pills with mints... one never knows...
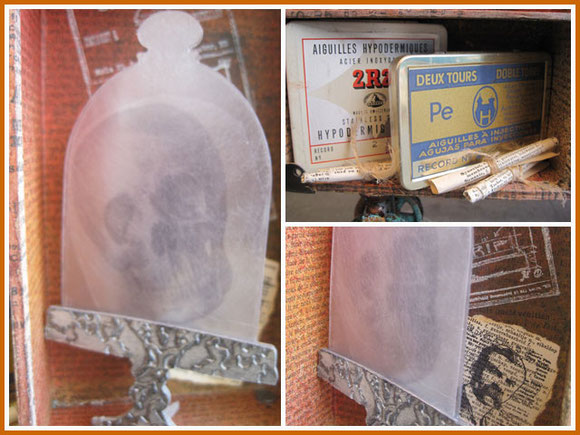
My bell jar die arrived just in time to be added in my apothecarybox !
Packaging plastic was sanded to give it an old look. I didn't have any skull stamp but I have a whole Dover book full with skeletons and skulls from ancient artists...
I printed the skull on a transparency and added it between two layers of plastic. The bottom part of the apothecary jar was cut four times and glued together to form a thicker bottom. I also added an extra one to the back so it could stand upright in the box.
If you take a peek behind the bell jar you can see the white stamp of a grave (tim Holtz) and the photo of the wicked pharmacist ( artistic outpost)...
On top more of the tins which hold injection needles.
I added vintage paper that I made into small rolls.
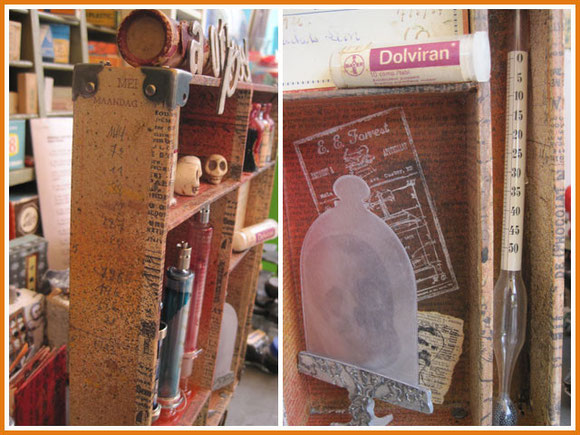
Here you can see the sides of the apothecary which I enforced with the metal corners ( Tim Holtz).
On the right the vintage thermometer. Glossy accents holds everything !
The box of the thermometer was glued on top of the box.
I had fun making this box and getting old findings in an appropriate setting.
Just another handmade addition to my halloweencollection :)
The party is going on...but it's not really a scary halloween, as I mostly hear giggles...
As a mom I enjoy the event from a distance, making this blog and ending the evening in my bed with my ipad, ready for just another day in my "onlinecardclass" :)
happy halloween !
Inge
zo
28
okt
2012
halloween... and getting them addicted...
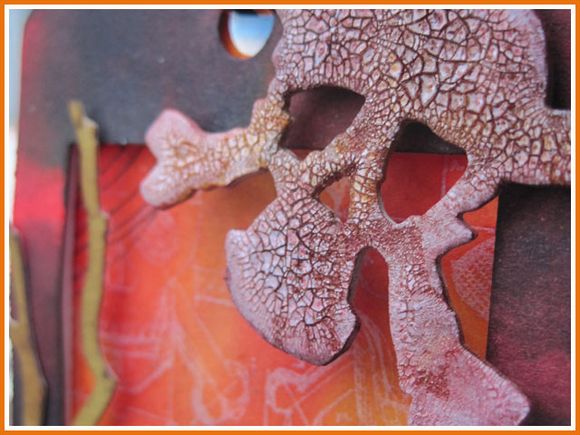
Halloween is near...
Time to show you more of my halloweendisplay projects !
"Absolutely everything " is one of my favorite online shops in the US. Lots of stuff, very good service, fast delivery ( even from the US to Belgium) and there 's always a goodie added at your purchase...
On one of their fridaynewsletters I saw a tag they will give a workshop for. Inspired by seeing their tag I made two for myself and my halloweendisplay.
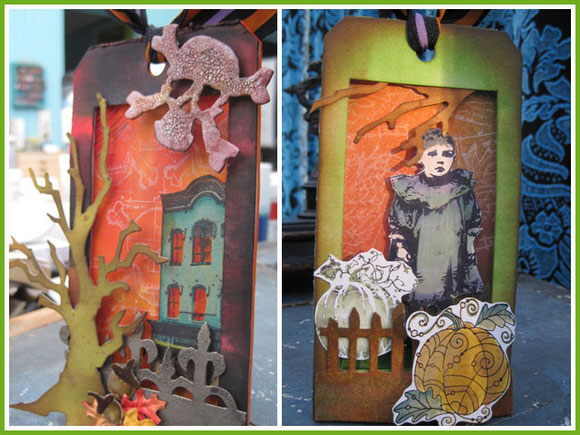
This halloween and autumntag is 3D and can stand up with the easeldiecut from Tim Holtz.
I love the 3D layers in these tags : so much to do with them !
In may I had a workshop with the children of the Spettersclass, a group of mentally retarded children of our school. Supported by their teacher and several therapists they all made a spinnercard.
After that workshop my collegues asked : " why don't you give a workshop for OUR children ? They would love that too ! ".
In august I had the first workshop with them and both them as I were pleased. Taking in consideration that although I'm a teacher I'm used to work with severely handicapped children and NOT with "normal" children.
Doing the workshop with them I discovered I loved it and another part of my "being a teacher" was appealed to.
One of the children discovered he can be creative although he can't draw. He said afterworths to his mom : "I hope she will do it again and hopefully she won't wait until the next summervacation"...
This ignited me to create a halloweenproject for these kids.
Yesterday we had the "halloween- and autumntag" workshop in my house with 7 children between 6 and 13 years old.
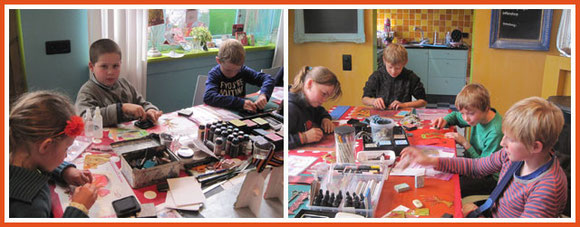
Even Siem was here : past sunday he broke his elbow and had surgery on wednesday... He almost did everything himself using weights, an old iron and my hands as his "second hand".
They all worked hard : some needed help and sometime I helped them, other times I challenged them to try it themselves.
Arno cut out the centre of his own tag with a sharp knife after showing him how to do it safely. Aran cut out his little figures with a scissor himself although this is difficult for him...
Mirre who is 6 and was new to the group, soon found out how she could do it herself and she was good at it. Nice to see how she made her composition on the tag now and then and decided what she needed more.
Bram and Eva who were here in august for their first workshop, worked like professionals. You could see how they incorporated the techniques and materials they learned the first time in the tag now. They are quiet workers but they keep on working. Their friend Thiemen took profit of their knowledge and soon seemed like a pro himself !
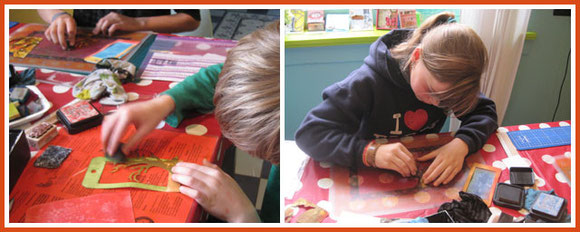
They had a lot of techniques to learn and we did it step by step.
Although I made two examples, it was not the intention that they made copies of mine.
They constantly had the choice for own colors, stamps,.. so they could create an own project.
A few of the techniques they learned were :
* making a background with white ink as a resist and overinking with distress ink.
* make an embellishment with crackle rock candy and distress stains.
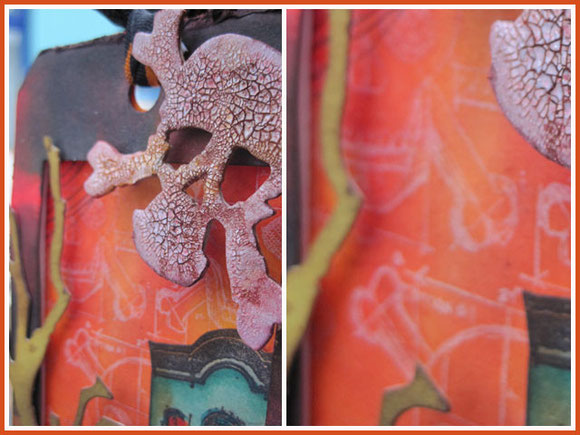
Others were :
* making a background by swiping your paper through distress stains and make splatters by flickering with water
* using dies to cut out a tree with their paper colored with distress stains and use edgedies. ( The kids LOVE to use the Vagabond and do it all by themselves)
* decorating the edgediecuts with the different embossingpowders : regular, distress,.... and using the tarnished silver technique.
* coloring with distress markers and copic markers and discover the different properties of each.
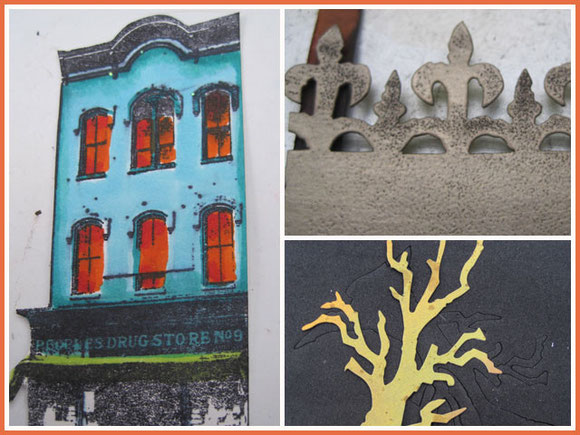
They all did it great and went home with a unique creation.
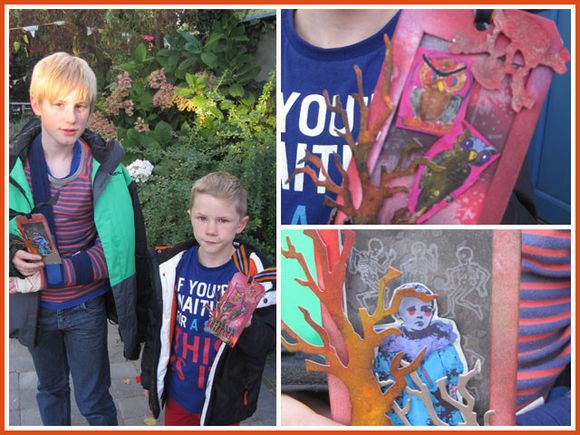
Siem and brother Aran show off their tags. Aran made scarey owls and Siem transferred a stamp of a child in a zombiechild.
Can you see the white skeletons in the background ? The result of stamping white ink on the background, drying it good and then overinking it with distress inks. This gives a ghostly effect.
The kids were surprised to see their images appear when inking !
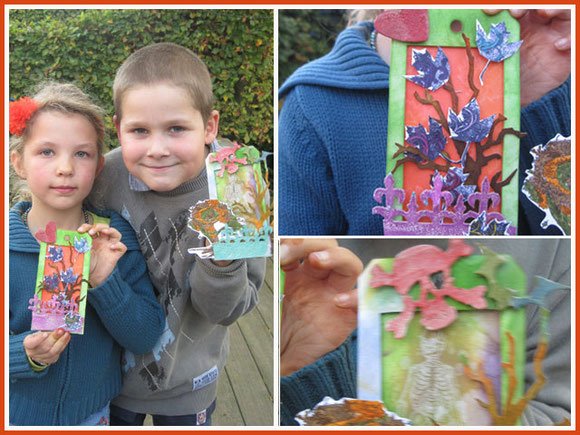
Mirre and Arno with their creations.
Mirre added a heart with crackle paint to her autumntag.
Arno was all into skulls and skeletons.
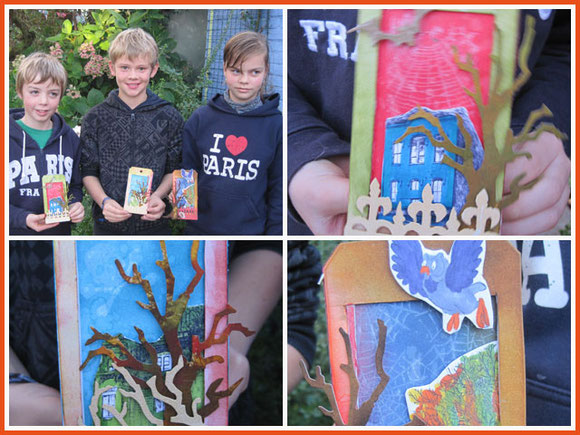
Bram, Thiemen and Eva with their personal creations.
They too had a great effect with the white ink and their trees made from paper with distress stains were multicolored.
I enjoyed myself yesterday afternoon and looking at their faces, I know they did too :)
Time to get thinking for a new project for them in spring...
Oh... still in doubt about the "getting them addicted " ?
You're never too young to create and to learn how to work with stamps and other stuff... ( says a stampaddict...)
And getting addicted to the homemade chocolatmousse is not difficult too :)
Inge
zo
21
okt
2012
Jack and Emily...
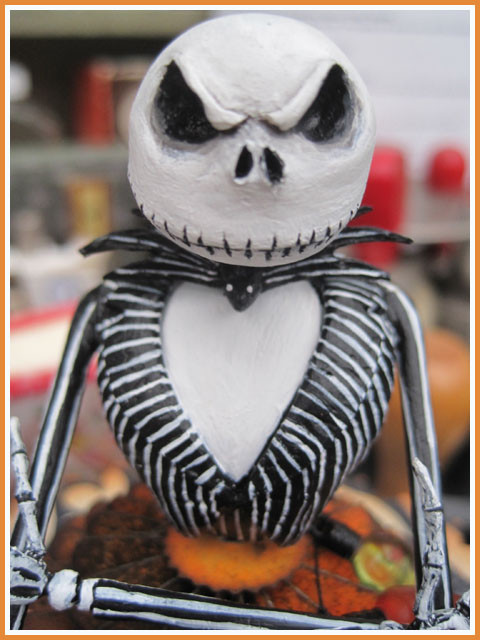
Halloween is approching fast...
My halloweendisplay is on my piano and I just added two cuties : Jack Skellington and corpse bride Emily from the movies of Tim Burton.
We are huge Tim Burtonfans since we first discovered "nightmare before Christmas" ages ago. This man understands how "fantasy can color your life" :)
My husband is a modelscaler, mostly of aeroplanes, but he once in a while buys resinfigures to paint. He's more hoarding then painting them, cause he's not so good at this...
When he found the resinfigures of Jack and Emily, he couldn't resist them to buy for Gaia's birthday.
As she's a good painter, she could probably paint these ?
So, this project ended up as a collaboration between Wienne who bought and glued the figures, Gaia who painted them and me, who made them ready to display...
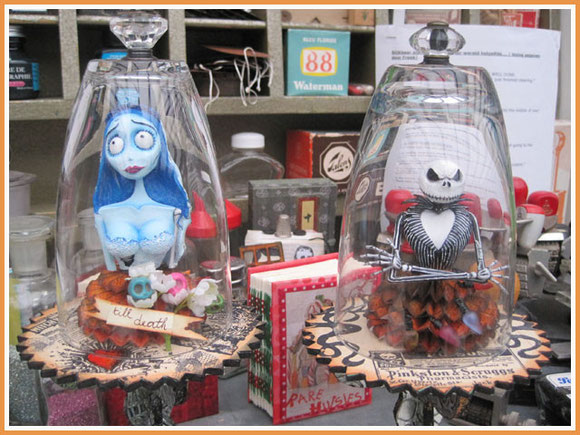
When I saw the "halloween bell jar" of talented Shelly Hickox, I immediately thought : " I want this too ! ".
When Gaia painted the figures, everything came together. These would be the perfect content for my halloween bell jars !
I don't have a cupcake die, but I had purchased months ago cheap cupcake standards made from foam and thin cardboard.
I liked the colors and the print on the cupcake standards a lot, but they are NOT halloweeny...
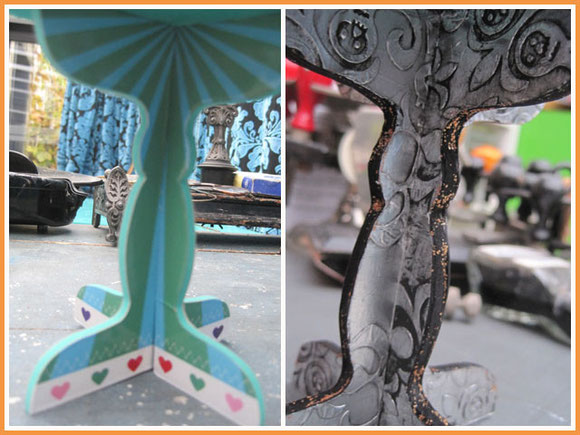
I first covered the base.
I glued two sheets of kitchen aluminium sheets to cerealboxcardboard.
For Jacks base I embossed it with an embossingfolder with swirls and skulls.
This looked too shiny, so I used Shelly's technique to age the metal: I painted the metal with black paint , let it slightly dry and then rubbed it with a babywipe until most of the black came off but remained in the crevices.
The sides of the stand were green foam, so I colored them with a black permanent pen and added some orange stickles.
Then I glued the embossed cardboard to the cupcake standard pieces, cutting around them, not forgetting to cut out the pieces where the parts had to slide in each other.
The extra cardboard also made the cupcakes sturdier then they were.
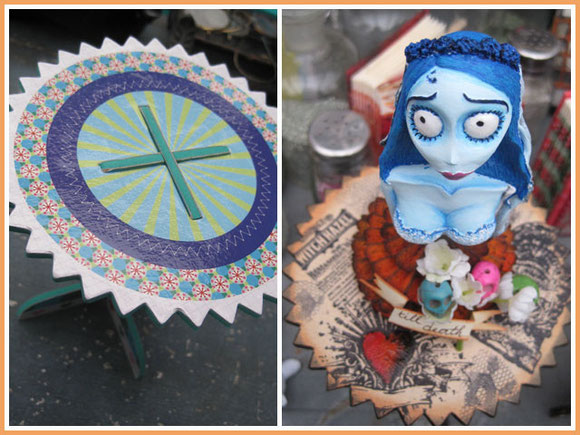
The top of the cupcakestandard was covered with vintage paper and stamped with permanent ink with stamps from Tim Holtz, oxford impressions and a lace stamp.
The edges were inked with rusty hinge and black soot distress ink .
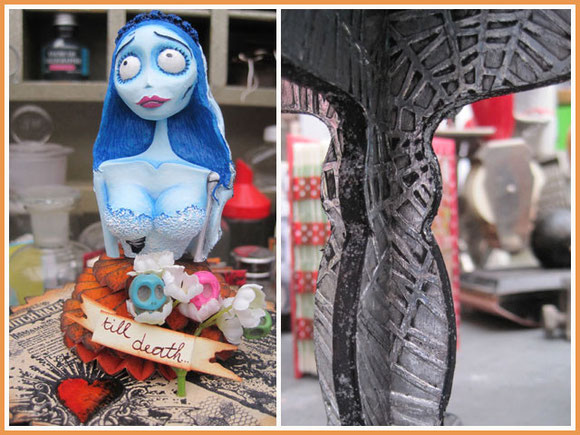
Emily's stand got the same treatment as Jack's, but with a spiderweb embossingfolder.
I added a banner from Tim's bannerstripdie, aged it with old paper distress ink and rusty hinge distress ink.
With an old pen and sepia ink I wrote : " until death...".
" Until death do us part"... but this was not the fact for Emily...
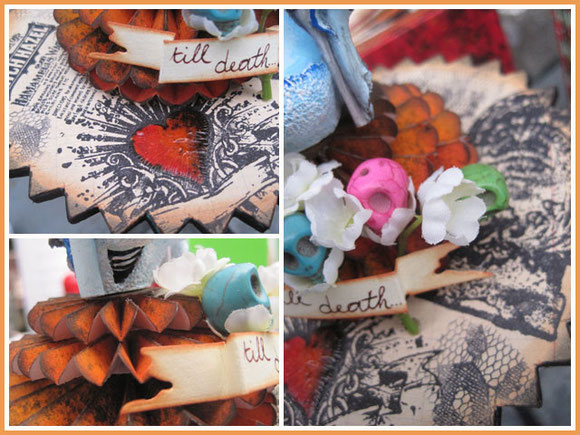
The heart on the base from the Tim Holtz stamp was covered with Ranger crackle glaze. Her heart has been shattered by her groom...not ?
The figures had a metal rod underneath so they could be put in a stand.
We've been looking for some, but they are not cheap and actually not nice too.
How could I add the figures to the cupcakestand ? ...
What about stacking some rosettes ?
I colored sturdy paper with orange, yellow, black and brown dylusions inksprays and cut the rosettes with Tim's rosette die.
The edges and top of the folds were inked with black soot distress ink, to grunge them up a bit more.
I glued four of them on top of each other and put the metal rod in the hole in the middle. Perfect !
They stand up like I wanted, but if my daughter wants them on another stand she can still pull them out. But I hope she agrees they are looking good...
For Emily's bridal boucquet I pulled some white flowers from the stems and replaced them with skull head beads.
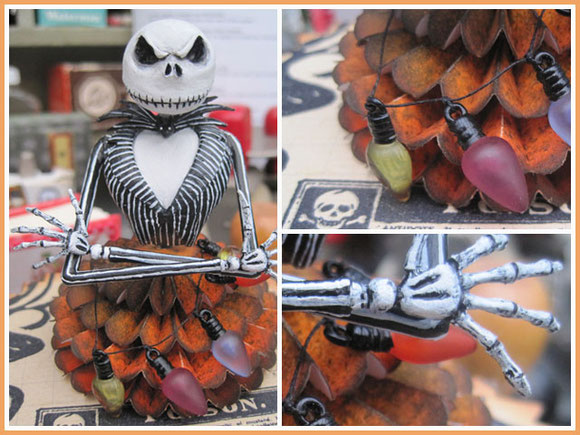
Jack got the same treatment. I think he looks good on his orange skirt... oeps... base...
The little lights were purchased in London a few weeks ago for a project...
They came out handy now for this project.
I hung them on a black string and draped them around the rosettes.
No christmas without christmaslights even not on nightmare before christmas...
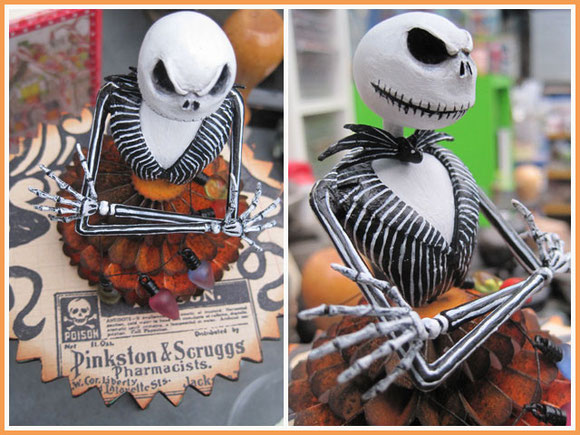
On Jack's base a swirly handmade stamp and the poison stamp of tim Holtz.
He lookes quite satisfied :)
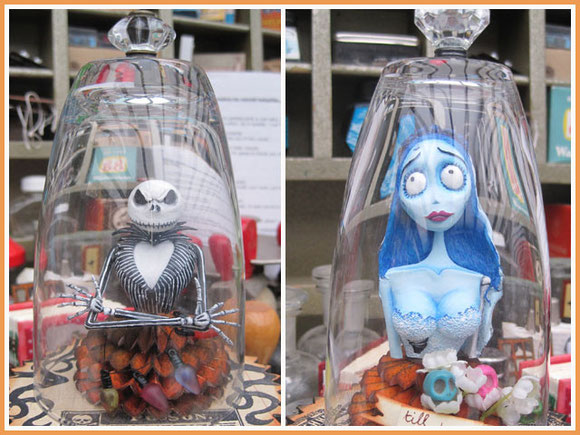
The selfmade belljars finish off the whole project.
Inspired by Shelly, I made these with an ordinary IKEA glass who has the perfect curve and the glass doorknobs of Tim's ideology line.
They were glued with glossy accents on the glass and it holds perfectly !
I'm still not sure if I will decorate the glass bell jars more cause I think I will use them for future projects like a wintertheme, a springtheme,...
I can reuse them, but maybe each project will get their own bell jar.
The bell jars with Jack and Emily are now on my piano display, between more halloween projects.
More about that next week...
Inge
za
13
okt
2012
Art to carry with me for ever...

I have a happy secret to share with you...
A while ago we did a fabric round robin with the Sweet Sistersgroup and Zoë's book was titled : " I wish I listened to my mother"...
What did my mother say or do that I will carry with me my whole life ?
Pondering about it, I came to the conclusion that I had a warm nest to grow up in although my mom was a widow with two small children. She was quite severe, but also did give me and my sister a lot of freedom to develop ourselves.
A few years ago I found a little musicbox with the quote : " give sturdy roots to little children, give wings to bigger children" and this quote immediately spoke to me.
That's what my mom did for me and this is also my lifequote...
I made my pages for Zoë around this quote and I gave my daughter Gaia dragonwings ( fairywings are a bit too cute for her.... Her personality needs stronger wings :)
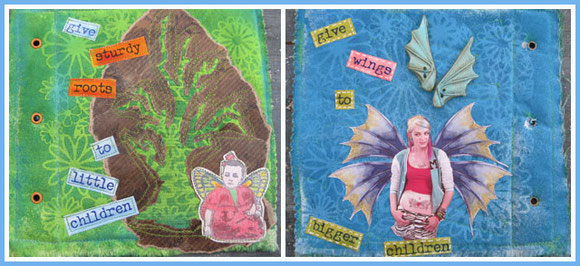
I tried to give my children a good base in life and now they are flying out.
This is also something I want to give my handicapped children of my Poppyclass : give them trust, give them sturdy roots, but also give them little wings to become who they are with the posibilities they have.
I also try to do this with the people surrounding me : family, friends, collegues, people I meet in life .... give them wings...
Life hasn't always been sweet and we had our sorrows : I lost two fathers and my only sister, I have a son with autism ( who is a treasure :), I have a body that doesn't always behave very well because of fybromyalgy and backproblems,... but I try to stay positive in life.
My other life quote is to "enjoy life everyday".
So, I try to give myself wings everyday and try the same with the others.
"Now what's the secret ? " I can hear you think...
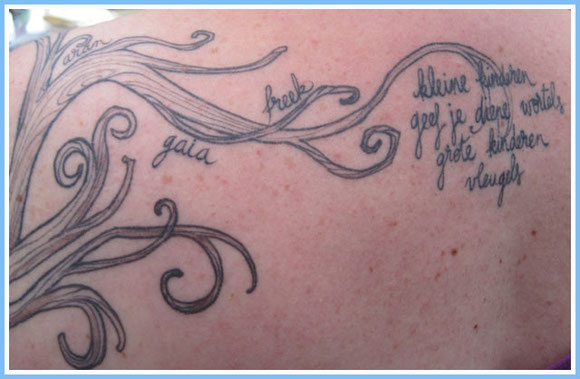
Well, I'm wearing my lifequote on my body for the rest of my life ...:)
I've always loved tattoos, but as a teacher this is not so "allowed" to have, although times are changing.
When Gaia got her second tattoo done by tattoo-artist Jenzie, I knew the time has come. I loved the detailed work of Jenzie.
In the meantime I had become 45 years old and I thought I was finally old enough to decide for myself and have a tattoo: I don't need permission of anybody.... It's my body and it's my life...
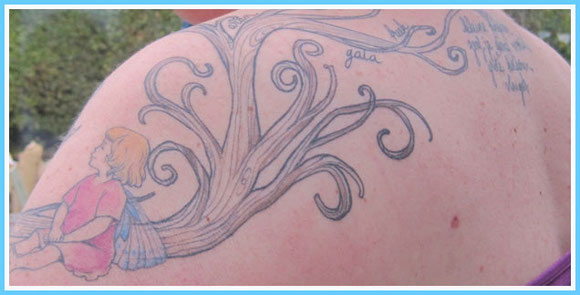
I waited for so long, so I wanted it all in one big tattoo.
The tattoo starts on the side of my shoulder and runs over my back to my neck where my lifequote is tattooed.
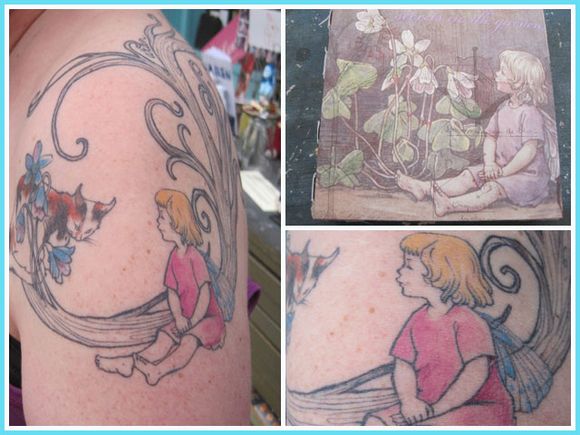
Every image in the tatoo has it's meaning...
The tree on my shoulder almost makes a circle. I love circles and rounds...
Life is a constant circle of death and (re)birth.
The tree represents this life. In winter you think the tree has died, but then in spring... flowers are growing from the bare branches.
The little flowerchild represents my love for children. My own children, but also the children I raise and care for in my Poppyclass.
The flowerchild is a design of Mary Cecily Barker , a watercolorartist who lived in the beginning of 1900 and who's paintings and drawings in her books I cherish for decades.
The child is a "two year old" : I love this age. They are still innocent, but their character starts showing through. She's still close to the tree and the sturdy roots, but she's already getting little wings.
" your children are not your children" said the poët Kahlil Gibran " they come through you, but you don't own them"... ( his poem in Dutch you can find here ). I want to raise children according to his poem.
So, give them wings...
It's a fairy... cause fantasy colors my life since I was born. Fairies, gnomes, witches, lord of the rings, ... anything fantasy inspires me.

The circle of the tree was also inspired by this image of Emily the Strange, a comiccharacter I like.
This image is painted on the wall of my daughter's bedroom...
What I especially wanted on my body for ever, are the names of my children : Freek, Aran and Gaia.
My branches reach out for them, but also give them a lift to fly out.
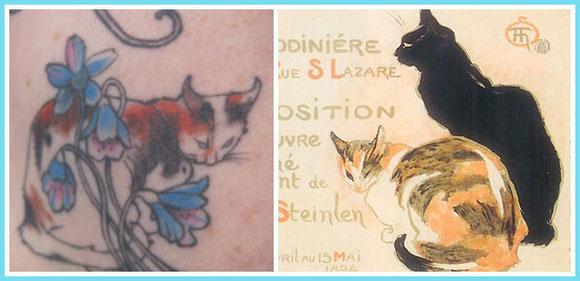
Who also couldn't be absent is a cat...
We have six cats in our home and I couldn't miss any of them. They all have their personalities and they color our life a lot.
Six cats tattooed would be a bit too much, so this cat represents my love for cats.
The cat is inspired by the cats of Steinlen ( 1859-1923), a French artist I love a lot too. I own several books of him and images that decorate my house...
I have my tattoo for months now and I'm still happy I finally decided to have "Art on my body".
Mostly it's not visible cause it's covered by clothes, but I know it's there and I 'm happy about it.
To my joy I discovered on thursday France Papillon, a Belgian artist I like, had her first tatoo too : a butterfly with inkstains.( Papillon is French for butterfly) It's awesome !
I commented on her photo on facebook about my first tattoo on my 45 th and Lorraine Parkinson (Grannypoppy) commented also : she has been a teacher too and had her first tatoo on her 55 th !
Now I know I'm not the only happy creative person with Art on her body ! :)
Inge
zo
30
sep
2012
London, here we came ! ...
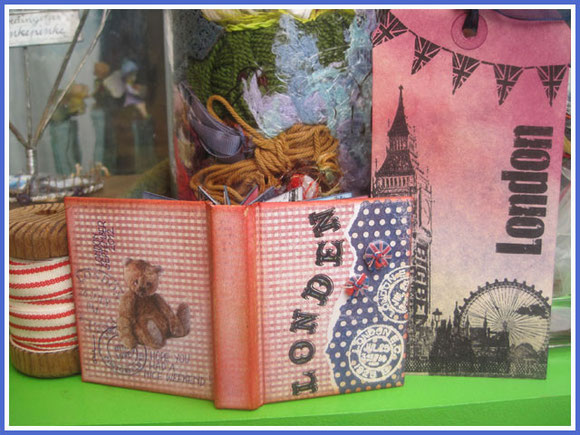
Sorry for not being around for two weeks... 2 weeks ago I had to go facepainting at a local fair and school was too busy in the week to find some time to blog.
And past weekend.... well... we were in LONDON ! :)
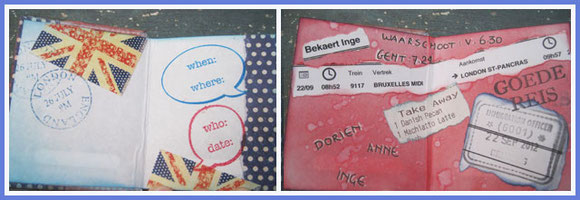
On saterdaymorning 6.30 AM Anne picked Dorien and me up with the car and we left in Ghent with the train at 7.24 AM direction Bruxelles.
After 3 check-ins with lots of identification the immigration officer put his stamp on our travelpapers and we were allowed to go on the Eurostar from Bruxelles to London.
At 10 AM we put our feet on Britisch ground in St-Pancrasstation :)
It felt sooo good to be back again in London and we immediately took the tube direction Ally Pally...
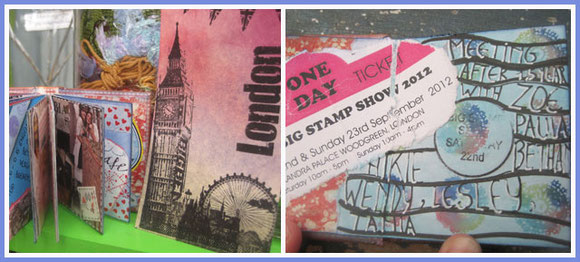
After 1,5 year we finally met our UK friends again at the big stamp show in Alexandra Palace in Woodgreen in London !
What started a few years ago online at the yahoogroup ATT as a collaboration, developed in European friendship.
This was the third time we met Nikie, Bethan, Zoë, Paula, the second time with Tania and Wendy and the first time with Lesley.
Warm hugs welcomed us in the beautiful entrance hall of Alexandra Palace.
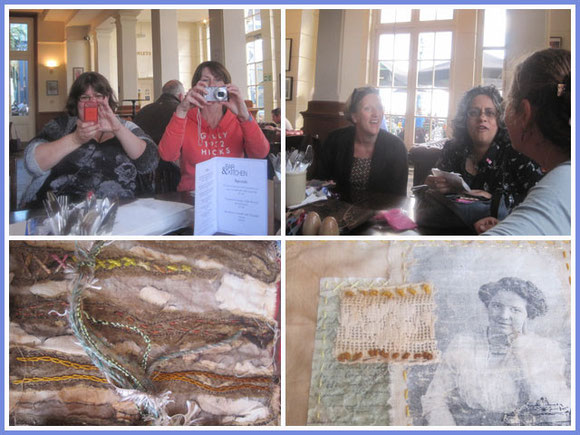
We first headed of for a drink and some food and the first chatters ànd of course having fun taking photos of each other!
Lesley would not be able to stay the whole day with us and she has collaborated with us in our fabricbook of the Sweet Sisters.
She brought some more of her handmade books.... mixed media... fabric, paper, transfers, stitches,... One of her bookcovers looked like the bark of a tree, but it was completely made with fabric and fibers...
This surely is someone we can learn from a lot !
Edit : Nikie stayed with us the whole day, but I couldn't spend a lot of time with her. Maybe next time ? Anyway the "bark"book is not Lesley's, but Nikie's !! Sorry Nikie I messed them up... One thing I know for sure : you and Lesley are both fabricartists I could learn a lot from !!
Then we headed into little groups into the craftshow...
I thought I would hyperventilate... the hall was big.. so many boots... where to start ?... where to spend my pocketmoney ?...
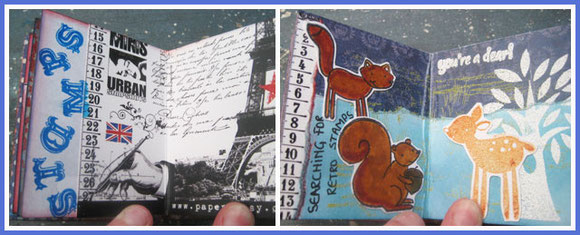
What's so nice about this craftshow is that there are so many British stampcompagnies with stamps I've never seen...
This also made it very hard to choose and eliminate... what to buy, what not...
One of the targets of this day was to find a retro fawn... everybody helped me searching and I indeed found two sheets with a retro fawn on it... You'll surely see some creations with it in the future.
I filled my bags with stencils, stamps, dies, embossingfolders, distress stains, glitter,....The fuller the bags, the emptier my wallet... but I saved a long time for this day, so I sought, found and bought everything I had on my wishlist... and more :)
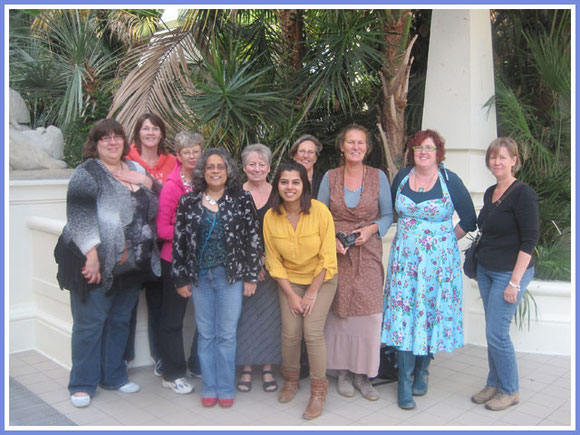
At 3 PM we had a stop for a drink and some sharing about what we found, what we were still looking for, which booth we must have seen...
Tania joined us and we took a groupphoto of Euro-ATT group.
From left to right : Zoë, Bethan, Lesley, Wendy, Nikie, Dorien, Inge, Anne and in front Paula and Tania.
At 5 PM they closed the doors of Ally Pally... so we were "kicked" out :)
With 7 left we head over to our hotel close to St-Pancras station.. We checked in, left our heavy bags in the room and went to the hotelrestaurant for dinner.
They gave us a good price for a three course meal ànd our breakfast, so we took the deal.
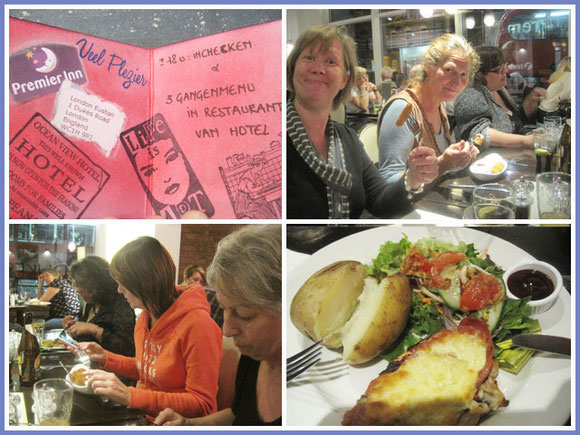
Maybe the British are not well known for their cooking like the French or the Belgians, but it tasted perfect. Mmmmm.... a jacket potato with chicken and melted cheese,...
The compagny was good too, so we enjoyed the evening together with lots of stories.
With full stomachs we headed over to Bethan's room, rearranged the table and chairs and beds, so everyone could sit around the table.
We didn't made it to create together in the room with our first aidcraftkits as it was our initial plan, but we shared a lot...
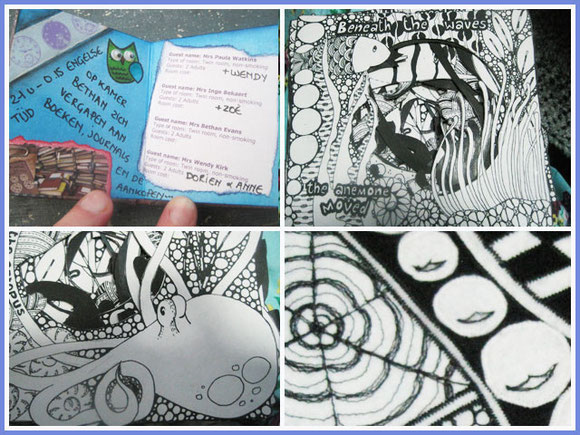
Books, books, books... everyone had their fabricbook with her we created together the past year in a round robin. Some of the pages we had seen when the books were in our homes, but lots we have not seen.
A lot of ooh-ing and aaah-ing and how did you do this, what materials you made this with,... a sharing of materials and techniques.
Zoë had her zentangle tunnelbook with her... no words to describe how awesome it is. In this book went hours and hours of drawing...but the result is stunning. Zoë even had a piece of stitched zentangling with her.
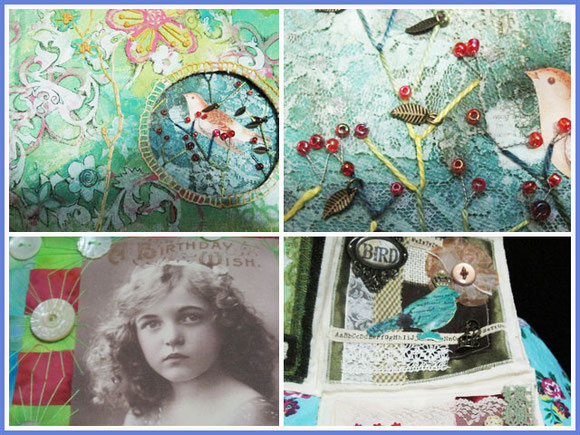
Paula and Wendy also brought some of their books made with lots of materials and techniques : real pieces of mixed media art.Sigh...
I wanted to soak it all in, took several photos so I could learn from the experiences I had with these books.
After the exchange of the booknovelties, we had to share our bags from Ally Pally....
What did you buy ? Why ? What are your intentions to create with it ? ... enough stuff to fill the evening chatting together.
00.15 AM British time everyone went to their bed in the big, clean room (what a difference with the Paris hotelroom...) and I had a good night sleep in a good bed. I didn't even heard Zoë snorring as I have been warned for...:)
On sundaymorning we had a good British breakfast that would feed us whole day.
At 10 PM we left our hotel for Colombia Road... in a British weather... rain...
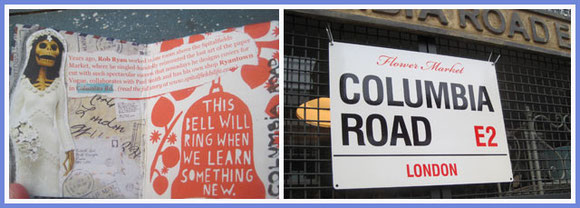
Taking the tube, waiting for a bus and walking to Colombia Road in the East End of London made us experience the pouring rain, but no problem once we arrived in the street...
I've never been here before and I even never have heard of this road although this was my 7th visit to London...
Colombia Road is known for its flower market on sunday.
Nothing to see in the week, but on sunday the whole street is full with flowerboots.
On the right and left side there all lots of small shops, only open in the weekends.
We went shop in, shop out, avoiding the rain by doing this and making discoveries....
What do you think of the Ryantownshop of papercutting artist Rob Ryan ? Take a look here for his website and an idea of his creations. I love papercutting, but his work is a real labour of love and patience.
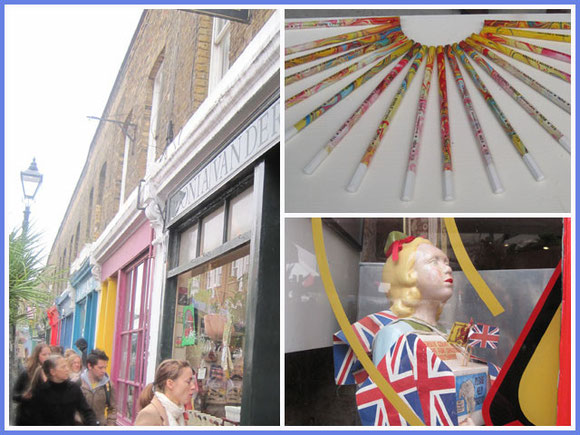
Everyone hopped in and out of the shops... a small Japanese papershop... I bought tiny tiny paperclips here.
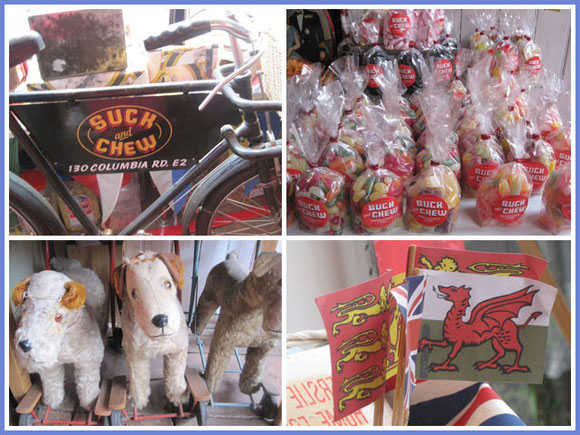
A candyshop... lots of British candy, but also vintage tins and these cute dogs.
I bought an altoid tin with mints. Now I have to eat them all quickly so I can create a mixed media piece with it as I've seen from Bethan and lots on Pinterest.
Bethan showed me the Welsh flag with the white and green and the red dragon ... that day I learned Wales is a country in the UK and is not English...just like Belgium is an independent country..
I promise, Bethan, I never call you English again ...LOL...
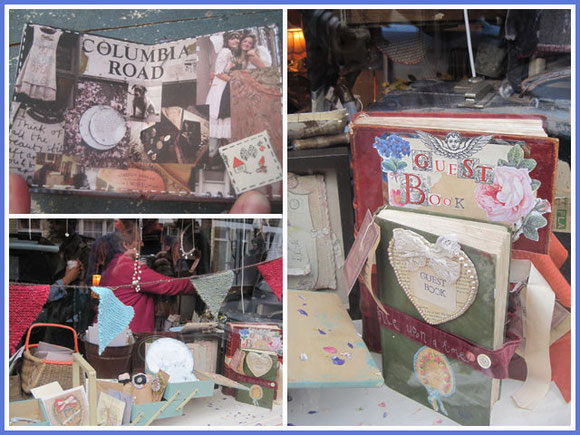
Two girls who are also very proud of their Welsh origin are jessie and Buddug.
They earn their living with their mixed media : hand embroidery on vintage cloths, collage, journals, books, cards, enamel on metal,...
These girls are worldfamous. People from all over the world come to their little shop in the weekend, even from Australia, to see and buy their creations.
You can find more about their projects here
They were surely inspiring for us !
At the end of the street I heard music that gave me goosebumps... the voice, the instruments...
A small girl stood there singing with her guitar, accompagnied now and then by a guy with a cello...
streetmusicians ?... as they moved my heart, I gave them some money... but I came back when I saw there was a "contactbook" lying down...
I wrote my name and commented : " if you had a CD I would buy it immediately..."
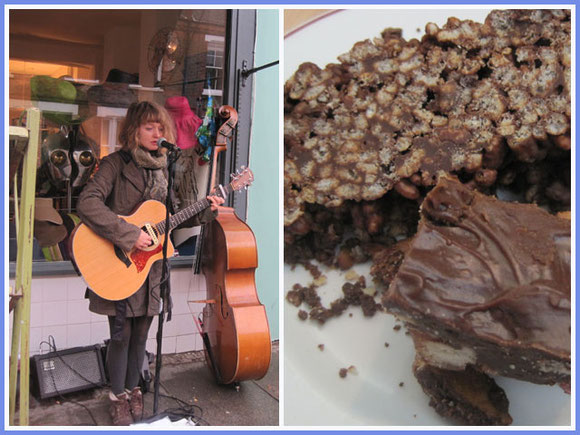
Oh look... there were CD's too ! I bought one immediately as a support for these young musicians and ,girls, am I glad I bought the CD !
Once home I listened to the CD of Brooke Sharkey and listened over and over... this is the perfect music for my artroom :)
You can find more about this musician here
She's already playing a lot in the UK , but still plays on sunday on the street, as her father, a musician also, recommended her.
Luckily she was there on sunday or I would never have met her and missed some gorgeous music in my life !
Time for a break and a chocolatindulgance in a local communityhouse.
After that Zoë and Wendy left us... till next time !
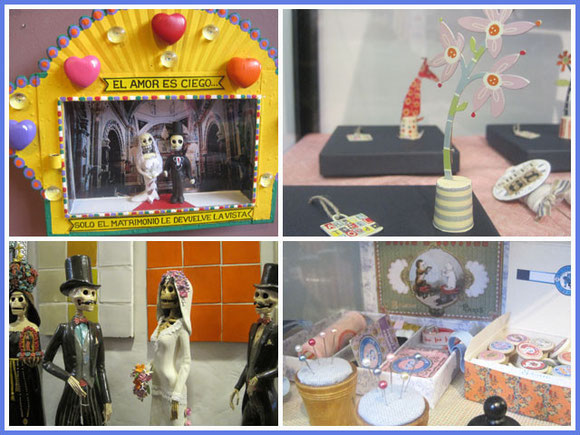
A shop with mexican creations : "dios de los muertes"... a favorite of my daughter so I took her some photos as "inspiration".
Seeing all the beautiful fabric books the past two days, we couldn't ignore the little fabricshop "beyondfabrics" with lots of fabrics in vintage and retro style. You can have a look at their shop here.
They had a nice glasscabinet in the shop with vintage sewingnotions and some handmade stuff.
Anne found lots of special ribbons for her mini bears and I bought a ribbon with "red riding hood"images for my tunnelbook " once upon a time red riding hood went into the woods...", a book that is currently on a journey from belgium, to France, to the UK, to the Netherlands,...
We left Colombia Road in the pouring rain, but not before I bought myself a package of English pink roses on the flower market.
Whe we went through the check-in that night at the eurostar, the man behind asked : " Pink roses ?..." I said : " I bought them as a hint for home...".
He just smiled :)
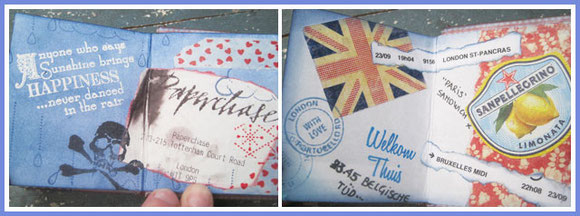
We went back to the center of London by bus where it was much more crowdy.
Paula had a proposal... could we hide for the pouring rain in Paperchase ? ...
A papershop ? Surely ? Can you get a "no" when you ask this to creative people ? ....
This is so much more than a "candyshop" for us. This shop was a revelation for me : all the handmade and printed papers, the paperstuff ( books,...),...
I spent my last pocketmoney here on washitape, skull erasers ( which I already molded with mold-'n -pour...) and some halloweenstuff for my daughter and for home...
I think we wandered seperately for 1,5 hour through the shop... until we really had to leave otherwise we would miss our train !
We kissed goodbye to Bethan and Paula and took the train back to Belgium at 7 PM.
I came home at 23.45 hours...
Packed with lots of stuff, but mostly with lots of gratitude of the past weekend and the meeting with friends.
We'll see each other again in spring ! Promise..
Inge
PS : several of the girls had little gifts for each of us ( thanks ! ). The little bearbook was a gift from Anne when we left home. I used it as a little "journal" for the days in London...
zo
09
sep
2012
addicted to Pinterest...
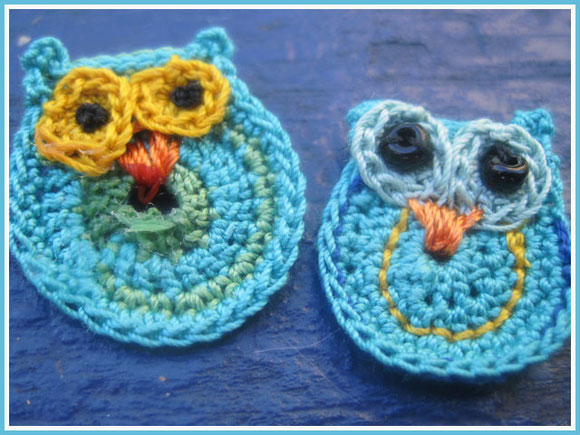
I admit... I'm addicted to Pinterest...
I'm on facebook, but hardly use it.. just use it to have a look at some peoples account, but it's not my thing.
When I heard about Pinterest, a digital pinboard ( but also a social network...) a while ago, I thought maybe this was something for me.
I got an invite and logged in, but didn't took the time to "learn" how to use it.
In one of my favorite magazines " Flow" was recently an article about Pinterest and I got curious again.
With the help of the article I took my first steps in the use of Pinterest and the rest is history...
Every night I dig in my bed with the ipad and go searching on Pinterest.Actually the use of it is quite simple...
You can "pin" interesting things from a board they suggest or you can "pin" interesting things you find on a website yourself.
In the two months I'm using Pinterest I created 31 boards. Most are about creativity, art, house or gardenideas,... but I also created some for school.
A new world opened again and I'm making new activities for the handicapped children in my Poppyclass thanks to ideas I found on Pinterest.
I also made a board about crocheting when I found these...
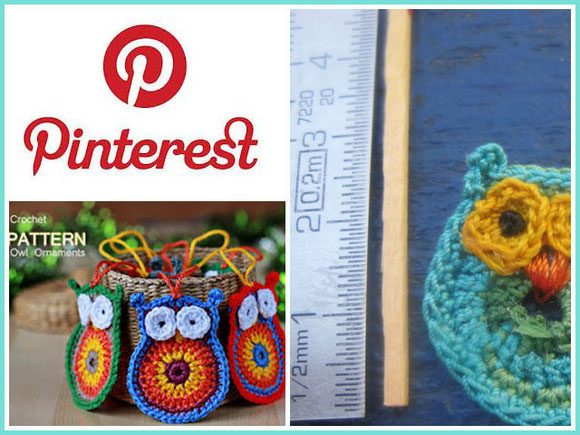
These cute crocheted owls caught my interest and thanks to the "pin" of Pinterest, I could find the Etsyshop of the designer of the patterns.
I ordered the PDF's yesterdayevening and today I tried them out.
You probably know I like to work with very fine yarn and my owls are just 2,5 cm ( 0,98 inch) high. Oh, I feel the ideas coming to incorporate them in other creative projects....
Keep an eye open, you certainly will see these owls appear again...
Only downside of Pinterest is that you get addicted... this means you go in bed at 10 PM with the intention to go sleeping early, but the clock passes midnight and I'm still collecting "just one more pin"....:)
You only can get into Pinterest through an "invite", so if you are interested let me know your emailadress and I send you an invite. (If you don't like your emailadress in the comment, send me an email at [email protected])
Are you already on Pinterest and do you have interesting boards to share, can you send me your link in a comment so I can follow you?
When you are logged in, you can find me here.
Another creative news : my mom and I are part of the artexhibition Gîrn-Art in Boekhoute ( Belgium).
She shows her painted trees and I show the books I make and my projects I did in "round robin journals" locally, European and international.
People are very surprised to hear about these roundrobins and ATC's and I loved telling about them yesterday when I was there to "guard " the exhibition.
I've been so busy telling that I forgot to take photos of the displays of our work...
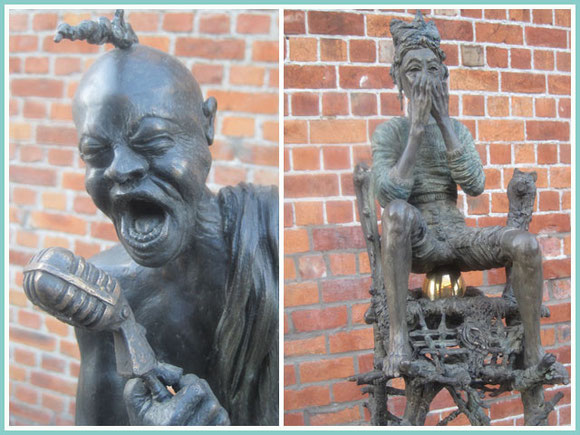
There are more then 20 people showing their projects and I can't call everything "ART" ( I don't even call my own projects art...), but these little statues are ART for me. I love the creative ideas he worked out and all the details in the bronze figures.
Another project I liked were large paintings made with lots of gelmedium and paint. They are very colorful and lots and lots of texture. I could hang one of these in my house :)
This painting also caught my eye.
This painter ( I don't even know his name... shame on me...) really showed an own style. He can draw, he can paint, he can tell a story,... this is ART for me.
Seeing these paintings I know I must exhibit the paintings of my daughter in the next edition of Gîrn-Art in two years... She also has a very own style and I have not seen anything similar...
The last creative project for today is a commission that I got.
I was asked to make a design for a large poster A1 size. There was a poem about the sea she wanted on it. It's a present for her mom who's very fond of the sea.
I used a photo of a part of the background I made in Eileen's evolutionjournal which was made by adding gelmedium through a stencil on old bookpages. Layers of blue paint were added.
In photoshop I added a part of a songtext of Jacques Brel, a Belgian singer about the sea. The songtext is in French and used as digital layer.
On top I added the wanted poem of Frank Eerhart.
This was the first time I made such project ,but I have to admit I love to see my handmade background printed on a large poster !
Inge
zo
02
sep
2012
roundrobin journals...
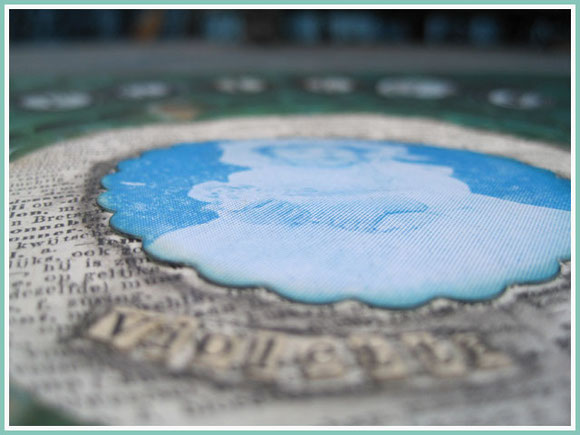
I'm involved in several round robins : a local round robin, a European and an international round robin.
Our local round robin has come to an end after one year. Yesterday we came together to meet, to chat, to eat and to exchange the books and see each others projects in the books.
I made applecupcakes, chocolatmousse and chocolatcookies ( first time I made these, but they are sooooo yummy...) and my friend made a rhubarb cake.
With a cup of coffee and some sweets we got started for a whole afternoon....
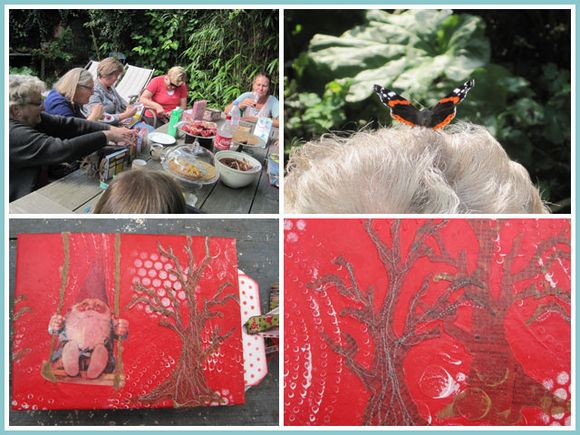
The enveloppebooks left home a year ago and came back filled with creative pages. We picked a name and looked at her creations in every book and did so for every book.
This gaves us the opportunity to see how people evolved during the past year, if they grabbed back to some favorite colors or experimented with different techniques everytime,.. Sometimes you really could see someone developping an own style, others have different styles. Very interesting.
We were not the only ones intrigued by all the colors and textures in the books. There was a butterfly that came back several times to land on my mom-in-laws white hair ! :)
In november we start with a new round robin : an ATC enveloppebook. You can see an example of what it can be here.
I haven't been creative at home past week, because it was filled with preparations for school tomorrow !
My body and back don't completely agree with this, but after being home for 9 months with backproblems I want to start again in my Poppyclass with handicapped children. We'll see what the future brings...
I decorated my class in a "summer afterparty" and I used Tim Holtz dies to make a banner etc.
I forgot to take photos, but I promise to show you some next week !
Another round robin that's almost coming to an end is an international one : the evolution journals.
I made the past weeks pages for Valerie's steampunk journal and Lillians book.
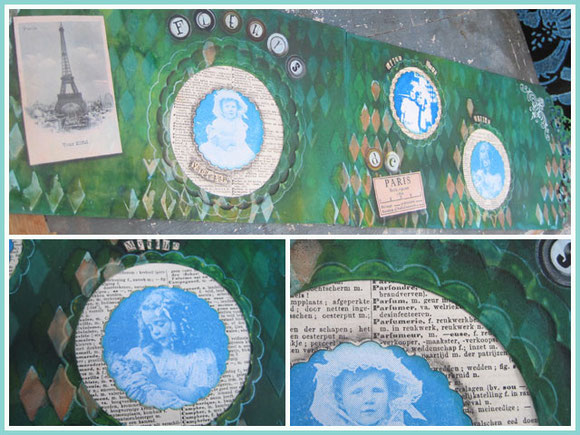
The previous page of Valerie for Lillian was with lots of geometric shapes in bold colors.
The harlequin shape got me inspired and I found a stamp of two girls with a harlequin image in the back.
Being back from Paris inspired me for a Parisian theme...
The background was made by painting with gesso and after this was dry, putting gesso through a harlequin stencil. I first inked the whole page in orange, but then found out that azurblue was Lillians favorite color...
So the page got another inkspraylayer with Dylusions spray and it turned out to be a green-blue background.
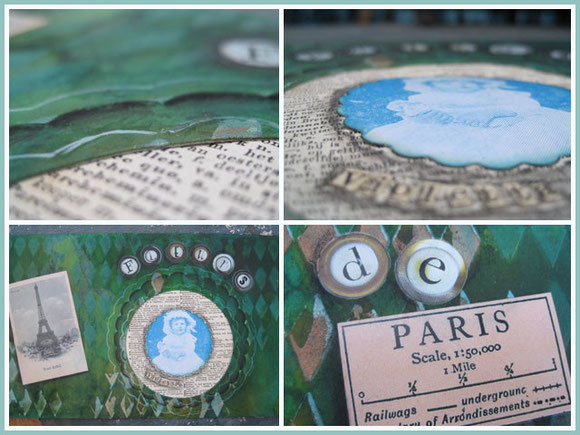
In my last workshop at home I teached the participants to use wafer thin dies and I wanted to experiment a bit more with this myself.
So, I punched out big circles with the circle dies and added texture by embossing with another scalloped circledie.
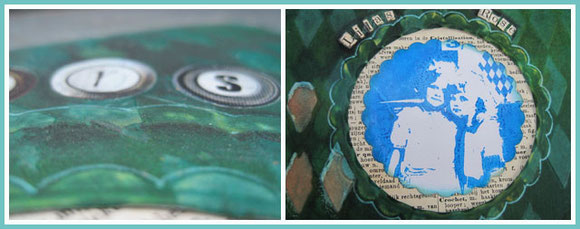
I loved the result of combining this two techniques. I enhanced the depth by adding charcoal pencil in the scallops.
You never know where the muse takes you, so having one stamp with little girls, I evolved during the project. The cutouts looked like flowers and in the open space I added vintage French bookpaper and photostamps.
Each girl got the name of a flower : Myrthe, Lilas, Rose and Violette...
Here was finally the name of my page : " fleurs de Paris"... ( "flowers of Paris")!
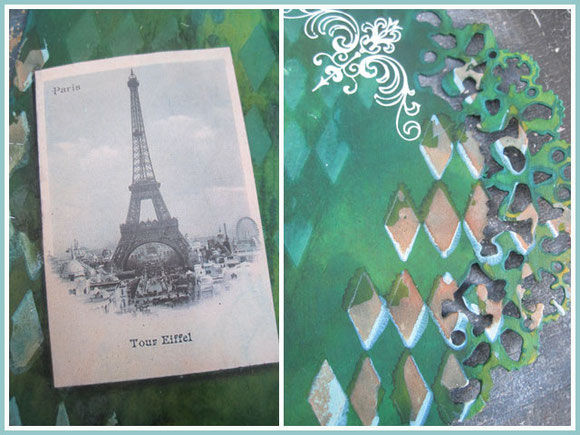
I had some images of Paris for ages, but I am more drawn to stamps then to images, so I use them very rarely.
The image of the Eiffeltower finally found it's spot here on this page.
As the evolutionjournals are also about "going over the edge", I used the "doily edgedie" of Tim Holtz. This refers to all the lace and frills on the clothes of children of the 1900's.
I had a lot of fun making these pages because of experimenting with the dylusionssprays ( which showed in very inked fingers...) and different dies and techniques.
Another journalpages I made are the pages for Valerie's steampunk journal that's "out of the world" if you could see it...
Seeing the photos of the previous projects in this book made me a bit scary of the high level of the projects ànd what more could I add to the steampunk theme ?...
Gina made an amazing textured collagepage with a steampunk " mother of invention"...
This word swirled around in my head and made me think of "mothers of invention", the group of Frank Zappa...
I wanted to do something with Frank Zappa whom I find a very attractive guy... ànd he was in his time an inventor of new ways of music and experimented a lot with styles...
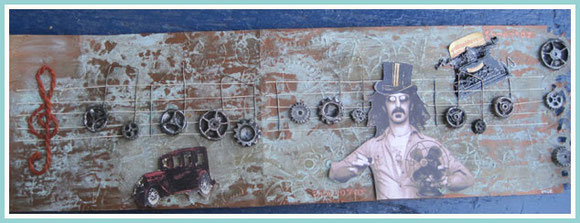
Here's my interpretation of a Frank Zappa in steampunkmode...
I made the background with gesso again and a stencil of gears to make texture.
With modern option paint I achieved the copper verdigris effect.

I don't have lots of metal gears cause they are quite expensive here, so I made some myself...
I made a mold of several of Tim Holtz gears and used UTEE to make several gears. I painted them in silver and then overpainted them with black paint.
The black was rubbed off before it was completely dry, so the silver is exposed again, but there is black in every cranny and nook of the gears.
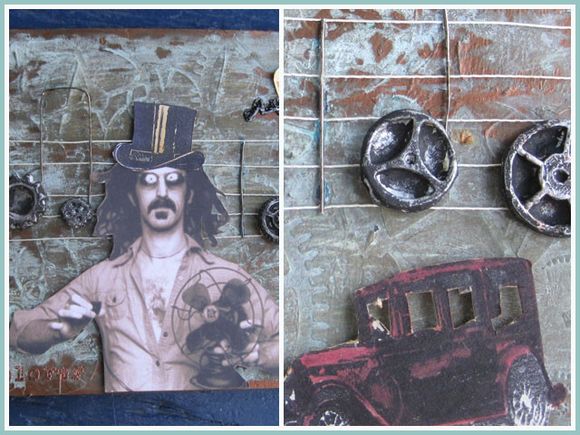
I used the gears as musicnotes on string I sewed on the backgroundpage. The notes form the first notes of " Bobby Brown".
A downloaded image of Frank Zappa ( changed to sepia color in iphoto) was mounted with 3D foam on the background..
I like Frank with his high gentlemanhat !
He even got his "fast car" : a Tim Holtz stamp.
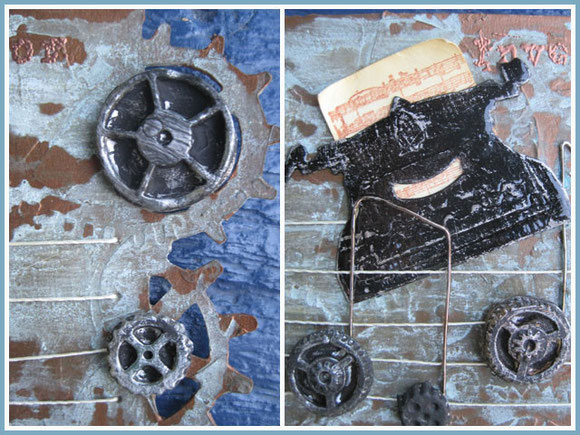
The edge was made with the gears edgedie of Tim Holtz and selfmade gears were added as an extra textural element.
I bet Frank Zappa could have invented a typewriter with which you could write music...
Typewriter is a die from Tim Holtz and was cut out of cardboardpaper, painted with black paint and distressed with sandpaper. I added glossyaccents on top.
Because of the busy week for school these pages are still in Belgium, but today I'll wrap them up and send them off to the US.
Only two more evolutionjournals to go and then we are ready for another new project !
Inge
zo
26
aug
2012
flying out of the nest to Finland...

Freek is leaving home for at least 4 months...
Freek has studied political science for 4 years at the university and past year he started another 3 years of studies : social science this time.
Now in his second year he gets the opportunity to go studying in Helsinki in Finland for 4 months.
I've never been without one of my kids for sooooo long, but I didn't want to deny him this unique experience just because of me having it hard to part from my kids...

He's 23... so it's time I let him go on his own journeys... I had two little kids at his age...:)
I'm completely ok that he goes now. I just hate the moment of saying goodbye tomorrowmorning....
I bring him to the trainstation and he leaves with the train of 6 AM.
At 8.30 he's getting his aeroplane, first to Riga , then to Helsinki....
He's limited to bring much luggage, so I made him a small "cherishbox" to take with him on his journey.

It's made from a small metal mintbox.
I painted the outside with the Ranger vintaj inks which are permanent and will hopefully last a long time.
I stamped some postmarks, no not from Finland ( but I'll ask Freek to search for a Finnish rubber stamp) ...and a quote from Tim Holtz.
I cut out letters from an old book and glued them on a stamped tag : "koesterdoosje Finland" ( cherishbox Finland).
I embossed the label with UTEE to make this sturdier too.
In the box is an accordeonfolded little book with photos : family on one side, our six cats and our home on the other side.

I know young people are sometimes so busy with their life that they don't really miss home, although they are missed a lot at home...
I hope he cherish this little box in his temporarily new home in Helsinki.

I wish him an uncredible good journey there with lots of new friends and meeting with "old " online friends, an interesting study in Finnish ( he will learn Finnish ... but they also teach in English).
He will travel to places I've never been before : it seems they even go with the foreign students to Lapland ( will he find the real Santa Claus there ? ...) and he will probably spend some days in St-Petersburg in Russia...
Amazing what opportunities young people can get nowadays.
I wish him everything good...but especially a safe homecoming in a few months...
Inge
zo
19
aug
2012
Paris in pink..
A big week ago I was in Paris for two days with my 19 year old daughter Gaia.
My intention was to blog about it sooner, but life came in between : doing homework, having two workshops : one for adults, one for the children of my collegues, I've been on a fleamarket past sunday, I went to the tattoo-artist to finish my tattoo,..
Anyway, here is finally my story about our "Paris in pink" journey...
We left home on wednesdaymorning 8 august at 5.45 AM and arrived in Paris with the Thalystrain from Brussels at 9.30 AM.
Our first stop to visit was the Eiffeltower... The photo on top of this blogpost is the sight we had on the Eiffeltower when we turned around the building close to Trocadero metro station... We were on a hill and had the Eiffeltower straight in our sight.
We took the stairs down and passed by a beautiful area with fountains, but although it was warm you're not allowed to sit on the grass or get your feet wet in the water...
The Eiffeltower rose up as a giant tower before us. It IS huge when you're standing under it. Hundreds ( or thousands ? ) of people were waiting in very long lines to take the elevators and the stairs...
This waiting is nothing for me and my daughter, but we enjoyed admiring the different sides of the Eiffeltower and seeing all the metal and scrollwork.
The Eiffeltower was built for the Worldexhibition in 1913. After the exhibition there were plans to demolish the Eiffeltower but there was a lot of protest also because the tower was and is still used as a broadcasting tower.
Who could have thought that the Eiffeltower would grow into a national symbol for France and Paris !
It IS a nice example of technology and detailed ironwork.
Walking through a park and the building of " l' hopital des invalides" we arrived at the Champs Elyssée... In one of the sites online I read that the Champs Elysée is one of the nicest roads in Paris... Hmmm, this does mean you don't look at the traffic that's running by or the big commercials of the shops...
My daughter bought some clothes on the Champs Elysée ! ... No nothing expensive :) They had a H&M there and she found some good bargains : a new jacket, t-shirts and a short... I was happy cause she don't often find something she likes in the shops and now she was clothed completely for 80 euros!
We had lunch in a cute pizzarestaurant. The pizza tasted perfectly and I liked the decoration in the restaurant : wallpaper with vintage images and a wall of books.
Love this metrosigns ! They are original art nouveau creations and you can still find a lot of these in Paris.
There are new metrosigns, but although they are bigger and modern I still prefer these !
We would have loved to visit the catacombs but there was a huge line of people waiting. Someone came and said we had to wait at least 1,5 hours and it was even not sure we could get in after all the waiting because they close at 16 hours... The catacombs are only open between 14 and 16 hours...
Damn, this was a touristic place that would have intrigued my daughter...
In Paris they not only have art nouveau metro stations.. I loved this "steampunk" one too !
Upstairs we took the stairs... but that was much heavier then I thought. Now I could understand why there was an elevator :)
In the elevator back down we had a nice reaction on my daughters pink hair...
I thought Paris was used to quite a lot, but my daughter seemed to be one of the attractions in Paris with her pink hair... She got lots of comments ( nice and not nice ones), lots of staring ( funny, happy reactions, but sometimes also impolite staring and not by children...)
In the elevator a young girl stood right before my daughter, said nothing, but stared at Gaia... I asked the girl : " do you like pink ? "
She stopped gazing, turned around and nodded...Her British grandma gave her grandchild this reaction: " All princesses wear pink ! ..."
Oh, I love this reaction ! I understand that people have a second look, but impolite staring is not nice...
I was surprised by the reactions in Paris...I thought they were a lot more innovative.. I'm sure my daughter wouldn't even attract attention in London...
Do you understand now why my blogpost is called : "Paris in pink " ? :)
We went to the Notre Dame... This is the church we all know from the "hunchback of the Notre Dame"...
We would have loved to visit the church inside, but there were again huge waitinglines in the burning sun.
Next stop : "cinématique"... Actually this was the reason why Gaia and me were in Paris... We are huge fans of anything Tim Burton produces and we knew there was an exposition in Paris for a few months.
Because of my backproblems we didn' make it earlier to Paris.
Gaia's friend visited the exhibition in the beginning of august and said it was so worth going.
Gaia still wanted to go, searched the internet and found out the exhibition was until the 12 th of august.
I immediately booked a train and a hotel and our dates were 8 and 9 august.
When I asked Gaia to look on the internet for tickets to avoid standing in line, she discovered on the official site the exhibition was due to the 6th august....:/
The travel to Paris was booked, so we swallowed in our dissappointment and looked up other places in Paris to visit. Gaia had not been in Paris before, so this would still be a discovering journey.
We did go to the place of the exhibition hoping we could at least visit the museum and maybe there was still something to see from Tim Burton or we could buy the book of the exhibition in the museumshop...
It was closed.... they were in vacation since the 7th august and the museum was closed for the whole month of august...
We wish we could rip of the poster of the exhibition but we didn't dare... Luckily we found later in a coffeeshop a small poster of the exhibition and when we told the lady "our story" she gave it to us :)
After traveling up and down the metro, walking miles between all the tourists, we long to have some " quiet" time..
We found this peace in "le Marais", a section of Paris that's worth while visiting too.
There are tourists here too, but not as much as close to thé touristic places. Le Marais is a part of St-Paul.
In the early days Paris was not so big. It was a small city surrounded by little towns like St-Paul. Once the centre of Paris grew, the big city "swallowed up " all these little towns and they became a part of bigger Paris.
You can still see these little towns in the St-Paul region. You walk a street and suddenly you see a big gate that stands open. If you go inside, you discover behind this gate more streets and little shops and nice coffeeshops to sit down quietly.
We even found a little American shop in one of the streets... They sold "Duff beer" ! Didn't buy one but had to take a photo to show at home "Homer Simpsons favorite beer".
We did bought some special m&m's you can't find here, some icing for cupcakes and "nerdcandy from Willy Wonka" !
I had to buy these for my "nerds" at home and save an original product of Jake and the chocolatfactory... ( hello Tim Burton, did you lend us this way to find this shop ? ...)
There's also a little museum in Le Marais :" La musée de la magie". It's a small cosy museum filled with original posters and stuff used by magicians of bygone area. There are a lot of optic illusions too. Even people of our generation are amazed by these.
There is a small magician show and although we are used these days to big revelations, the magician made us wonder : "how does he do that ? ".
There was also an exhibition of "automats", vintage and newly made.
These were the attractions you could find on fairs 100 years ago.
I loved the growing nose of Pinocchio ! Made me wonder if I could make it myself as a " mechanical card"...
A small museum worth while visiting if you are in Paris, with or without children.

Although I've been to Paris before, this was the first time I took a ride in a " bateau mouche" on the Seine...
I can highly recommend this as one of the first things to do when you visit Paris !
I bet it's very crowdy during the day, but we did this at 8 o' clock in the evening and this was perfect.
It was very relaxing and the trip on the Seine really made you seen the "grandeur" ( "greatness") of Paris.
We sailed under several bridges and none is the same. There was even a wooden bridge, but most are from iron and stone, but what a huge nice ornaments they have !
This boattrip leads you past most of Paris famous "grand" buildings : the Louvre, le Musée D'Orsay, the Notre Dame, the Eiffeltower,...
It was one big building next to the other and that moment made me realize why Paris is indeed a "world city".
When you walk through Paris you walk between the buildings, but you don't have a clue what's next or behind that building.
The boattrip showed it all !
Everyone knows the left image of the Notre Dame, but actually the Notre Dame looks more beautiful seen from the side or behind.
The frontside is quite ungainly although the details on the front makes it nice to look at.
But look at the photo on the right ! What a gorgeous window and all those fine little towers !
Look at all the carved details in the towers or the ironwork on top.
Can you find the gargoyles on the right ?
It was hot in Paris and it looked like every Parisian came out of their house.
It was nice to see how people "live" at the sides of the Seine : people were sitting there, making music, dancing,.. They even made a beach with sand along the sides of the Seine !
The boattrip took almost an hour.
Just before it became dark, we passed beside the Eiffeltower. Funny how lots of people grabbed their camera to take photos of themselves with the Eiffeltower in the back...
I made a funny one of Gaia saying she didn't want such photos...
Then we went back to our hotel : completely worn out...
The photos in the internet didn't show what we got...
The location of the hotel was perfect : close to the Bastille and two metrostations, but it was small and dirty...
The bed for two persons was very small and Gaia preferred to sleep on the ground..
There was mold in the closet, on the tubes,...
Sheets were clean, but there were spots on the bedspread...
The people were polite and nice and we could leave our luggage there too, but it's not a hotel I would recommend or go back.
Paris is expensive, but next time I look for a hotel in another category I did now...
Anyway we did catch up some sleep...
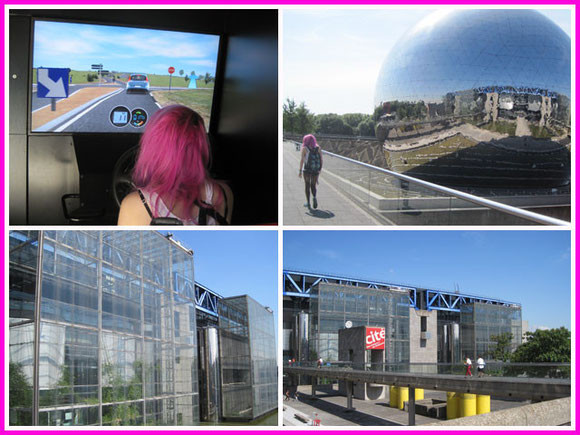
Next morning we went to a newer part of Paris : the museum of science and technology.
The building and it's surroundings look like one of the scenes in the film " inception" : very futuristique, but I did like it.
The museum is huge and you can spend more then a day there, especially with children. There are lots of interactive displays and Gaia tried out an "electric car".. Hmm, she crashed... but I have my driverlicense and even I crashed ! ... Hope this doesn't mean anything for the future for her or me...
The museum is placed next to water at Port de la Vilette and has a nice parc too. Worth while spending more time in the future.
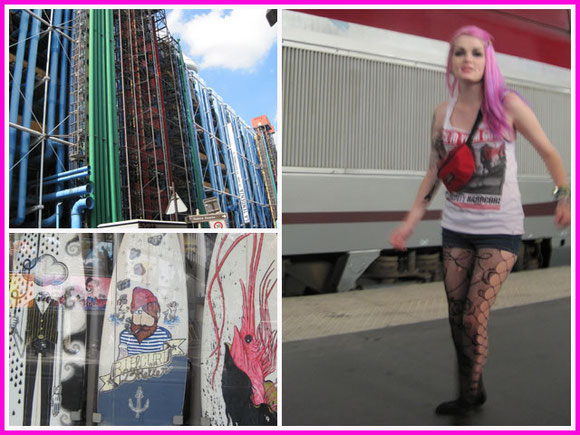
We spend the afternoon looking for a papershop with stamps 'l' art du papier", but after walking miles, we must agree that " rue de Montparnasse" is not the same as " boulevard de Montparnasse",...
We visited some gothic shops, passed by Centre Pompidou ( the photo left on top). This was the back of the museum of modern art and yes, it's special, but actually it's ugly too...
We ended up in "gare du Nord", where we would catch our train back home.
Gaia ended up walking on her socks in the station: her feet hurt and were overheated...
Two days in Paris with my daughter was a revelation, but it's very busy and after two days in the crowds and noices, I felt "overexcited" by all the stimuli..
Nothing feels like home and it's nice to have a home to come back to...
Or when it's hot like the past days, to float in my outside bath...
Inge
di
07
aug
2012
it's all about ATC's ...
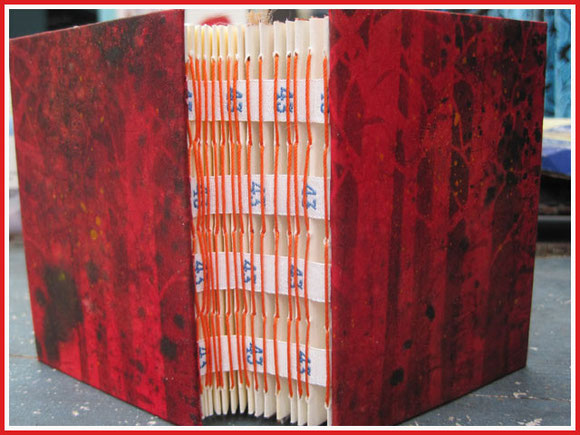
I'm working on a new project for a new round robin...
At the end of this month our current local round robin of an enveloppebook ends when we meet and give the books back to the owners.
People have already been asking "if I had an idea for a new roundrobin"...
My proposal is to make a small enveloppebook with space in every envelop for an ATC. Each participant may choose her own theme, but decorates in every book one envelope and makes one ATC according to the theme.
As an example I'm making a Halloweenbook. Every time I don't have a real project in mind, I make an ATC and decorate an enveloppe in my own book just for the fun of creating.
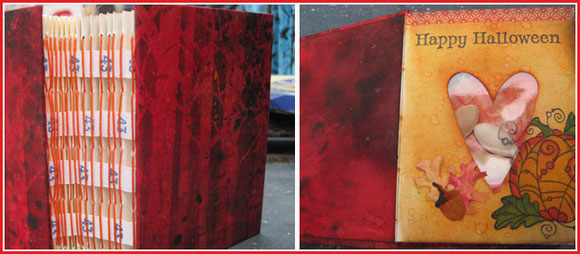
The covers were made by spraying paper with all kinds of inks and using a treestencil of the craftersworkshop.
I cut enveloppes with the new enveloppedie of Tim Holtz and sewed them into an accordeonpaper with ribbons.
Then this accordeon was attached to the covers to assemble the book.
My first enveloppe has a heart-cutout and is sealed. Inside are pumpkinseeds that show through.
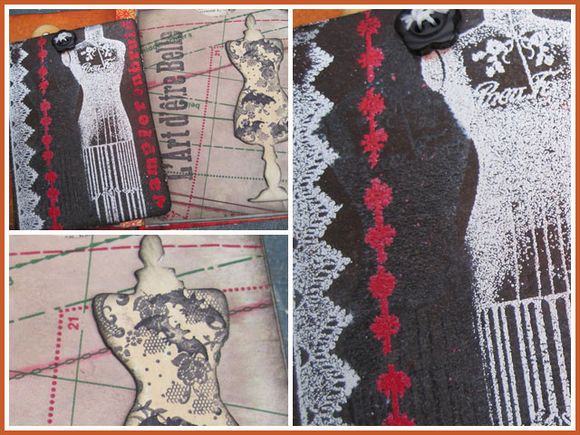
I think you can use all kinds or a lot of your stamps in a theme, if you just adapt them a bit.
What do you think about designing a dress for a vampirebride? What will she think of red, white and black, some lace and a bat ? ...
I alternated two kinds of enveloppes. There is an envelopp that closes on the back, the next one is open at the top.
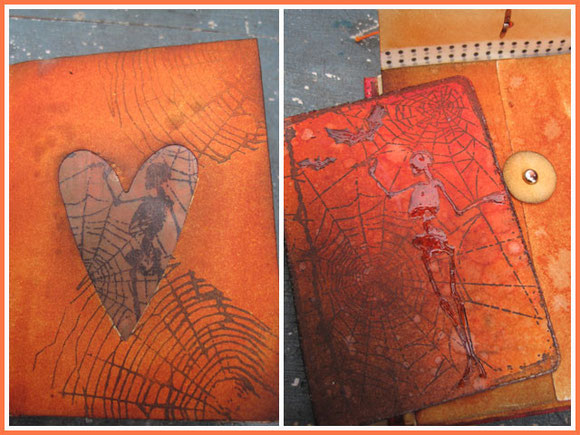
A skeleton and spiderwebs decorate another eveloppe and ATC.
The open heart in the enveloppe is backed with selfmade waxpaper.
Inside an ATC of Tim Holtz on a sprayed and spritzed background. To make the skeleton stand out more I putted glossy accents on the figure.
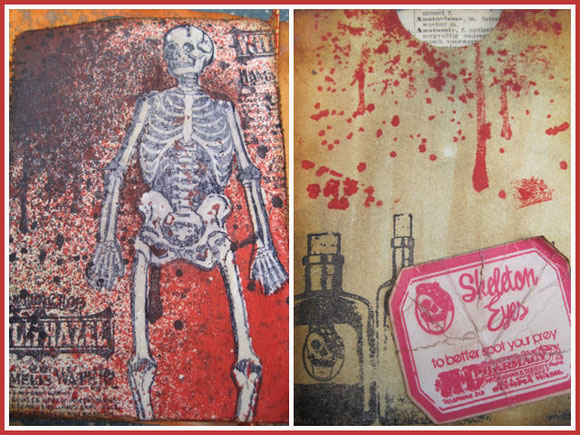
What's left over when they need skeletoneyes in a creepy apothecary?...
Indeed.. the skeleton..
On the left the ATC .I inked the ATC with distress ink old paper cause this would show through in the skeleton.The skeleton was stamped with permanent ink and with a perfect medium pen I inked the skeleton and embossed it with UTEE.
A few more stamps of Tim Holtz and spraying with Dylusions sprays.
On the enveloppe a Tim Holtz stamps and halloweenstamps from the Artistic Outpost.
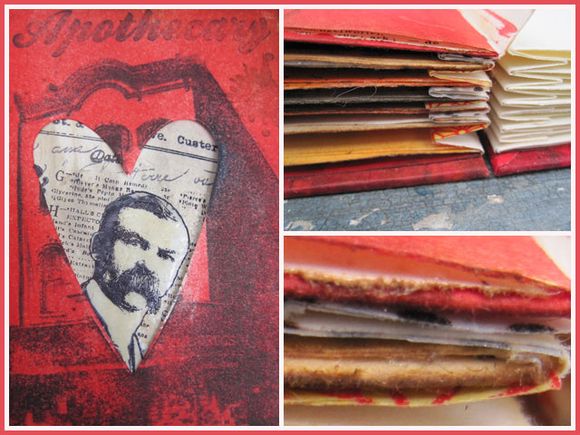
The man that keeps the apothecary open seems a decent man, but having skeletoneyes in his store ?...
The ends of paper between the enveloppes are covered with washi tape .
For the moment I have done the half of the enveloppes and ATC's in the book.
At least I have something to show to the participants and ask if this is a project they would like to do.
Being busy with ATC's I collected my ATC's I made and recieved in the past.
I didn't have a proper way to display or store them: some were in an old book that falls apart, some were in a box, some were on display...
I made several ringbinded books the past months for onlineclasses I followed, the outprints of Technique junkies,..
Now I made two books for my ATC's with plastic sheets that are used for collectorcards.
I covered the boards with packingpaper from Anahata Katkin ( Papaya ART), a designer/artist I like a lot.
One of the books is for the ATC's I made myself, the other book is for swapped ATC's.
I made a lot of ATC's in the beginning of my stamping and used them in my displays in my house. Collecting them all together made me realize I did made a lot !
I have several themes : halloween, writing, sewing, love, the sea,...
Seeing them all made me realize I like ATC's and it's way too long ago since I made or swapped them ! Change will come in the future :)
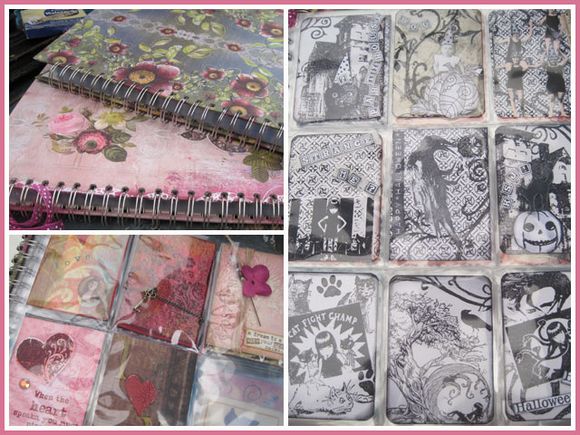
One of my first ATC's I made was for a challenge on a Dutch onlineshop.
I made a combination of fabric and paper with stamping and inks : "sew beautiful"
I couldn't believe my eyes when I saw on the website I won the third price ! And I recieved a set of stamps... one of the first of my collection then.
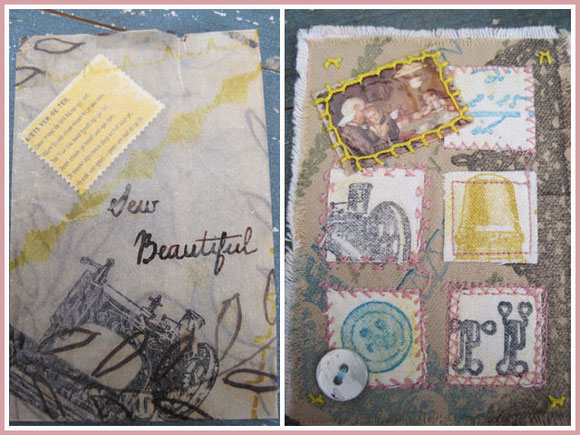
Also in the beginning of our local round robins ( 2007 ? 2008?) we made ATC's with a monthly theme.
To house my recieved ATC's I made books for every theme : being a mom, easter/spring, favorite animals, schooldays,...
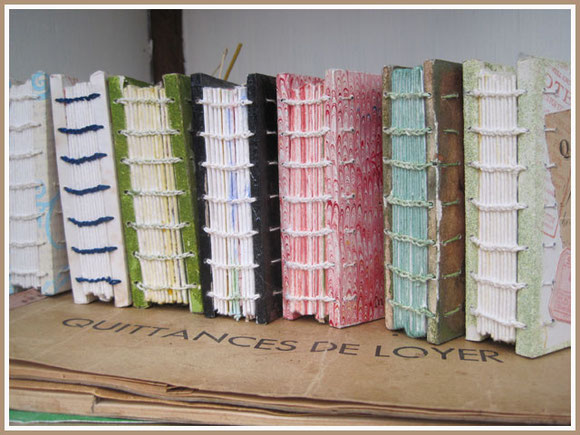
These books are still on display in my craftroom in a glasscabinet.
For the ATC's of "schooldays" I made for everyone a blue/white ATC with a soldered pendant on with the first letter of their name and images of things they like.
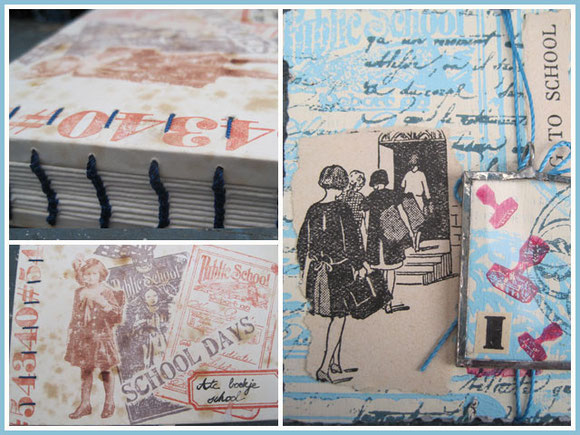
My goal for these books was to house an ATC in every page and decorate the page according to the ATC.
The ATC could still be taken out, but put back in it's place after use.
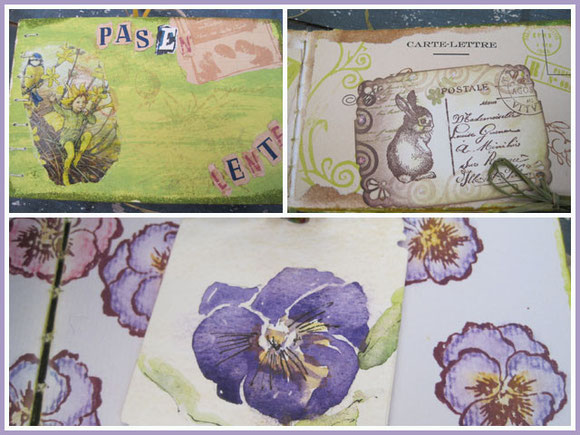
I managed to finish some of the books, but not all...
Here you see the book "Easter/ spring" and the ATC's of Anne with the rabbit and one of my mom with the pansy with their decorated backgrounds.
I don't only look for a way to store ATC's, but I also use ATC's to store things on...:)
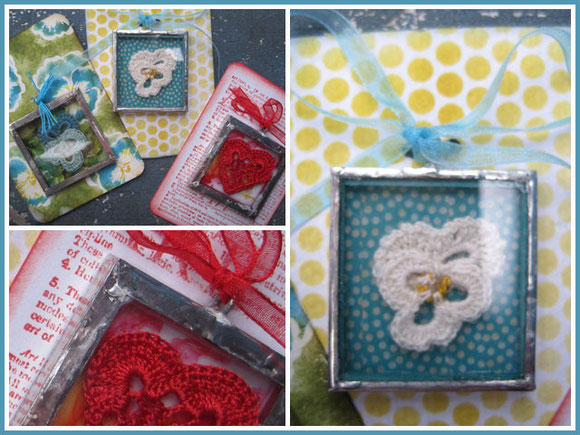
An ATC is the right size to store and present my selfmade pendants.
I crochet flowers or hearts, decorate the background of the glass on which they are put on and solder them into a pendant.
ATC's are decorated matching the pendant.
You can order some of these pendants on my etsyshop. I have more made then are listed now, so if you're interested I can send you some photos. Just send me an email.
Some day I will fix my shop here too...
No more creating the next two days, but soaking in inspiration...
I'm going to Paris with my daughter for two days ! Tomorrow we leave very early in the morning and come back on thursdayevening.
I have some "must sees" on my schedule : the Eiffeltower ( cause my daughter has never been in Paris) and the Louvre ( Egyptian collections), but we also want to do some alternative visits : the catacombs, la musée de la magie, the cemetry of Montmartre, le Marais, le viaduct des Arts,...
I even looked up a Paris store with paper and stamps... " l'Art du papier".. You never know they have stuff I don't have !! LOL
Inge
zo
29
jul
2012
a Belgian summer at home...
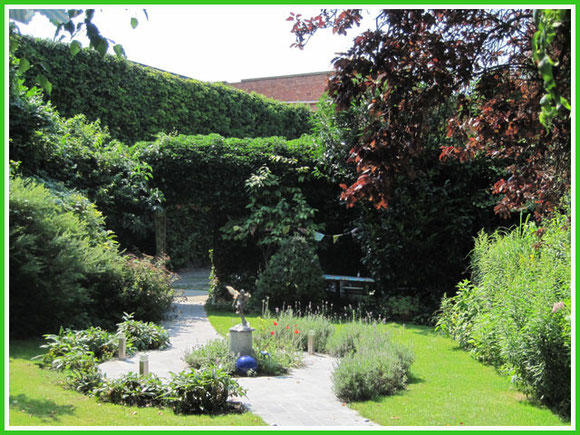
After two weeks of pouring rain, we got real summer the past week. The temperatures rose until 30 ° C ( 86° F)...
Not really my cup of tea... a bit too hot... I'm more then pleased with temperatures between 20 and 25 ° C, but luckily mankind doesn't have the ability too choose this himself...
The good weather has its advantages too : warm evenings... my daughter had a gardenparty with some friends on tuesday and they enjoyed the evening and night on my wooden terrace in the garden into the early hours of the next day...
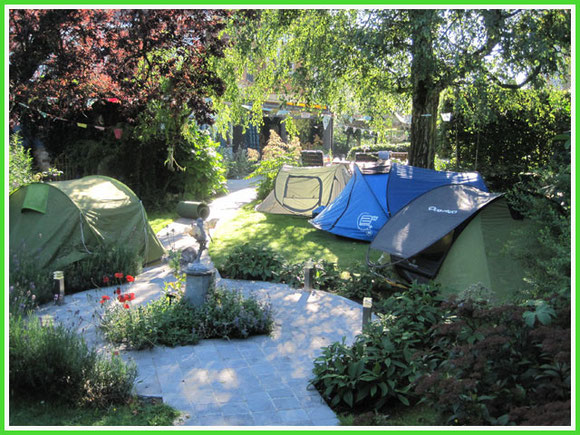
I enjoyed this sight in the morning... everyone still sleeping in their tents in the garden while the sun is already lightening the day...
Inside the house is was quite cool ( it's an old house) and during the hotest hours of the day I stayed inside and worked on the boys bedrooms. I've been busy for a big week now and I'm almost finished repainting them completely..
Even it was doable in the house, after a while I got overheated, but I do have my solutions for this...
In my garden I have an outsidebed ( for an afternoonnap...) ànd I have now an outside bath too...
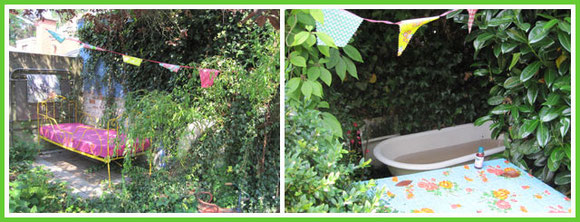
I remember when the kids were little, I often took a plunge in their swimmingpool just to cool down, but since about 3 years they used it so little in summer that we didn't put it outside anymore.
But I did miss the "cool-downs" in the swimmingpool in summer...
In the autumn past year I searched the internet for an old bath. My husband declared me "nuts", but with his help and a relative the bath came home and was installed in the garden.
Autumn and winter was not really the moment to try it out, but days like the past week were perfect...
The bath is tucked away between my shrubs and above me there is a "ceiling" of ivy.
No one can see me sitting in my bath in my bathsuit... but I can overlook the whole garden..
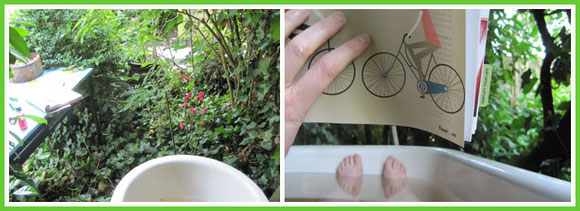
Past week I cooled down 3 times in my outsidebath... With a little essential oil of Rosmarin in the bath and a magazine ( and OK, maybe also a spider and some leaves,...) I soaked there for an hour...
I had to smile when I saw myself in my bath : these are moments to treasure and I have the feeling I have a bit of heaven in my home...
Apart of being creative in the bedrooms, I made two birthdaycards.
In the online class " stretch your stamps" I relearned the technique to make your own custom inkpad with distress reinkers and the cut 'n dry felt.
I made myself a rainbowinkpad and immediately fell in love with it and had to use it in different projects ...:)
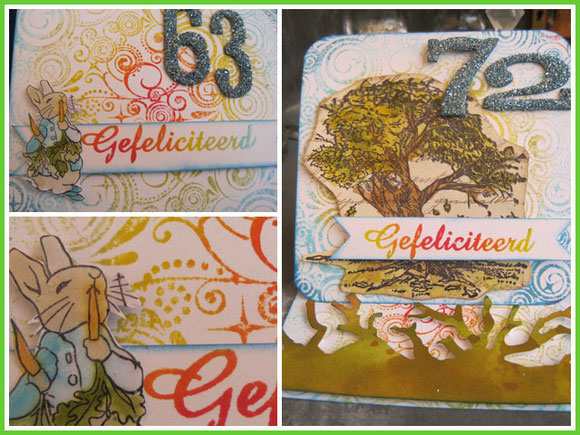
Rita became 63 and she's a fan of Peter Rabbit.. so I make her every year a card with Peter Rabbit on.
The background was made with a large backgroundstamp which I love for all the circles and swirls.
Peter Rabbit was stamped with permanent black ink and colored in with distress stains. Then he was completely covered in glossy accents.
For my mom who becomes 72 coming wednesday I made a card with a tree, cause trees are her favorite.
The numbers on both cards were cut with the new "word play" die and decorated with german glass glitter.
Another card I made was a project I wanted to do for a looooong time. A few months ago I bought several books on pop-ups and mechanical cards/pages.
One of the techniques I wanted to try was the "pull-tab with changing picture".
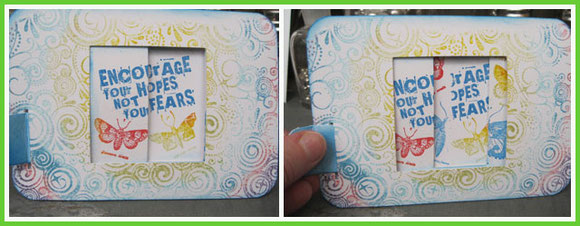
In the center of the card is a center image. when you pull the tab on the left...
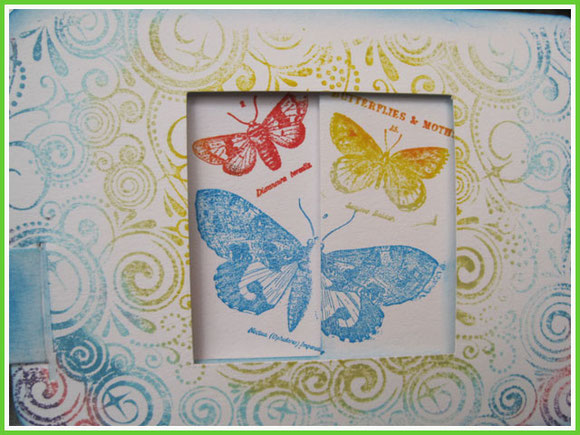
.... the image changes !
In the meantime I made several of these to find out the do's and don'ts and adapt the technique to my taste.
Not every project worked perfect, so I'll try more out.
Another project that was on my to-do list for a long time, was remaking some of the books and bookbindingtechniques I learned a few years ago in bookbinding.
It was a long time ago and I had a lot of problems to figure everything out again. Luckily I had my techniquebook and my notes of the classes.
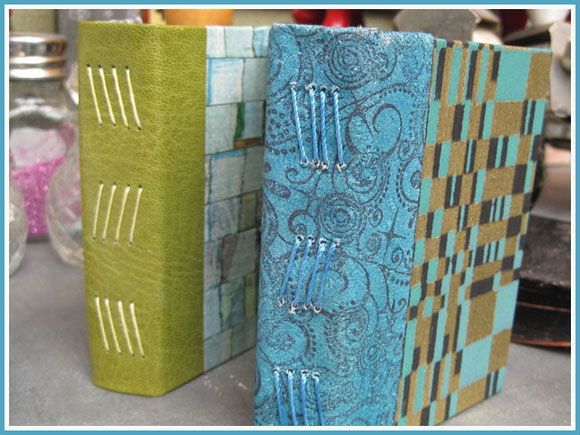
The book on the left was made in bookbindinglessons. It's the quick leather binding with a real leather spine. I don't know why they call it the "quick" leather binding, cause it took my hours to figure it out again !
I don't have leather that is treated for bookbinding.
But I had grungepaper...
I've seen grungepaper used as spines of books and this product has its flexibility but can also be colored with distress stains and stamps, so why not try it out ?
I'm quite pleased with the result !
I could thin out the grungepaper at the ends with a craftknife so I could use it in the same way I would have used leather.

I love the stitching in this technique. It looks very easy on the outside, but it's NOT easy to do.
I needed to make a sewingpattern for the back and the signatures and this is "maths"...
The paper I used for the boards on the outside and inside is an old paper I found in a pictureframe. I liked it and saved it for future purposes..
The protective page on the first signature is made of printed vellum.
I like how the book turned out, but I have to practice this bookbinding a lot more, to get it in my fingers...
For the moment it's the " slow grungepaper binding" instead of the"quick leather binding" :)
Inge
zo
22
jul
2012
vintage office supplies...
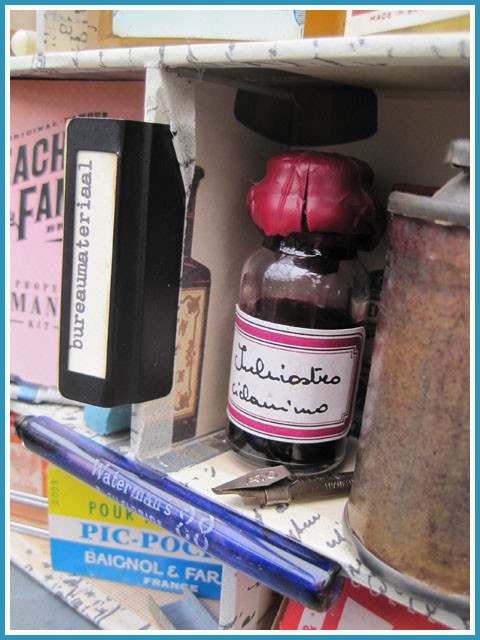
In the previous blogpost you could see in my make-over of my craftroom that I love vintage officesupplies...
I don't know where it started...Did I have some old inkbottles or did it started when I saw the nice inkbottles with calligraphyink which I "needed" all because they looked so nice...
Or was it when I found the oldprinterscabinet in a secondhandshop with all the little "boxes" where I could put something in...
Anyway... it is a little collection...After reorganizing the stuff in the printerscabinet I found out I had more cute cardboardboxes and blass bottles tucked away, but worthwhile to be displayed...
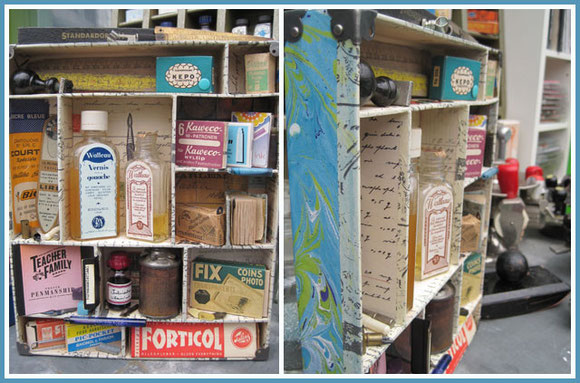
I've seen lots of configurationboxes made inspired by Tim Holtz and I know he has 4 different sizes of these.
I just hadn't any in my house and I doubted if all my stuff would suit or fit in his boxes.
I wanted to incorporate the glass bottles with varnish and the large box of Forticol ( an old glue..), so I started measuring everything and made a template of how big I wanted all the little segments.
I cut heavy cardboard and assembled the box. The outside was decorated with marbled paper I made myself in my first workshop in my house past year. Marbled papers are always nice and I liked especially these bold blues and greens which would suit my new-painted veranda.
The inside was decorated with vintage ledgerpaper, Italian paper with inkbottles printed on, dictionary paper,...
I used the method Tim explains in his second book a compendium of curiosities volume II",which is an quite easy way to decorate these boxes. Easier and faster then what I learned in bookbinding...but with the tissuetape on the edges it looks finished too.
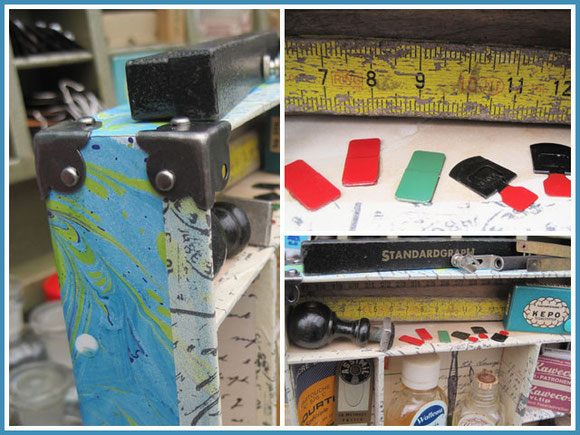
I used Tim Holtz boxcorners to finish the box off and make it sturdier.
Then began the fun part : filling all the boxes with the vintage office supplies.
It's incredible what you can find at fleamarkets : the red, green and black/red metals are tabs to put on files and I found a box full.
I had two wooden broken rulers to fit on the back.
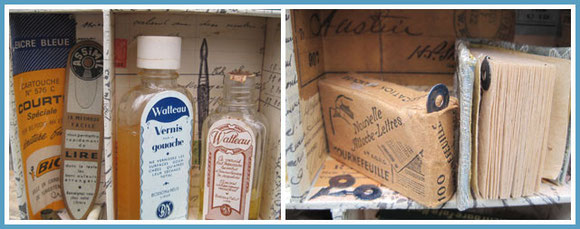
On the left an enveloppe from refillings of BIC : this is a ballpointmark I still love to use.
A cardboard bookmark I picked up on a French fleamarket and 3 small containers with refills for compasses.
Two old bottles with varnish and on the right a little handmade book with a box filled with metal "arrows". These should have been used to attach on pages...On the box it says : "nouvelle attache-lettres".
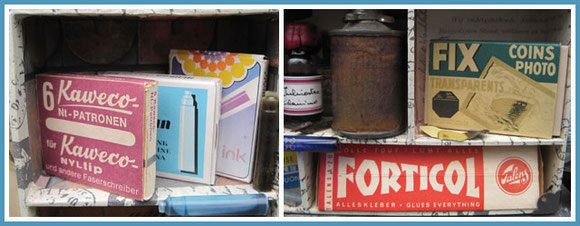
Although I always get inky fingers, I still love to write with my fathers pen...
So when I find an old box with inkcartridges, I buy them : partly to use, partly to hoarder the nice boxes...
A box of vintage photocorners I got from a friend who's dad passed away at the age of 96... Part of my collection comes from this man, when his son cleared out his desk and put it all in a box for me cause he knew I wouldn't throw it away...
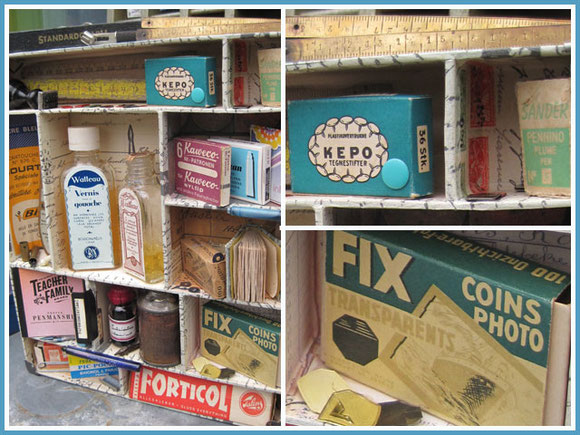
In that box I found also a little blue box with gorgeous blue drawing-pins !
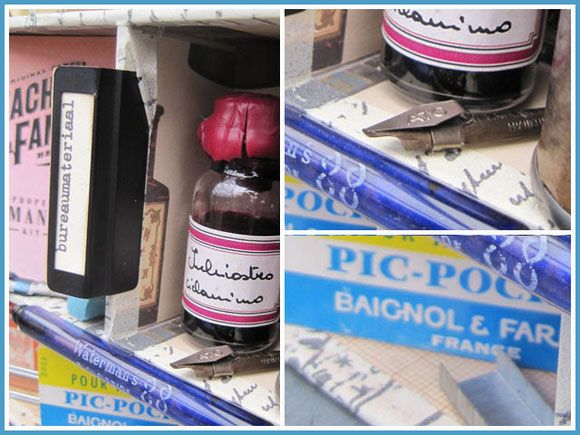
On the left a little book about "penmanship" and a calligraphy pen, Italian ink I don't have the gutts to open and use and a glass cartridge of Watermanink, an ink I still use.
I also had two little vintage boxes with staples which I also put in the configuration box.
To "name" my box I wrote on my computer "bureaumateriaal" ("officesupplies") in the font "vintage typewriter" and printed it. I inked it up with distress ink to make it look older.
In my collection I also have vintage metal labeltabs... so I added the label here.
Now my "configurationbox" is finished and is part of my decoration in my craftroom.
I love to see my collections and enjoy them.
Clearing everything out I also found old bandages, apothecarybottles, vintage injectionneedles.... I think I'm going to make another configurationbox : inspired by real vintage apothecarystuff and halloween...
Inge
zo
15
jul
2012
make-over in Turkish blue...
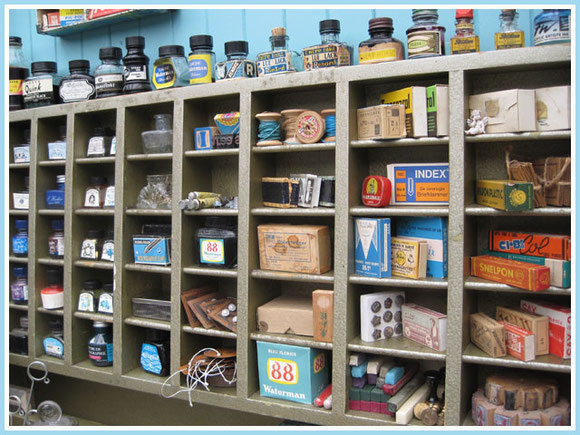
I revamped my creative room in the veranda... After a year of not being able to do bigger works, I finally am able to take a brush in my hand and paint bigger spaces then a journalpage :)
When we moved in our house of 1924, 18 years ago, there was a veranda attached with brown woodpaneling... Brown is not my color, so one of the first things I did was overpainting the brown with a green varnish.
I chose green, to make the link to the garden, but after 18 years I wanted something else...
One of the tasks I want to complete this summer is repainting the bedroom of my eldest son Freek. I bought 3 tubes of paint to "test" the colors in his room. The colors are : eggshell for his ceiling, azura for the focal wall and Turkish stone for the other walls.
Hmmm.... the Turkish stone color called to me : " what about the veranda in this color ?"...
I did a test ... this color matches my curtains I made past summer perfectly...
So instead of Freeks bedroom I started painting my creative room !
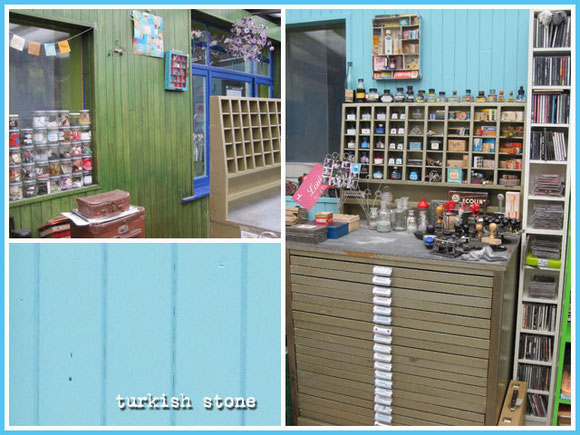
In the past I would have completed this task in two days... but considering my backproblems of the past year, I was wise and worked in stages... It took me 1,5 week to complete the job but this means not only the walls got painted, but every drawer and cabinet was cleared out too and reorganized.
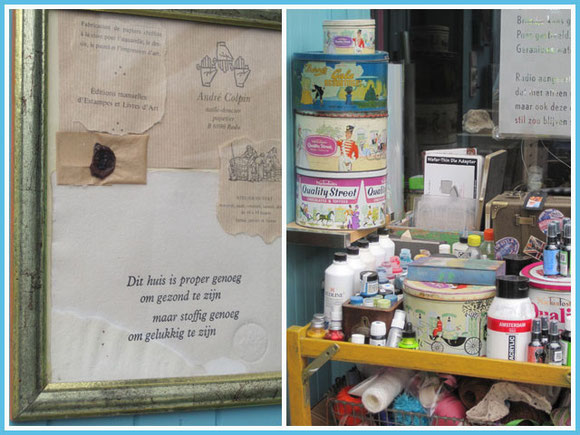
One of the first things I hung up again is a favorite quote: " this house is clean enough to be healthy, but dusty enough to be happy"...
Most of my creative stuff is stored in open cabinets so I can see what I have and I'm more inspired to use it all.
I've always loved and still love old tins. Some are pure decorations, but most are also used as containers to hold my paint, sprays, scentcandles,...
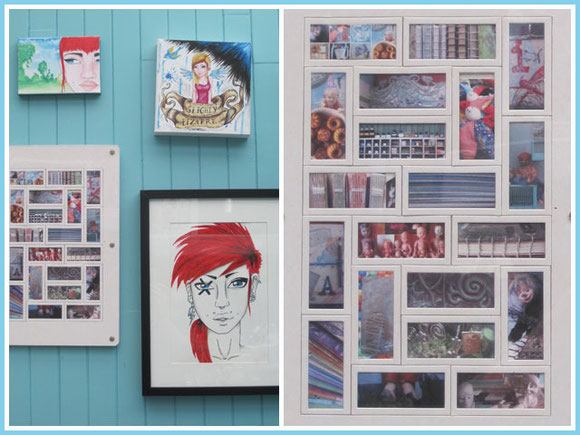
On the wall above my radiator, between two windows, I hung some artwork up from my daughter. These ar some of my favorites I will never sell.
I also have a display with several of my MOO-minicards in. On my MOO-cards ( my "business"cards) I have photos of things I made myself ( books, dolls,...) or views in my house.
I love this display I bought at MOO.
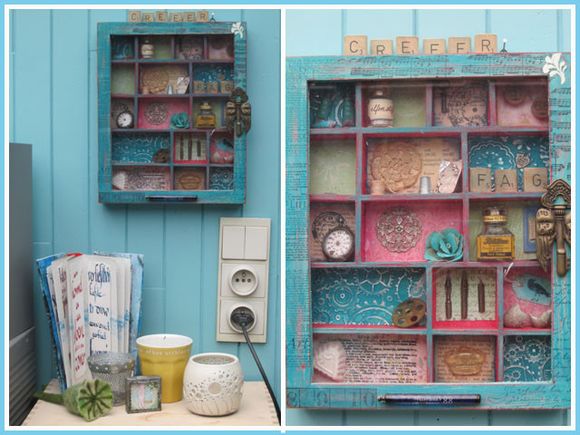
Above a wooden drawercabinet in which I house my edgedies, precut cards, melting pot,... I hung a box I made in a workshop in my local craftshop.
The workshop was mostly about backgrounds, but once home I added found stuff I saved through the years. My daughter asked recently why I added the word " FAG" in the box... I had to laugh : it's not a word... The letters are the first letters of my childrens name : F for Freek, A for Aran, G for Gaia... I never thought about the meaning of the word . LOL
There is fairydust in the box, a robin's egg I found in my garden and didn't want to throw away,old pennibs,... On the door is one of the flying keys of Harry Potter...
Every item has its meaning...
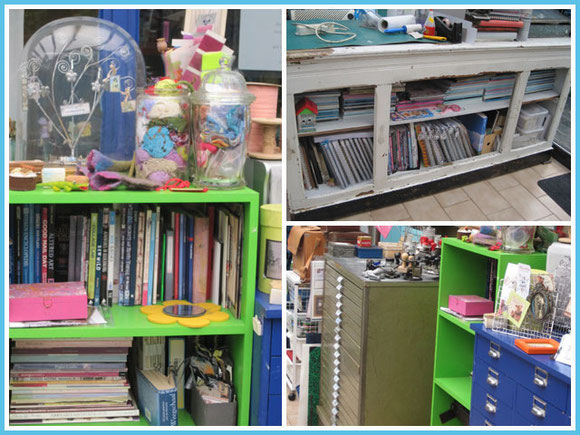
I share this creative room with my husband... He is housed with his modelscaling on the other side of the old white cabinet. This is my "cutting" table for larger paper or to use my Vagabond.
In the cabinet my collection of Stampingtonmagazines of the past 7 years. These magazines opened my creative world and are still a source of inspiration.
This cabinet also houses the books I made by printing all my blogposts with comments of the past 5 years on my previous website. My diaries...
The blogposts and comments on this new website will end up on paper and in books too.
The past years I also bought several books on mixed media, bookbinding,.. and they are housed in an open green cabinet.
The blue drawercabinet I share with my husband. More paints, glues, tools,...
My pride and joy is the green fakemetal printerscabinet I found in a second handshop.
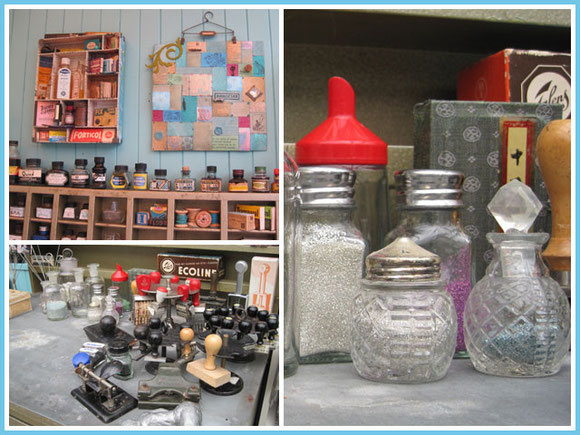
In the drawers lots of wooden stamps, clear stamps, scrapbookpaper and handmade papers.
On top of the cabinet my collection of "officesupplies" I gathered through the years on fleamarkets: old stampspinners, old stamps, lots of inkpots in different sizes, some with the inks still in ( and still useable!).
My glassglitter is in old salt 'n peppershakers...
Above my printerscabinet a "patchworkpandemonium" I made myself after seeing the ones on the internet made in Tim's classes.
The "configuration" box is one I made myself past week. I'll show you more about this one in a following blogpost...
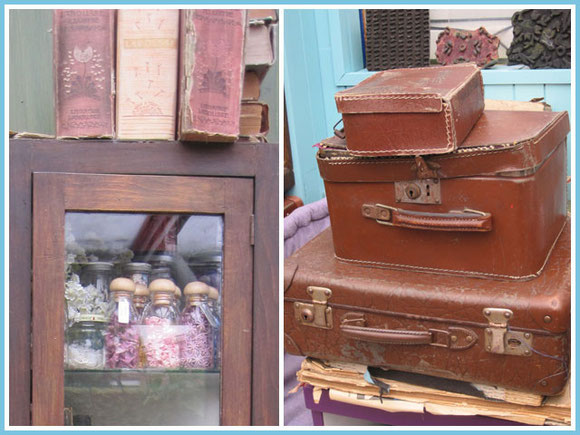
More old collected stuff... Lots of papers, old books and magazines, crochetingstuff,... is tucked away in vintage suitcases found on fleamarkets and second handshops. Lots I have for years, long before they were sought after like now, so I bought them for cheap prices...
An old glasscabinet on the wall to display more stuff.
On top old French dictionaries from "Larousse" : these are my favorite ones with the brittle pages and the images.
I bought them to tear papers out and use in mixed media projects, but some I don't have to heart to pull papers out...
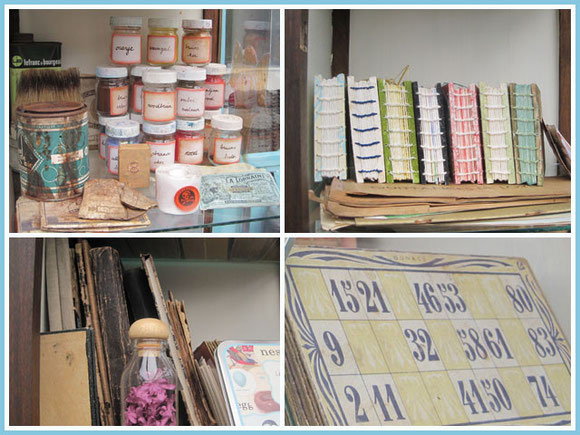
In the glass cabinet more old stuff to cherish and use : pigment powders, old packages of fabricdyes, old bingocards,..
The books are handsewed books I made to house ATC's in.
I also inherited some old exercisebooks from the beginning of 1900 : handwritten recipes and even one of my grandmother she used as a young child in school.
Originally saved to use because of the old handwriting, but I think I'll make copies if I need some...
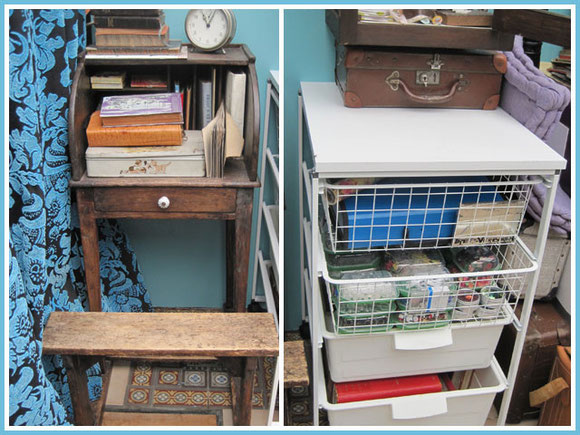
Above a little childrensdesk I inherited. It must once have belonged to a rich child of a family where one of my ancesters was a servant. Normal kids didn't have a desk like this !
On the right a new Ikea drawercabinet on wheels. I needed some more storage place for more ( yes, more... ) old books and my little embellishments I housed in glass jars before.
It' very handy, but doesn' t have the right look... yet... Nothing some paint or old papers or whatever won't be able to alter !
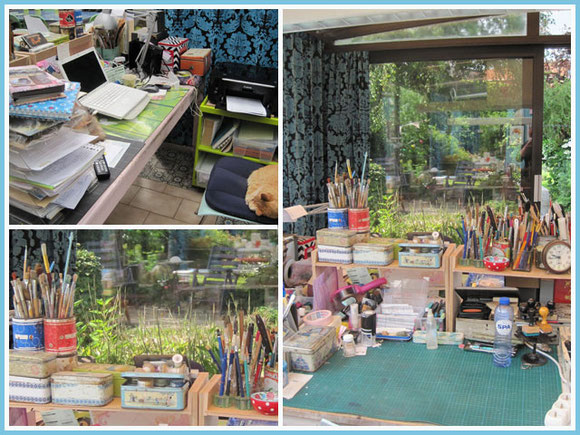
I have two old tables to work on. One is my "computer" table ( messy...) and overtaken by cats..., on the other I do my creative projects.
I cleaned my worksurface to make this photo...LOL
When I sit here, I can see through the windows my garden, my waterfountains, my fairies and path of Alice in Wonderland...
If the weather is a tiny bit good, I open the glass doors and I have the feeling I'm outside in the garden.
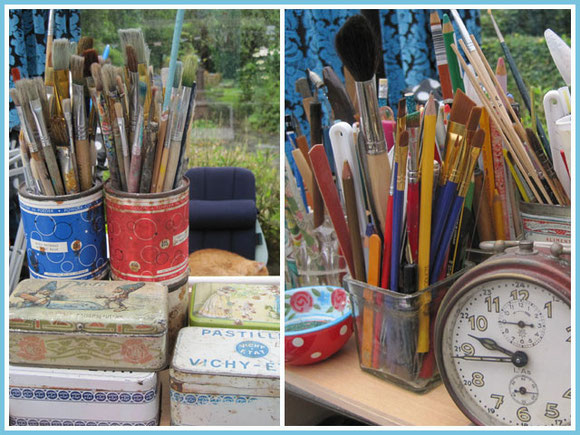
My storage here is again old stuff : old sewing or sweets tins, old painttins I attached on top of each other so I could use them for my paintbrushes.
Everything is in handreach, so I don't have to search long to find what I need.
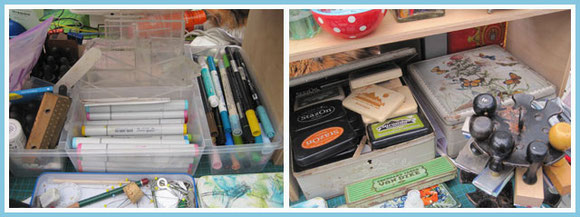
My markers are in IKEA storage. My inks are in vintage tins.
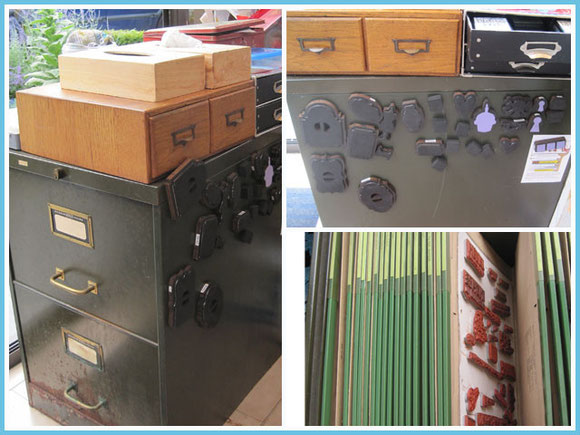
Another secondhandshopfind... a metal cabinet for filefolders.
This one was cheap and even had all the original filefolders in it : the perfect spot to house all my unmounted stamps.
In the little drawers on top are my alcholinks, distress inks, embossingpowders,...
When I was looking for a storage place for my movers and shapers I suddenly noticed my metal cabinet... As this is metal, the movers and shapers stick to it ! Perfectly in handreach and I can see what I have and use...
Phew... this was a long virtual trip to my revamped creative space.
I hope you enjoyed it and maybe you get inspired.
I combined my love for vintage stuff, my collecting of it with my creative life.
I can use it all ànd enjoy looking at it. :)
Inge
zo
08
jul
2012
seadragons ! ....

Do you know that seadragons really exist ?
I worked in Elena's evolutionjournal. Her journal started about mermaids, but instead of evolving from page to page into something completely different, the pages unfold a hidden world of the sea.
Valerie's page before me showed a sleeping king of the sea : Neptune.
Would they have pets in the seaworld ? I think so... A sea-king can't have a simple fish as pet, but what about seadragons ?
Googling for images I found seadragons and believe it or not but these creatures really exist !!
They are gorgeous and there are several varieties with different colors.
They look a bit like seahorses but their body seems to exist of seaweed.

I created a waterworld for these seasdragons by spritzing my papers with green and blue sprayinks.
Most sprayinks react with water ànd salt. In the middle of the pages I sprinkled seasalt on the wet pages to add more layers to the "water".
Just let it dry with the salt on it and then wipe the salt off.

This is the left page where one of the seadragons is peeping from behind a waterplant.

On the right page a red seadragon is coming closer.
The images of the seadragons were downloaded from the internet, scaled and printed on canvaspaper. Then I have to carefully cut them out, trying not to cut off parts of their body...

The large waterplants are made with a stamp of Dyan Reavely. When I prepared the papers of the background I made them larger then needed.
Now I could stamp the leaves with permanent ink on the left over pages so I immediately had a colored background.
I colored the leaves with different product : distress stain, Steward Gill paints and distress stickles.

The other plants on the pages were made with the same leftover paper. I like how not one of the "seaweed" looks the same.
The seaweed is actually the leaves of the "tattered pinecone" die of Tim Holtz.
I first diecut a piece of left over packaging paper with this die. To create a more layered background I used this selfmade stencil and inked through it with different distress inks overlapping each other.
Die cuts of the leaves were then adhered with glossy accents on top.
The colored large plants were mounted with 3D foam on the background to create more depth in the pages.
For the rest I haven't been creating a lot the past week.
It's was an emotional week with the funeral of 13 months old Boris, the marriage of a collegue, the missing of my daughter Gaia, who's at her boyfriends house for 2 weeks (!) and son Freek who's in London for a week making real international contacts with people he often plays with on the internet...
But I have also done a lot ! My back is finally really approving after the second facetinfiltration and visits to a manual therapist. The combination has done wonders after having backpain for months...
I wanted to paint my veranda already for a very long time, but the backpain stood in the way.
Now I'm finished for 2/3... The green is changing in a "Turkish stoneblue"...
In the past I would have finished this in 2 days, but now I limit myself to do just parts of it so I don't overdo myself and it works :)
In the meantime while moving furniture, I'm cleaning what 's IN the closets... I think I have too much stuff, too much papers...
So inspired by "clean house", I have three boxes : keep and reorganize, trash and give away...
It does feel good !
I'll show you the result when I'm finished.
Inge
zo
01
jul
2012
little, little toddler...

This week I worked in the last enveloppebook of our local round robin !
Katja's book was about children, music and childrenssongs...
I chose a very old Belgian song " klein klein kleutertje, wat doe je in de hof ? ..." (translation : "little, little todler what do you do in the garden ? You pick all the flowers. Oh, oh that's not good...)

The whole enveloppebook breaths happiness and joy of children and music.
That's why I wanted a bright colorful page too.
I sprayed the background with bright red and real green spraypaints and did the "ghost" technique of Dyan Reavely: after drying the sprayed background, spray through a stencil with water. The inks react with the water and a ghostly image of the stencil appear.
You have an instant great background to built further on.

On the left red background I made a "colorful "garden. I stamped with bold stamps on scrapbookpaper and cut them out. I added stems from scrapbookpaper too. I don't often do this, but the project asked for bold images.
I didn't want to add too much to the flowers so you could also see the backgroundflowers.
The little tag is inked with the brand new summer distress ink of Tim Holtz "mowed lawn". Gorgeous green color !!
The stamps are from two very famous childrenscharacters" Jip and Janneke".
The stories of the boy Jip and the girl Janneke are from the imagination of Annie M.G. Schmidt ( 1911-1995), a Dutch writer who wrote lots of poems and stories that are real heritage here in Belgium and the Netherlands.
The characters in her books or poems were mostly adventurous, not mainstream, clever and funny,...
Fiep Westendorp ( 1916-2004) was the illustrator who made Jip and Janneke immortal by her very own style of drawing.
I grew up with some of their characters, I read bednightstories for my children and the book of Jip and Janneke is in my memoriessuitcase for the day I once have grandchildren...
They are together with Pippi Longstocking still favorites of me...
I know they are precious for Katja too, so I used Jip and Janneke to be the naughty toddlers in the garden...

In every enveloppebook of our round robin I made a pop-up.
This is the pop-up of a dancing Jip and Janneke in the garden while they are picking all the flowers...
I downloaded their images from the internet and resized them so they would fit in my "garden".
The garden was created by a green sprayed background with a flower stencil.
I stamped the leavesstamp of Dyan Reavely on top and colored the leaves with distress stains and a waterbrush.
Bold flowers were stamped again on scrapbookpaper and on selfmade paper and adhered with 3D foam on the background.
Jip and Janneke were mounted on tabs made from plastic packaging paper.

Jip and Janneke were dancing and had their feet lifted from the ground. To keep this sight the same, I used the clear tabs.
They are a bit more rigid when you open and close the card, but I folded them several times so they became less rigid.
When I opened the card to reveal the pop-up the clear tabs, glued with real sticky glue, the tabs had the tendancy to come off the background.
The problem was solved when I added the two large tabs to get the fence moving. These took away some of the strength of pulling at the tabs.
I colored these tabes in red and green so they match the background and you can hardly see these tabs.
You need the tabs to let the pop-up "pop-up", but I don't want the tabs to be too prominently seen, so I try to disguise them by matching them with the background they are on.

The fence is an edgedie of Tim Holtz, cut out from scrapbookpaper and edged with the new summerdistress ink "salty ocean".
If you love bold colors, the new summer distress inks set is an must have...
On the photo above you see how the pop-up looks when opened and some more details of the pages.

The big tag that houses in the pocket on the right page has also flowers on it.
On one side I used an inked stencil from thecraftersworkshop in my Vagabond to give it some texture.
The green ink is the new distress ink "mowed lawn".
I added some bold flowers and colored them in with distress stain.
The back that has the reverse embossed image of the stencil was overinked with the mowed lawn ink. I used the leavesstamp of Dyan Reavely again, colored in with distress stains.
Some more flowerstamps i used on the pages were added here also.
I personally love the big contrast of the black images of Jip and Janneke and the bold contrast of the red and green.
I wish I could let Katja already see her book, but she has to wait until we come together with the participants of the local round robin...
Now this round robin has come to an end, I must work on the next project for them ànd find another project to put my pop-ups in!
Inge
zo
24
jun
2012
once I was a child...
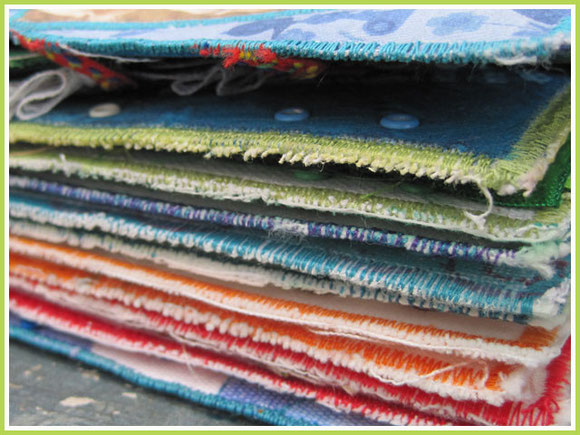
A few months ago we started a new European round robin with the "sweet sisters" (me, Dorien, Paula, Zoë, Nikie, Bethan and "new sister" Lesley).
The commitment for the book was that it has to have something with fabric, stitching... kind of a fabric book but we also loved to see a mix with other media such as paper, paint,...
Everyone was free to choose an own theme and mine was " once I was a child". They could create anything about their childhood, a imaginative child from now or years ago.
My book made it home this week and much to my delight they all created something personal about their own youth !
It's awesome, really awesome and I like the quality of each one's work.
I HAVE to share this with you : maybe you get inspired :)
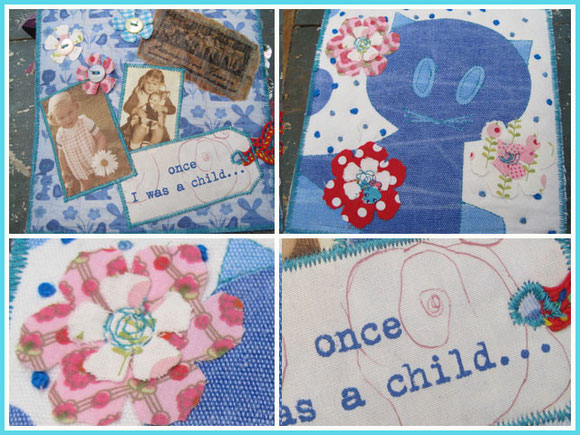
On top my covers front and back. I started with a piece of fabric that I had since I was a child: a vintage fabric with cats and rabbits,... I used it in my childhood to play with my dolls, but I NEVER cut it up or used it to make something with it.
I still had it in my drawers after 40 years... I took a photograph of the fabric and resized it to a smaller scale and printed it on fabric. The back of the book is a piece of the real fabric I finally had the guts to cut it up and use it !
I embellished the covers with photos of myself as a small child with my dolls.
A scribble I made as a child was scanned and printed on fabric too. I printed the title "once I was a child".
I cut it up with a tagdie and sewed it on the frontcover.
Fabricflowers were cut from favorite fabrics with the tattered flowersdie of Tim Holtz and freestyle stitched.
On the back I added French knots with blue thread.
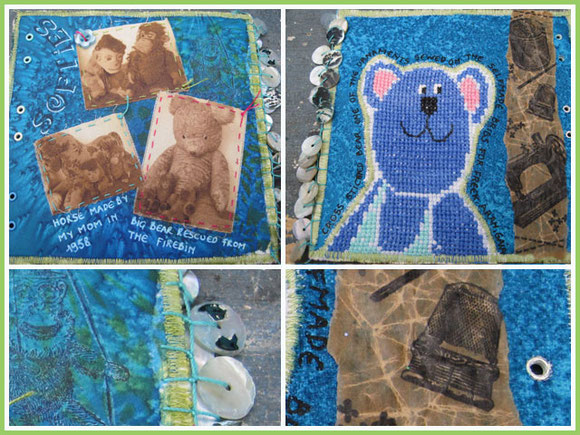
I made all my pages by sewing canvaspaper/ wallpaper and cottonfabric together with batting between. The sides were all stitched with different colors of threads ( see blogphoto).
I need color, you know :)
My own page was made by spraying ink on the lining paper and adding salt. The ink reacts with the salt and gives a special background. Some childrenstoysstamps were added on the background .
On top I added some photos of softies I have since I was a child.
On the back of the page a cross-stitched bear I made for the bribs of my own children. The brib was worn out and now I could save my cross-stitched bear in a book :)
As a child I was allowed to use my mom's sewingmachine to my make my dollsclothes. To represent this I stamped sewing notions ( needle, sewingmachine,...) with permanent ink on craftpaper.
I then turned it into my own waxed paper by putting hot wax on it until it's completely soaked in. Then a remelt the wax on the paper with my heatgun and let it melt off again. There's a certain amount of wax that stays in the craftpaper and this gives a great effect, especially when you crumble it up afterworths.
I added a decorated edge by sewing mother of pearl circles on the side.
After I finished my pages the book went on her journey...
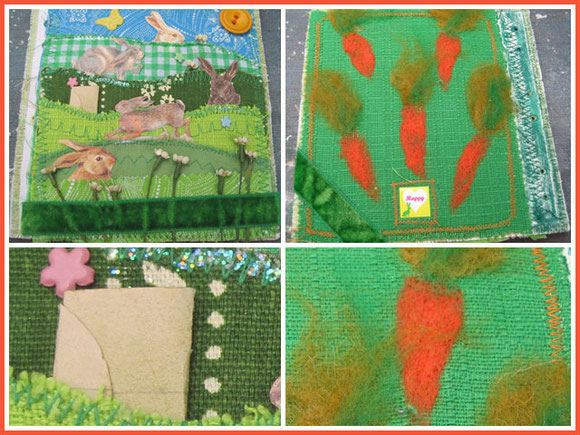
This page is from my Belgian friend Dorien. She had rabbits as a child ( her father still has), so she was inspired by them to make this page.
She really did a good job : I love the different fabric hills the rabbits are running behind and on top !
On the back she needlefelted some carrots. Love the contrast between the green and the orange !
From her the book left Belgium for a trip around the UK.
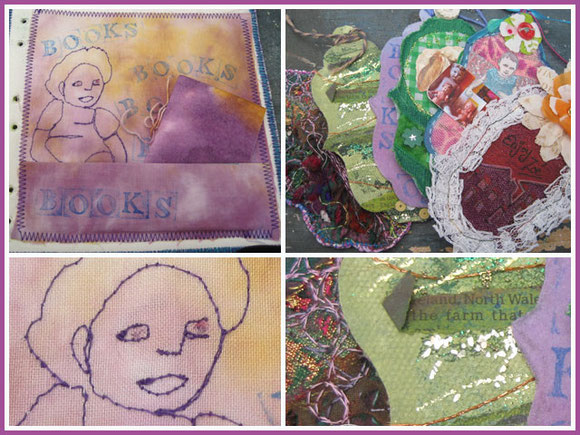
Lesley is a friend of Zoë in the UK and is joining us for the first time.
Her father took her as a child to the public library. It ignited her love for both reading and making books !
I love how she stitched the child ! She sure has sewing skills !
It seems she makes a lot of books in all kind of media: I hope I can see more of her in the future.
On the right the sign-in tags I added for every participant. It's nice to see how every tag can be linked to the maker and the page they did ! Love, love all the texture in them !
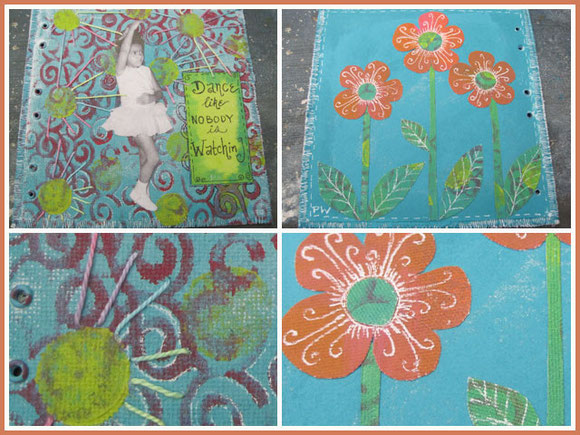
Oh Paula as a child !! I immediately recognized her page as hers by her style, but I love to see her as a child on the photo. She still has the same eyes.
Paula made a great colorful background with paint and stencils or stamps ? and added stitching. This is so her and she has me inspired several times by doing this.
On the back a bunch of flowers cut out of painted/ stencilled/ stamped canvaspaper. This adds so much depth in the flowers. Of course her doodling with the white pen couldn't be missed. I love how she always uses her white pen !
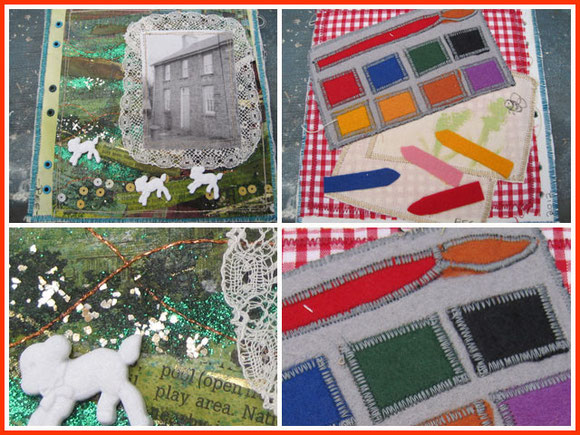
This is Behan's page. I have to pull her ears when I saw this page !
She's always SOOO hesitant about her own creations, she has no inspiration she says,...
Look at her page... it's awesome !! Her background is layered with several papers, paint and glitters are added, even stitching. This is completely my cup of tea !
The photo is of her granddads farm where she spend a lot of her childhood. She was always drawing and painting there and this is reflected on the back of her page. She collage-stitched a felted paintbox and crayons.
Bethan, this is the LAST time you are in doubt with your own work !! You can do it and I love it ! :)
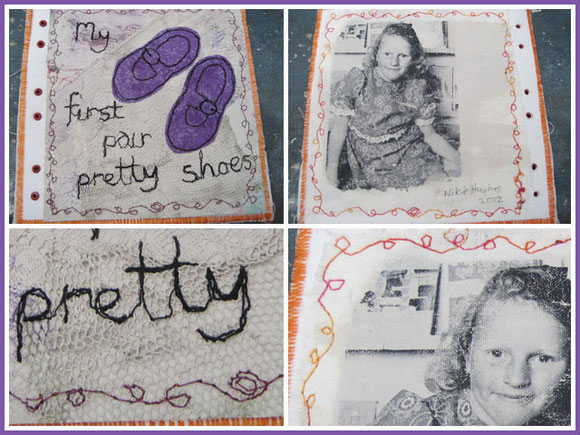
Nikie is so good in freestylestitching ! On a painted background she layered lace and stitched a pair of Mary-Janes ( I still love this kind of shoes...) AND she stitched the words "my first pair of pretty shoes".
Love, love the photo of Nikie on the back ! I only met Nikie twice but she's so recognizable on this photo !
i think it's a transfer she made on fabric or it's printed.. not completely sure, but it's great. Love the stitched border around the photo too.
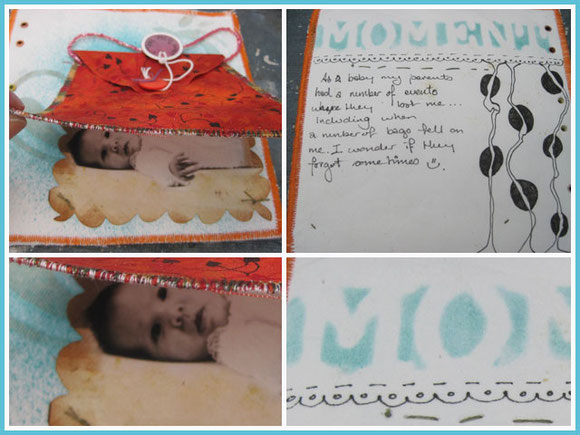
Zoë was the last to work in my book and I had some extra pages in it so I could add to my book if I wanted it.
Zoë asked if she could use them cause she had so many ideas to work out and I'm glad she did !!
On a sprayed stencilled background is an orange fabric purse. The story is that she got lost several times as a child... Once she got lost when a number of bags fell on her !
Under the orange bag is a gorgeous fabric photo of Zoë as a baby. I met Zoë in real twice and she still has the eyes of her as a baby !
On the back is the story of the bags , soms zentangling ( that I love) and the word "moment", inked through a selfmade stencil of Tim Holtz ' moments" die.
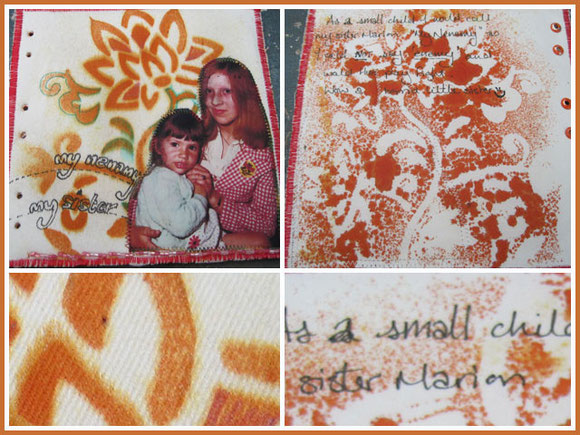
Second page of Zoë is a confession she wasn't always a sweet child... She often played fight with her elder sister Marion and cause Zoë couldn't say the word "enemy" she called her sister " my nenamy"...:)
Nice photo of them"in love" on a stenciled and sprayed background.
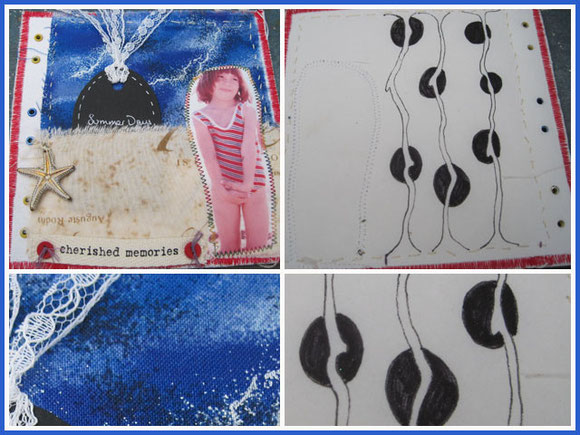
Another photo of Zoë ! Isn't she cute !
A fabric page about the sea and the days they spend there as father and daughter making sandcastles for a long time.
On the back again some zentangling of her. It looks like young seeds to me... reminding me how memories that are planted in our memory are kept forever and even have their influences in our current life.
This book is the third book I do with the "sweet sisters" and it's another one to cherish a lot, to flip through the pages over and over again to enjoy and get inspired.
It makes me long to see Zoë, Paula, Nikie and Bethan in real life again after 1,5 year and we will...
We finally decided to come together in London for the craftshow in september and spend the weekend together !
You'll hear about this journey at the end of september !
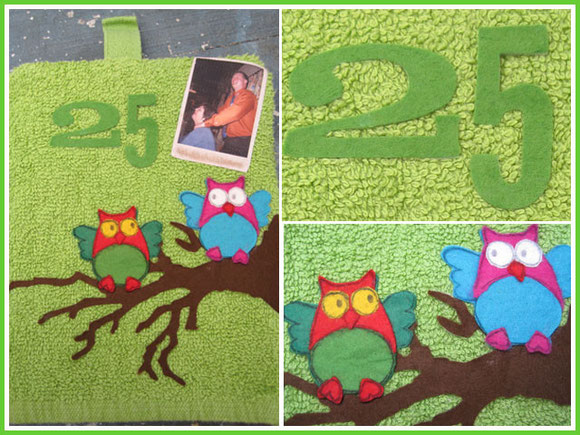
I've been working on some creative commitments. One I got from a collegue of me. Did I have decorated washing-gloves in my creations ?
Not really... but I have now :)
Friends of them are married for 25 years and as gift everyone gives a decorated washing-glove with some money in and they will all be hung in a christmastree ?.... I'm curious to hear the story about this !
I stamped with black permanent ink on several pieces of felt and collaged the owls together. The tree was made by ironing "wonder under" on brown felt and running it through the Vagabond with the branch treedie. Worked perfectly.
I did the same with the "25" from my new "word-die". Everything was glued with glossy accents to the washing-glove, so this is a decorative one and not one to be used :)
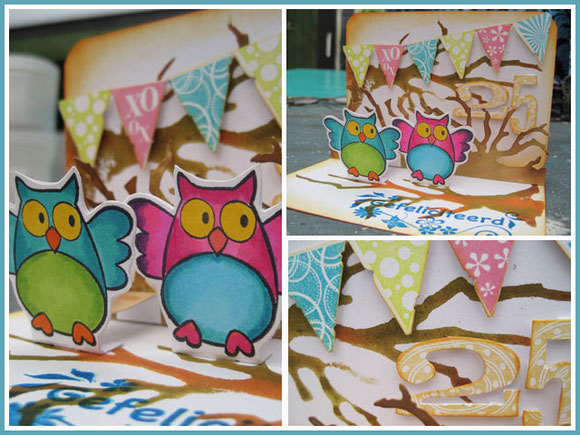
Today I made a matching pop-up card for the couple.
The owls were stamped and colored with copics. The trees were stamped with distress stains and a selfmade foam stamp ( from the branchtree die).
I also used the branches edgedie to pop up behind the owls.
The banner is made with the pennants edgedie and stamped with stamps from Michelle Ward.
I hope the couple loves retro and handmade ! :)
Married for 25 years... That's how long Wienne and I are married today too !
It feels like yesterday... so does this mean we're getting old ? LOL
Inge
zo
17
jun
2012
the raven towerlady and the sea....

Two creative projects this week : one from my daughter I had a helping hand in and a roundrobinbook about the sea...

My daughter had a practical exam past tuesday. An important one in which she has to show her interpretation of the theme "towers".
She's in her last year at artschool and this project is an important project to show she's ready to graduate...
She had to make a workbook with lots of sketches of towers and photos of how her project evolved during the year.
She needed to make a 3-D project and she had to make a digital book of her project.
Above a page of her digital book. I love how she incorporated several of her drawings of towers in "hair".

Gaia's project was "the human as a tower". She wanted to elongate the human figure by clothing, schminking and high-towered hair.
She was also inspired by ravens and figures of old horror-movies.

We had a black mannequindoll without arms to start with. Searching on the internet we found a head with long hair she could use to make the "towered" hair.
With the help of her dad we were able to attach the head to the body...
The hair was made standing up by making braids in the hair with ironwire in them.
The middlest part of the hair was made high by making knots with a comb.
To add more body and tall hair, she dyed extensions black and made them hard by putting them into glue and letting them dry upside down...

Here you can see her busy making the rigid braids.
On the left the base for a collar made with feathers.

Here is the endresult of the hair... She sprayed the hair with glue and added black feathers and peacockfeathers.
The face was painted.
As the doll didn't have arms, we had a huge hunt on the internet, fleamarkets and second handshops to find some.
Thanks to my mom we finally find a complete mannequindoll a week before the exam... We celebrated the finding with a good cup of coffee and cake !
Gaia painted the arms, added feathers and long nails to elongate the body.
As we already had a way to attach to head to the first mannequindoll and the dress was custommade for this doll, we had to find a way to attach the heavy arms to this doll...
Heavy velcro did the trick !

Gaia drew the dress and I sewed it...
One of the reasons I didn't blog past weekend, was the finishing of the dress and the fact that I had to be there for my daughter.
Do you know that : you are five minutes doing something and then you hear : " mom ?" LOL
This is the endresult !
Gaia had her exam and she passed! :)
I like the towerlady so she will decorate my home in the future...
Finishing this project lifted a lot of stress of her and my shoulders.
This meant that I could create again for my own projects.

This is the last but one enveloppebook to work in.
Sandra's theme was about the sea and traveling.
This meant I could use my favorite blues and greens again.:)
I've been watching all the youtube videos with Dyan Reavely the past weeks so I wanted to try her technique.
This means lots of spraying with inks and water, using stencils to be sprayed through and using them to blot of the water on your page.
I love the results and the ghosting effect of the ink reacting with water.
My "words" die arrived also a week ago ! I was able to cut heavy cardboard with it without any problem. Love this worddie !
The letters were sprayed with the inksprays and selfmade glimmermist.

On the bottom of the flap on the right side of the page I created "the beach" by using several distress powders.
The stamp is from craftyindividuals.
I bought one of their stamps for my mom-in-law in a Dutch shop. She looked up the website of this compagny and asked me if I could order more stamps for her. I ended up buying a lot of them for myself too !!!
You know every enveloppebook of this round robin got his pop-up element so here you have one again...

Stamps are from two sheets of oxfordimpressions. Another favorite stampcompagny of me...
Making the pop-ups is getting easier and easier as I know better what I have to pay attention to. I know that even after this project the pop-ups will "pop-up" in future projects !

The tags were made with the same "Dyan Reavely" technique.
The fish was stamped with white distress stain. I like how the white stain is not completely opaque.
I colored in some of the shells with the white distress stain too.
Another book finished ! This week the last book arrives.
This means I had to start thinking of a new project for a round robin !
As together with the worddie the little enveloppedie arrived, I got started on another enveloppebook. This one will house ATC's in them.
I'm busy making an "example" book for the participants so they can see how the project can be.
It's also a "just fun" project for me, adding decorated envelops and ATC's when I wish to create something. And it's about halloween...LOL
greetings from Belgium
Inge
zo
03
jun
2012
Bearmail ! ...
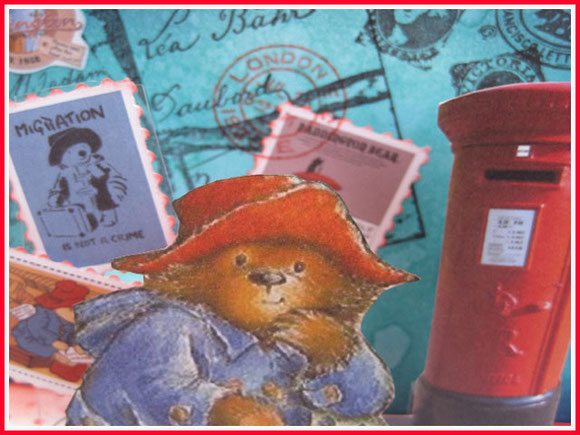
Anne Bearheart's enveloppebook arrived at my home with the theme : Bears and anything mailrelated...
I first thought of doing something with Pooh bear and mail, but searching for inspiration on the internet I found Paddington bear !
Of course : Paddington got lost in Paddington station while traveling. He must have send mail from where he has been before on his travels !
One of Anne's favorite colors is red, so I combined red with blue: it reflects the colors of Paddingtons clothes and hat, an English mailbox is brightred and red, blue and white or UK colors !
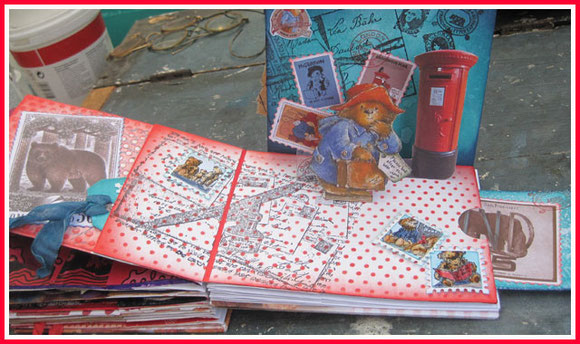
Paddington could travel from finland, to the UK, to San Francisco... even to the universe !
If you followed me before you know I end up wit a pop-up in every enveloppebook...

Part of the left page was embossed with a dotstencil which I inked with red distress ink and stamped a reflections textstamp on and then ran through my Vagabond. That's how the text appears between the dots and not on top of the dots.
Lots of dots in this book cause I know this is another favorite of Anne :)
I found an image of a Finnish stamp with a bear on the internet.
My eldest son will study at the Helsinki University in Finland coming september until december. Anne already asked me if he could collect some Finnish stamps : now I know why ! They are indeed gorgeous.
I don't have much bearstamps but I have a large one with lots of bears on a shelf. I stamped this stamp with permanent black ink on white paper, colored the bears with distress stains and after drying put a layer of glossy accents over them.
After drying I inked them over with distress ink. Where the glossy accents is, the ink won't stay.
I mounted these bears on a scrappaper punched with a stamppunch.
Now I have my own bearstamps !
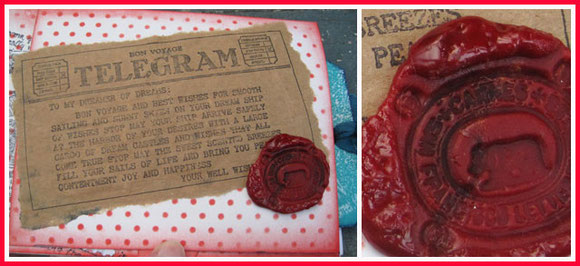
This is the right page of the enveloppebook.
I teared off a piece of paper from craftpaper I use to spray or paint on, so it was already a bit distressed.
The large telegramstamp wishes the reciever all kinds of good things. That's what Anne can use for the moment...
In my stash I had a rubber bearstamp from San Francisco.
I heated a waxstick and stamped in the hot wax with the stamp. Because I inked the stamp first with embossing ink, the stamp got released easy from the wax when cooled.
And then you have to open the flap...
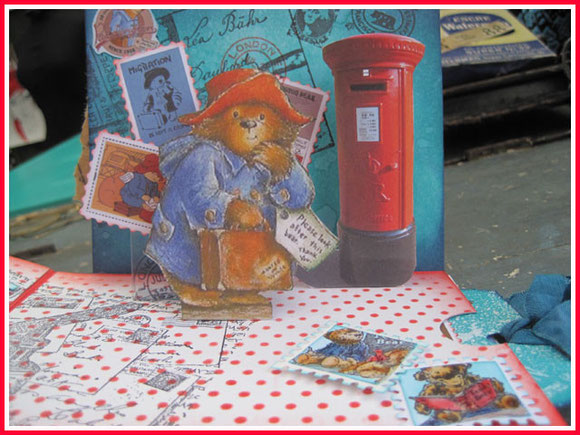
Here he is : Paddington bear !
I assume he's in the UK now, seeing the red mailbox...
The Paddington image is from the internet, as are the paddingtonimages on the back I resized and changed into mailstamps with a decorative scissor.
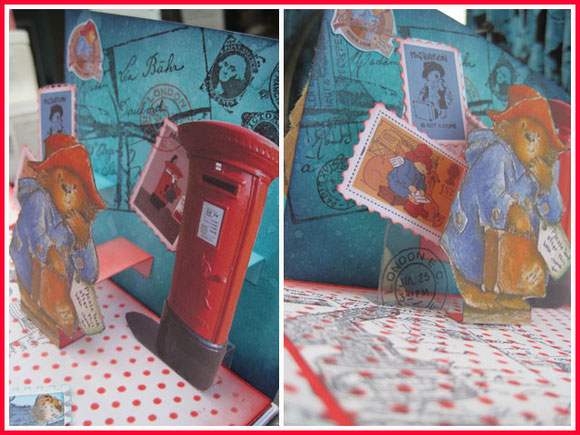
Here you can see how Paddington and the mailbox is attached on the back with tabs which make them pop up and stand up when you open the page.
The back was inked my new favorite distress ink : peacock blue ! I added some mailrelated stamps with permanent ink on this background.
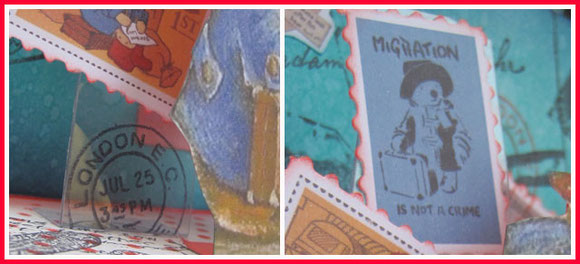
For the tab on which I mounted the Paddington stamps I used a piece of packagingplastic. This doesn't bend as easily as a papertab, but I loved it that it was transparent.
It makes the images "float" in the air and I added a "London" stamp with stazon ink.
I don't know if you know Banksy ? This is a British street artist whom I admire for his fun sight on the world, his power to make a statement with his art, the way he makes graffiti real art... You can find more about him here.
Banksy made this Paddington stencil : "migration is not a crime..." It says enough....
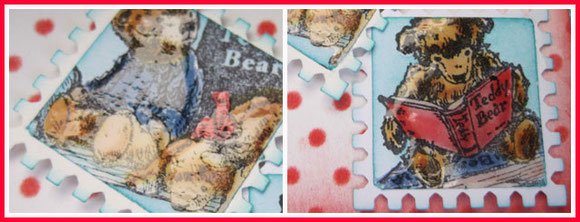
More handmade bearstamps with the same technique as I explained above. Love this technique and the results ! They are mounted with 3 D-foam to stand out more.
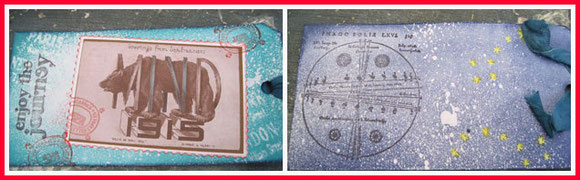
The tag in the rightpocket shows Paddington went to other places too...
Next to my bearstamp of San Francisco I found this image of a bearstamp of San Francisco on the internet.
I guess San Francisco has something with bears seeing them appear on their stamps : are there a lot of bears there ? Anyone who can explain the relationship between this city and bears : feel free to tell the story here !
I think Paddington will need a spaceship for his voyage to the next destination: Ursa Minor ( Little Bear) and Ursa Major ( Great Bear) !
The tag was spritzed with Tsukineko goose bumps and they resisted the inks perfectly.
I first did the San Francisco side and when I saw the effect it reminded me of the starry sky and then I thought.. of course Little Bear and Great Bear !
Funny how things come together...
And now about something completely different...
Some of you (you know who you are :) have asked how my back evolves...
Well, good news from the neurosurgeon is that most of my spine is still good, so I don't need spare parts and a backsurgery !
The pain is still there but coming friday and the week after that I will get "facetinfiltrations" in my back... Fingers crossed they solve at least a part of the backproblems !
In the meantime I keep myself mentally sane by creating !
Inge
zo
27
mei
2012
manly cards and more...

No post past week cause I was on a garden-craft-artevent having a booth...
No blogging about it because I forgot to take photos !
But here I'm again with some creations !
Making cards for men is not easy... not to say "difficult"...
For women you can choose any color, add flowers in all sizes as embellisments and go over the top as much as you want.
But I tried to make some for men...
I made several tags and mounted them with the easeldie so they can stand up.

One of my favorite techniques is inking a embossingfolder on one side and ran it through the Vagabond.
You immediately get a colored and textured background !
I added the "steampunk"bird from oxford impressions inked with rusty hinge distress ink, a piece of tissue tape, 2 bingonumbers, the quote " live now" and a photostamp on shrinkplastic.

On this tag I glued paper from an old mathbook on the tag and run it trough the clockembossingfolder. I love how the numbers of the text are repeated in the numbers of the clock.
The tag was inked with rusty hinge distress ink.
The tag needed a bit more color, so I added a left over piece from a clockdie. The clockdie was embossed with verdigris embossingpowder. I like the contrast of the "brown" tag with the blues of the clock.

I wanted to try this technique for a long while but I didn't have metal foil.
Maybe heavy aluminium wrapping foil from the kitchen could do the same ?
I doubled a sheet of aluminium foil and glued it together to make it thicker. I glued the aluminium on the tag and run it through the Vagabond.
Wow, the impression held perfectly and the aluminium didn't tear !
I painted over the tag with black gesso, let it dry a little bit and then wiped the gesso off again with a wet cloth.
The gesso stayed in the crevices and gave it a great weathered effect.
Why didn't I experimented this earlier ????
The clock die was embossed with verdigris embossing powder to have a contrast with the metal.
The rusty hinge on the tag makes the quote stand out more.

Another favorite technique : embossing with the stencils from the craftersworkshop ! The embossing is not so deep as with embossingfolders or the texture fades, but I love how it comes out when you ink the stencil before the embossing.
I overstamped with white distress stain and dried it immediately with my heat gun. If you wait too long the white stain seeps in the paper too much. Now it adds a ghostly image to the tag.

I loved experimenting with different backgrounds on the tags and this was one I learned in the online card classes of Jennifer Mc Guire.
A large backgroundstamp was inked with embossing ink and "kissed" with a textstamp.
I then stamped the stamp on the paper and embossed with clear embossing ink.
The whole tag was then covered with the new "peacock" distress ink, a new favorite of me...
The manstamp was colored with distress stains and a watercolorbrush.
All the tags were a combination of blues and the rusty hinge color which go together well I think.
I also had to make a card for "one of my men" this week.
My eldest son became 23 years on the 25 th of May.
While I was already married and having a child at this age, he's still a student at the university and enjoys this studentlife !
"live the life you've imagined"... :)

A week before on the 18 th of May , my daughter Gaia became 19 !
So we had to celebrate twice this week !

On her card I used blues and pink, her favorite colors. She loves to wear these colors in her hair too :)
I also "took" one of her drawings and printed it on canvaspaper.
This is a drawing in which I recognize her... the colors, the haircut, the piercings, tattoos,...
I love to see how my kids grow up and choose their own path.
In some ways I recognize myself, in others they show they are making their life like they imagine it themselves.
And that's how it has to be :)
Happy birthday sweet kids !
Inge
zo
13
mei
2012
a happy creative mother's day ! ...
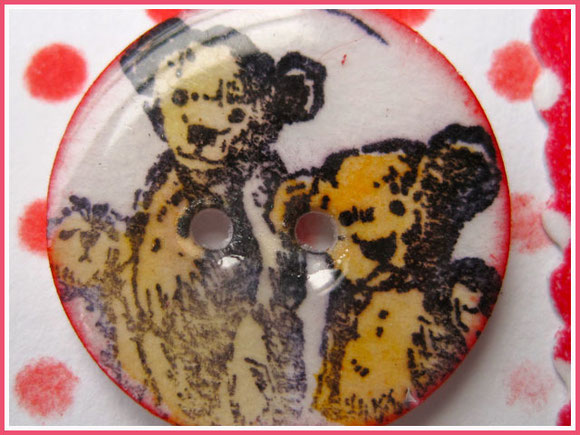
"Mothers are like buttons... they keep everything together..."
A happy mother's day to everyone who's a mother or cares like a mother !
I'm a happy creative mother and creativity helps me to stay a happy mom.
I have an appointment with a neurosurgeon in 1,5 week to talk about a possible backsurgery....:(
After the first disappointment and tears when my reumatologist told it, I grabbed my inks and stamps and started creating.
It immediately started to lift my spirits and i've been creating in every possible moment the past week.
Looking at my photos about what exactly I would show you in this blogpost I discovered I created a LOT the past week...
I even need a second blogpost for the tunnelbooks I worked in so that's for the future.
I created for several birthdays past week and one of them was Anne's.
She loves anything about sewing but is most of all a huge lover of bears. She makes the most wonderful tiny bears I know ! You can find some here.
I first made her an easelcard.
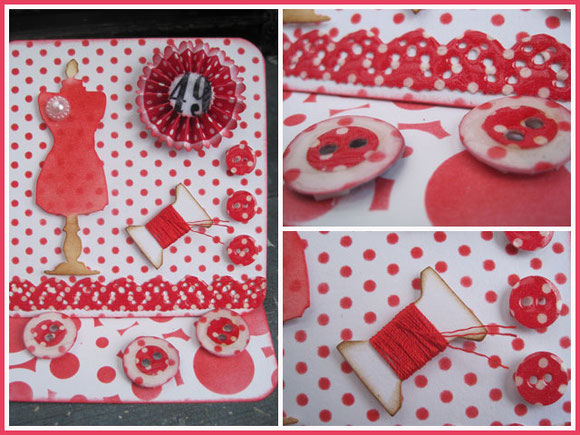
I also know she loves red dots, so in everything I create for her I try to incorporate them.
Backgrounds of the cards were made with the stencils of the craftersworkshop and barn door red distress ink.
I punched small and big circles. On the big ones I added dots with ink. The small red- with- white- dots buttons were made by adding washi tape to sturdy paper and punch circles out of it.
I punched two holes to make them look like buttons, but embossing them 3 times with UTEE really makes them look like buttons. I love this technique and I love UTEE !
I also used the UTEE on a washi tape covered scrap that I punched with Tim Holtz vintage lace stripdie.
Same technique on the circle with the "49" on the rosette die ( again with washitape).
I also made her a handmade gift.
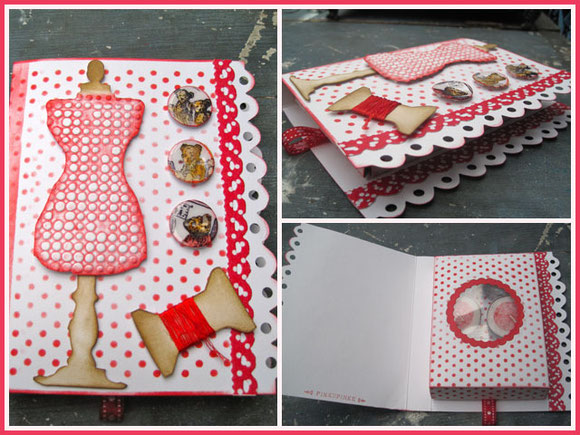
I found this box in a tutorial on a CD of Technique Junkies.
The cover is decorated and on the inside is a box also made with paper in which you can put a present.
Dots again here with the swiss dot stencil of the crafters workshop, the red with white dots washi tape ( again the lace die of Tim Holtz).
The dressform was embossed with Tim's dots embossingfolder.
My favorites here are the buttons...
I wanted to keep the box assorted with her card which was about sewing, but I also wanted to add something with bears.
Why not creating bearbuttons ? ! ...
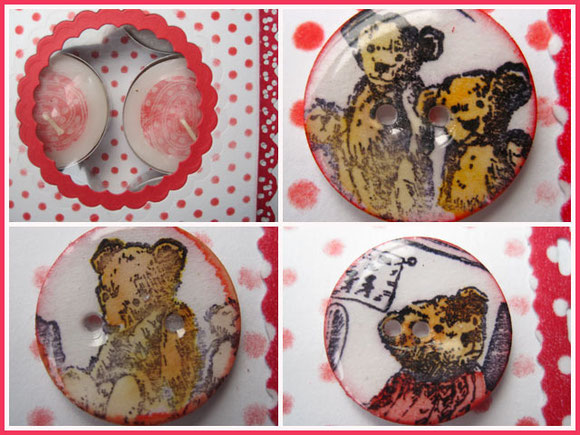
I wish I could sew this buttons on my clothes ! But they are not washable... they are made from paper, stamped with permanent black ink, colored with distress stains and a watercolorbrush and three times embossed with UTEE.
The candles inside are decorated with stamped tissuepaper that was melted on the candles.
Other projects this week were tags inspired by the techniques in Tim's two books and his creative chemistry 101 online class.
I had the easel die for a while now but had not used it yet.
I told myself I'm not allowed to just buy and hoarder Tim's stuff, but that I have to USE it...
On the back of each tag I added a paper easel cut out with the easel die and I really like the result that the tags can stand up right now !
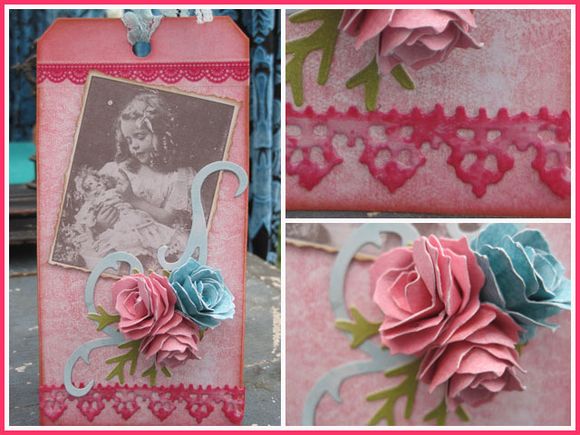
The lace on top is a washi tape, the lace under is stamped paper cut with the lace strip die and embossed with UTEE.
Another die I had for a while and I have not used yet was the distressed pineconedie.
I used it to make the blue and pink roses here. It needed a bit of practice to make them look like I wanted, but this die will be used more now !
I made them of paper ( 120 grams) and colored with distress inks, splattered with water.
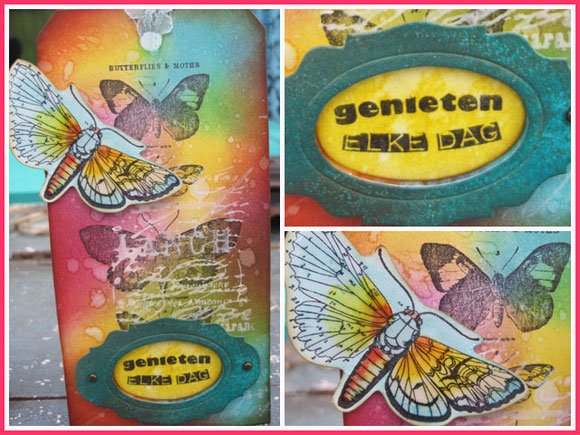
Background inked with several distress ink, splattered with water and stamped on with white distress stain. I like how this technique adds a subtle layer to the tag.
The butterfly was colored with distress stains and a watercolorbrush. After drying I added glossy accents. When this was dry I cut the butterfly out and inked over it with distress ink. The glossy accent resist the ink and gives a lovely shine and texture to the butterfly.
The bookplate was inked with the new spring distress stain peacock ( I think this is my favorite color next to broken china !! ) .
I added clear embossing powder, flickered some off and overinked with a brown distress ink. Instant verdigris !
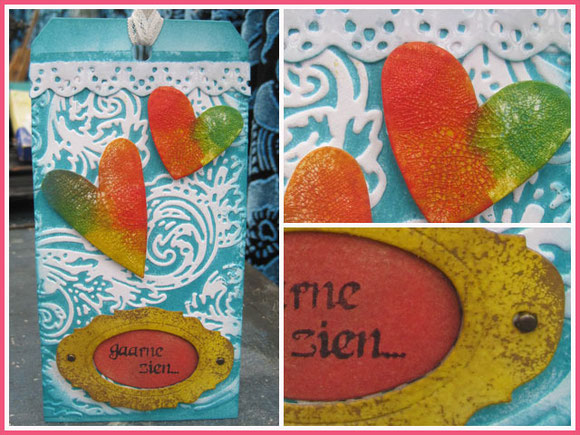
In this "gaarne zien " ( "loving") tag I used the same techniques as in the tags above. The yellow bookplate was inked with the new yellow "lemonade" distress ink. On the hearts I used the shattered stains technique.

In this tag I used the new spring distress inks together.
The little label " genieten elke dag" ( "enjoy every day") was inked with blue distress ink and overstamped with the white distress stain.
I used the same technique to overstamp the background with a gears stamp.
On the gear I used distress embossingpowder and on the clock the new "verdigris" technique.
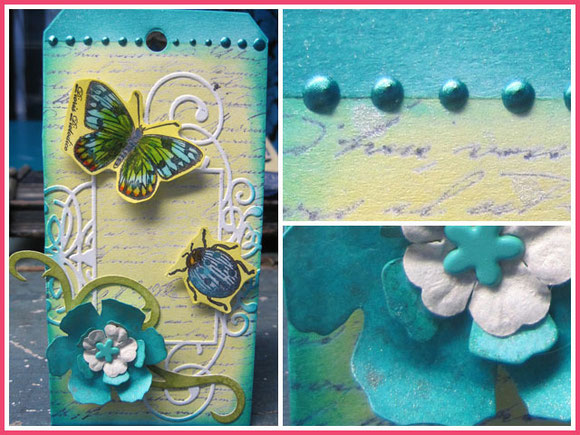
On this tag I used two of the new springdistress inks and the stamping with reflections on the embossingfolder technique.

As last photos, some details of birthdaycards I also made this week.
When I overview my creations of past week I cannot say I haven't been creative ! :)
I hope you get inspired by this blogpost and get your fingers inky !
Inge
di
01
mei
2012
creativity in the Castle of the rats... Ratteljee !
On sunday we had our creative event "Ratteljee" for the second time in an old restorated priory in my hometown, locally known as "the castle of the rats" because it's been an ruin for decades until it was restored some years ago...
Ratteljee is a creative event with 20 people, mostly locally who wants to come outside with their creativity, show their passion to others, share their projects with the outer world.
We had all kinds of "crafts" and I think we had a very good selection and diversity this year.
I hope I can convince you about the quality we had by showing you lots of photos...
I can't show everyone's projects... This is just a sneak peek so you have an idea of what you missed if you weren't there :)
I was in the organizing team, so I was also busy with other things and I forgot to take a photo of my own booth... Luckily I can show you some of the stuff I had for sale that I photographed before...
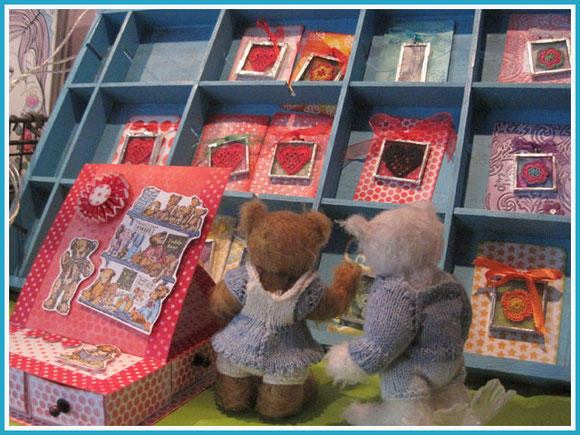
I had my pendants : crocheted flowers or hearts between alcholinked glass or washitape as background, soldered between glass.
They were all presented on "ATC's" , a lovely size to present them.
I had made several easelcard-drawerboxes.

I made fabricbuttons and presented them on decorated diecuts ( the dressform of Tim Holtz).
Of course you can use the buttons on your selfmade clothes, but in the meantime you can store them or use them as a decorative item in a display !
I also had several harlequindolls. I make these alread more then 20 years and they are my gift to newborns.
They are made from a combination between vintage and new fabrics and are all unique, cause once the vintage fabric is used, there is no more to make the same ones.
They are very soft and light and I know several of the recievers really made them their own "cuddly" toy, but it's the child that decides if or if not this harlequin becomes the favorite one...
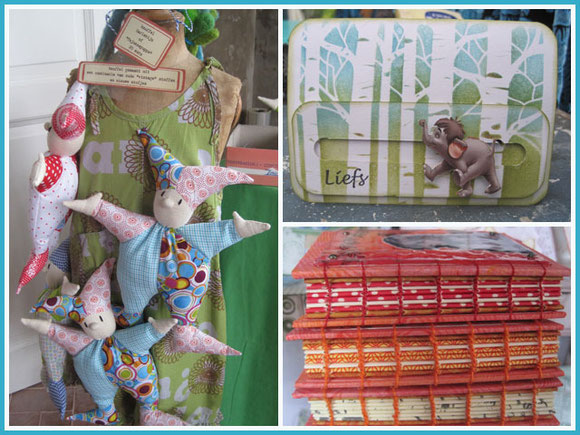
What sold very good were my cards... especially the spinnercards were favorite.
It's funny to see how people react. They see the card and then you tell them it's a mechanical card and then you demonstrate how it starts spinning !
Their faces are so funny to see :)
Some are really intrigued : "how does this happen ? "... and they start looking at the card in all angles trying to figure out the system.
I tell them the secret... just don't know if they really understand without making one themselves...
We were represented with three generations at Ratteljee : me, my mom and my daughter Gaia...
Actually, I was representing my daughter, cause she was having fun at a musicfestival in Groes for a whole weekend...
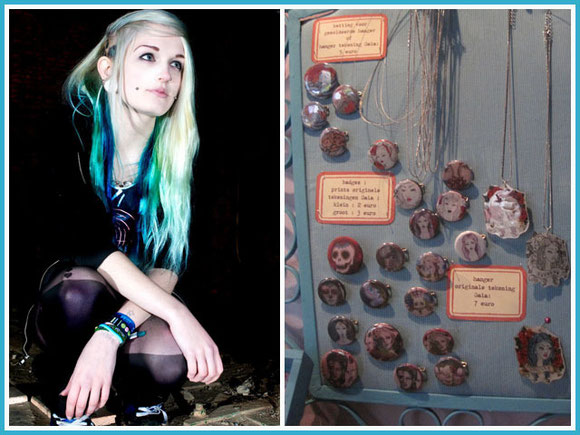
I really wanted to show the outerworld what Gaia can do with her hands...
That's why I made a booth for her at Ratteljee with lots of her stuff.
Gaia loves mostly to draw and paint. I had several of her paintings presented, I had badges with prints from her drawings and paintings,..
I had her calendar: she had made this past year for school and the instruction was it has to be a reflection of what they liked.
Gaia drew hours and hours on this calendar, filled with zombies ( Marilyn Monroe as a zombie) and vampires, creatures from old horrormovies (Frankenstein, the bride of Frankenstein,...) and recent movies ( death note,...),...
I know this is not everyones cup of tea, but I DO think it's a work of art...
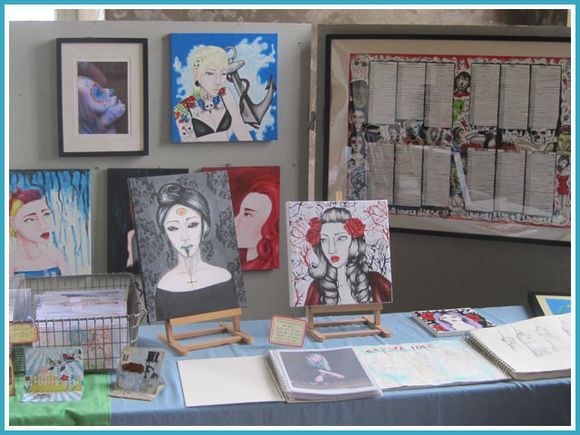
I had two books with drawings and paintings from her, altered photos (I know most girls use photoshop to make them look thinner and taller and... my Gaia uses photoshop to alter her photo in zombie or a vampire...LOL)
I thought people would hesitate to look at her creations, thinking it's a bit strange, not something they are used to, but I was amazed by the interest her work got.
Lots of people looked in the books, listened to what I was telling about it... and I told a lot... I am a proud mom, you know !
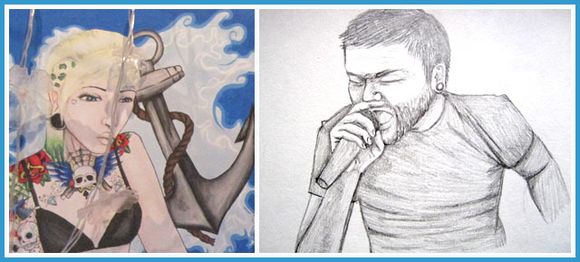
What I love about Gaia's work is that you really can see she has her own style and themes, but she also has several styles in drawing ( stilized ànd realistic).
I knew Gaia was having fun at the musicfestival, but I really wish she could have heared all the positive comments on her work.
I really was a proud mom :)
I also was a proud daughter, having my mom with her work in the same room.
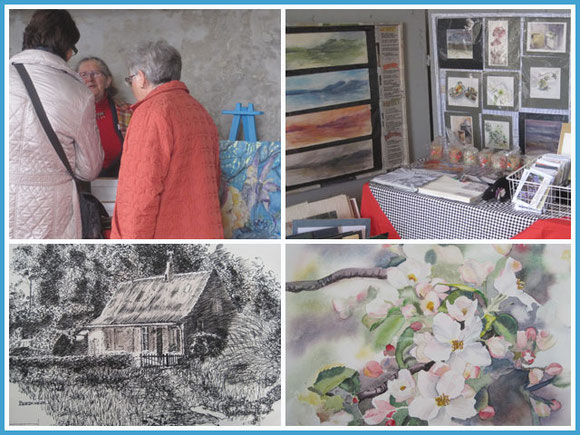
Gaia has a lot from my mom : she also draws and paint.
My mom mostly works with aquarel but can also draw very well.
She also loves to do mixed media : using all kinds of materials and techniques she knows.
We can't deny creativity is in our genes...
My mom, Gaia and me were not the only participants in Ratteljee...
Els loves to scrapbook and showed layouts, but also cards she made. She's also a designer for basic grey and really has an own style.You can find more of her at Bestamped.
Christel is amazing with felt and needle and had a booth full of gnomes and fairies and animals and... made of felt.
She made the little animalheads for the goodiebag the first 50 visitors recieved. I think they are amazing !
You can find more of her on her facebookpage.
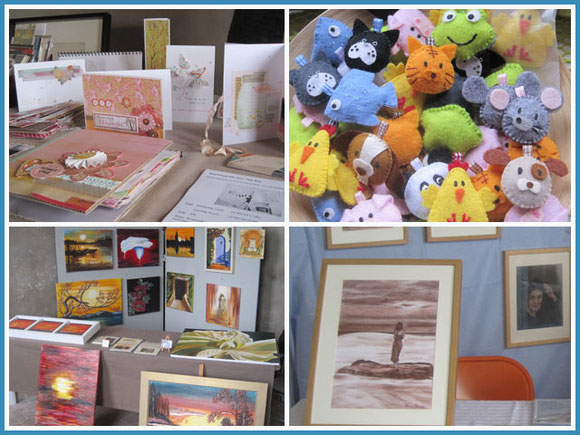
Luc paints abstract and realistic paintings. Dorine draws mostly portrets or figures and bister is a medium she loves to work with.
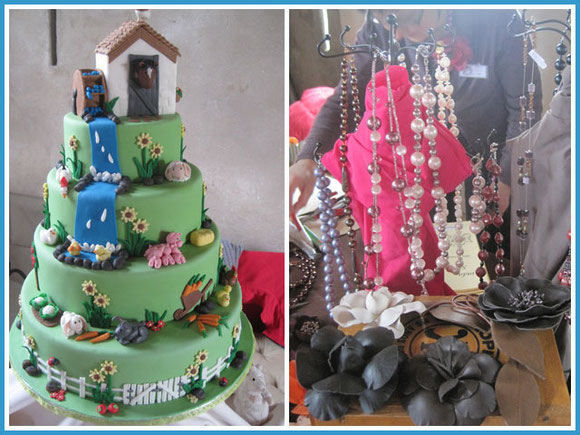
Sonia and Evelyn are masterchefs in making decorated cakes, lovely cookies and delicious cupcakes.
Linda makes mostly flowercorsages and in the past she exposed in real castles in France !
She was a bit surprised when she saw our "castle"... of course it's not a real castle, but the castle of the rats ! LOL
At the end of the event, she admitted that even if it was not a real castle, it was a great and unique building to expose in.
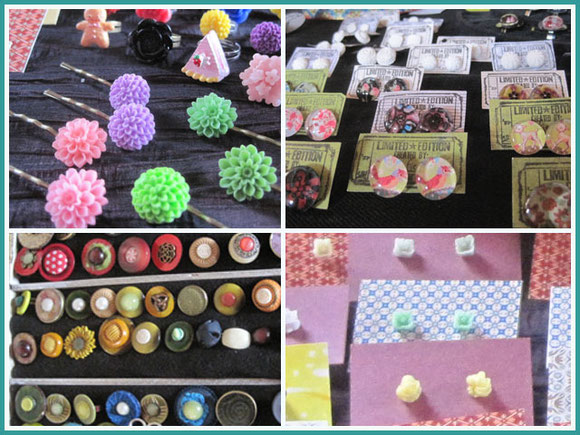
We had several people ( Jo, Sofie, Marieke, Carla,...) who made jewelry but definitely they all had their own style and they all used different techniques.
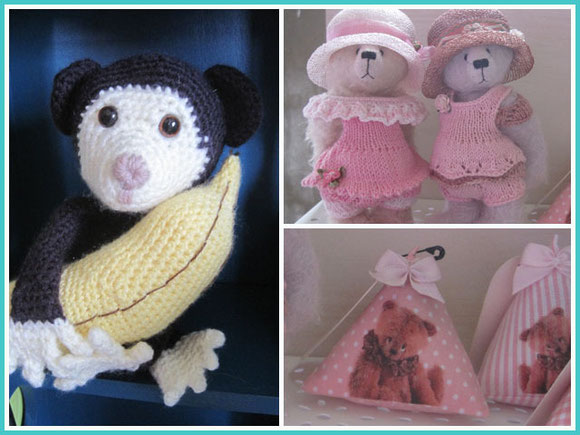
I had my harlequins, but Naan ( Nathalie and Sofie) had handcrocheted softies and other stuff.
Anne was there too together with some of her unique minibears. They are made with an incredible eye for detail ( look at the clothes, look at the hats !).
You can find more of Anne here. For people who live close : Anne soon starts giving different workshops, so please contact her for more information.
We had more people who participated, but I don't have photos of them all... but each one deserved to be there.
Ratteljee was fun : it was a joy to be able to tell and show our passion.
We did sell some stuff, but the main purpose was "show and tell" and we did that.
I'm sure I'll be here again within a year with photos and a story of our third Ratteljee !
Thanks to all the participants, the visitors, the people behind the scenes,...
you... for being here...
Inge
zo
22
apr
2012
ATC inspired books...

It all started with some ATC's I made and and I ended up with 3 books...
A while ago I experimented with some friends to make backgroundpapers. Wallpaperpaste mixed with acrylic paint was spread on large papers.
We made marks in it with all kinds of tools : paintbrushes, the back of the paintbrush, different sized combs bought and handmade, jarlids,...
We dragged the materials through the mixture, stamped in it, wrote sentences enlarged and in different directions,...
We ended up making marks with our hands...
The papers were put away to dry completely.
Another moment we came together and made some ATC's.
I teached them how they could do the "enamel" technique I learned from Shelly Hickox.
I ended up embossing the ATC's I made with 3 layers of UTEE.
The UTEE made the already nice backgroundpapers shine and the colors were even enhanced.

The ATC of the praying girl was made with the backgroundpaper, washi tape ( red with white dots) and an inked piece of paperlace made with Tim Holtz laceborderdie. The girls was stamped on glossy paper which works best for photostamps and some extra stamps were added with archival ink.
After embossing the ATC's and seeing the result, I knew I wanted to do something with them.
They would make a perfect cover for my small handsewed books !
I covered two boards with the same backgroundpaper I used for the ATC. The ATC was glued on top with glossy accents and 4 metal pieces were added on the corners.
For the inside I made paper with inkrefresher which make the paper very durable and flexible.
I colored the brown packingpaper with distress stains and covered it completely with the inkrefresher. I rubbed the inkrefresher in the paper and then let it dry completely.
To reflect the washitape with the dots on the ATC I inked the paper with distress ink barn door and a stencil.
Alternating the signatures I added a strip of red washitape with white dots on the edge of the signatures.
This gives the open spine a nice finish.

This ATC was made in a similar way as the other, but after I added the UTEE and melted it, I put it in the fridge.
I cracked the UTEE and you can see these cracks which give an extra texture to the ATC.
On the edges of the signatures I added tissuetape of Tim Holtz.
The book was sewed with orange sewing thread which contrast nicely with the tissuetape on the spine.

The third book was made the same way as the others and I also cracked the UTEE here.
You can see the orange washi tape I used on the signatures. I love how the images on the washitape gives the spine an extra visual effect.

The paper on the first signature on the inside was made again with the inkrefresher.
The detailed lacestamp in red distress ink came out fine on the paper.

I love the sight of these open spines !
The sewing is made with the copic stitch which makes it possible for the books to open completely.
These books are 7/10 cm ( 2,75 inch/ 3,93 inch) which makes them nice books to put in your bag or your pocket.
You can use them to write quotes in it, draw in it when you are on a travel, make a little journal of it, use it for birthdays,... or you can use your ATC's in them !

I also made some more cards this week.
This is a card I made for a collegue who lost her 92 year old mom. The quote says : sorrow for the loss, joy for what has been .
I used the image of trees to represent the life and death a tree has in it.
Even when a very old tree dies, it's not completely dead. When you look around it you see all the little seedlings it has around it...
It' s the same with old people... of course you miss them and you have sorrow for them, because it was your mom... But she's not dead as long as there are people left who remember her and talk about her. She lives in her kids and her grandchildren... That's what I wanted to express with the colorful flowers under the black and white trees.
This is an easel card, so you first see the quote and the trees. When you open it and let it stand up, you also see the colorful flowers...
Life and death are one...

Of course I also made some more spinnercards this week !
The image of the aspen trees ( stencil of the craftersworkshop) is used here again but this time to represent to wood a bear lives in.
On the right an Asian inspired spinnercard with pinks and blossoms and washi tape...
Just one week to go and we have Ratteljee !
Our creative event happens for the second time in the Castle of the Rats ( an old priory in the city where I live).

20 creative people with all kinds of creativity "come outside to show what they càn".
First of all we want to tell about our passion which we mostly practice behind closed doors.
We have some things for sale, but that's not the first purpose.
Maybe when you are close, we can welcome you ?
Inge
zo
15
apr
2012
keep on spinning and popping-up...
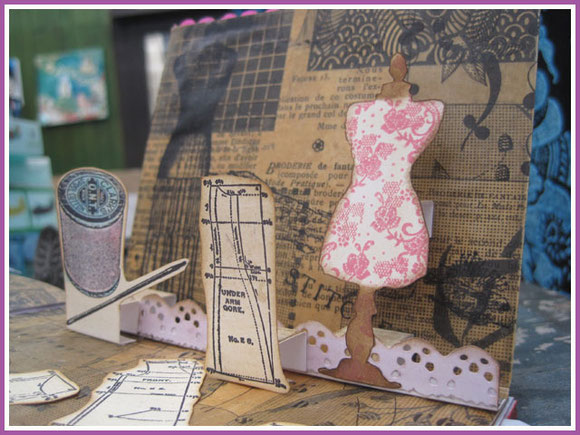
Between making cards for Ratteljee, our creative event in two weeks, I also finished a page in a local round robin enveloppebook.
Dorien's book is all about " collecting". The people before me made pages about collecting buttons, everything about pansies,...
I know Dorien has in real life collections of "sewing stuff", so I wanted to make a page about this "hoarding" habit...
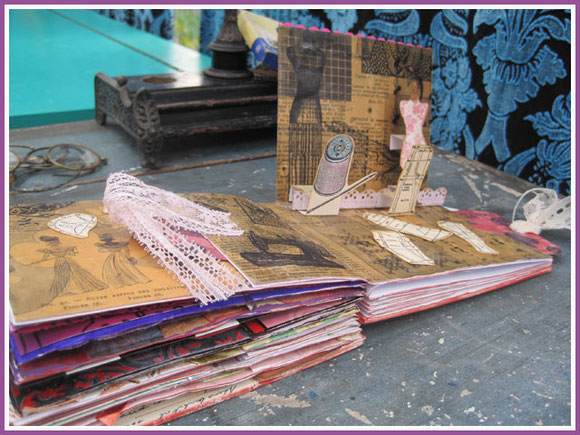
You can see the enveloppebook is starting to become FAT because of all the creations and tags people made in this book.
I have a book from 1897 of "revue de la famille". The book is tattered and damaged, but has beautiful pages with images of clothing of that era, embroidery, patterns,...
I have one magazine about undergarments of that time that I cherish, but I do rip out pages of the book to use in creative projects...
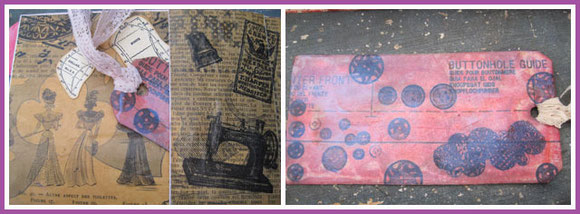
I glued the brittle paper on sturdy paper. I stamped "sewing" images like a sewing machine, a timble, a package of needles, buttons,... with permanent ink onto the paper.
I then covered the whole paper with melted wax. With my heat gun I then melt off almost every part of wax again. The paper did soak in a lot of wax and this stays.
What happened as an unexpected event in a previous creation in an evolution journal, was now used conscious.
The images on the backside of the old paper appear by waxing the paper and create an interesting layer.
The small tag was treated in the same way, but before I added wax, I colored the paper with pink distress stain. After waxing I brushed perfect pearls on the wax and heated it again to make the perfect pearls permanent.
The perfect pearls give the tag an pearl shine like old pearl buttons.
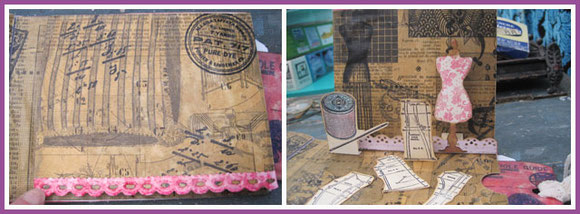
On the right page I added a flap. On the edge of the page I added a strip of enameled lace made with Tim Holtz lace die.
The paper was inked with distress stain, stamped with a lace stamp and 3 times embossed with UTEE.
Under the flap is again hiding... a pop-up..
I made a scene with sewing notions.
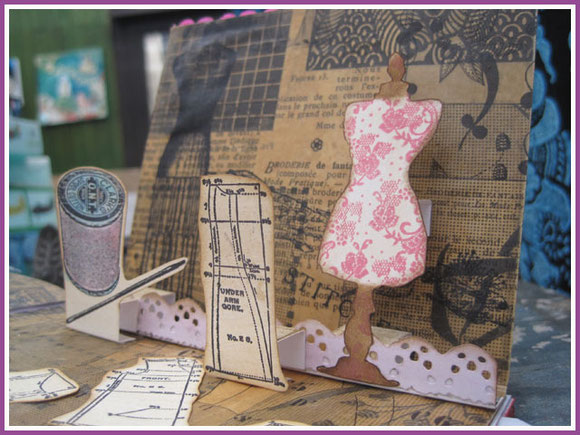
There is a paper lace trim on which I mounted the mini dress form I cut out of sturdy paper with one of Tim's mover and shapers.
The dressform was stamped with a lacestamp and edged with distress ink.
At two different widths of the background there is a spool and needle stamp and a patternstamp.
These things pop up when you open the flap and stand up due to the papertabs added at the background.
Pop-up madness still continues in the future..
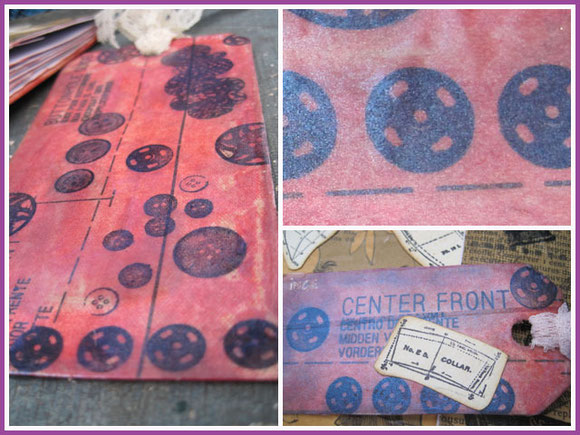
The large tag was treated the same way as the small tag.
Old paper glued on sturdy paper, colored with distress stain, stamps stamped with permanent black ink, covered in wax and melted off again and perfect pearls added.
On the photo on the top right you can see a bit of the shimmer the perfect pearls create.
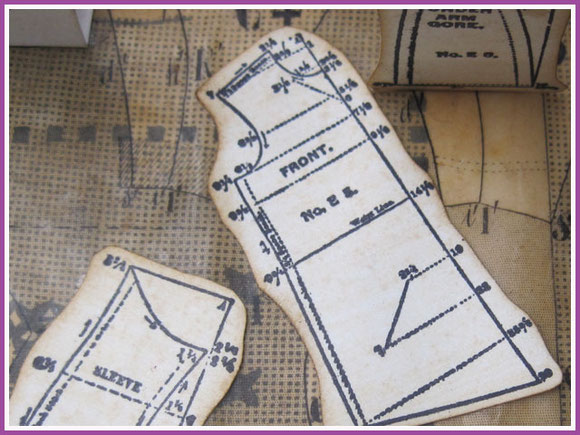
Here you can see a close-up of the waxed backgroundpaper and two patternstamps I once found online ( I know the shop is going out of business now but I can't remember their name right now...:(
I've also been busy past week making more spinnercards.
You find more about the techniques in my previous blogpost.
I just can't resist to show you these cute gnomes of Snow White...
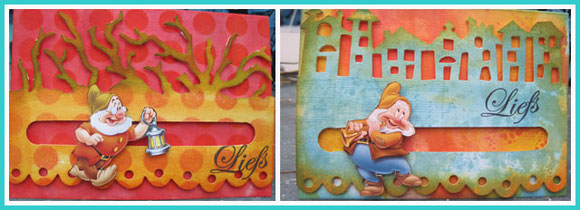
Also made with distress inks and the wrinkle free distress technique, Tim's edge dies or with stencils of the craftersworkshop are these two spinnercards.
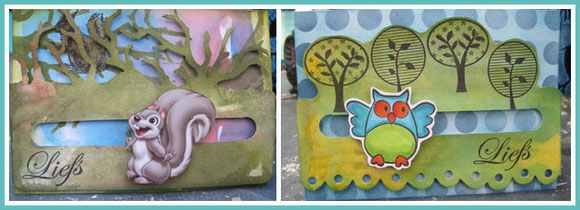
It has been a while since a made spinnercards, but now I'm addicted again...
I'm off now to make some more for Ratteljee...
liefs ( Dutch for 'sweet greetings'...)
Inge
zo
08
apr
2012
recycled spinner cards...

In the ATT yahoo group the question of the week was " how do you recycle in your creations" ?
I think half of the stuff most crafters use is recycled stuff. I cut up my cardboard boxes too, plastic packaging paper is for free and useable for lots of use, left over scraps of paper are reused for other projects..
I made some spinnercards past week in which I recycled too.
The start of the spinnercards were trading cards for children.
I don't know how this is in other countries but at some supermarkets here in Belgium, they give temporarely trading cards with a certain amount on your bill.
In the past my children collected them, especially the holographic cards were their favorites.
Now that they are adults, I mostly give the trading cards to the children of my neighbours.
A while ago they gave trading cards with Disney figures on...
Bambi, the gnomes of Snow White, Pinocchio, Dumbo... the figures of the old movies still speak to me. I thought they were so cute, so I selected some trading cards to keep for myself for " future use".

This week they finally came out of the "collecting box".
They would be perfect as the spinning element on a spinning card !

I love spinning cards, as I do with most mechanical cards.
When you tilt the card, the figure is spinning around until it stops at the end of the card. Then you tilt it again and it spins back to the front...
Every time I make such a card, I amuse myself playing with the spinning... The child in me, I guess...

Although there are wonderful paper stacks out in the creative world, I mostly make my background papers myself.
On most of these spinnercards I colored the white background with distress inks and the wrinkle free distress technique of Tim Holtz.
Perfect projects to practice the techniques Tim showed in his online card class " creative chemistry 101".
On the card with the owl of Bambi, I cut out the branch tree of Tim and mounted the owl on it.
I also cut the tree with foam and made a stamp with it.
The foam was inked with several distress stains and then stamped on the card.
(EDIT : it's been a while since I participated in Linda Ledbetters challenges (due to other creative projects...) but I still like her idea to get us creating using Tim Holtz techniques from his book Compendium of curiosities II.
Maybe an extra push to participate is that there is always a sponsor. Now it'sSimonsaysstamp, an online store I ordered from in the past.
Although I made this blogpost past sunday I would like to participate with the challenge with my "owl card" and the foamstamp made with Tim's treebranch die. This is just an extra use of his dies ! )

The wrinkle free distress technique is very easy to do but creates beautiful watercolored backgrounds. The fun part is also that it's never the same and you can add as many spots and drips as you like until you pleased with the layered background.

On some of the cards I used the edge dies of Tim to add more interest to the element that makes the card spin.
I love the contrast between the crisp Disney image and the splattered background.

On these cards I used the marbled stains technique on the background and the shattered stains technique on the butterfly edge.
The marbled stains technique is again easy to do, but with a lot of different unexpected results.
Edges of the card are always colored with distress inks. On the background of the marbled stains you can always add more color with the distress inks too.

What's also nice about these technique is that you can use any colorcombinations you like.
On the first cards I wanted to create a " forest" feel so I used more browns, green, rusty hinge,...
On the card above I use blues and greens and yellows, to make the front pop up more and coordinate with the colorful butterflies.

It was the first time I used the shattered stains technique : a combination of crackle paint rock candy and distress stains.
I did the technique on recycled cardboard.
I colored the cardboard under the butterflies first with picket fence white distress stain and then added more distress stains.
You add again as many layers of colors as you like.
They make a colorful contrast with the distressed backgroundpaper.

I'm now working on a series of "Dumbo" circus spinner cards.
Background is again the marbled distress stains technique with some extra stamps.
It's fun to combine exploring techniques, recycling free images and left over cardboard to make these cards.
Inge
zo
01
apr
2012
fashion in Belgian spring...

The past 14 days we had real spring in Belgium. Some days we had 20° C (68°F) !This gave energy to create in different ways...
I created in the enveloppebook of Jenny. Her theme is all about fashion : dresses,shoes,... She especially love images of the beginning of 1900, so I decided to make something in my style that she (hopefully) will love.

I've been following the online class of Tim Holtz "creative chemistry" the past 14 days too. I especially loved all the "chemistry" he explained that is involved in the different products he uses.
Although I already knew all the techniques he teached, the class was still a revelation for me because of the knowledge, the tips and tricks he gave.
The class is over, but people can still sign in here, whenever they want and view all the videos. The PDF's are such a great resource to go back to when you start to create and make his techniques " your own".
On the pages I used the wrinkle free distress technique. One thing I also learned on this class is that I can use much more different distress colors on one page and that they still coordinate !
The page was a bit too bright for the images I wanted to use. I used gel medium and a stencil from the craftersworkshop to make also more texture. When the gel medium was dry I overinked everything with purple distress ink.
This toned down the bright background but through the gelmedium different colors still could pop up.

I stamped "tiny bridesmaid" from Stampington (one of the first stamps I bought years ago...) with permanent black ink on white paper.
The white was not good: a too big contrast with the background and the kind of image I was using.
I colored the paper over the inked image with "antique linen" distress stain. The dress and the ruler were colored in with distress stains and a waterbrush. The edges were finished off with vintage photo distress ink.
I added 4 vintage buttons from my stash on the corners and glued the image on the left side of the page.

There is a flap on the right page and some of you who's been here before know what's behind... Something is hidden...
I used another technique here to cover the bright background. I stamped with embossing ink and embossed with clear embossing powder. Overinked everything again with purple distress ink.
The medaillon is a photostamp of oxford impressions, stamped with permanent black ink and three times embossed with UTEE, so it looks like a enameled plate.

When you lift the flap : here you see what is hidden...
A pop-up of two vintage ladies. I used several stamps of oxford impressions and of crafty individuals ( the poppy stamp) , another great vintage stampdealer, but this one is from the UK.
I also used the lace border of Tim Holtz as a decorative element in the pop up.

Here you can see the big and small tag that houses in the enveloppepockets on the left and right.

To prove spring arrived in Belgium, look at these beauties... Wild pansies in my garden.. I love how they find their way in my garden and start spreading out...

The weather was so good, we could sit in our gardenchairs on the wooden terrace . We were not the only ones...
As soon as I left my chair, one of the six cats took my place, so I ended up putting more gardenchairs so they had a sit too...or at least I had a seat when I didn't had the guts to get the cats move...

The weather has even been so good, we could grow cats in our plantpots...
This seemed the perfect sunny spot for our old cat "Red Zita"...

We could even eat twice a day outside..
The waterfountain is bubbling water and in the garden several springflowers are starting to bloom and give color in the green garden.
I renewed my little flags in the garden. I always have flags in the garden. I love it to see how the wind plays with the colorful flags during the several seasons.
To complete the fun I went to Ikea and bought three strings of lights ( with sunenergy) so even at night our garden looks colorful and happy.
Yes, I am happy :)
Inge
zo
18
mrt
2012
into the woods...

Days go so fast... I missed making a blogpost last weekend, but here I'm again !
I worked in two roundrobinjournals the past weeks both with an " in the woods theme".
First book is from our local round robin group and I had to work on two pages in an eveloppebook and on a small and a large tag.

Sometimes it's funny how you get ideas to make a project.
I had several ideas for this "in the woods" book : it could be about fairies or gnomes or little rabbits... ( the owner of the book Rita is very fond of Peter Rabbit from Beatrix potter).
Then we got a local magazine in which they promoted childrensbooks because it was childrensbooksweek in the library.
On the front page was an image from a childrensbook that immediatly attracted me.
What if I created a " letter forest"? Several animals in the woods, letters, books,...

I first made a transfer of the image of the magazine with gelmedium and then started creating around it.
I colored my background with distress stains and added texture with the fernstencil of the craftersworkshop and gelmedium.
When this was dry, I inked over and around the gelmediumferns with a darker green distress ink.
This made the texture pop up so you can see the ferns better.
For the tree I embossed text with white embossing powder and inked over it with distress stains and distress ink.
I cut the treeshape with Tim Holtz treedie.
The little tag that's in the pocket on the left page was made with selfmade blue glimmermist. I stamped a tree on it ( tattered angels stamp) and added an image on vellum I found on the wrapping of a book I purchased. Yes, more animals and more trees... These are "the lucky finds" during a project.

Under the flap with the transferred image is again.... a pop-up..
My pop-up madness is still not over... I think I will make a pop-up in every enveloppebook I still have to work in...
Because Rita is so fond of Peter Rabbit I wanted to incorporate him in the project. Peter is maybe more a countryfarmrabbit, but he's sometimes a naughty rabbit, so I can guess he will end up in the woods too...
I made a pop-up with an image of Peter Rabbit, again the treedie of Tim Holtz, stamps of an owl, a squirrel and mushrooms.
I colored them in with the distress stains and a waterbrush.
Cause it's a "letterforest" there should also be a book...
I teared pages out from an old French dictionary with images of animals and made them in a little book with the pamphlet stitch. Outside of the book was made with leftovers of the paper I used to cut the tree out.

The big tag that's in the pocket on the right side, was colored with blue distress stains.
I then colored one of the tree stencils of the craftersworkshop with brown distress stain and run it through my Vagabond with a heavier sandwich of different plates and foam.
The tree was de-bossed in the tag and the brown makes the image stand out. Because of the distress stain who are more wet then distress ink, it colored not evenly and bleeded here and there.
I love the effect and I thought it didn't need more embellishments or images. I just like it how it turned out.
Another project was Bethan's tunnelbook of our European round robin.
In her book two friends ( two dogs) come in the woods and what did they see ?...
Ellen from the Netherlands made them see two fairies chatting about something...
I continued the story with... " a child, a human child in our woods... Is she lost ? "

What's so nice about the tunnelbooks is the story that continues, but most of all the tunneleffect that is created. Everyone lets something peep out of the hole in the book.
On the left you can see already the tunnel appear and how the different items on each page are layered.

On the top of the photo you see the left and the right page.
With a left over of the paper I made for the first journal, I cut out branches with the edgedie.
I added some pink roses made with a stamp of Michele Ward. A little sparkle was added with distress rock candy stickles.

Background was made again with distress stains, spritzing with blue and green glimmermists and texture of the ferns made with the stencil and gelmedium.
Because I liked the background as it is, I didn't add much extra : just the branches with the roses and the little girl.
The pink on the roses on the left and the pink in the girls dress give something extra to the green pages.

On the green background I de-bossed the tree image ( stencil from craftersworkshop).
I placed them where I knew they would overlap the hole in the page.
With a craftknife I cut a part of the background and the hole out.
Branches of the trees will be seen in the tunnel. I colored the back of them darkbrown so they look good at the other pages too.
When everything was done, I glued the pages to the cardboard of the tunnelbook.
Bethan's book is already on the travel to France !
Inge
zo
04
mrt
2012
the evolution goes on...

About a month ago I recieved from Valerie from our Artistic evolutions journal group the dimensions for two evolutionjournals.
In the journal of Ali, Valerie ended up with a man in an aeroplane and the quote : "those magnificent men in their flying machines." Valerie is a steampunkqueen and I had to evolve from her awesome steampunkpage.
Cause that's what the evolutionjournals are all about : evolving from the previous page the person did before you, getting inspired by their creation, taking one element of their page... and evolve from there.

I was inspired by the "flying machines" and thought of the several gorgeous balloons and zeppelins I had from 3 sheets of stamps of Oxford impressions.
I stamped lots of gears, steampunkmachines,.. from the same stampsheets in a random collage on my white backgroundpaper with permanent ink.
I sprayed with inks in several blues and let it dry.
I glued a blue tissuepaper on top and crinckled it,so there were wrinkels in the paper.
The backgroundstamps and blue sprays still peek through the paper.
I let the background dry under heavy books so the tissuepaper adhered good to the backgroundpaper as did the wrinkels.
Then I brushed melted wax on the paper until the whole pages were covered and the wax soaked in the paper.
I then melted the wax off again, but the wax that's in the paper, doesn't come out of it again. This gives the paper a leathery feeling.

I stamped several airballoons and a clownchild on white backgroundpaper with permanent black ink. Because the white was too white, I colored it with old paper distress stains.
The coloring was done with copic markers. I don't have a lot yet, just 3 shades of my favorite colors and with these I go already a long way :)
The different images were adhered with 3 D foam in different thicknesses so there was more depth created.
I stamped the quote : " in every man a real child is hidden that wants to play" with black ink on a white diecut and embossed it three times with UTEE.
When the UTEE was cooled down I cracked the UTEE.

One of the features of the evolution journals are the edges. The journal pages don't have the same width every time and when everyone adds a special edge to the right page, you can see the different edges of the pages.
I can't show you here, cause I don't have the journals in my hand... Because of the costs of sending the books to the USA, I just make my pages and send them to Valerie, who tips them in the right journal.
The child on my pages has the airballoons, zeppelins, steampunkmachine in his hands with strings , just like a child holds a balloon.
If a kid could have such balloons as toys, I guess that would feel like a party.
So, I made an orange banner with the stamps of Michelle Ward.
I set green eyelets in the page and added the banner with string to the page.
I love that they move....just like a banner does outside by the wind...

The second evolution journal is Jenn's. Valeries page was her interpretation of Andy Warhol and a pink Marilynn Monroe.
I was stuck for a while: how could I evolve...
Then I remembered the photo of Marilynn with her famous dress...
It's all about the right dress... not ?
I have the problem that I love bold colors and patterns and cause I'm a "handfull" of woman, I rarely find a dress that I like in the shops. Mostly I come home frustrated because I couldn't find a dress that I liked or if I liked it , that suited me well...
So, after the past sales and the dissappointments I had again, I took my sewing machine and made myself three dresses in fabrics that I love and in a pattern that flatters my size...
Happy again :)

I used a paper from an old book of 1896 ( "revue de la famille") with all kind of dress patterns in of clothes they wore that time.
I added some stamps about sewing ( mostly from Oxford impressions) on the background with permanent black ink.
Then I waxed the paper again as I did in the previous journal. Something happened that I didn't expected.
The paper became translucent ! This means that the printing on the back of the paper started to showing through and added an extra layer of depth on my page !
I made diecuts, stamped them with a lacestamp and added vintage buttons of my stash.
The "quote" was printed with my printer, sealed with spray and then "enameled" with three layers of UTEE.
I didn't have pink trim, so I colored a white one with pink distress stain.After drying I overstamped the trim with a lace border.

The "buttoncards" were inspired by the new stuff of French General I saw on youtube from CHA.
Behind the stamped buttons on the right, you can see the text from front and backside of the paper that appears when the paper is waxed.

This is my edge of my page. I used an edgedie of Tim Holtz, flipped it over to the back and glued it down. The little pink stars were created by doing this.
Another favorite thing to do is make my own embellishments. I used vintage white/cream buttons and stamped on them with pink stazon and my lacestamps. They are not washproof but they fit perfect in a journal !
This week the journalpages leave Belgium to the USA.
Time to work on other projects !
Inge
zo
26
feb
2012
art and the sea...
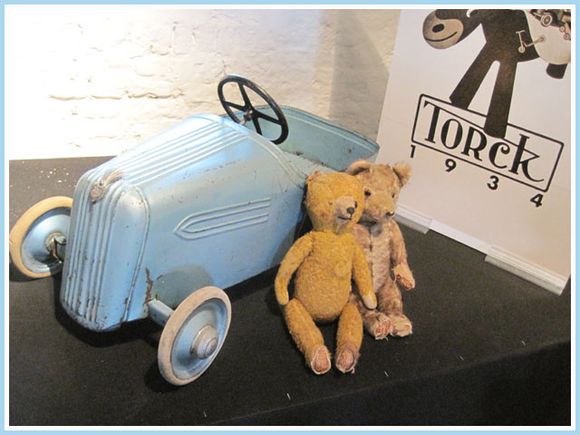
One and a half week ago my husband and I went to Ostend, a city at the Northsea for 2 days.
We are married for 25 years and with students in the house there is no big budget for festivities or the planned travel to the UK... but instead we will treat ourselves with some small suprises during the year.
Thanks to a deal on the internet I was able to purchase two nights in a chique hotel in Ostend... at least chique for us :)
We could see the sea from our roomwindow !
These two days we walked by the sea and the beach a few times, visited the town, went for a long walk in the port of Ostend behind the atlantic wall ( remnants of the second world war),...
Now and then we took a stop for a cappucino with fresh cream...mmmm...
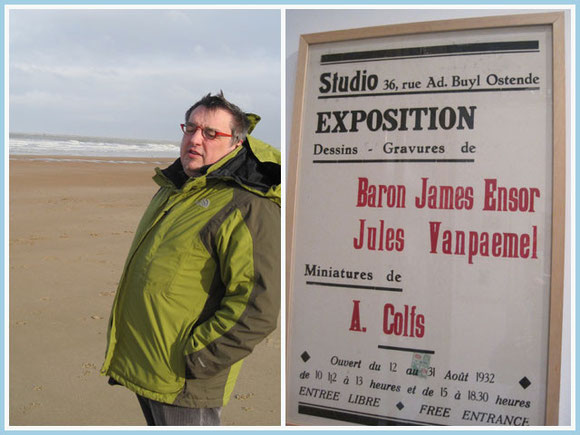
I visited Ostend in the past. I then visited the museum of James Ensor ( 1860-1049) , a well-known Belgian painter.
One of his most famous works is hanging in the Guggenheimmuseum in New York.
There was a replica of this painting in the house where he lived the last years of his life.
I missed this house the past time, so I could convince my husband to go there this time.
On the outside there is a big window with all kinds of shells and seatreasures so if you didn't know that James Ensor lived here, you would walk by...
This little house was originally a little shelf and souvenirshop where his aunt and uncle lived, but when they died James Ensor came here to live in 1917.
After his dead it became a museum.
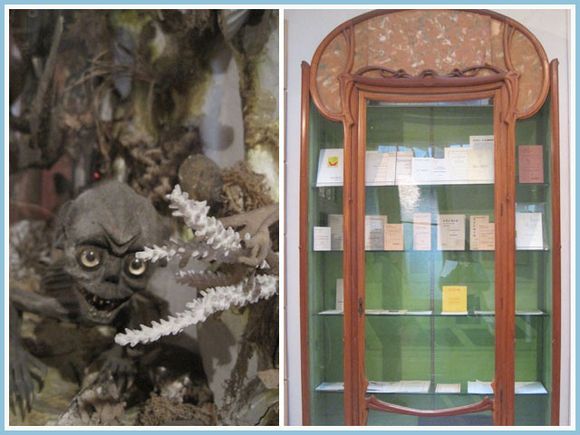
Downstairs are large photos of him and his friends and a very special 3D-composition.
The weird creatures behind the shells immediately spoke to me. As did the Art Nouveau glasscabinet with lots of documents about him !
This would suit perfect in my house with all my collections... don't think they would sell it...
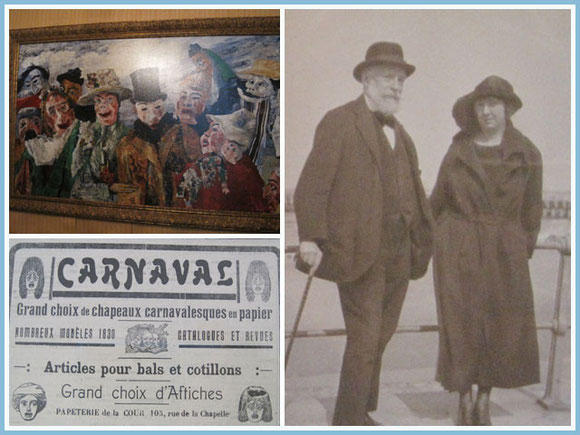
James Ensor is mostly known for this paintings of people with the masks. I don't really "like" them, never would hang one in my house, but they do have "something".
On the first floor we could see a video about the life in Ostend in the beginning of the 1900's !
We could visit his dining room and the room where he painted and met other artists.
A small museum but well worthy to visit when you ever visit Ostend !
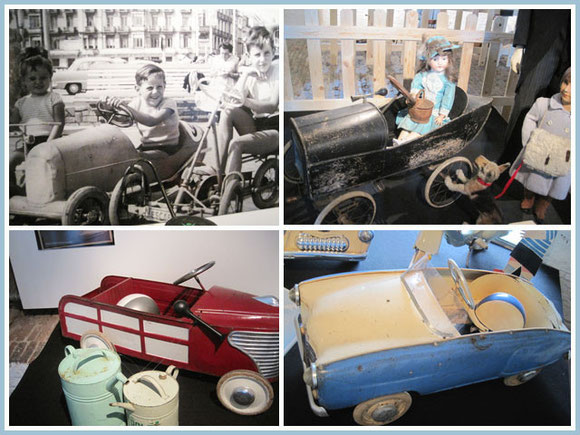
When we walked along the coast we arrived at "Fort Napoleon". We did an audio-tour about the origin of this fort and what it was used for in the past centuries and the past worldwars.
What interested me even more was that there was an exposition of vintage cartoys that were made between 1934 and the 1970's in the Belgian factory "Torck".
This exposition was build up completely from the collection of two people who hunt the world for these rare childrenstoys.
Originally the "cars" were made from wood, but have been made for years out of metal inspired by the real cars of that time.
These were childrentoys, of course for rich children but in the 50's and 60's you could also find them at the sea for the children to ride in.
Now they are collectibles...
I wished I could grab one of these and take home with me : they were gorgeous !
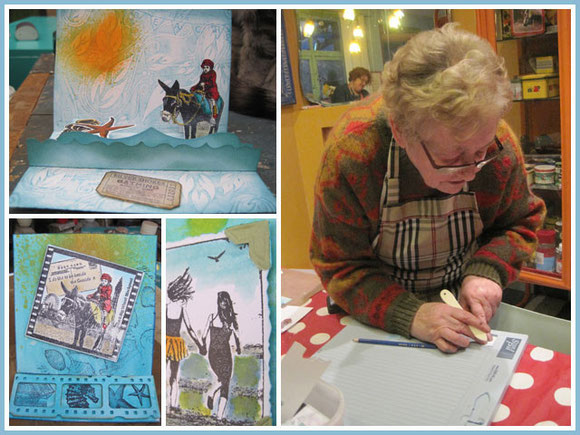
One of the reasons I couldn't blog past week , was that I had a workshop in my house : how to make an easelcard and a pop-up card.
Sadly some people were sick ( the flue is knocking lots of people down for the moment, even my son and daughter have been sick past week).
We were with a little group of 6 woman and it has it advantages. I could really help people with little hints and tips for the techniques, how you ink large areas without having pain in the shoulder,...
I gave them the technique but they could choose their own theme and I helped them to work their ideas out.
I had some examples of the "sea"... any idea where I got my inspiration from?:)
At 18.30 I phoned my dad-in-law that I didn't get my mom-in-law out of my house ! LOL
She was so busy and occupied and she left my home 1,5 hours later then she would normally have done. No worries about eating at the right time as usual.
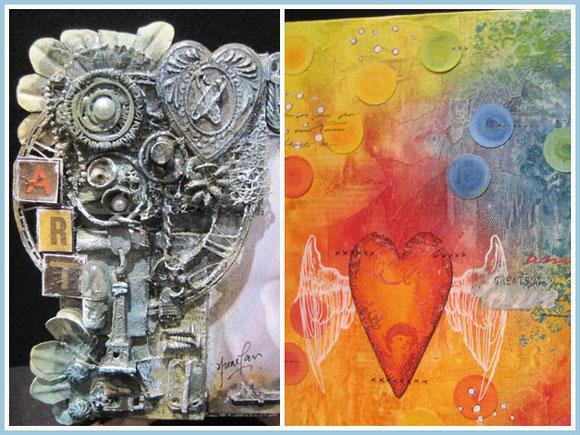
Second reason I didn't blog past week.
On sunday we went to a craftshow in Lille ( France) : "pour l'amour du scrap".
It's just an hour with the train from where we live, so that's not so far.
My mom's friend who would have come with us was still sick, but my mom-in-law grabbed my arm and went with me and my two friends.
The craftshow was not so big, mainly about scrapbooking and I didn't saw much new things or must-have stamps, but we met some people we knew, had a chat, ... This show was my mom-in-laws third craftshow and she proved that even in at 75 you can be happy as a kid when you find craftstuff you like !
I took some photos of examples of the workshops that have been going on the previous days. I just forgot whom these creations are from... but they attracted me : left one for the collage, right one for the colors.
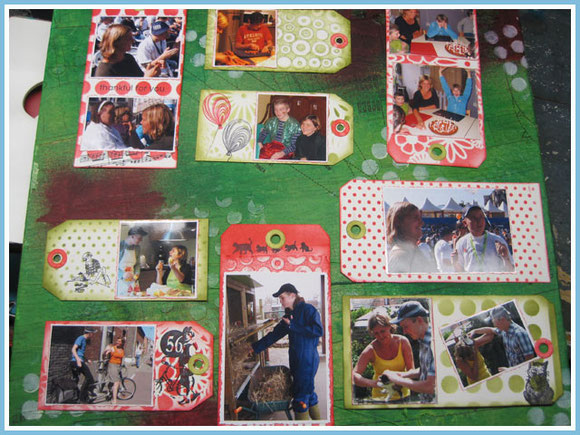
This week I finished a collage someone asked me to make as a thank you for the woman who took care of her autistic son.
I loved making the background with a double layer of patterpaper, sprays, stencils,...
On the tags are photos of Seppe and Katrien. They show how Seppe and Katrien interacted, what activities they did together,...
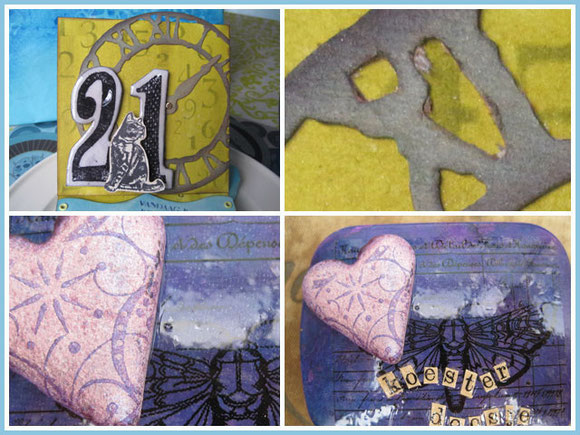
I also made a new cherishbox for someone's birthday. In the tin is a little harmonicabook with photos of her loved ones.
The tin was colored with a basecoat of paint and alcoholinks.
On the craftshow I found a plastictape with vintage images. I used one on this box as an extra layer and added the word " koesterdoosje" ( cherishbox) with letters cut out of an old book.
The heart was made with UTEE and colored with white dabber paint and then with perfect pearls. I stamped on it with stazon.
And last but not least... I made a birthdaycard for my second son Aran who became 21 yesterday !!!
I still remember the day this special sweet son came into our lives... Incredible how fast the years go...
But we enjoyed them :)
Inge
zo
12
feb
2012
I'm in love with...
POP-UPS !
I'm still completely in love with pop-ups and mechanical cards...
Instead of decorating my piano with a Valentine theme and reds, I made a display completely dedicated to pop-ups.
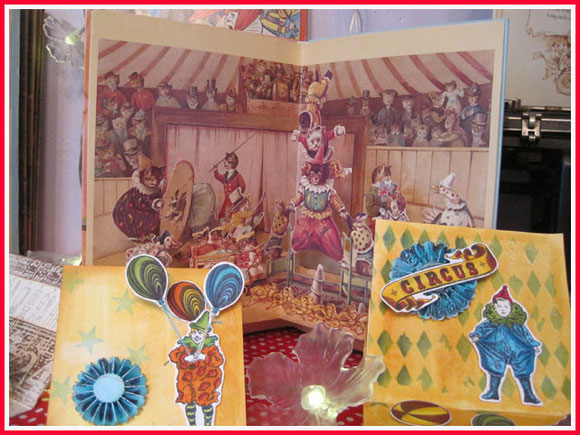
Working on more easelcards and easeldrawercards I was tickled to search the internet for more "pop-ups".
I hopped from one site to another , reading about the history of popup books, new artists who develop new pop-up books,...
There were two names that came back on almost every site I visited : Ernest Nister and Lothar Meggendorfer.
These two invented end 19 th century several mechanical systems to use in their books and add a surprise element in each book.
I bought a few months ago 5 books about pop-ups and they explained a lot of mechanical systems, but didn't really show completed cards/bookpages.
So, I was looking for pop-up books with the different systems. The books with the tabs can easily be found even in today books, but what about the cascading images and the rotating images?
The beautiful books of Ernest Nister , who's first book was published in 1892 surely would be a treasure, hard to find and very expensive...:(
Okay, then I'll buy some pop-up books from artists of today like Robert Sabuda (http://robertsabuda.com)
I searched Amazon and bookmarked some books worth buying and then I found a link... Stella & Rose books...(www.stellabooks.com) : specialized in rare and collectable children's and illustrated books...
This was a revelation ! I searched the hundreds of pop-up books they have in stock... and unbelieveable but the books of Ernest Nister were there too, but not cheap ( 200 £ for a book...), so that was not an option...
To my surprise I made a discovery : in 1980 they made a reproduction of his books ànd the books were available for prices between 8 and 15 £ !!
I hit... and hit... and hit the "buy now" button...
I was over the moon when the 7 books arrived ! These were the books I was searching for so long !
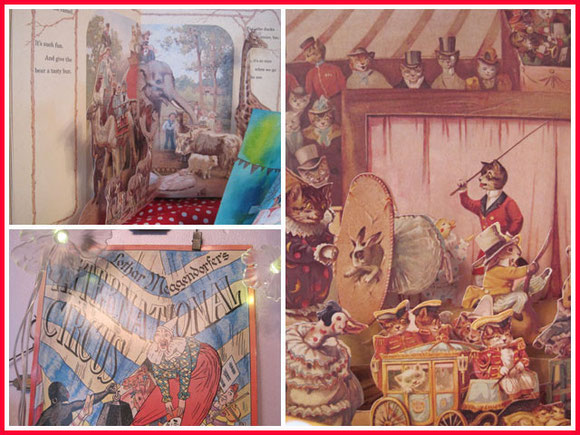
The books not only work with the pop-up systems I wanted to explore, but the drawings are so beautiful with vintage images of a bygone era.
A book with pop-ups of farmanimals, a visit to the zoo or in a circus.
Now I could see different systems of pop-ups with tabs, but there are also two books with a circular system.
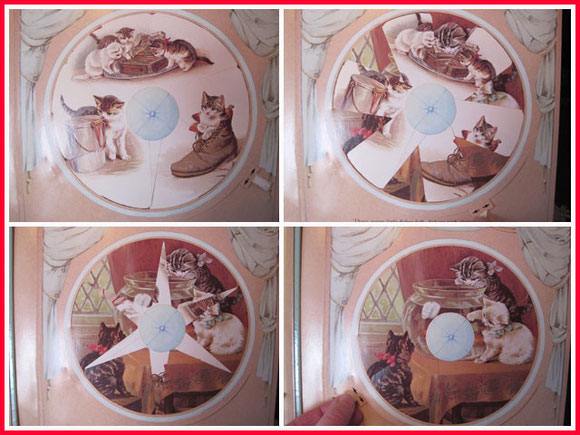
In the middle of the page is an image in a circle. There is a tab on the right. When you move the tab from left to right images are moving and a second image is rotating over the first image.
When the tab is on the left : there is a full sight of the second image.
I really want to figure this system out, cause this one is NOT in my instruction pop-up books...
Another nice book is with cascading images. Just pull the tab on the bottom and the first image flips open. Maybe you know this from the "waterfall" cards. I guess the same system is used here.
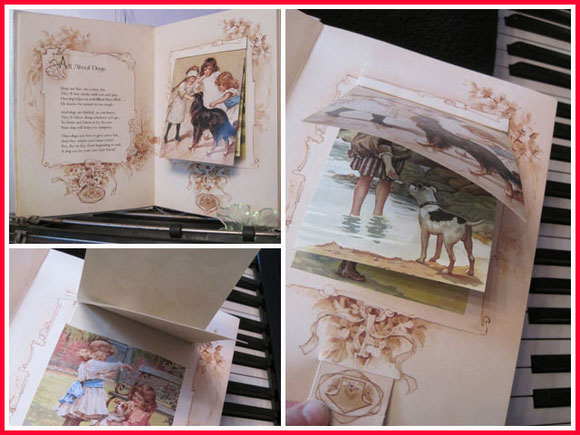
These books that I love are now decorating my house. I added my version of simple pop-up-cards. Simple, but I love the effect !
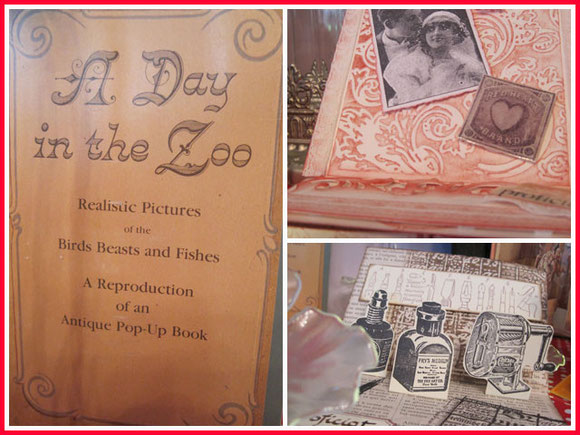
The books just ignited my hunger even more to make pop-ups myself...
When I recieved Bea's enveloppebook about "dolls" in our round robin group, I wanted to try something mechanical out in her book too.
I don't know if you know " Punch and Judy" , in Dutch they are called "Jan Klaassen and Katrijn" ?
They are puppets in a puppet-show that was very popular in the early 18th century, but their popularity lasted for decades. You can read more about their history here ( http://en.wikipedia.org/wiki/Punch_and_Judy).
I searched the internet for images of Punch and Judy and started my pages from here.
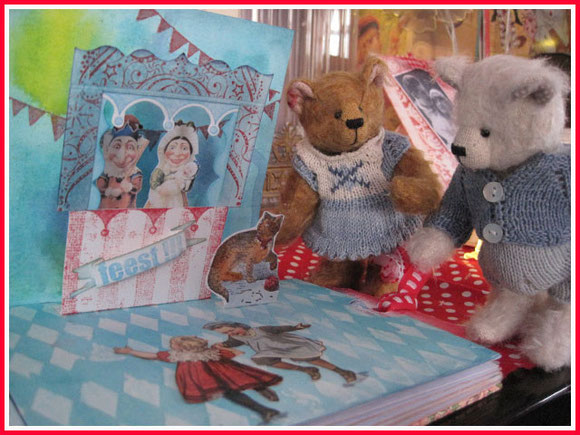
Here you can see the right page opened. The mini-bears from Anne Bearheart are as curious as children and adults were to see the show !
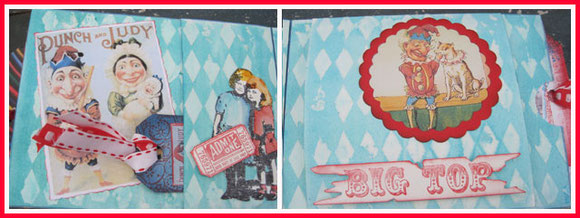
The photo shows the completed pages. Background is made with gelmedium and the harlequin stencil of the craftersworkshop.
After drying it was inked with distress ink broken china.
Left is a printed image of Punch and Judy as they are well-known.
I stamped a stamp of two girls with permanent ink and colored it with distress stains and a waterbrush.
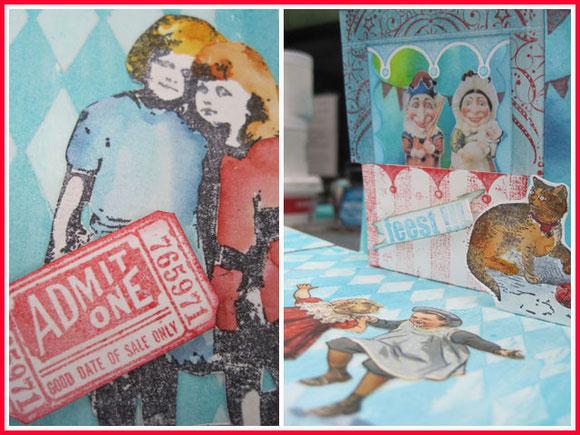
They hold their ticket for the Punch and Judy show.( "admit one "ticket from Tim Holtz)
On the right is Punch with his dog. The banner ( Tim Holtz die) was stamped with the word "Big Top" from the circus stampsset of Oxfordimpressions.
When you open this right flap the pop-up of the puppetry opens and you can see two dancing children ( "Ot and Sien", well known figures in the Netherlands)
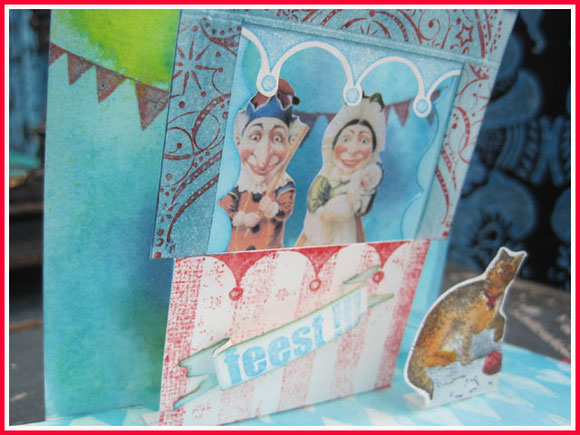
It's hard to see on photo I think, but the images of Punch and Judy ( images from the internet), the selfmade puppetry and the stamped cat are on three different levels attached with tabs on the flap, so they give dimension to the card.
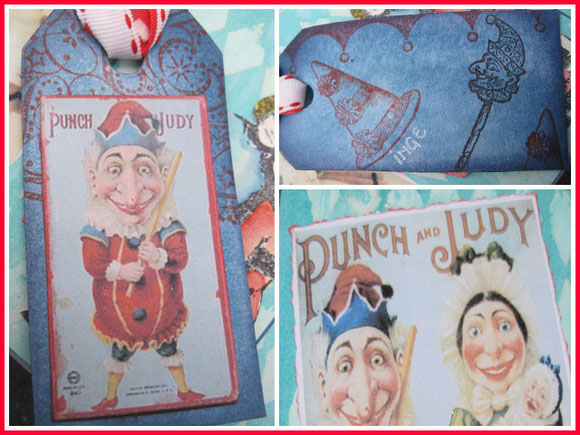
In the left pocket of the enveloppebook is a small tag with another Punch image on the front.
The tag was colored with distress ink spritzed with selfmade glimmermist and stamped with a stamp with fine details.
On the back of the tag a hat and a Punch-toy from the oxford impressions circusstampsset.
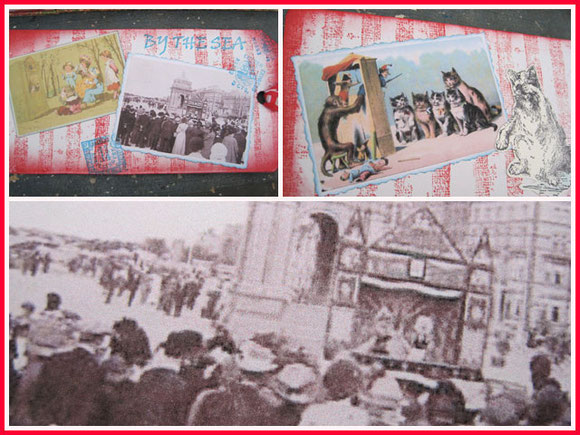
The big tag in the right pocket of the enveloppebook is decorated with stamps ( oxford impressions) and images found on the internet.
The performances of Punch and Judy could be seen for years at the seaside in the UK. The Puppetry was set up on the beach and the people who passed by could see the adventures of Punch and Judy just like we look at soaps on TV now..
It was definitely something that could enchant young and old... just like pop-ups and mechanical cards and books intrigue me...
There is definitely still a child in me that loves to play :)
Inge
zo
05
feb
2012
celebrate !
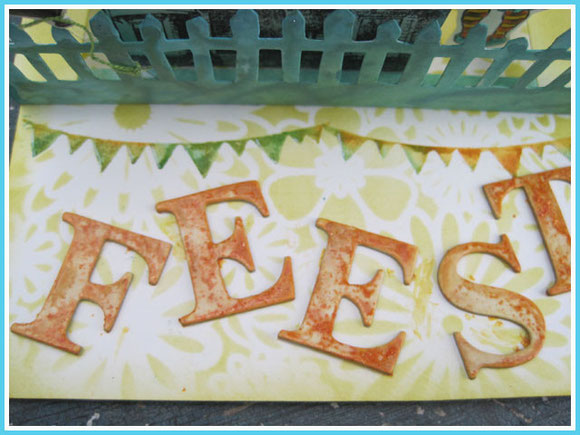
My last blogpost on web.me.com/pinkepinke DID go out with a bang !
I got so many lovely comments... I cherish a lot whàt you wrote : what you liked about my website, which blogpost you still remember,...
I take these comments with me for ever : they will be printed and binded in a book together with my blogposts as "diaries".
I take these comments also with me in creating this new website and blog : it will take me some time to find all the right tools to do it, but I'll try to blog in the same way I did before.
Two people got picked from the hat to recieve a gift : Dawn B. and Bev Allaire will recieve my handsewed book or the crocheted soldered pendant. I'll contact them for their adresses ! congratulations !
More congratulations this week : my husband added another 50 years to his life. On thursday he became 51 ! Where are the years we met... 27 years ago...
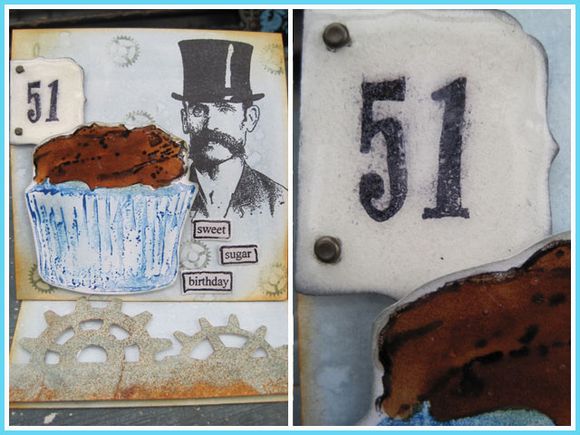
This is an easelcard I made for him...
All the people I send a birthdaycard to this year will recieve an easelcard. They are quite easy to make, but fun to create and I love how the cards opens and stands up.
I used the gears edgedie of Tim Holtz to create the "stop" for the card. I inked the cardboard with distress ink iced spruce, embossed it with clear embossing and "flickered" some off, embossed it with the heatgun and inked with rusty hinge distress ink.
The "51" tag was made with the faux enamel technique of Shelly Hickox.

A collegue starting living on her own and had a little party on friday at her house.
I would have loved to go, but it SNOWED here on fridayafternoon. I drove almost 1,5 hours to get home from the hospital. Normally it's just 25 minutes away...
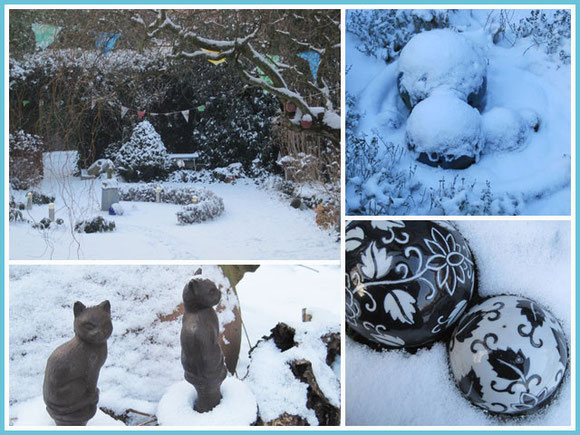
So, I didn't go...:/
I hope I can pay her a visit when I'm around where she lives one day.
I did make her a "happy home" pop-up card to give... so I'll send it to her this week.
I hope her house will soon become a warm home, a "nest" and she may have lots of happy moments there.

Background was embossed with one of my stencils from www.thecraftersworkshop.com ! I saw this technique on their website and had to try it out ! Awesome ! The embossing is not so very deep, but gives a great effect when the stencil was inked previously !
This means I now got MORE embossing stuff, cause I do have several of these stencils. It surely gives more possibilities to create and use. I really, really love these stencils and Paula, just another kiss from me for showing these stencils to me in London in 2009 !
I saw on the youtube video's of CHA 2012 they have several new ones...more tree silhouettes , steampunk backgrounds... I think I will have to make a new "have-to have" list...
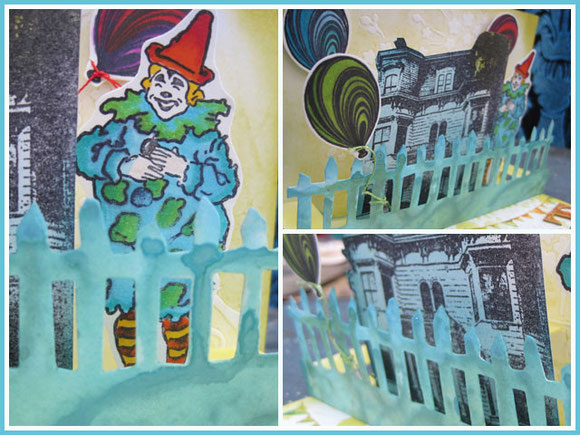
The fence is an edgedie of Tim Holtz and I colored it with his marbling technique with the distress stains picket fence, blues and greens.
Definitely a techniqe I will try out more : perfect effect for me. I LOVE a patina color...
The house, the clown, the fence... were added with tabs so the card can close, but when you open it, everything "pops out"...
You'll see more pop-ups from me.... it's just a beginning of my journey :)
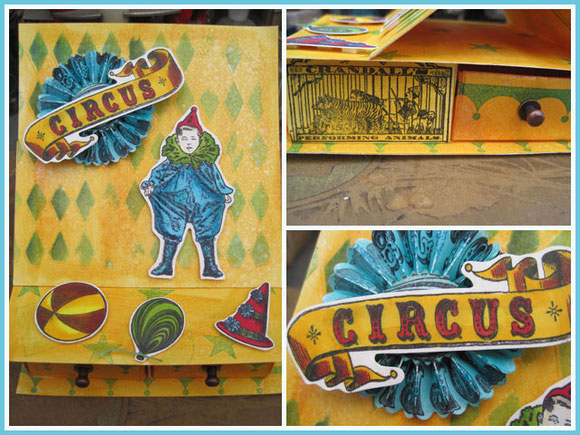
I made another easel-drawercard : a happy "circus" theme.
It started with the new stamps I recieved lateley from oxford impressions.My favorite parts on this project are the lioncagestamps on the drawers and the rosette with the circusbanner.
It's fun to see how you start with plain white paper, some stamps and lots of distress inks and how it ends.
This is my first official blogpost and I'm happy I was able to display my photos big enough....
I'm happy with my first steps here :)
Inge
zo
29
jan
2012
a new start, a new beginning...

Welcome !
Maybe you came over from my previous website I had since 2007, maybe you are new here...
My cherished online diary vanishes definitely on june 2012 due to changes at Apple.
You can read my blogpost about this here :
http://web.me.com/pinkepinke/pinkepinke/Blog/Artikelen/2012/1/29_going_outwith_a_bang....html
I was sad because it feels like someone is burning all my diaries, but luckily I had all my blogposts with comments printed and made into books.
It's time to get out of my "egg" and start a new online life.
I hope this place will soon become my new home and reflect who and what Pinkepinke is.
It will take some time, but it sure is a challenge !
greetings from Belgium
Inge