
Playing with the gelliplate is addicting and fun !
In a short time you end up with piles of gorgeous paper...
But what do I create with them ? ...
That's a question I ask myself when I'm almost burried under the gelliplateprints :)
First of all: share my experiments and experiences with this new "hype".
In a previous workshop I gave, my "students" asked me if I have heard of the gelliplate.... I had to admit I already HAD one and loved it, but I could not teach a workshop with it because it's too expensive to provide all my students with a gelliplate.
Making them myself for them all was one option, but timeconsuming...
And would I teach them if they ordered one for themselves ? Of course !
I searched the internet and found a supplier in the Netherlands: happyscrappy.
The same day I mailed my question about the large quantity and if she had them in stock, I got a mail back.
I payed with paypal that same afternoon and in the morning my postman rang me out of my bed with a huge box full of gelliplates !!!
Time to prepare an extra workshop for my students !
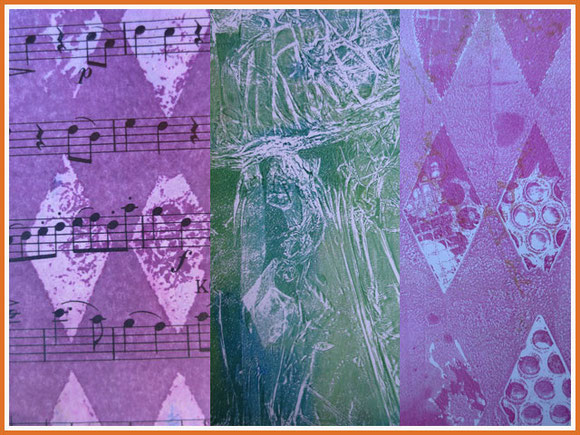
I made almost 20 different papers, with techniques and different materials and then I have not even started making multiple prints on top of each other.
My purpose was to show them possibilities and then it's off to them to combine the different techniques and materials and make layered papers.
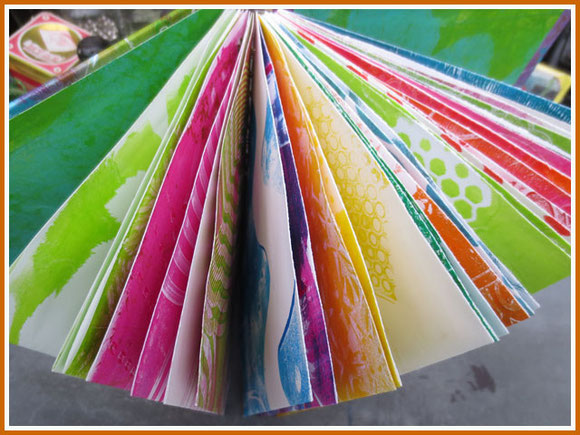
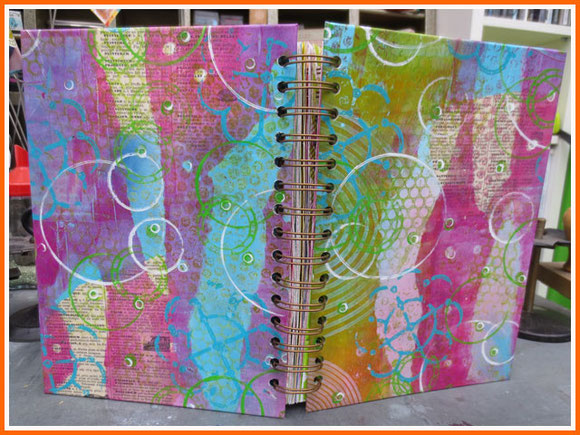
My prints piled up... and I was asking myself how I could present them to the students in pleasing way..
Of course ! Make a book with them !
I made a gelliplate print with the "gelli transfer packaging tape" technique and made two covers with them. On the inside another gelliprint and then spiralbound them with the cinch.
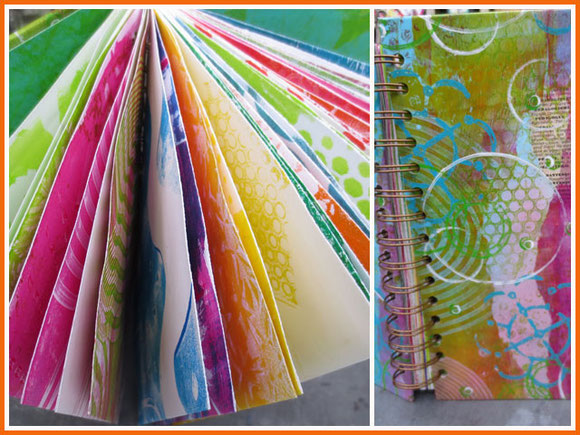
Look at all those yummy colors !
I can keep this book as an examplebook for gelliprinting, but I can also turn it into a journal.
And what else can you make with the gelliprints?...
I had some leftovers and I cut them in squares of 20/ 20 cm ( 8,5/8,5 inch).
I always loved origami and watched some youtube videos on how to make the origamiboxes to get in the mood again.
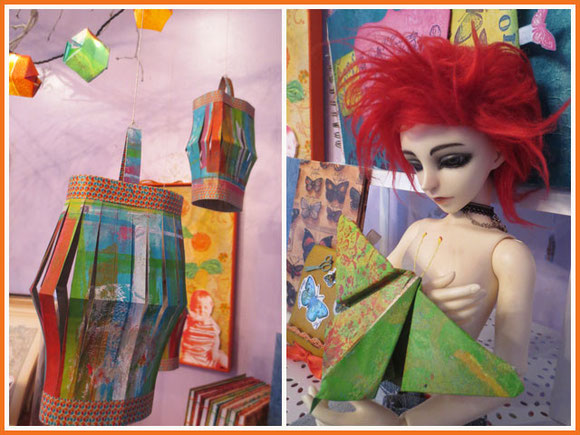
They fit perfectly on plain christmaslights and now they decorate my "summer"display on the piano.
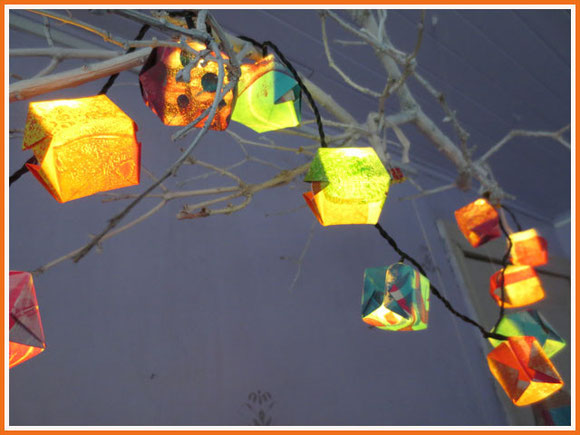
And that scrap of paper you roll the excess paint on each time ?
That looked so colorful in the end and now I have paperlanterns!
An origami-butterfly landed on the finger of Gaia's balljointed doll...
Yesterday Sam, Gaia's boyfriend became 21 years old !
They had a very joyful outdoorparty in a field surrounded by trees. Lots of tents, music, good food and friends..
I made him a personal birthdaycard. The telescoping card didn't fit in a regular envelop I had, so I made a custommade one.
Several layers of gelprinting and images of skulls and his name made this envelop personal.
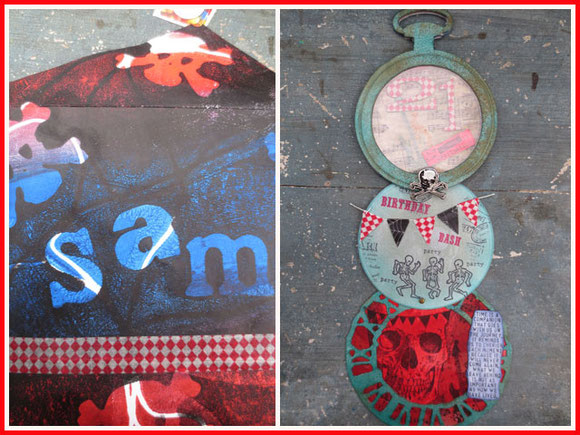
Not always easy to make a card for a guy.. and especially not when they are young and have a certain style.
Sam is the singer in a hardcore band and I know he loves guitars, music, skulls,..
The card definitely needed some "rock"..
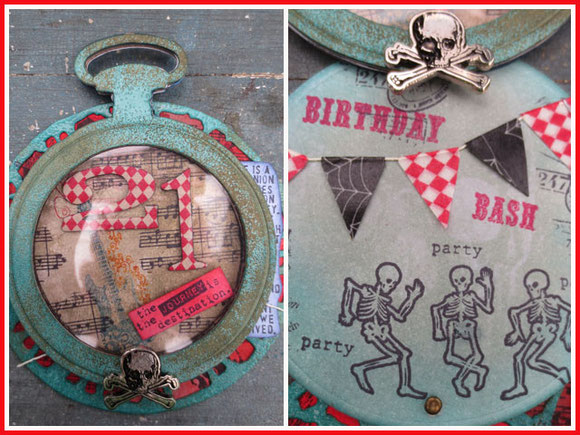
I made this card using the masking technique Tim Holtz shows in his monthly tagchallenge on the front card and several similar techniques I mentioned in my previous blogpost about the telescoping cards.
On the second circle some dancing skeletons and a washibanner. On the background of distress inks I stamped with a skullstamp with water which created a ghostly effect.

On the last circle a smiling skull, a guitar, musicnotes and the quote.
I like this quote. It's an important one to keep in mind.
Sam is glad he finally is 21, but I hope he cherishes the memories of his youth and savour every moment of his life, cause time flies "very" fast...
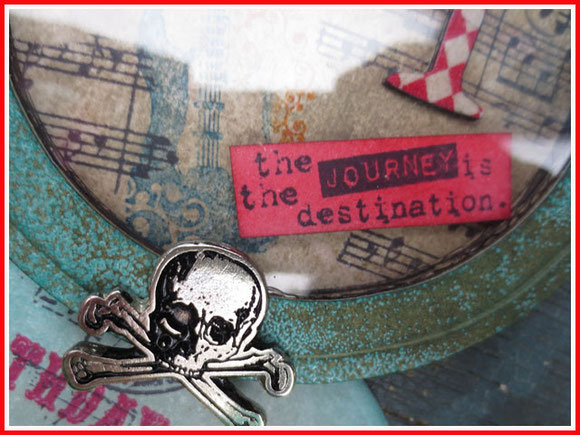
Instead of a plain brad, I used a skullbrad that I had. It fits perfectly on this card !
Sam was pleased with his card and it was "cool" :)
A big week ago my mom became 73 years old.
She 's painting poppies the past month on cards, on canvasses,...I think she painted hundreds !
So I couldn't resist the urge to give her a birthdaycard with a poppy :)
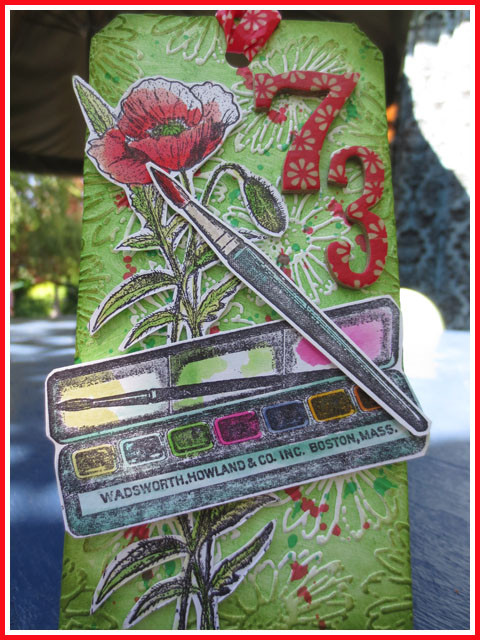
The poppiestamp, the paintbox, the brush were colored with distress stains and mounted on a tag.
It stands up with the easel from Tim Holtz.
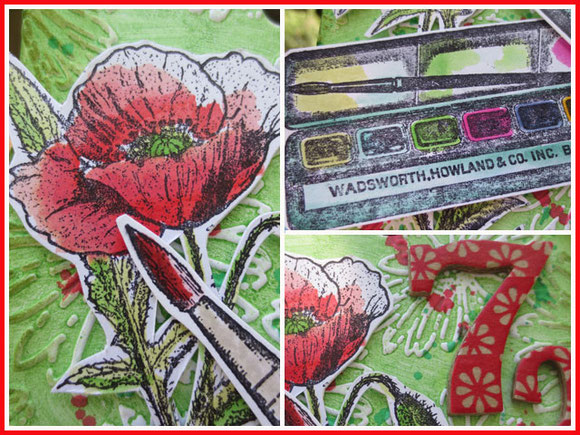
I can't paint like her, but I did like the result of my "watercolor"painting !
I hope she stays like she is now : energetic, full of ideas, always busy and constantly creating or thinking of creating :)
greetings from Belgium
Inge

Reactie schrijven
Donna (zaterdag, 10 augustus 2013 22:48)
Inge-i love each of your projects. So much creativity all in one post! Love the tag you made for your Mom, it does seem fitting!
The birthday card is awesome!
Thanks for sharing!
Linda Levine (zondag, 11 augustus 2013 04:59)
Loved reading your blogpost about gelliplates,the skull card, and your mothers birthday! All very special!
Eileen Bellomo (zondag, 11 augustus 2013)
Your gelli prints are fabulous, and I love the cards you made for Sam and your mom. And those lanterns, and the cubes that cover the lights! Genius!
You know what I've recently done with all my gelli prints? I turned them into envelopes for a mail art swap I'm in. So many wonderful things you can do with them.
Enjoy the rest of your summer!
xoxo
Sue Young (zondag, 11 augustus 2013 20:44)
I agree with Gina: don't you ever sleep?!?!?!?!?
LOVE your Gelli prints.....it is so fun,isn't it???Your students are so lucky to have you!
Linda (zondag, 11 augustus 2013 21:53)
I loved reading your blog! So many fun creations! Great stories too!
Best wishes,
Linda
Gina (zondag, 11 augustus 2013 21:53)
You are so talented and full of energy, Inge! Do you ever sleep? I love your creations and the book idea was perfect for your students and like you said...so very colorful! I bet the students in your classes beg for more!
So much fun and thanks for sharing!
Xo Gina
stephen (maandag, 12 augustus 2013 13:51)
Amazing as always. I love all your work.
Lisa H (dinsdag, 13 augustus 2013 02:42)
Wonderful! I love printmaking but I haven't succumbed to those lovely looking gelli plates yet. I would totally take a class from you though - so cool!
Hetty (vrijdag, 16 augustus 2013 08:44)
Wat een kleurenpracht Inge! En wat een leuke projecten.
Beth (vrijdag, 16 augustus 2013 09:12)
Inge,
Wow, I love the projects you made with your gelliplateprints! Thank you for sharing!
Providencia Dahle (donderdag, 02 februari 2017 03:16)
We stumbled over here different page and thought I might check things out. I like what I see so i am just following you. Look forward to exploring your web page yet again.
Dacia Renninger (vrijdag, 03 februari 2017 15:48)
I was extremely pleased to discover this web site. I wanted to thank you for your time for this fantastic read!! I definitely liked every little bit of it and i also have you book-marked to look at new things on your blog.
Zenobia Mullins (zaterdag, 04 februari 2017 13:46)
Appreciation to my father who stated to me about this weblog, this web site is really awesome.
Catherina Mcqueeney (zondag, 05 februari 2017 00:42)
My relatives always say that I am killing my time here at net, but I know I am getting familiarity every day by reading thes fastidious articles.
Cristen Vandermark (donderdag, 09 februari 2017 14:45)
Hello, just wanted to say, I liked this blog post. It was practical. Keep on posting!