
A new round robin has started... 11 small ATC enveloppe-books left their home in january and are wandering around now...
My theme is " once upon a time..." and invites all the participants to make an ATC about a fairytale and make an adapted envelop for this ATC in the ready made books.
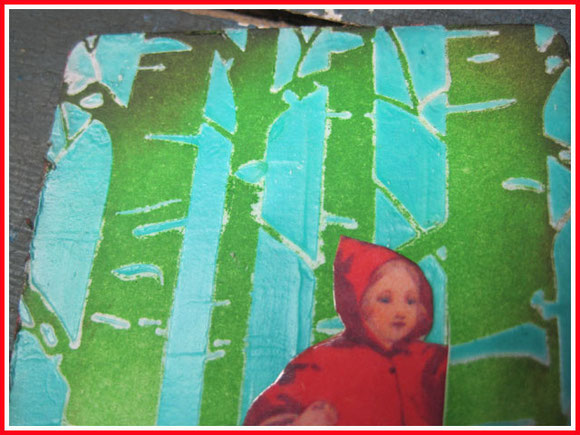
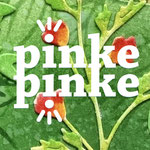
These are my covers, made with a favorite technique of me : coloring plain white paper with distress inks, then make a pattern with gelmedium through a stencil ( my favorite stencil : aspen trees from the craftersworkshop)
I overinked with another green distress ink and added some dots with a dotstamp and red ink.
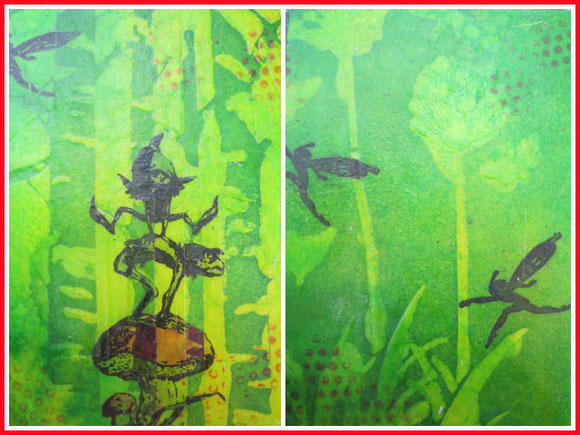
The fairies are a selfmade stamp that I made using a drawing from Brian Froud, my favorite fantasy-artist.
I stamped them with permanent black ink and colored them in using distress markers.
Everything was waxed then with beeswax and melted off again, leaving some wax into the paper and giving it a special texture.
After the covers were finished I used the mini-enveloppe die of Tim Holtz to cut 15 enveloppes and sewed everything together to an ATC-enveloppebook. How I made this small book ? Read until the end of the blogpost :)....
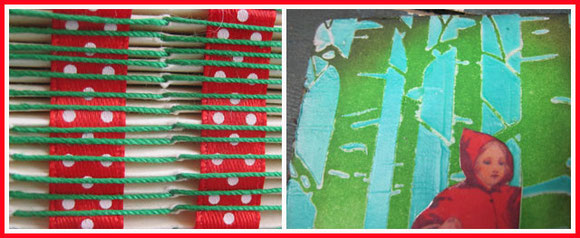
On the right my ATC I made for my first enveloppe. I made the background the same way I made the covers and used a copy of red ridinghood from an old fairytale book.
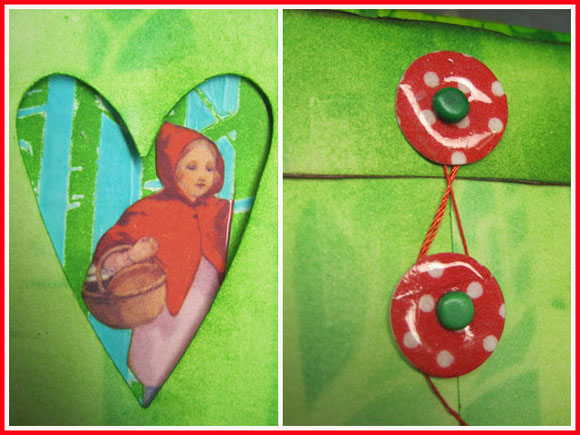
All the uneven enveloppes have a heart died out of the enveloppe.
This creates a peeping hole to see a bit of the ATC inside it...
On the back of the enveloppe I made closures by adding washitape to paper, punch them out and putting 3 layers of UTEE on them.
Then my book went on it's way for several months. Every three weeks we get a new book to work in.
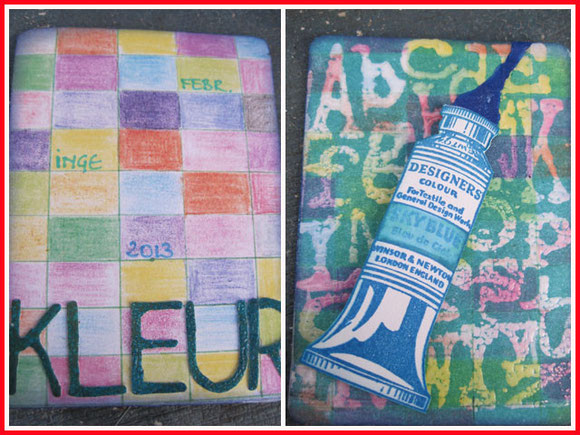
First one I got was from Katrien and it's all about letters and the alphabet.
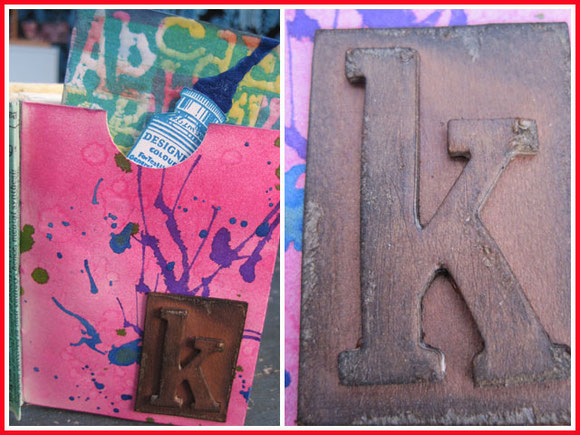
I picked the letter "K" for her name and because the world "color" in Dutch is written " kleur" with a "K"...
I made a faux wooden stampblock by cutting out the letter "K" with the wordstampdie from leftover cardboard. I colored the letter and a rectangular piece of cardboard with brown distress stains, sanded them a bit after drying and inking the sides with black soot distress ink.
Katrien added some leftover printouts of colors in blocks. She invited us to do something with it...
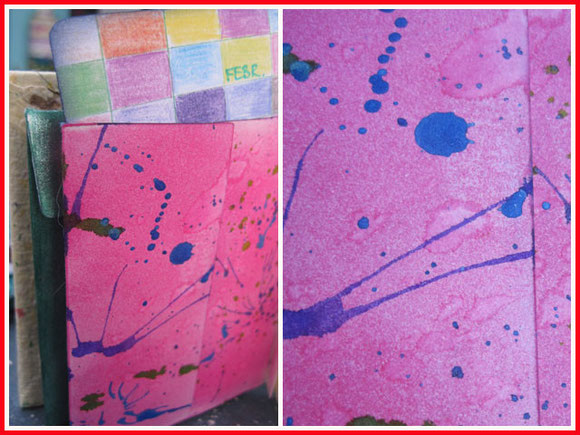
The enveloppe was colored with the bold distress ink picked raspberry and splattered with water.
On top of this I dripped some calligraphy ink and blew it open with a straw to create more splatters.
Next minibook is from Singrid and is all about " weird houses"...
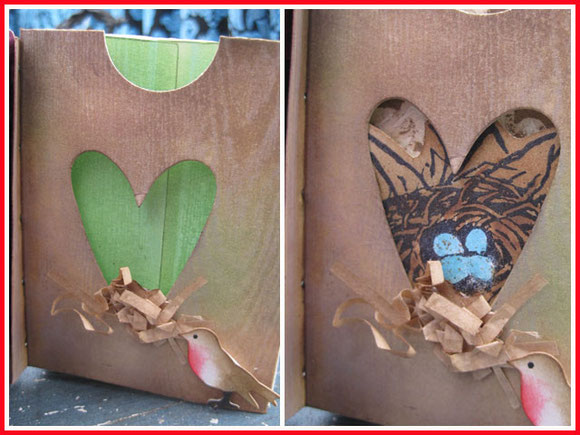
I immediately thought of the houses some birds make in trees.
I know a robin doesn't make holes in trees for it's nest, but hey... it's all about imagination...:)
I imitated the bark of a tree by using an treestamp and stamped it with white ink on the enveloppe.
I let it dry and then overinked with several brown distressinks. The white ink resists the distressink and makes the bark show through.
I did the same on the inside but added green inks to make a contrast with the brown outside.
On the right how the "hearthole in the tree" looks with the ATC inside...
Look, there is a birdsnest with little eggs !
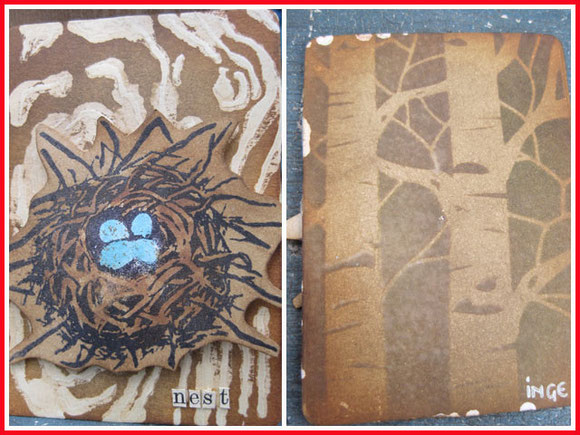
Background of the ATC was made with gelmedium and a stencil.
The stamp is a selfmade stamp I made years ago because I couldn't find a nest that I liked...
The blue eggs were colored with a distress marker and splattered with brown distress stain to add "speckles".
The back is again the aspentree stencil used with several distress inks.
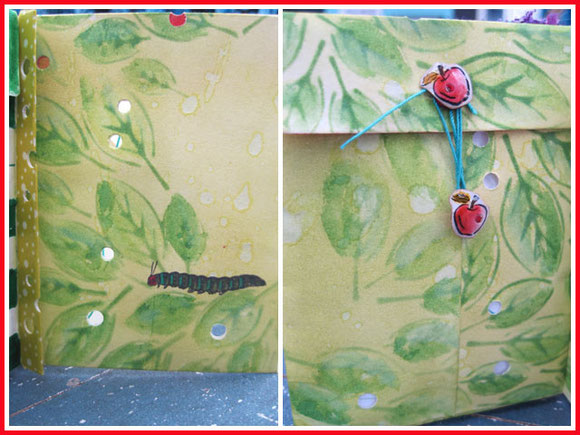
Last ATC-book I worked in for the moment is from Krista.
Her theme is "metamorphosis"...
What better metamorphosis do you have then a catterpillar and a butterfly ? At least that was the first that popped in my head when I saw the theme.
I used a leafstencil and colored them with distress stains. I added a hungry catterpillar who ate through the enveloppe !!!
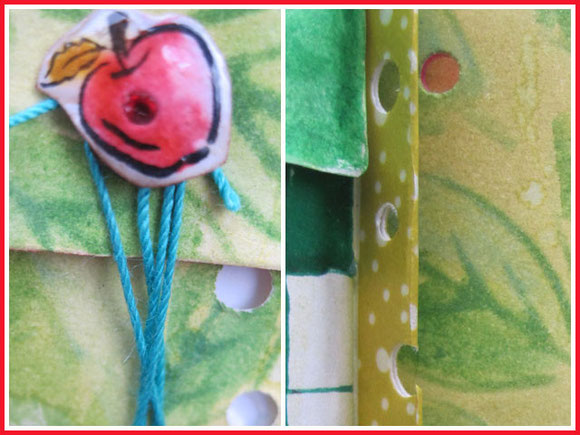
The catterpillar even ate through the spine of the book... and the apples I made as closure...
I stamped a little apple with a stamp, colored it with distress markers and punched a hole in the paper.
I put them on top of red split-pins and glazed them with glossyaccents so they looks more like yummy shiny red apples...
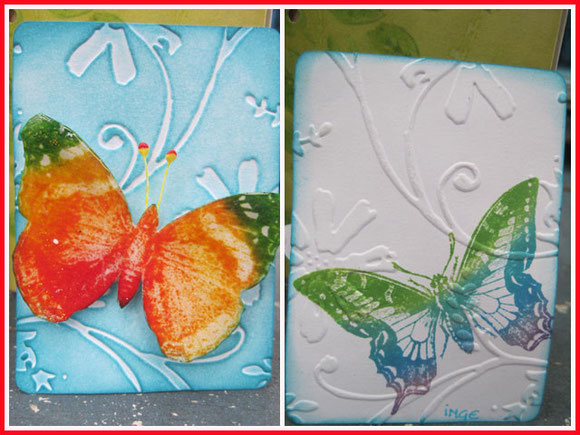
Inside a quite simple ATC for the metamorphose to the caterpillar.
I inked a butterflystamp with my selfmade rainbowinkpad ( made with stampingfoam and distress reinkers), cut it out and added two stamen as antenna. Much easier then cutting the tiny antenna from the stamp...
I mounted the stamp with 3D foam so it's ready to fly off.
On the back a stamped a butterfly with the same rainboxink and embossed the paper.
Thumbs up, if you read this whole post ! :)
I have a little give-away for you all : the tutorial how to make a little ATC-enveloppebook as all the participants of our roundrobin did.
Please don't use this tutorial to sell or teach, but use it for your own pleasure and if you make a book, give me credit and show me !!
Inge

Reactie schrijven
Stephen- Bearcrazyman (zondag, 10 maart 2013 19:13)
very cool. I love all your work!
Mary Beth (zondag, 10 maart 2013 20:51)
Your book is lovely Inge! Thank you for the pdf.
Deb Ring (zondag, 10 maart 2013 21:09)
Loved your description of the books you have worked in and all the colors you have used. I am always very impressed with your homemade stamps!
all very creative
Christi (zondag, 10 maart 2013 22:03)
WOW!
They are amazing Inge!!
:)
Christi
cindi Estes (maandag, 11 maart 2013 07:58)
Inge...I love every single bit of it!
Shari Vanpelt (maandag, 11 maart 2013 08:12)
The books are awesome Inge!
Stacy (maandag, 11 maart 2013 18:14)
Thank you for the tutorial! I love the idea of a book full of ATC's.
Wendy Kirk (vrijdag, 15 maart 2013 14:25)
Inge, these are fabulous. Love the homemade stamps
Karin R. (vrijdag, 15 maart 2013 20:52)
What a fun swap! Your ATCs and envelopes are so fun and colorful. Thank you for the tutorial, too.